This project Includes
- Pipe lagging
- Nail holes in pipes
- Burst pipe repair method
- Slip on coupling
- Compression joints
- Push fit repair
An unprotected water pipe will often freeze during the winter months, of which we seem to get about 11 per year in this Country! In light of this repairing a burst pipe can be quite a common job so it is a good idea to posses the know how on how to do it.
Frozen water expands quite dramatically, and if contained in a pipe where no expansion room is available, the pipe will split. This in itself, is not the problem. The problem occurs when the ice thaws out again!
Rather than wait for a freezing spell and wish a burst pipe on somebody, we have used a pipe with a deliberate
nail hole in, to explain the mending procedure.
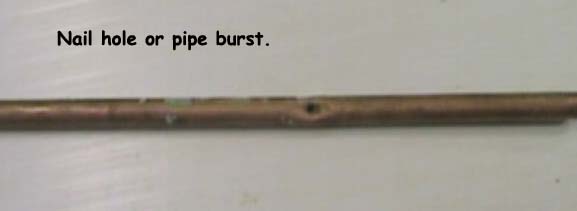
Pipe with nail hole in it
Pipe Lagging
Incidentally, burst pipes can be avoided with the correct lagging applied to them, the minimum recommended thickness of pipe insulation are:
- 15mm pipe: 25mm
- 22-28 mm pipe: 19mm
- 35mm and over pipe: 9mm.
Nail Holes In Pipes
Nail holes can be avoided by a careful search of the area you are nailing in with a pipe and/or cable detector. These are available from most diy stores at about £12.00.
Burst Pipe Repair Method
First turn the water off as soon as you realise there is a problem. A small amount of water will dry out, a large amount will cause a great deal of damage. If, when you are reading this project and you do not know where your main stop cock is; go and find it!
Locate the burst or nail hole, remember this may not be directly below the visible signs of water. The ceiling may slope, or the pressure may have forced a spray of water away from the actual split, so search thoroughly.
For a single nail hole or small split, proprietary slip on couplers are available from the plumbers merchants.
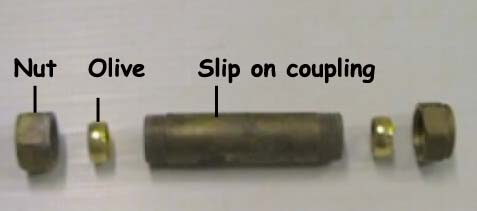
Cross section of a slip on coupling
These are lengths of copper pipe, threaded at either end. Using a pipe cutter, hacksaw or pipe slice, cut the section of pipe containing the split or hole, away. Make sure you have cut far enough back to a section of the pipe that is still completely round and not distorted by the burst or force from the nail.
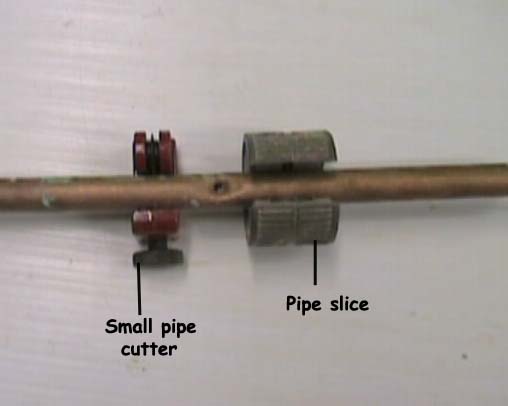
Small pipe cutter and pipe slice
If a hack saw is used, you may need to file the ends of the pipe free of burrs, to slide the olives on.
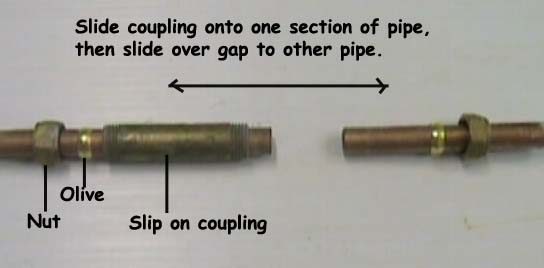
Sliding slip on coupling onto pipe
The olives slide into the slip on coupling and are compressed by tightening the nuts. This gives a seal as in any other compression fitting.
Slip On Coupling
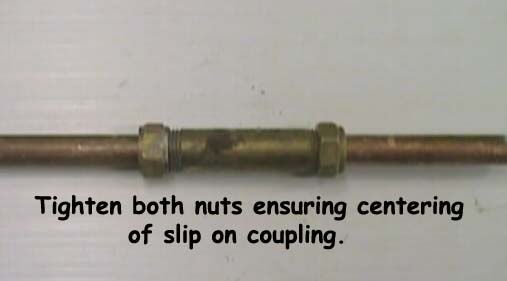
Tighten both nuts at either end of the coupling
If the hole, burst or pipe distortion is longer than about 2 inches, you will need to insert a section of pipe. This is achieved by using two small compression couplers either side of the new section.
Compression Joints
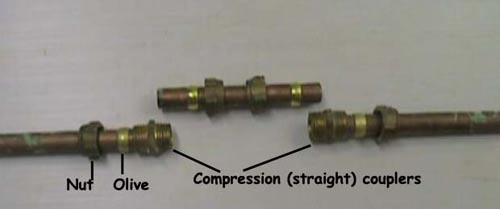
Compression coupling
A compression joint, as mentioned above, is so called because of the compression of a brass ring, or "olive" against the copper pipe, by a nut tightening onto a thread. The openings on compression fittings are made to accept the pipe, and a small amount of the olive, which is accommodated in a small bevel machined into the fitting. The nut is then tightened, while the fitting itself is held fast with another spanner. The olive is compressed, forming a water tight seal between the pipe and fitting. Care must be taken not to overtighten these fittings as it can lead to squashing the pipe slightly causing the joint to leak. No amount of tightening, should that occur, will remedy the situation.
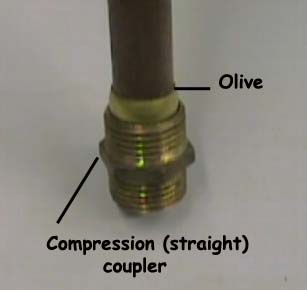
Compression coupler
Push Fit Repair
The easiest way to effect a repair in a leaking pipe is with a push fit system. Simply cut out the burst or damaged area of the pipe, as described above, and push on this purpose made repair pipe at both ends. The collars at each end of the push fit flexi hose will seal over the ends of the pipe giving you a water tight join and a very quick and easy fix.
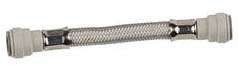
Push fit flexible fitting