Push fit plastic waste pipe fittings are probably one of the most commonly used waste fittings by DIY enthusiasts mainly due to their ease of use.
In respect to their simplicity, we can understand why this is the case as there is nothing at all complicated about them as it is a simple matter of pushing the pieces together to fit them as, of course, the name would imply!
Despite how easy push fit waste fittings are to use, we recommend you read our project on solvent weld waste fittings before you embark on your next bathroom or indeed any other waste plumbing related project as, however good push fit fittings are, we honestly believe they do limit the plumbing a little.
When it comes to the different types of waste fittings there is one key thing to remember in that push fit fittings and solvent weld fittings are not interchangeable as the pipe sizes are different.
We have already highlight above one of the alternatives to push fit wastes above, namely solvent weld, so before we go any further, it’s a good idea to look at the remaining types.
For these, see our projects on compression waste fittings and also take some time to read our project on compression fittings and also those relating to changing a soil and vent pipe.
Essentially, if you have an overview of all the different ways to do a job your choice will be that much more informed and the job itself that much easier.
What’s the Main Difference Between Push Fit, Solvent Weld and Compression Wastes?
When it comes down to the differences between the different waste pipe systems, the key difference between each type is really the way in which they are joined together. In terms of this we mean the method by which any joins or joints are made water tight.
We will look at each in a little more detail below:
Push Fit Waste Pipes and Joints
As we have mentioned above, the clue is certainly in the name when it comes to how push fit pies are joined together.
Each section of pipe work, colar, joint, bend etc features a small, thin captive rubber collar that, when a section of pipe is pushed in, forms a water tight seal around the pipe that prevents any leaks.
One other difference comes in the materials that push fit systems are made from. In most instances, push fit is constructed from polypropylene due to it’s hardwearing, heat resistant and chemical resistant properties.
When it comes to sizes, the following are available:
- 32mm
- 40mm
- 50mm
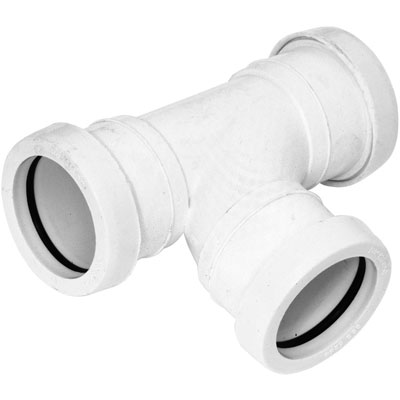
Standard push fit T-piece
Solvent Weld Waste Pipes and Joints
Whereas the above push fit systems utilize a rubber O-ring seal, solvent weld does not. Again, as the name suggests, all sections of pipework, bends, collars etc are joined using a solvent cement (essentially a glue) that permanently joins the pipes together.
In terms of construction, solvent weld pipes and fittings are typically made from rigid PVC or sometimes ABS plastic.
In terms of sizes for these, please see the following:
- 32mm
- 40mm
- 50mm
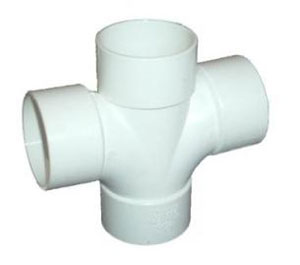
Solvent weld cross t-piece
Compression Waste Pipes and Joints
Compression waste fittings work in a similar manner to push fit, in that each fitting features a rubber collar inside. The pipe is inserted into the fitting and then a screw cap is screwed down on to the fitting, squashing the rubber collar onto the pipe and creating a seal.
The main difference here, as I’m sure you have guessed, is with the screw down cap as this provides the mechanism for creating the seal, whereas with push fit, the tightness of the rubber collar onto the pipe is what creates the seal.
For the sizes of compression waste systems, they are:
- 32mm
- 40mm
- 50mm
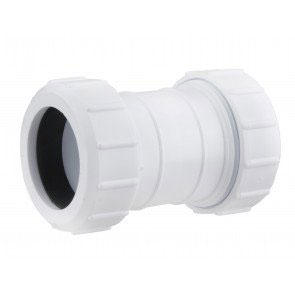
Compression waste straight coupling
Can Compression and Solvent Weld Fittings and Pipes be Used Together?
One further difference between each comes in the form of size. All the different systems are of different sizes and due to this, are not interchangeable with each other.
Although solvent weld and push fit are available in 40mm sizes, 40mm push fit tends to have a diameter of around 41mm and it’s solvent weld counterpart’s diameter is normally around 43mm.
However, 40mm compression waste pipes and fittings can be used in both situations due to the fact that when the compression fitting itself is tightened, the rubber collar is pulled down on to the pipe to form the seal, so the actual size of the pipes doesn’t matter as much.
Despite this, we would always recommend sticking with only one system throughout and for any new plumbing work, always find out what’s already been used in the property and match to that.
Note: When measuring pipes, always measure the outside of the pipe and never the inside diameter.
With the above in mind you may be wondering how to tell the difference between the 2 systems when trying to make a purchase. In answer, the best method is to select your desired fittings and then test them on a given length of pipe to make sure they fit correctly. This way you’ll know you have the correct pipe for your fittings.
One final point to note on the different waste systems is visual appeal. At the end of the day a piece of pipe is a piece of pipe, regardless of what system it’s used with (only different colours are really relevant), so it’s really down to the look of the fittings.
In terms of what’s best, that’s really an individual thing, but on the whole, solvent weld tends to be the most subtle as teh joints themselves are quite slimline, compression joints are the most bulky and what some see as rather visually unappealing and push fit sit somewhere inbetween.
What are the Different Types of Push Fit Waste Pipe?
In order to plumb in a waste for a washing machine, sink or any other appliance or object, in 90% of situations you’re going to need a straight run of pipework, to run along the surface of a wall, a couple of bends to run around corners and possibly some couplers to join some pipes together over longer runs.
As this scenario is pretty common, no matter whether you use push fit, compression or solvent weld so you can be sure that for each system you will be able to get the same types of joints and couplers etc to see you good in any situation.
For completeness, we will now go through the most common items:
- Push Fit Pipe: Standard straight run of pipework to connect sections of waste. Available in 4M lengths
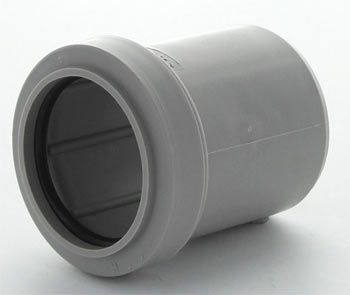
- Straight Coupling: Coupling used to connect 2 straight runs of pipe together if you need to span a distance greater than the length of pipe you have
- Saddle Clip: Bracket or saddle clip as they are also known. Used for fixing and securing pipes to walls and other solid surfaces to prevent movement
- 45° Bend: Not all walls or plumbing runs are square or turn at a 90° angle so in these instances you might not want something as sharp as a 90° bend – In steps the 45° bend
- 45° Spigot Bend: The spigot bend can be a life saver when you just want to connect in to a coupler or similar to continue a pipework run but you already have a couled end
- 90° Bend: When you need to turn a 90° corner, this bend is what you need
- 88.5° T-Piece: If you need to T-off a new run of pipework, this is the piece of kit you need. Works in the same way as a straight coupling, only this gives you the ability to add your new run at 90°
- Socket Reducer: Sometimes it may be necessary to join 2 different sized pipes together and in these situations, a reducer is needed
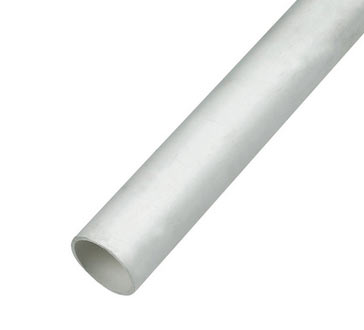
Standard straight push fit pipe
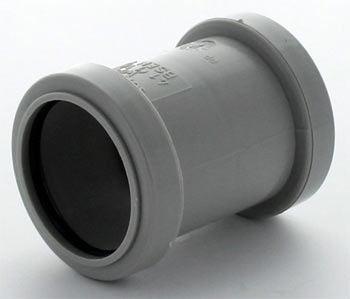
Straight coupling for joining pipes together
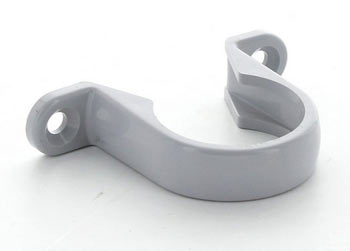
Saddle clip for securing pipes to walls and other suarfaces
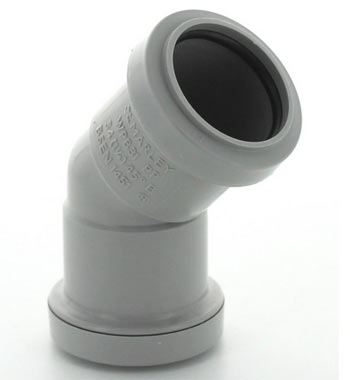
45° push fit bend for angling pipework around shallow bends
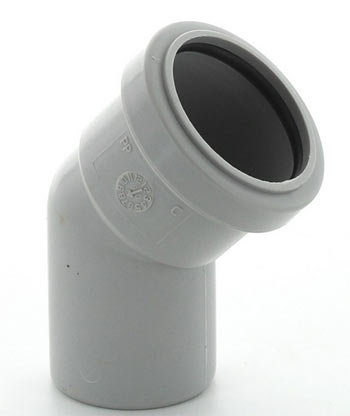
45 degree spigot bend for joining in to coupled ends
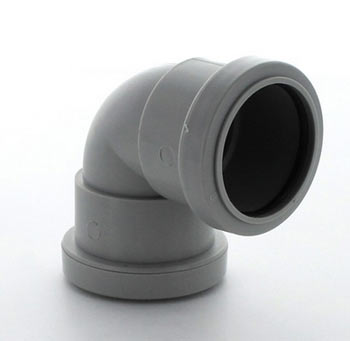
90° push fit bend for turning right angle corners
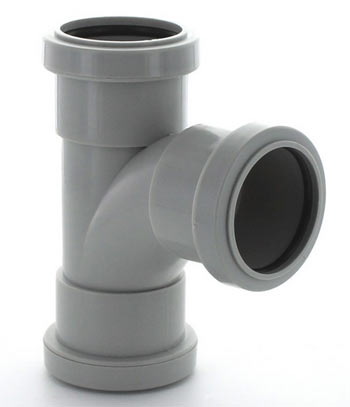
88.5° T-piece for creating new pipework runs from an existing run
Socket reducer for joining 32 and 40mm pipes together
As mentioned, regardless of the type of system you are using, each will have their own variation on the above.
How to Use Push Fit Waste Pipes
Now that we have established exactly what the push fit plumbing system is and what types of fittings you can get, it’s now time to look at how to use it.
As an example, we are going to be cutting a section of pipe to a given length and then fitting a 90° bend to run around a corner.
Measure and Mark the Pipe
The first task is to measure and mark a point on your section of pipe where your cut needs to be made.
Using a tape measure, measure to the point of your cut and use a marker pen to mark that point (something like a Sharpie works well on PVC pipework).
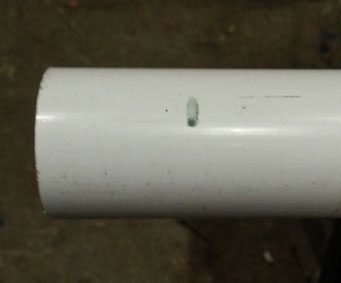
Mark your cutting point on your pipe
Using a piece of cardboard or something similarly flexible but with a defined edge, place this around your pipe so that the edge is touching your mark. Now, run a pen line all the way around.
This will give you a nice straight line to follow to ensure that your cut is square.
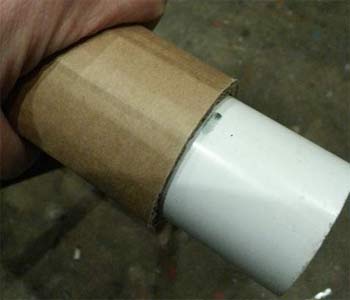
Mark around the outside of the pipe to give a straight line
Any cuts you make need to be absolutely square. This is to ensure that when inserted in to a fitting that there is an equal amount of pipe actually in the fitting.
If it’s cut at an acute angle and pressure is put on that particular joint, there is a good chance that you will get a leak.
Cut the Pipe
Before you start cutting, clamp the pipe securely so that it does not move. Something like a Workmate is best but if you don’t have one, a solid bench and some clamps will be fine.
With the pipe clamped, use a hacksaw to make your cut. Take your time and regularly check that you are cutting straight and true.
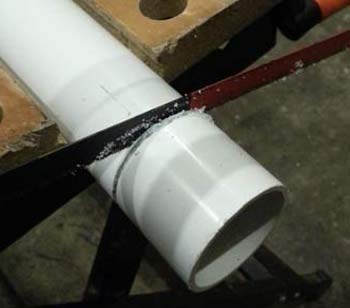
Use a hacksaw to cut the pipe but make sure your cut is totally straight
Tidy up the Cut Edge
With your cut now made, you will probably notice that your cut edge is pretty untidy and will need some sorting.
Any and all small plastic shards and shavings will need to be removed and all edges smoothed to form a slight bevel.
You may be thinking, why do I need to do this, can’t I just push the pieces together? Well, there is a very good reason for this.
As we are dealing with a rubber seal, any sharp pieces of plastic could easily damage or tear the seal which would ultimately mean leaks further down the line.
Additionally, if a jagged or sharp edge catches in the collar and you continue to force your pipe into the fitting, you can easily pull the seal out of its housing, again, causing leaks and failure.
Using a fine grade sandpaper, something like 240 grit or more, run this around all cut edges to remove any and all burrs.
Once you’ve done this, use a flat file to run around the outer edge of the pipe to create a bevel. This will help the pipe slide easily into the seal.
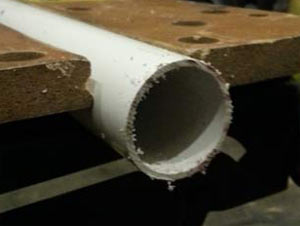
After you have made your cut you will be left with a rough edge and burrs
Apply Some Lubricant to the Seal
Simply forcing a plastic pipe into a rubber seal is not the easiest. As the pipe is pushed in, the rubber compresses down as it should do to create a water tight seal, but restricts the inward movement of the pipe.
To make this process as easy as possible and also prevent any damage to the seal, a lubricant (such as teh one seen below) is applied to the seal to help the pipe slide is as easily as possible.

Floplast lubricant gel
In the event that you don’t have any lubricant gel, washing up liquid is a great substitute.
What ever you decide to use, put some of the gel/lubricant on the end of your finger and run it around the rubber seal. giving it a good coating.
Fit Pipes Together
With everything now prepped and ready, it’s time to fit our pipe and fitting together.
Holding the pipe firmly in one hand, take the fitting and push it over the end of the pipe until it touches the seal. Apply a little pressure on to the fitting, but keep it square to the pipe.
It may be a little stiff to begin with but as soon as it starts, it should slip straight in. Once in, push the fitting down until it stops and then pull it back around 8-10mm. This is to allow for any expansion that the pipe or fitting may experience.
With your 90° fitting now in place on the end of your pipe, you’ve now successfully fitted your first your first piece of push fit waste.