Skim plastering or top coat plastering as it’s also known is a very tricky job indeed for first timers. It is not difficult to actually get it on the wall or ceiling, but getting it flat and smooth before it dries rock hard requires a great deal of hard work and practice.
As with any job like this we would always suggest that you practice and hone your skills first so in this DIY guide we run through the process of how to skim plaster a wall or ceiling.
What is Skim Plastering?
Skim plastering is essentially the process of laying on a thin layer of plaster over a rougher base coat plaster that is then flattened off to produce a beautifully smooth finish that can then be painted or wallpapered.
When plastering a bare brick or block wall, the first coat that is applied is know as the base coat plaster and this is laid on the wall using either bonding plaster or basecoat plaster. This is laid on at a thickness of somewhere between 13 and 15mm.
As basecoat plaster is quite rough and a nice flat and even finish is needed for the interior of a home a finishing coat or skim coat is applied on top that can then be smoothed and levelled to give an excellent finish for decorating. This is generally laid on the surface at a thickness of around 3 – 5mm to give a total thickness of base coat and skim coat plaster of around 18mm.
Over time, as the skim coat is easily accessible, it can become knocked and damaged and during the renovation of a property, walls are often skimmed over again to give them a fresh flat finish ready for any new decoration. Although essentially the same process as skimming over base coat plaster, this is known as “over skimming”
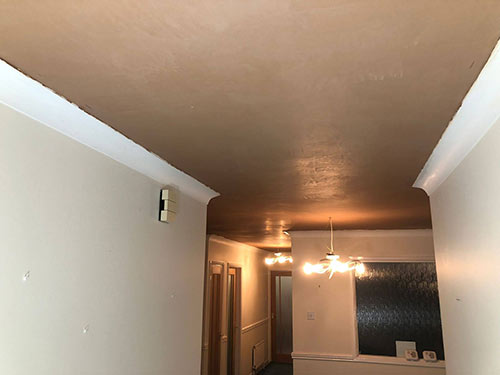
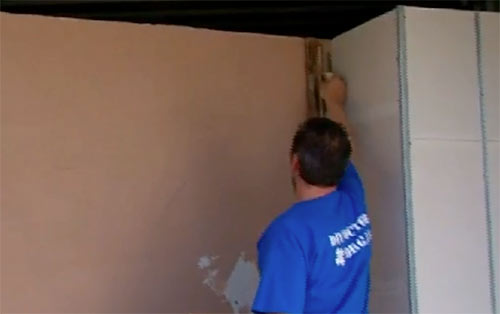
Skim coat plaster applied to ceiling
Can You Skim Straight Over Plasterboard
Yes, you certainly can skim plaster straight over bare plasterboard, this is essentially what it’s designed for.
In terms of what face you should plaster over, it is generally regarded that you should plaster over the grey or coloured side as this should be the side that faces into the room. With plasterboard that has tapered edges, these should also be on the grey or coloured side as they also need to face into the room when the plasterboard is just being decorated and not skimmed as they can be filled to produce a seamless joint.
The opposite side or the side that is printed on should face away from the room and be fixed at the rear, it is not advised that you plaster onto this face, however when it comes down to it, plaster will stick to this face also with no problems.
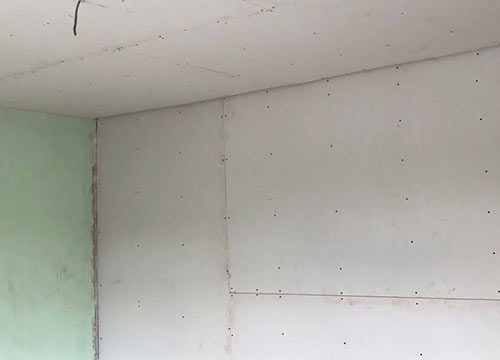
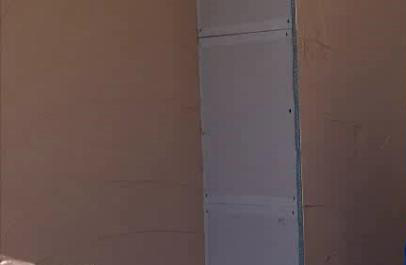
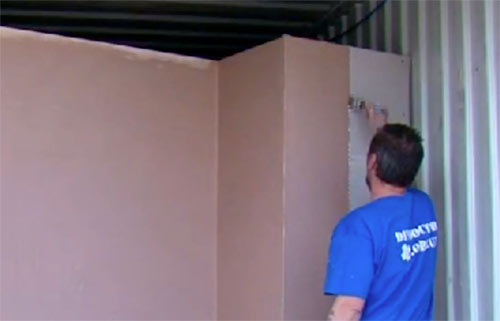
Plasterboard stud wall ready for plastering
Do You Need to PVA Plasterboard Before Skim Plastering?
In short, no you do not need to apply PVA to a bare plasterboard surface before it is plastered, you can simply plaster straight onto it as long as it’s flat and smooth with no imperfections.
The only real situations where you would want to PVA a surface before it’s plastered would be if you are over skimming a previously plastered wall as this will help to prevent the old plaster sucking moisture form the new plaster before it dries correctly and if you are plastering over a previously painted surface.
Ideally it’s always best to plaster on to a bare plasterboard wall or base coat plaster, so taking the wall back to this would yield the best results over time, however this isn’t always practical so being able to seal a surface and make it good for plastering is sometimes needed.
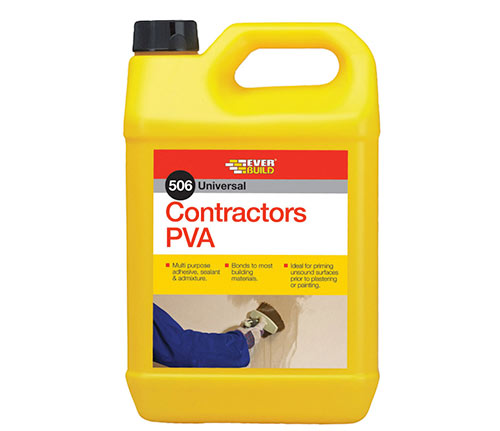
PVA suitable for preparing surfaces for plastering
How Thick Should Skim Plaster be?
A finished coating of skim plaster should be around 3 – 5mm thick. This is generally laid on in 2 coats. The first coat is laid on at a thickness of around 1.5 – 2.5mm thick and once it’s roughly finished and smoothed, the second coat is laid on again at a thickness of around 1.5 – 2.5mm thick.
The second coat is laid on almost immediately to take advantage of the fact that it should still be damp and this ensures that the first coat does not suck all the moisture from the second coat before that dries correctly.
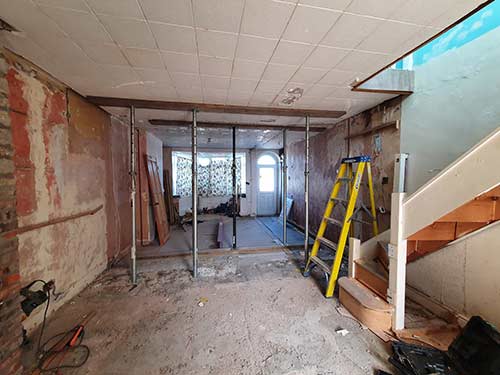
Bare walls being prepared for plastering
Should I Practice Skim Plastering Before Doing it?
If you get it right, doing your own skim plastering can save you a lot of money. If you get it wrong it can cost you a fortune putting it right, so if you’ve never done any skim plastering, before doing it for real on a given wall in your home, practice first to perfect your skills.
Buying (and being prepared to throw away) a sheet of plasterboard and a bag of top coat plaster will cost around £20.00 or so but will be worth every penny! It’s better that than the £400 plus that it’s going to take to put it right after the damage is done.
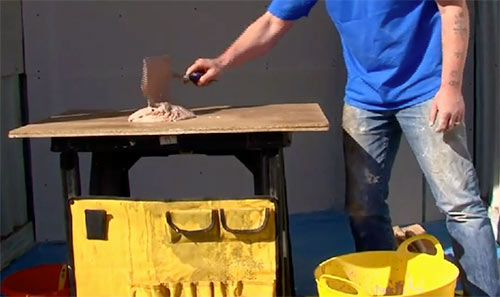
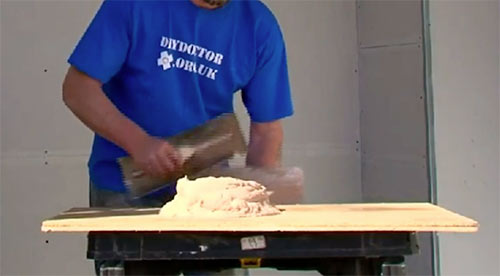
Practice laying on skim plaster on a spare plasterboard sheet
The main thing that novice plasterers are unaware of is just how quickly top coat plaster goes hard. As soon as the first coat is "laid on" the second coat is applied pretty much straight away.
Skim plastering is as much about timing as anything else and trying to get a polished finish too quickly, or too late, can result in a horrible job.
This is why practicing is a great idea. First, we suggest you mix up an eggcup full of skim. Place this on a plasterboard off cut of some kind that you have prepared with some PVA. Spread it out and mark the time it takes to go firm but not hard. This is the point at which skim can be made smooth and the trowel marks will disappear.
This is essentially how long you’ve got to work with it and get it on the wall before it’s gone too hard and it’s too late. Once skim is hard the only way of smoothing it is by sanding.
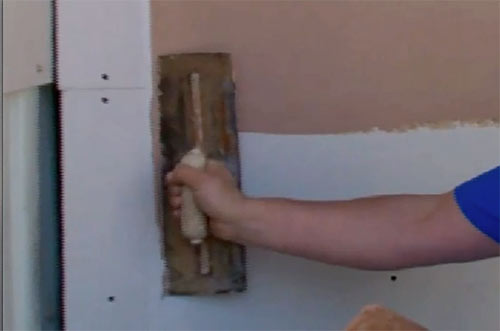
One of the most important parts of plastering as a novice is not taking on too much in one go and this is where “stop end beads” come into play.
They are ideal for breaking up large areas into smaller, more manageable chunks. They are essentially galvanised or stainless steel strips, roughly 3 – 5mm in thickness that are fixed to the surface and allow you to divide your plastering area into smaller, more manageable sections.
Their flat top gives you an edge to plaster up to and finishes flush with the surface of the plaster so once finished and painted you’ll never know they are there.
Laying on plaster up to a corner stop bead and a stop end bead
What Tools and Products are Needed for Skim Plastering?
In order to successfully lay on skim plaster on to a walls surface, you will need the following tools and products:
- Bag of top coat/multi-finish plaster
- Bucket of clean, fresh water
- Bucket large enough to mix plaster in
- Drill with mixer or specific plastering paddle mixer
- Bucket trowel
- Plasterers trowel
- Hawk
- Spot board or table
- Small 1 or 2 inch paint brush
- Large masonry brush
- Rose sprayer
- Step ladder or hop up (for top of wall or ceiling if you are plastering that)
- Dust sheets
- Large tarpaulin (to lay out and mix on, it can get messy)
- Measuring scoop to get accurate measurements of all materials
- Suitable PPE – old clothes, gloves, eye protection and a mask
- Extra bucket of water for washing tools
How to Prepare a Wall for Skim Plastering
Before you can begin any form of plastering it’s essential that you first prepare the area and also the surface that you’re going to plaster:
- Apply scratch coat: If you have just laid on a layer of base coat plaster, ensure that it has been “scratched” up correctly. This is the process where a scratch comb is run over the surface to scratch lines into it. These lines then create a bond to improve the adhesion of the skim coat
- Apply skrim tape: If you are plastering straight over a plasterboard stud wall or surface then you will first need to apply skrim tape to all of the plasterboard joints and over any screw or nail heads. This will help the plaster to adhere and also compensate for any movement in the joints that would otherwise cause cracks
- Remove loose items and debris: The plaster will only stay on the wall if it’s stuck to the actual walls surface so before it’s applied, run a scraper over the wall and remove any loose items, mortar etc. If it leaves any holes then these will need to be filled level to the surface first
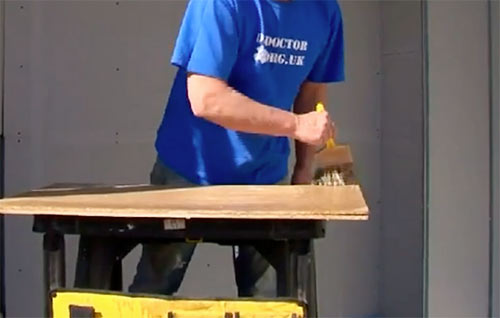
- Sweep and remove dust: Once scraped over, use a stiff bristled brush to brush the entire surface over and remove any remaining dust or debris
- Seal surface: If you are over skimming a surface or plastering over satin paint or another glossy surface then you will need to first coat that surface with a layer of PVA mixed at around 1:4 (1 PVA to every 4 water). Apply at least 1 coat, 2 won’t do any harm and then allow it to dry before laying on your skim
- Fix stop beads/corner beads: To help break up the walls in to more manageable chunks so that you don’t have to tackle too much in one go, fix stop beads to the walls to divide them up. Also to make forming corners much easier, fix corner beads to all external corners. Find out how to fix corners beads in our project here
- Clear room, protect floors: Finally before getting going you will need to clear out any moveable furniture and items from the room you’re plastering and anything that can’t be moved, including any floors, should be covered with suitable dust sheets. Laying on plaster is a messy jobs it can go everywhere so ensure all surfaces are suitably protected
How to Skim Plaster a Wall
Once you have practices and practiced and now you are at the point that you feel confident that you can now tackle a wall in your home, it’s now time to get plastering for real!
Step 1 – Prepare Wall and Area
In accordance to the preparation list detailed above, prepare the wall or walls that you are going to plaster carefully and correctly.
Remove any loose material from the wall or walls and then sweep them over. Fill any holes to surface level so that when you lay on your plaster it’s a uniform thickness.
If you’re working on a plasterboard wall, ensure that you have applied skrim tape to any and all joints and over any screw or nail heads.
Finally, fix any stop beads in place to divide the room space up and also fix any corner beads to external corners. Forming a perfectly straight and square corner is tricky for even time-served plasterers, so save yourself the headache and use beads. Once plastered and decorated they’re invisible and as they are metal they give corners a lot more strength.
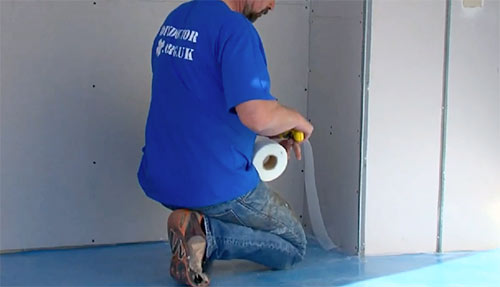
Applying skrim tape over plasterboard joints
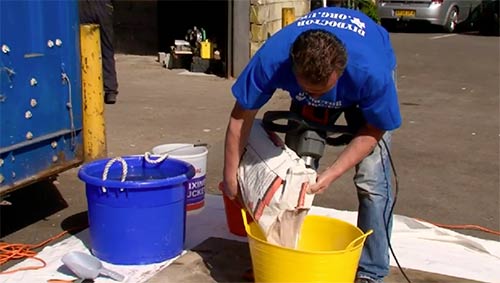
Step 2 – Mix up Plaster
Once everything is prepared, the next task is to then mix up some plaster ready to get it on the wall.
Mixing your skim plaster is where it all goes wrong for most people as they don’t make the correct mix. The plaster must be mixed to a thick, creamy consistency which is a bit sloppy and there must be no lumps at all.
When mixing, the dry plaster powder must be added to water and mixed, the water should never be added to the powder.
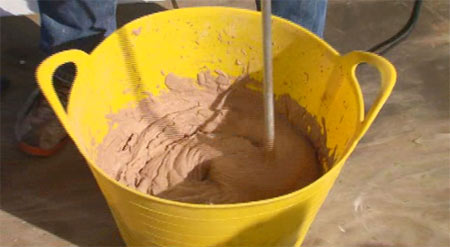
Adding plaster powder to clean, fresh water
If possible the mixing and movement should continue while the powder is being added as this will help prevent any lumps forming, as in the image above.
A special "paddle" blade is used, in conjunction with a variable speed electric drill, to get a good mix.
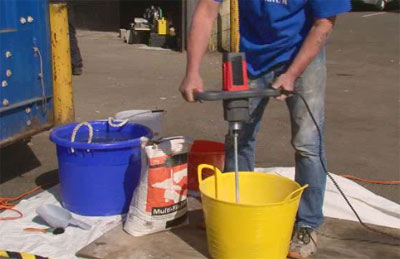
Mixing up top coat skim plaster
As you can see from the image above, professional plasterer use big buckets which enables them to mix a whole bag of skim in one go. It is unwise to do this if you have no experience as a bag of skim plaster covers about 12 – 13 square meters which an amateur cannot lay on in one go without it going hard.
It’s very hard to gauge exactly how much plaster to mix, however a good starting point is to fill a standard 14ltr bucket roughly 1/3rd full and then add plaster accordingly. This should give you a decent amount to plaster with, and avoid it going hard before you’ve used it all.
Very steadily pour the plaster powder into the water, mixing as you go. Keep the paddle or drill at a low speed, too high and it will fling the power everywhere. When placed in the bucket, move it up and down, and side to side to mix the plaster. You may have to add more plaster to get a consistency to that of thick porridge.
Top coat plaster mixed up to the consistency of thick porridge
When you think the consistency is right, take some out and drop it on the spot board. It should remain in a heap and be self supporting.
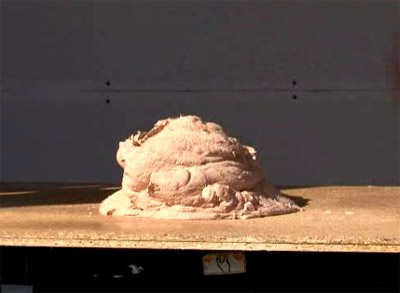
Top coat plaster mixed so that it is self supporting
As plaster dries very quickly, as soon as you’ve finished mixing stick the paddle in the washing bucket and thoroughly wash it off.
If you mix a new batch of plaster and there is still some of the old remaining on any of the tools, it will go hard much quicker. The mixing bucket should be cleaned thoroughly after every mix.

Washing off mixing paddle in bucket of water
Step 3 – Put on Spot Board and Then on Hawk
With your plaster mixed to the correct consistency, the next job is to get it on the spot board ready for applying to the wall. Before this though and to prevent any moisture from being sucked out of the mix, wet the masonry brush and brush water over the spot board. Don’t forget about the edges.
Once the spot board has been wetted down, repeat for all the tools you’ll be using also, the hawk, bucket trowel and your plasterers trowel.
Wetting down spot board before placing plaster on it
Using your bucket trowel, scoop up some of the plaster mix and pop it on the spot board, 2 or 3 dollops should suffice. Once piled up check that the mix is self supporting as it should be. Tap the spot board with your trowel, the mix should slump very slightly.
Every subsequent mix you make should match this consistency and also the amount it slumps as this will signify that the mixes are the same.
Place 2 or 3 dollops of plaster mix on to your spot board
To start with, scoop only a small amount of plaster on to the hawk. The hawk should be tilted towards you as you scoop some skim off the heap with your trowel. This is done in one swift, smooth movement.
Scooping plaster mix on to hawk
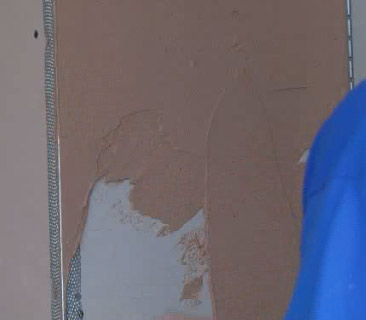
Step 4 – Apply First Skim Coat
It’s now time to start getting some plaster on to the wall. Scoop a little plaster mix off of the hawk on to your trowel. Position your trowel up to the wall and tilting the leading edge to at roughly 20° away from the surface you’re plastering, gently push the trowel across the face of the surface, leaving roughly a 1.5 – 2mm coating of plaster on the wall.
Applying plaster to wall using a plasterers trowel
Lay the plaster on the wall or ceiling as quickly as you can and keep the thickness even. Do not worry about trowel marks at this stage and don’t try to get it smooth yet either.
Trowel marks visible in skim plaster
Your concentration should be on applying an even thickness over the area as quickly as possible.
Repeat the above process of scooping and apply plaster until the wall or area you’re working on has a full coating of around 1.5 – 2mm.
When plastering corners, don’t plaster into the corner, get your trowel into the crease of the corner and trowel away from it. This will give a much easier and more even coating.
Trowelling away from the corner is much easier when applying plaster
Additionally, stop roughly 2 inch (50mm) from the floor. Don’t be tempted to plaster all the wall down the surface, the gap will be hidden when the skirting is put on.
Going all the way to the floor can easily drag dust and debris, hair etc. from the floor back on to your fresh plaster, totally ruining it.
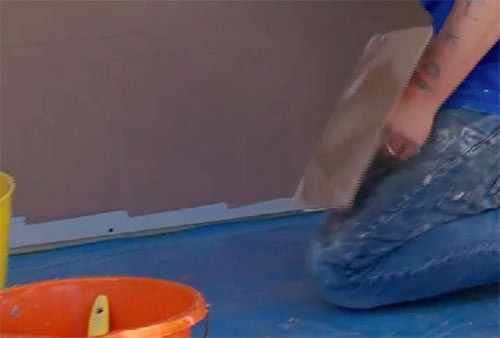
Gap left above floor to cover with skirting
If there are any obstructions such as heating pipework, boilers or the similar these can be quite tricky to plaster around even for those that do it on a day-to-day basis. In these situations do as much as you can with the plastering trowel and then you can use what’s know as “small tools”.
These are effectively miniature trowels that enable you to lay on and smooth plaster in very tight to reach areas. Again, these take a lot of practice to master, so if you know you have obstructions to get around, practice using these tools also.
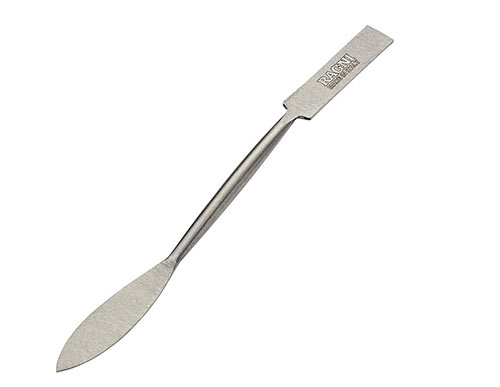
Plasterers leaf and square small tool
Step 5 – Apply Second Coat
Once the first coat has been laid on and the area you’re working on is covered the second coat then goes on immediately afterwards, no smoothing off, no drying time, get the second coat straight on!
The main reason for this is that if the first coat dries, as soon as you lay on the second coat it will suck all the moisture from it and it won’t cure correctly and will fail, so the first coat still needs to be damp for the second coat to successfully bond.
If you find that the first coat is drying before the second coat goes on, you will either need to speed up or reduce the size of the area you’re working on.
Get the second coat on in the same way as the first, by scooping from your hawk and then trowelling over the surface, holding your trowel at roughly 20° or so.
Getting the second coat of plaster on as soon as You’ve finished the first
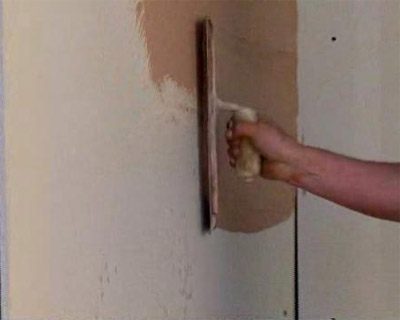
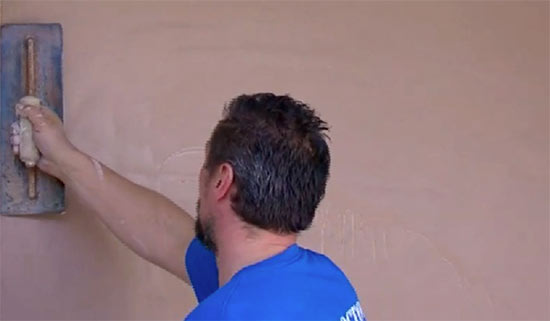
Step 6 – Trowel off and Smooth
Once both coats of plaster are on the wall and you have achieved a thickness of some where between 3 and 5mm, only now is it time to start trowelling down and smoothing off.
This can only really be done as the plaster is getting hard, as if you try and do it when it’s still soft, you’ll just end up moving it around the wall as opposed to actually smoothing it.
Trowel marks in plaster that need to be “trowelled off”
To test when it’s ready, gently press your thumb into the plaster. It’s ready to go when your thumb only leaves a very slight depression and a feint finger print.
In ideal conditions e.g. a standard family home with central heating, it will probably be dry enough to start taking trowel marks out 20 – 25 minutes after it was first laid on, so you don’t get long!
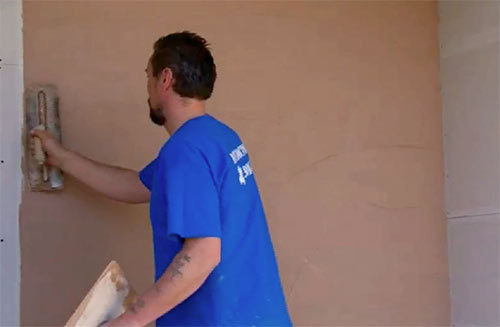
Trowelling off is done in “passes”, and this simply means running your trowel over the entire surface of the wall, flattening off any high spots and trowel marks as you go. With each pass the surface will get smoother and smoother. Generally around 3 or so passes are required to get a wall totally flat and smooth.
Holding your trowel at around 20°, run over the surface taking off the trowel marks and hard edges. When trowelling down, the idea is to take the high spots off and move them into any low spots so as you trowel off the high trowel marks, try to push them into any depressions. Again this takes a bit of time and practice to master.
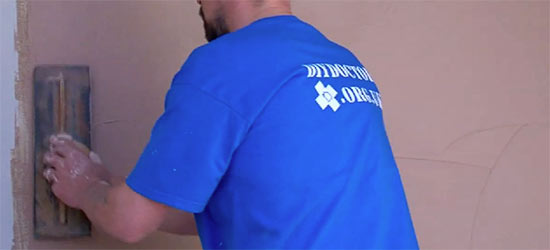
Trowelling off plaster to create a smooth finish
You may find that some areas have started to go quite hard and trying to smooth the plaster is getting very difficult. In these instances, take your masonry brush or rose sprayer dip the brush in some clean water and flick or spray it on to the plaster, not too much though.
This will dampen it slightly which is just enough to soften it and allow you to trowel it out and move it to a lower depression.
Hardening plaster dampened down to make trowelling off easier
Take your time when trowelling off, keep running the trowel over the surface and gradually all of the trowel marks will come out, all dips will be filled and you’ll be left with a lovely smooth, flat and level surface.
If you find any bad dips then you can simply scoop up a little plaster and then push it into the depression and flatten it off.
Once the flat surfaces are flat and smooth, if you have any corners it’s time to sort these. Using a small paintbrush, dip it in clean water and shake off any excess and then, with internal corners, gently run it down the apex of the corner. This will help to remove any trowel marks and also define the corner and make it much cleaner.
Don’t be tempted to use corner trowels for this, they’re not that easy to use and can do more harm than good sometimes.
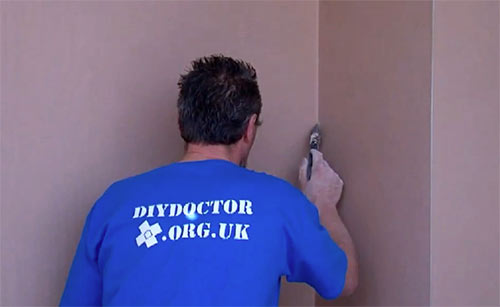
Use a damp paint brush to help define internal corners
This technique can also be used for external corners, however you should run the paint brush down each side external side of the corner.
Once you are confident that the entire surface is smooth, take a spirit level place it across several areas of the wall. If the surface truly is flat, every part of that level will touch the wall and if it doesn’t there will either be a high spot or depression.
If the level stays flush with the wall then it really is totally smooth and you’re done, good job!
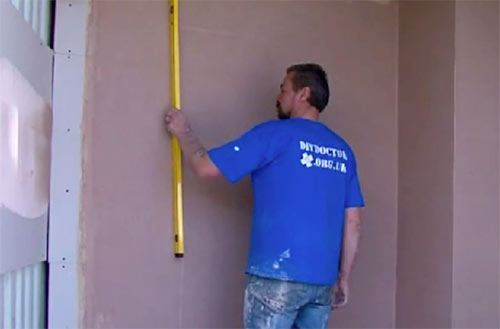
Check how flat and level your plastering work really is
If there are any slight trowel marks left on the surface or small high spots then these instead of trying to add plaster to resolve this, these are best dealt with by sanding them down using a sanding block and some 120 – 240 grit sand paper.
Step 8 – Clean up
Once you have finished plastering the very last job is to clean everything up. This must be done the second you finish as the plaster will cure very quickly and you don’t want it setting on your tools ruining them!
Wash everything in clean, fresh water removing and residual plaster mix. Once cleaned, place your tools out to dry.
The final task now is to dispose of the plaster-filled water. You absolutely cannot simply pour it down the drain. Over time it could harden and then block the drain!
Instead, leave any buckets and allow the plaster to settle in the bottom then gently drain the clean water that sits on the top off. Once the water has gone, allow the plaster to fully dry and then you can take it, along with any other left over plaster, to your local recycling centre for disposal. Note: There may be a charge for this.
Continuing Plastering
If you have used stop beads to divide up your wall into more manageable chunks then the chances are that you are going to break your plastering up into several sessions so this means starting fresh against an edge of some kind.
If you simply start plastering out from an older plaster or plaster bead edge, this will again draw moisture form the fresh plaster causing it to harden much quicker which will then ultimately mean it doesn’t bond correctly or it cracks.
To resolve this issue, before applying any plaster, dip a paint brush in some fresh clean water and run the brush over any such edges to wet them down.
Dampen edges before continuing plastering