Base coat plastering is the process of laying on a coat of bonding or browning plaster to form a solid and level base to lay on a finishing coat or plaster, or skim coat as it’s also known.
In this guide we run through the basics of laying on a base coat, however getting the wall level, flat and smooth is done by “feel”, rather than technique. The technique is important of course, and this is what we cover here, but this is one of those jobs where plenty of practice is essential.
What is Base Coat Plastering?
If you have never done any plastering before it’s firstly important to establish that it’s done in 2 parts, the first being a 12 – 15mm thick base coat and the second being a 3 – 5mm thick skim or finishing coat to give a total finished thickness of around 15 – 18mm.
The main goal of base coat plastering is to provide a flat and level base for the skim coat or top coat. The skim coat needs to be totally flat as this provides a base for wallpaper or paint and will become the visible finish in a room.
Applying a base coat over any bare masonry surfaces will cover any imperfections and also fill over depressions and high spots to leave a nice flat base for your finishing top coat.
The base coat is extremely important as, with all jobs, the overall finished job will only ever be as good as the preparation that was done initially.
Laying on base coat plaster is only done when you are plastering from scratch e.g. plastering a bare brick or block wall. If you are needing to cover a plasterboard wall then your don’t need to worry about a base coat, you can skip straight to the skim coat, unless the surface is extremely out of level that is.
For full information on skim coat plaster including how to mix it, lay it on and finish it, see our skim coat plastering project here.
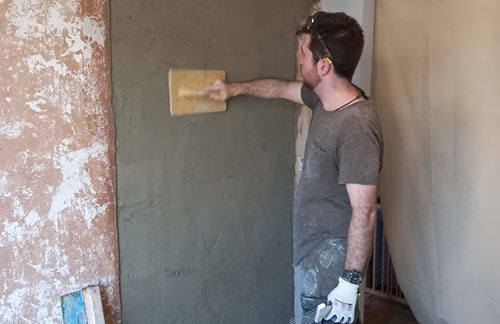
Base coat plaster laid on to wall
Is Base Coat Plaster the Same as Skim Coat Plaster?
No, base coat plaster and skim coat plaster are not the same. Base coat plaster, as the name suggests, provides a base or under coat for skim or top coat plaster which forms the outer visible finished coat.
Base coat plaster is also made using different powder, it uses bonding or browning plaster powder as opposed to skim coat which uses multi-finish or board finish powder.
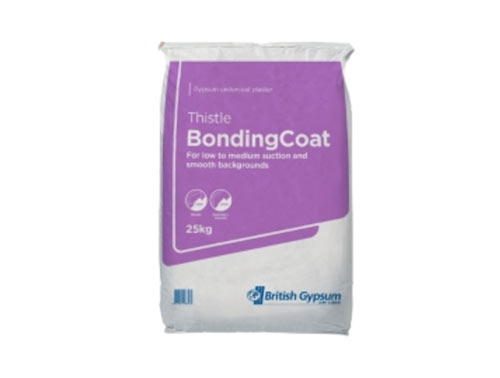
Bonding plaster used to make base coat plaster
How Thick is Base Coat Plaster?
Base coat plaster should be somewhere between 12mm and 15mm in thickness. The reason for this is that once a skim coat is applied at 3mm – 5mm, this gives a total thickness of somewhere around 18mm which is the desired overall thickness for both coats.
Generally, 12 – 15mm should be enough to take out any imperfections in a surface and also level it, however some surfaces can require quite a bit more to level them.
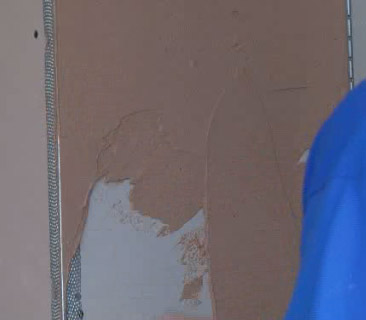
Corner angle bead and stop angle bead fixed that can be used to level surface off
How to Practice Base Coat Plastering
As we have said, plastering is a tricky job and even those that do it every day as a job need to practice and keep their skills up to ensure they still have the “feel” for it.
With many other jobs in the building industry, some of them you can learn in a class room from text books, but with trades like brick laying, plastering and the similar, theory will only take you so far, it’s when you actually start doing it that you learn how it’s done.
To this end, before you start actually tackling the walls of your home it really is essential that you practice first.
Mixing plaster the first time is a trial and error job. Plasterers use different consistencies of plaster for different jobs and being a plasterer’s laborer is the hardest job in the world…. Bar none! The important thing to remember is to add the plaster to the water, not the water to the plaster.
The consistency you’re aiming for is quite different to skim coat plaster. Base coat plaster should be quite thick, similar to the consistency of soft, sticky mud
Once mixed, learn how if feels when getting it on the hawk and on to the wall. Take note with how it feels when spreading it and how you need to hold your trowel to get it on the wall and ensure that it stays there.
When spreading it, also pay attention to the angle you need to hold your trowel and how much force you need to apply to push it into the wall and retain an even thickness.
The best way to practice is to go to your local DIY store and buy a bag of bonding plaster, a sheet of plasterboard and any other tools you may need, bring it home and then fix the plasterboard to a wall in your garage, on the shed or anywhere you can fix it, mix up some plaster and just get stuck in!
Obviously read on below for the theory part, but once you’ve read all you can read, just getting on with it will teach you how to put the theory into practice.
Preparing a Wall for Base Coat Plastering
As said, with many jobs in the building industry, the preparation work that happens at the beginning will ultimately determine how good the final finish is, as at the end of the day, the finished skim coat is rather thin and any major imperfections below it will stick out like a sore thumb.
With this in mind, it is essential that the surface you’re plastering over is prepared correctly:
- Clear area: Plastering and preparing surfaces for plaster are both messy jobs so clear out any furniture that can be moved and cover anything that can’t, including floors, with dust sheets
- Scrape the Wall Over: The first job is to scrape the wall over with a scraper to remove any debris such as tile adhesive, loose mortar etc. or what ever crud there is on the surface. It is essential that anything loose is removed as the plaster will only stick to what’s on the wall and if that isn’t fixed then it will likely come off
- Brush it Down: Once scraped over, use a stiff bristled brush to brush the entire surface down removing any final dust and debris that could effect how the plaster bonds to the wall
- Fix Battens/Beads in Place: The best way to level base coat plaster is to fix battens or beads to either side of the surface you’re working on, plaster over the space in between and then use a straight edge or plasterers feather over the battens/beads to then pull off any high spots, leaving you with a perfectly flat surface, so depending on how thick the base coat will be, fix 12mm – 15mm battens or beads either side of the surface you’ll be working on
- Wet Wall Down: Finally before any plaster goes on the wall, dip a masonry brush in some clean, fresh water, and brush the wall over to wet it down, just make it damp, you don’t want water pouring down the surface. As masonry is rather porous, this will prevent it from sucking moisture from the plaster mix, making it cure faster than it should which will cause issues down the line
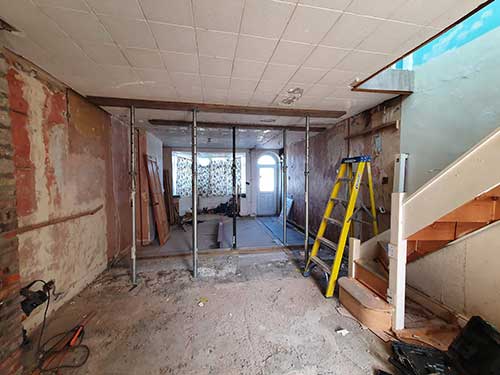
Brick wall cleaned down and prepared ready for base coat plaster
Tools Needed for Base Coat Plastering
To successfully base coat plaster a wall you will need the following tools and products:
- Bonding/browning coat plaster power bag or bags
- Mixing bucket – to start with, a standard 14ltr bucket should do
- Clean water for mixing
- Bucket with clean water for cleaning tools
- Drill/driver with mixing paddle or specific mixing paddle
- Bucket trowel
- Plasterers trowel
- Plasterers float
- Straight edge or feather edge
- Battens or beads of required depth
- Dust sheets
- Scraper
- Large masonry brush
- Screws, wall plugs (if fixing battens)
- Plasterers hawk
- Spot board
How to Base Coat Plaster a Wall
Now that you know exactly why and in what situations a base coat is used, if you have a surface that needs plastering that requires one, it’s now time to go through the steps involved in completing the work.
Step 1 – Prepare the Wall
The first job is to totally clear the room you’re working in of furniture or other similar items and anything that can’t be moved, including any floors should then be covered with dust sheets.
Next, prepare the wall or surface correctly to receive the base coat plaster in accordance to the list above. First scrape the surface over and remove any debris or loose material then give it a good brush down with a stiff bristled brush.
Check the wall over one final time to make sure any loose material and dust has been removed.
Step 2 – Fix Battens or Beads and Dampen Wall
To ensure you end up with a totally flat base coat, the best way to achieve this is to fix either timber battens or stop beads either side of the area you’re plastering and then once you have trowelled on the plaster and filled the void in between, you can then use a straight edge or plasterers feather edge placed over the battens/beads to run it down the wall, taking off any high spots and leaving you with a flat and level surface.
If you opt to use timber battens, once plastered up to and the plaster is cured, you will then need to remove the beads and then fill in the gaps using base coat plaster. However if you use galvanised beads, these can stay in the wall and once covered, you’ll never know they are there. Using beads is probably the way to go
To fix the beads to the wall, simply hold the bead in place, level it with a spirit level. You can then nail it in place using galvanised nails or by placing a few small dabs of base coat plaster on the wall and pushing the bead into it. After a few minutes the plaster will grip the bead.
Be sure to level each bead correctly before the plaster sets though.
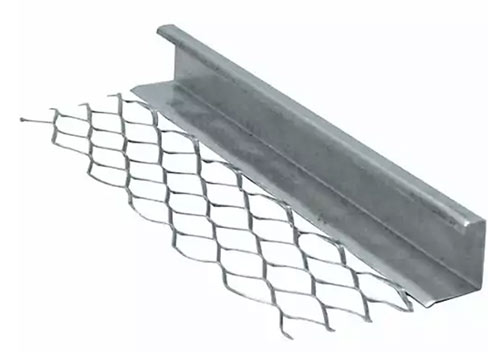
13mm plaster or rendering bead used for base coat plastering
Step 3 – Mix up Base Coat Plaster
Mixing base coat plaster is considerably easier than top coat or finish plaster. To mix base coat, you need a large container. Today on large sites it’s not uncommon to see basecoat plaster being mixed in a cement mixer. The plaster should be mixed well and there should be no lumps in it at all!
Half fill your mixing bucket with clean, fresh water and then steadily add the plaster powder, try to mix at the same time as adding the powder as this will reduce any lumps.
To get the correct consistency of mix for base coat plaster, imagine the kind of mud that is so soft your wellies simply slide through it as you walk, but when you pick your feet up there is tonnes of it stuck to your boots. That’s the kind of consistency you are looking for in your plaster mix!
Step 4 – Trowel Plaster on to Wall
Once mixed, use your bucket trowel to scoop out 3 or 4 scoops of plaster mix and place them on your spot board.
Once on the board, the mixed plaster should be placed on your hawk, about 2 trowels full at a time and then from the hawk, scoop up roughly a third of the size of your plastering trowel ready to get it on the wall.
Hold the trowel upright and get it next to the walls surface before tipping it into the surface of the wall and gently applying pressure to push it into the walls surface. Holding the trowel at roughly 20° with the rear edge lowest, push the trowel across the face of the wall, spreading the plaster across it as you go.
Spread the plaster about so it is slightly proud of the beads on the wall.
Which way you work, whether it’s side to side or up and down is entirely up to you, there’s no right or wrong way, as long as the plaster is on the wall, that’s all that matters.
Repeat this until the entire surface of the wall is covered.
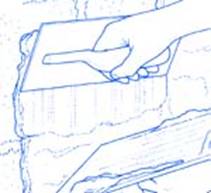
Applying plaster to the wall using a float
Step 5 – Level off With Feather Edge
Once all the plaster is on the wall the next task is to level it off.
Take your feather edge or what ever straight edge you’re using (preferably metal rather than timber) and lay it across the two beads on either side at the bottom of the section you have filled.
Push the straight edge in against the beads and pull upwards, sliding side-to-side as you go. Do not worry if some chunks come out as you drag upwards, these can be sorted afterwards.
Steadily work your way to the top of the wall making sure that you’ve run the feather edge over every section of the wall. If you’ve laid on rather a lot you may want to stop part way, scrape off any extra plaster and then continue your way up.
If any chunks have come out, simply scoop up some more plaster, fill the hole and level off to the surrounding surface.
Where there are any dips, again, simply scoop up some plaster and fill them in.
Once done, there should be some surface fissures, but not too many and none too deep. Repeat the process a couple of times until the section is full, flat and relatively smooth. Now move to the next section and repeat until all are covered.
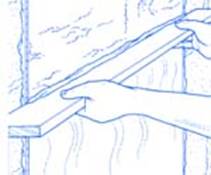
Levelling plaster with feather
Step 6 – Close up Surface
Once flat and level and starting to cure the next job is to them close the surface or “rub in” as it’s known. When you can put your finger lightly on the surface without leaving a mark, its time to start.
What this rubbing in actually means is getting your plastic float and rubbing in a circular motion over the wall to close any fissures that may be present.
As you run the float over the surface you will feel it go smooth under your touch and after a while you should be able to sense any depressions or high spots in the wall. You can add, or remove, a little plaster to put these right.
When you have finished you will have a smooth looking wall.
If there are any narrow areas such as the gap between a door frame and an adjoining wall or those around pipes etc. these can be filled and smoothed using one of the various “small tools” available.
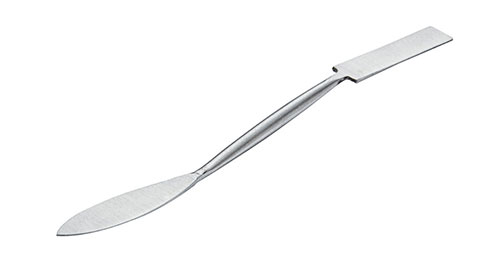
Plasterers small tool used for smoothing and applying plaster in tight spaces
Step 7 – Create Scratch Coat
Now that you have a nice smooth surface, it’s time to completely ruin it by scratching it all up!
This may seem ridiculous, but it is a necessary step as the lines created by the scratching will provide an ideal key for the finishing skim coat. The scratching is done after a few hours when the plaster has started to harden off.
To do this job there are special metal “combs”, but these are only really necessary when you are trying to cover over about 40 square m in one go. The average novice should aim for a maximum of 4 square metres in one go.
Take a nail, or a small screwdriver, and drag it lightly, in a coil or crisscross shape, over the surface of the plaster. The scratch should be no more than 1mm deep and all of the wall should be covered with no more than 150mm between any of the scratches.
Once all done rub over the wall lightly once more with your plastic float just to flatten out the burrs caused by the scratching.
Once this is done, that’s pretty much it when it comes to base coat plastering, good work!
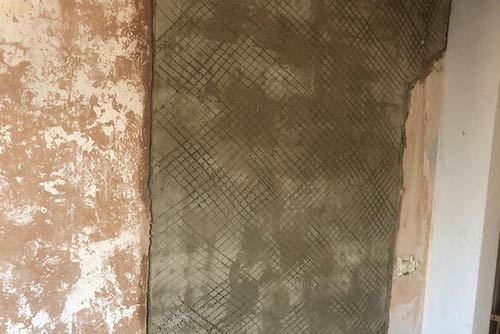
Scratch coat created in base coat plaster
Step 8 – Apply Skim or Top Coat Plaster
Once the base coat plaster has fully cured and set the final finishing skim coat can then put laid over it.
Before starting, to reduce the suction that the base coat has in terms of it sucking moisture out of skim coat, take a masonry brush, dip it in clean, fresh water and then brush the wall over, dampening it down. This will also give a little more time to keep the skim coat workable.
Firstly, you will need to mix up a batch of top coat. Again, this has to be to a certain consistency, that of thick porridge and when laid on a flat surface should be self-supporting.
Skim coat plastering is much more of a “feel” process and you should position yourself so you can see the thickness of plaster you are applying. Ideally you will apply the plaster in 2 layers. A very quick “flash” coat of 1mm, then a more deliberate coat of 2mm.
Lay it on as you did the base coat. Try to get the plaster to an approximate even thickness, but do not spend time trying to get it perfectly flat at this stage. This is impossible.

Laying top coat plaster on the wall
Cover the area as quickly as you can. Go back to the starting point and trowel over again getting the plaster a little flatter and smoother. Then again, and probably again.
Every time you re-visit, the plaster will have gone a little harder. It is the timing that is really important in top coat plastering or “skimming” as it is known.
Each pass on the hardening plaster should see more and more trowel marks and bumps disappearing. When the plaster is almost fully hard, your final pass will trowel it to a lovely flat finish.
The above is only a very brief run down of the skim plastering process, for a full and detailed tutorial on how to skim plaster, see our project here.
Base coat plastering is a necessary step when plastering a bare masonry surface and if you have never done it before, can seem like a daunting job, however if you take your time and work methodically then it’s certainly not beyond the reach of anyone to do.