Newly plastered walls and ceilings need to be sealed before any wallpapering or painting for that matter, takes place. For a full explanation as to why, please see our painting new plaster project.
Essentially, new plaster is extremely porous (absorbs water and moisture very easily) and if wallpaper paste is applied directly to it, it will suck the moisture out of the paste before it has a chance to dry fully.
When this happens, the bond between the paste and wall is very weak and the paste and wallpaper will simply peel off.
To seal a surface before you hang wall paper the wall also needs to be totally dry. Information regarding this is also contained in the above project.
Sealing a surface for papering can be done using a solution referred to as a “Size” or “Sizing Solution”.
If you go to your local DIY shed or builders merchant and say you wish to seal a newly plastered wall for wallpapering and require a “size” or “sizing solution” then they should be able to point you in the right direction in terms of the products you will need.
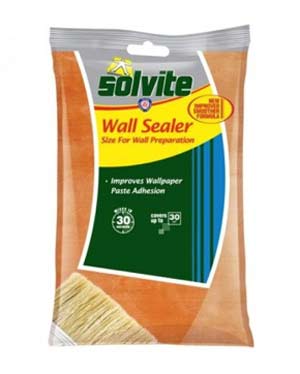
A popular brand of Sealer Size for Wallpapering – Available from Amazon
Do You Need to Use a Sizing Solution Before Papering?
It’s not always necessary to size before papering a wall or ceiling, but it generally helps to make the job a lot easier. The sizing solution creates a slightly glossy surface which means that the paper can slide on it which makes it much easier to position correctly.
A sizing solution also helps the paper paste to stick to the wall more effectively. If you paste new plaster without sizing, as we have discussed above, the plaster sucks all the moisture out of the paste making it dry very quickly which is not good. Sizing stops this.
Sizing a wall or ceiling before papering allows the wallpaper paste to work properly and bond with the surface as it should
If the wall has been painted with a sizing solution before the paper has been applied it makes it much easier if you every want to remove the paper again. You’ll probably not be thinking about this at the time you apply it, but perhaps in 10 years time you’ll be thankful of the extra care you took!
How to Apply Sizing Solution Before Papering Walls or Ceilings
Before you purchase make sure you read the manufacturers guidelines in detail and ensure that it is suitable for your wall surface.
Many of these types of sealer come in a gelatinous solution which is mixed with water and applied straight onto the wall and allowed to dry. Many products of this type are also used in glazing paper and for stiffening textiles.
Most can also be papered over while still wet but, with the addition of wallpapering paste it sometimes makes the wall too slippery to hang paper properly.

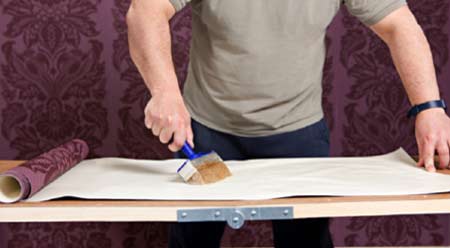
Sizing the wall before papering makes it easier to apply the paper – Image courtesy of Bunnings
A dilution of the wallpaper paste you are going to use can also be used as a form of size to seal the wall. Most pastes will indicate quantities to use for a sizing solution mix on the packet but a rough guide is to use 25% more water in a sizing solution.
In essence a size or sizing solution is a little similar to a “mist coat” when painting, which we explain in detail on a project all about painting new plaster.
When you intend to apply a vinyl paper to the surface, it is best to prepare the walls by sizing with a dilution of a paste with a fungicide in it.
Vinyl papers are air tight and as a result, any dampness at all that is trapped behind the paper will not be allowed to evaporate out. This could turn to mould over time.
Once you have purchased or mixed your “size” all you have to do then is apply to the surface using a large emulsion brush ensuring that you get a nice even spread and covering across the entire walls surface.
Once applied, leave to dry and you’re done – Time to get papering! Learn all about hanging wall paper here.
Sizing New Plaster or Drywall Walls
As we briefly touched on before it is very important to size a drywall or new plaster before you attempt to apply wall paper.
This is because these types of wall or ceiling are what are known as hydroscopic – they love water and attract it vigorously, drawing all the moisture out of your wallpaper paste very quickly meaning that it does not dry properly and there for, leading to the paper peeling away.
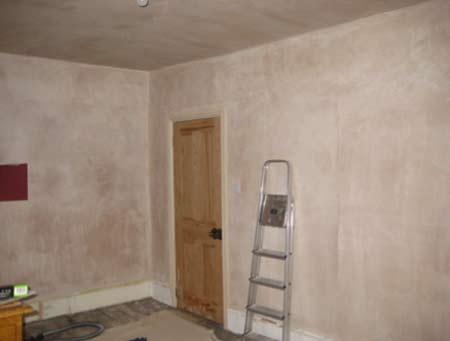
Newly plastered or drywall walls will need to be sized before papering
The hydroscopic nature of new plaster also makes it harder to position the paper on the wall. As you are sliding the paper around to position it, the paste is already drying and preventing the paper from moving.
This is not the only problem. The other issue is that drywall and new plaster are rough abrasive surfaces and so it is very difficult to slide and smooth the paper into the correct position when applying it anyway, without regardless of the fact that the paste is drying too fast.
While we have talked about specialist Sizing Solutions in this project it is possible to use primers, paints and mist coats to act as a sizing solution.
Obviously we would recommend using a dedicated Sizing Solution as they are only a few pounds and made specificaly for the job, but do not be alarmed if you see a professional using something else.
They are trying to get a surface that is smooth and will not absorb the moisture from the paste when the paper is applied. The smoother the finish the easier the paper will be to slide into position when pasted and sometimes a mist coat of paint or 2 can really help this.
Drywall and newly plastered wall will always need to be sized before you apply wall paper, but depending on the finish of other types of walls they may not need to be sized. If in doubt, and for the relative low cost and effort sizing is usually worth doing anyway.
Once you have applyied the walls with your sizing solution and you have allowed it to dry you are ready to start your wallpapering. Again, for tips on how to hang wallpaper, see our project here.