Cutting and sawing timber is done on a daily basis in many construction trades and also in many DIY jobs and having the right tools for the job is essential to get the best finish.
With this in mind, in this DIY guide we take a look at the bandsaw and how to use one of these handy power tools.
What is a Bandsaw?
A bandsaw is a versatile cutting tool that uses a continuous metal blade (band) with sharp teeth to make precise cuts. It’s ideal for cutting curves, ripping lumber, and making straight cuts in wood, metal, or plastic, making it a must-have for many DIY projects.
The key to a bandsaw’s functionality lies in its blade. The thin, flexible blade rotates at high speeds in a loop, creating a smooth, efficient cutting motion.

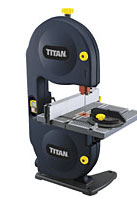
Benchtop bandsaw
You can adjust the blade’s speed and tension depending on the material you’re working with, from hardwoods to metals or plastics.
Bandsaws come in different sizes depending on the material you need to cut. Smaller versions, called scroll saws, handle finer detail work, while cordless portable bandsaws are great for flexible, on-the-go use.

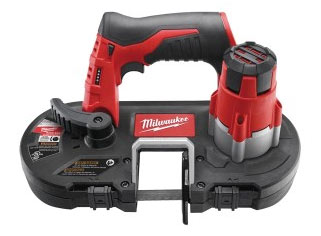
Cordless portable bandsaw
Larger bandsaws may come with a stand, but if yours doesn’t, ensure it’s securely bolted to a stable workbench for safe and accurate cutting.
Unlike other saws, a bandsaw allows for intricate curved cuts, as well as straight cuts, making it highly versatile for a range of tasks. Its ability to cut through thick and uneven materials with ease sets it apart from many other cutting tools.
Whether you’re a beginner or a seasoned pro, a bandsaw is an essential tool for achieving accurate and efficient cuts in various materials, making it a go-to in any workshop.
What to Think About Before Purchasing a Bandsaw
Before buying a bandsaw, it’s essential to assess your needs and the type of projects you’ll be working on. Bandsaws come in different sizes and capabilities, so understanding what you plan to cut—whether wood, metal, or other materials, these factors will guide your choice.
For general DIY tasks, a medium-sized bandsaw can handle most jobs, but if you’re working with larger or denser materials, consider a more heavy-duty option.
Next, think about the size of the throat and cutting depth. The throat size determines how wide a cut the saw can make, while the cutting depth indicates the thickness of material it can handle. For intricate work or cutting curves, a smaller scroll saw might be more suitable, but for larger, straightforward cuts, a wider throat size will be beneficial.
Portability is another factor to consider. If you need a tool that’s easy to move between workspaces, a portable, cordless bandsaw might be a better fit. However, for more stable, precision work, a bench-top or floor-standing model with a solid base is ideal. Make sure your workspace can accommodate the size and power requirements of the saw.
Lastly, consider safety features and ease of use. Look for models with blade guards, adjustable speed settings, and a reliable dust collection system. These features not only make the saw safer to use but also ensure cleaner, more precise cuts, reducing the risk of accidents or mistakes.

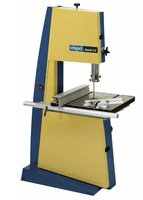
Freestanding heavy duty bandsaw
Placing Your Bandsaw
Another key consideration is where you are going to put your bandsaw in order to use it, however this will really be dictated by it’s size and what you intend on cutting with it and how big those items are likely to be.
On occasion you might want to cut long or awkward pieces of material. Therefore, you need to think carefully about where you place your bandsaw so that you have sufficient room to swing or turn the material you are working on easily and also enough space in front and behind to run the material through the saw.
Safety Issues With Bandsaws
Using a bandsaw can be highly efficient for cutting various materials, but it also comes with quite a few safety risks. One of the most important safety concerns is blade contact.
Bandsaws feature a very sharp and fast-moving, blade that can cause serious injuries if your hands or fingers get too close, so when using one, always use push sticks or guides to keep your hands away from the cutting line.
Also, while operating such a tool, always avoid any form of distractions, as even a mic seconds lack in concentration can lead to disaster..
Another key safety issue is kickback, which happens when the material binds on the blade, causing it to jerk or be thrown back at the operator. To prevent this, ensure that your blade is properly tensioned and sharp.
Using the correct blade for the material you’re cutting is also an absolute must. Dull or inappropriate blades can lead to uneven cuts, increasing the risk of accidents.
Proper eye and ear protection is often overlooked but is crucial when operating a bandsaw, as they can be can be very noisy, so always wear safety goggles and ear protection to minimise these risks. The saw also generates a lot of fine dust which can pose a serious health risk so ensure you always wear a good quality FFP3 mask.
Lastly, maintaining a clean workspace is critical. Dust, debris, or loose objects can interfere with your cutting, causing accidents. Many bandsaws come with dust collection systems, so use them to keep your area clear, and regularly clean the saw itself to ensure it runs smoothly.
What Blade to Use With a Bandsaw?
Choosing the right blade for your bandsaw is essential for getting the best results from your projects. The type of blade you use depends on the material you’re cutting and the type of cuts you want to make. Bandsaw blades are differentiated by tooth count, width, and material composition, and each combination serves a specific purpose.
Tooth count is a crucial factor. Blades with fewer teeth per inch (TPI) are ideal for cutting thicker materials like wood or metal because they remove material quickly, but they leave a rougher finish. For finer cuts, especially in thin materials like plastic or plywood, a higher TPI blade gives you more precision and a smoother surface.
Blade width also matters. For straight cuts or re-sawing thick wood, a wide blade (around 3/4″ to 1″) is best for stability. If you’re cutting curves or intricate shapes, opt for a narrower blade (1/8″ to 1/4″), which allows for tighter turns without binding or breaking.
The material of the blade is another important consideration. Carbon steel blades are affordable and work well for wood, but if you’re cutting metal or hardwood, a bimetal blade will last much longer. For extremely tough materials, like stainless steel or high-alloy metals, a carbide-tipped blade is the most durable and best choice.
One final point is that when inserting a blade into a bandsaw, always make sure that you put it on the right way around, so that the teeth are pointing in the right direction to cut correctly.
Ultimately, selecting the right bandsaw blade depends on your project needs. Matching the blade to the material and cut style will not only give you cleaner results but also prolong the life of your bandsaw.
How to Use a Bandsaw
After looking at the different aspects of the bandsaw; what blades to use, safety issues, where to place the saw etc., it’s now time to look at exactly how to use one.
Step 1: Prepare the Bandsaw
Before starting, ensure the bandsaw is set up correctly. First, check the blade tension, it should be tight enough to cut smoothly but not so tight that it could break. Most bandsaws have a tension gauge to help with this.
Next, adjust the blade guides. These should be set close to the workpiece but not touching it.
Finally, set the blade speed based on the material you’re cutting. Wood typically requires higher speeds, while metals need slower speeds for accurate cuts.
Step 2: Mark and Secure Your Material
To ensure your cuts are in the right place, before you cut anything at all, the first job is to measure and mark on the material you’re cutting, exactly where you want to cut it. This is done by marking your cut line on the material with a pencil or marker.
Next, ensure the piece is securely clamped or held down on the saw’s cutting table to prevent movement during the cut. Properly securing your material is essential for both safety and accuracy.
Some larger tools will have their own clamping system, if yours does not then you can use some hand clamps or G-clamps.
Step 3: Start the Bandsaw
Once everything is set, power on the bandsaw and wait for it to reach full speed.
Now, slowly guide the material into the blade, using a steady hand. Depending on the size of the object you’re cutting, use a push stick if your fingers may get too close to the blade.
Let the saw do the work, so don’t force the material through too quickly. When cutting curves, make gradual turns to avoid twisting or breaking the blade.
Step 4: Safety Tips While Using a Bandsaw
Always wear safety goggles to protect your eyes from dust and debris. Also, keep your hands a safe distance from the blade. Most bandsaws have a guide that shows how close is too close.
As mentioned, use a push stick for small pieces of wood to avoid hand injuries. Lastly, never leave the saw running unattended, and always turn it off when adjusting the blade or cutting material.
Step 5: Finish the Cut
After completing your cut, switch off the bandsaw and allow the blade to come to a complete stop before removing your material. Check the cut for accuracy and clean up any rough edges with sandpaper if needed.
Finally, once you have finished any and all cutting jobs, release the tension on the blade by releasing teh blade tensioner until the next time you need to do some cutting.
By following these simple steps, you can confidently and effectively use a bandsaw for a great range of DIY projects. Proper setup and careful handling are key to success and will help you achieve clean, accurate cuts every time.

