A nail gun is a powerful tool used to quickly drive nails, brads, or pins into materials. It operates using compressed air, gas, or an explosive charge, with compressed air and gas being the most popular means of power today.
In this DIY guide we take a look at the nail gun and how it can be used to dramatically aid productivity in many DIY and construction projects.
Different Types of Nail Guns in the UK
In the UK, nail guns have become an absolute essential tool for DIY’ers, tradespeople, and contractors alike. Choosing the right type of nail gun depends on what you are doing so here is a breakdown of the most common versions available.
Framing Nail Gun or First Fix Nailer
Framing nail guns are built for heavy-duty tasks such as building timber frames, garden sheds, or large carpentry jobs. In the UK, framing nailers are often powered by compressed using a compressor air or changeable gas cartridges for more modern cordless versions.
They’re ideal for fastening thick materials like wood studs and beams, making them a top choice for larger construction and home renovation projects.
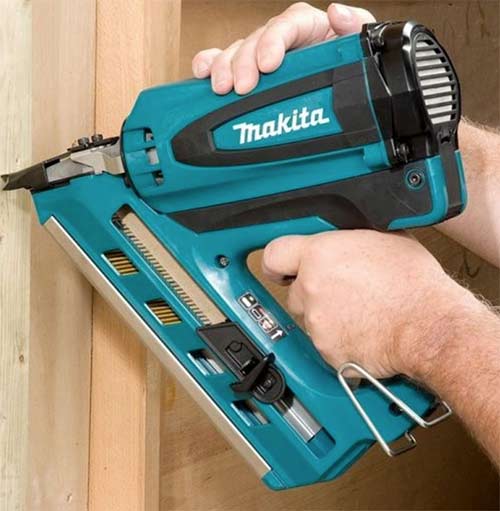
First fix nail gun
Finishing Nail Gun or Second Fix Nailer
Finishing nail guns are perfect for more detailed and finer work, such as installing skirting boards, door architrave, or kitchen units. In the UK, these nailers are popular for their ability to drive thinner nails that leave smaller, more invisible holes, reducing the need for touch-ups.
These are widely used in both domestic and commercial carpentry, where a polished, seamless look is required.
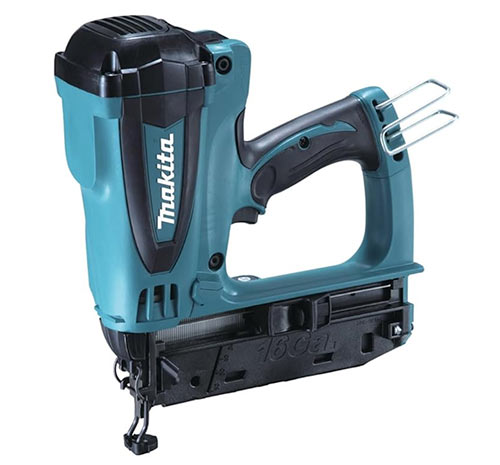
Second fix nail gun
Brad Nail Gun
A brad nail gun is a go-to tool for smaller, more delicate projects and precise work, like attaching decorative trim, beading, or assembling furniture.
Brad nailers available in the UK use smaller nails, or ‘brads’, which are ideal for delicate materials like MDF, plywood, or softwoods. They’re popular for interior projects where minimal visible nail holes are preferred.
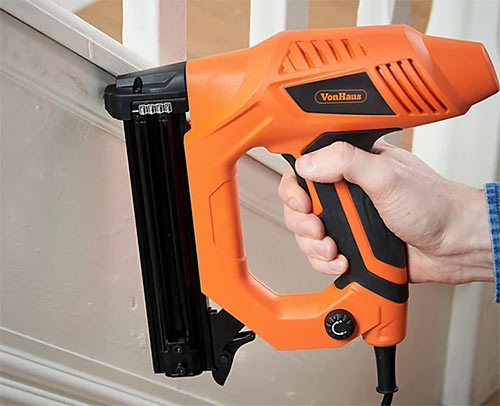
Brad nail gun
Roofing Nail Gun
Roofing nail guns are specially designed for installing roofing materials like shingles, tiles or felt. In the UK, they are often used in roofing repair or new installations, as they can quickly secure roofing nails with speed and accuracy.
Most UK roofing nailers are coil-fed, meaning you can work longer without needing to reload, which is a big plus for efficiency.
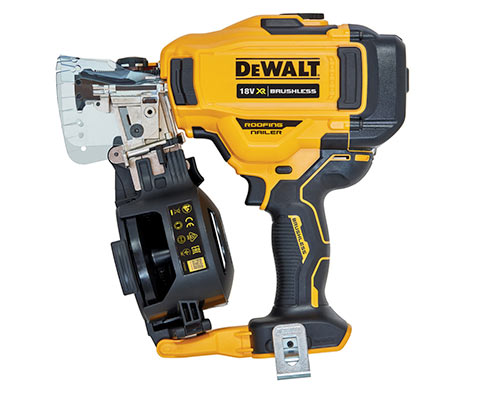
Roof nailer
Staple Gun
Although technically not a nail gun, staple guns are commonly used across the UK for tasks like upholstery, attaching insulation, or securing carpet.
They work similarly to nail guns but fire staples instead of nails. Their versatility makes them a handy tool for both DIYers and professionals working on lighter materials.
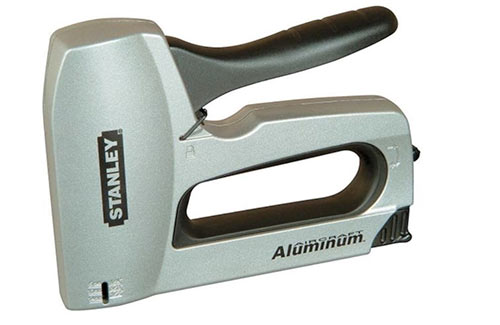
Basic staple gun
Types of Nail Gun Nails, Brads, and Pins
When it comes to using a nail gun, the type of actual fixing you use will again depend on the type of job that you are doing as nails, brads and pins are each designed for a different purpose.
Nails
Nails are the most common type of fastener used in nail guns. They are typically thicker and longer than brads or pins, making them suited to more heavy-duty jobs like framing, decking, or building large structures.
Nail gun nails come in various lengths and gauges, with the thicker nails being perfect for securing large, dense materials like timber beams or plywood. For tougher construction tasks, nails provide strong holding power and durability.
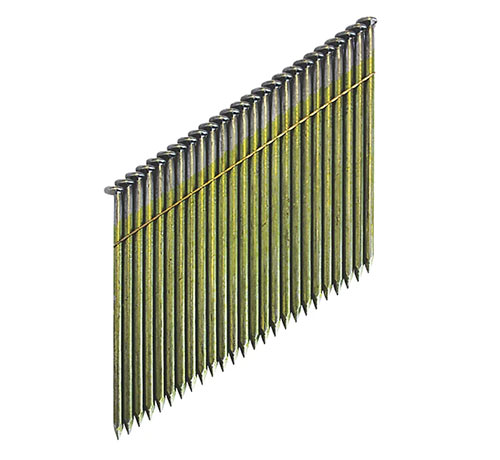
Collated nail gun nails
Brads
Brads are thinner than standard nails, making them ideal for more delicate tasks where larger nails could split the material. Brad nails, or ‘brads’, are usually 18-gauge and come in shorter lengths, perfect for jobs like attaching trim, moulding, or lightweight wood pieces.
Brads leave smaller holes, so they’re great for projects where you want a clean, finished look with minimal need for any finishing.
They provide a balance between holding power and precision, which is why they’re widely used in interior finishing work.
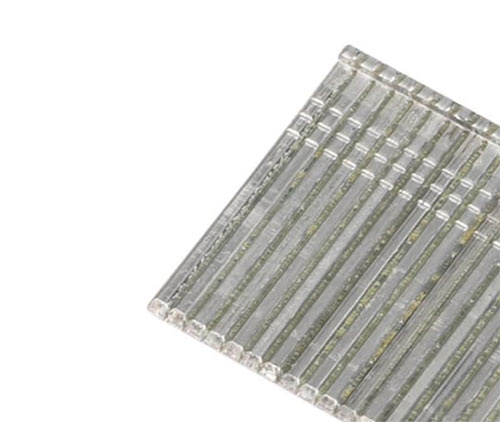
Nail gun brads
Pins
Pin nails, or pins, are the smallest and thinnest type of fastener used in nail guns. Typically 23-gauge, pins are almost invisible once driven into the material, making them perfect for delicate tasks like assembling small trims, fine woodworking, or attaching fragile materials like veneers.
They offer less holding power compared to larger nails and brads, so they are usually used in situations where appearance is more important than strength.
Pins are often combined with glue for extra holding support on fine projects.
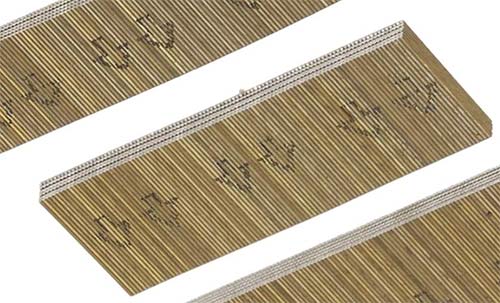
Nail gun pins
Safety Tips When Using a Nail Gun
As with any power tool, in inexperienced hands they can be extremely dangerous if not lethal and nail guns are certainly no exception to this rule, they are potentially lethal objects so extreme care must be taken when using them.
With this in mind, here are some tips and pointers that must be followed at all times:
- Wear Protective Gear: Always wear safety glasses to protect your eyes from flying debris and ear protection to guard against the loud noise of nail guns.
- Read the Manual: Before using any nail gun, thoroughly read the manufacturer’s instructions. This will help you understand the tool’s features, how to operate it, and any specific safety precautions.
- Check the Nail Gun Before Use: Inspect your nail gun for any damage or loose parts. Ensure that all safety mechanisms are functioning properly, and never use a faulty tool. Ensure any air lines are securely attached, or cartridges inserted correctly.
- Keep Your Hands Clear: Always keep your fingers and hands away from the firing area. Hold the nail gun securely and maintain control at all times to avoid accidental discharge.
- Engage the Safety Mechanism: Most nail guns come with a trigger lock or safety tip that must be pressed against the surface before firing. Always engage these safety features when not actively nailing to prevent accidental firing.
- Use the Correct Fasteners: Only use nails, brads, or pins that are compatible with your specific nail gun model. Using the wrong fasteners can lead to jams or misfires, increasing the risk of injury.
- Never Point the Nail Gun at Anyone: Treat a nail gun like any dangerous tool and never aim it at anyone, even if you think it’s unloaded. Always point the tool away from yourself and others when not in use.
- Keep the Nail Gun Powered Off When Not in Use: Disconnect the power source (battery, gas, or compressed air) when you’re not actively using the tool or when performing maintenance to avoid accidental firing.
- Secure Your Workpiece: Always make sure the material you’re working on is secure. Trying to nail into an unstable surface increases the risk of the gun slipping or misfiring.
- Stay Focused: Use nail guns with full concentration and avoid distractions. Never use a nail gun if you’re tired, under the influence of alcohol, or taking medication that could affect your alertness.
- Keep a Safe Stance: Maintain a balanced, stable stance when using a nail gun. Avoid awkward positions, as this could lead to loss of control and accidental discharge.
- Train Properly: If you’re new to using nail guns, seek proper training or guidance from experienced professionals to ensure you know how to safely operate the tool.
Parts of a Nail Gun
So that you fully understand exactly what we are referring to when we are describing exactly how to use a nail gun correctly, here follows a description of all the major parts of a nail gun and what they do:
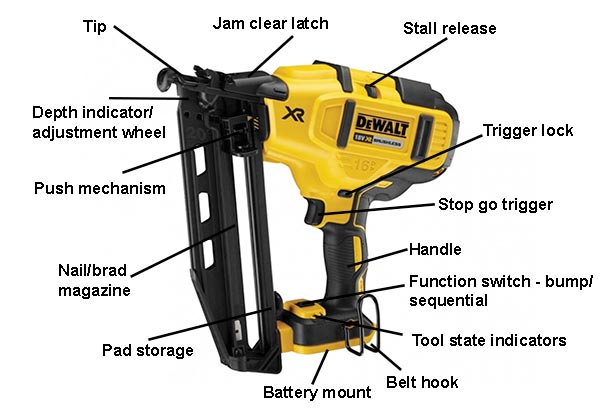
The main parts of a nail gun
- Tip: Where the nail or brad is fired from
- Jam Clear: Used to clear nail jam if one occurs
- Stall Release: Used to reset driver blade if it becomes stuck and stalls the tool
- Trigger Lock: Prevents trigger being pulled accidentally
- Stop Go: When squeezed, the tool fires a nail
- Handle: Where the user holds the tools to use it
- Function Switch: Used to switch between tool modes – Bump fires a nail when the bump tip is in bumped on a surface, sequential doesn’t require a bump, you can just drag the tip and then pull and release the trigger
- Tool State: Indicates the state of the tool – low battery, tool is stalled etc.
- Belt Hook: Used to hang tool from tool belt when not in use
- Battery Mount: If battery powered, used to clip battery to tool. With gas powered there may be a gas cartridge mount or if air powered there may be an air house plug in this place instead
- Magazine: Stores the nails or brads to be used with the tool
- Push Mechanism: Pushes the nails or brads to the top of the magazine for use
- Depth Indicator: Used to adjust how far nails or brads fired into surface
How to Use a Nail Gun
Nail guns are now pretty much the go-to tool on most building sites today, almost totally replacing the good old hammer when it comes to knocking in nails and the likes.
Due to the dangers that these tools pose it is absolutely imperative that they are used correctly and safely and to this end, here follows the best practice guide on how this is done.
Step 1 – Choose the Right Nail Gun for Your Project
Before you begin, make sure you’re using the right type of nail gun for the job you are doing e.g. first fix, second fix etc.
Framing or first fix nailers are ideal for heavy-duty tasks like building walls, roofs or decks, while finish, second fix or brad nailers are better suited for more delicate, finishing work like architrave, skirting and the likes.
Also, always check that the nail gun you’re using is compatible with the nails or brads you have or you will get jams and other issues.
Step 2 – Prepare Your Workspace
The next task is to now set up your workspace to ensure it’s safe and free from distractions and unnecessary obstacles.
Secure the material you’re working on with clamps if necessary.
Ensure you have a stable, clear surface and enough room to move around.
Always make sure there are no loose items or people nearby who could be in the way or accidentally hit by the nail gun.
Finally, fully inspect the gun before it’s used and make sure there are no defects or damage.
Step 3 – Load the Nail Gun
After prepping the tool and your working area, load your nail gun according to the manufacturer’s instructions.
This typically involves sliding the nails, brads, or pins into the magazine and locking it in place. Ensure you’re using the correct size and type of nail etc. for your tool and the job at hand.
Double-check that the fasteners are aligned correctly and the gun is securely closed before use.
Step 4 – Connect the Power Source
Most modern nail guns are powered by compressed air, gas, or batteries.
For pneumatic nailers, connect the air hose to the air line attachment of the tool and then the same at the other end on the compressor, ensuring all connections are tight.
For gas-powered models, insert a gas cartridge, and for cordless models, attach a fully charged battery.
Step 5 – Test the Nail Gun on Scrap Material
Before actually starting on your project, it’s a great idea to test the nail gun on a piece of scrap material first and hone your technique.
This helps ensure the tool is functioning properly and that the depth of the nail is set correctly.
Most nail guns have an adjustable depth setting, allowing you to control how far the nail is driven into the material so adjust this until you get it set just right.
Also while you’re practicing, get a feel for how the gun operates, how the trigger feels and how the firing of the nails also feels.
Step 6 – Position the Nail Gun
Now that the tool is correctly setup and you have mastered it’s use on your scrap material, it’s now time to get started.
To use the nail gun, position the tip of the tool directly against the surface you’re nailing into and that it’s positioned exactly where you want the nail to go. Make sure the safety tip is fully engaged before pulling the trigger.
Keep the gun steady and apply light pressure to the handle as you fire the nail. Always hold the nail gun with both hands for better control and accuracy.
Step 7 – Fire and Repeat
Once you’re in position, pull the trigger to fire the nail. Keep a firm grip on the tool and avoid rapid-firing multiple nails unless you’re experienced with the tool.
For beginners, it’s best to fire one nail at a time to maintain control and prevent accidental misfires.
Repeat the firing of nails for as long as needed until you have completed any and all required work.
Step 8 – Maintain and Store the Nail Gun
After completing your project, disconnect the power source and release any remaining pressure from pneumatic nail guns.
Clean the tool according to the manufacturer’s guidelines and store it in a safe, dry place away from moisture or dust, preferably in it’s own storage case (if it came with one).
Regular maintenance will keep your nail gun working efficiently and extend its lifespan.
As always with machinery that creates dust, debris and has sharp components DIY Doctor always recommends the use of gloves, dust masks and full eye protection.
If you have a large DIY project planned involving a lot of timber work, it is certainly well worth getting hold of a nail gun and mastering how to use it as it will considerably speed up your work flow.

