Fixings are a staple product used on a daily basis by DIY’ers and trade professionals alike. Today, there are a huge number of different fixings available, so in this guide we look at many differet types and how they should be used.
Types of Fixings, Fasteners and Anchors
Some of the fixings listed below will be familiar to you whereas others you may have never seen before. The idea is to give you an idea of what is available and how to use it. They are in no particular order and some have a variety of different uses.
Expanded Metal Lathing
Expanded metal lathing comes in either sheets or rolls of varying widths from 2 inches to 12inches.
Its primary use is for fixing to non pourus or in fact, non masonry, surfaces in order to plaster or render over them. The mesh, which is galvanised to avoid rust, is fixed securely to the structure and the plaster or render applied over it.
Its honeycomb-like structure is ideal for helping the plaster or render to bond to the surface and ultimately stay there.
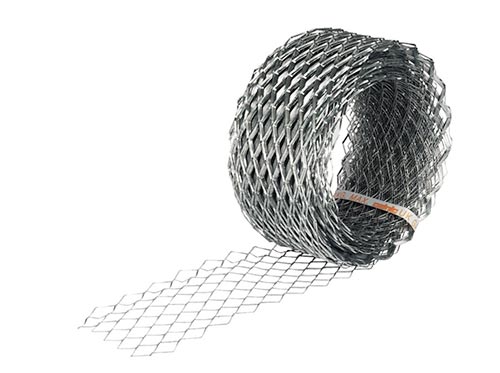
Expanded metal lathe or EML
Galvanised Strap
Galvanised strap is one of the more versatile fixings in the trade. It can be used for fixing roof timbers in place, holding door frames to masonry, fixing timbers to other timbers or masonry, cut into sections and used as washers, the list goes on and on.
It’s available in several different thicknesses from around 0.8mm up to a more sturdy 5mm or so.
As it’s galvanised it can also be used outdoors or in damp areas as it wont rust.
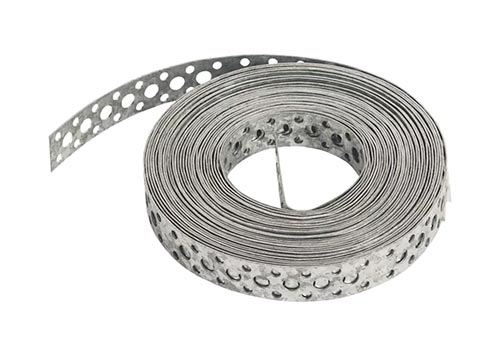
Galvanised strap
Self Tapping Concrete Bolt
Self tapping concrete bolts are ideal for fixing larger or heavy items to concrete or masonry surfces. Drill the required diameter hole for the size of bolt you have and screw it in with a spanner. They can be very expensive, but very handy, providing a strong and solid fixing.
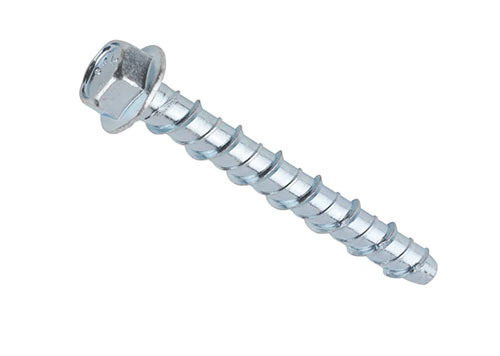
Different types of fixings
Screw Eye
The same principle as a curtain hook or eye, but slightly more heavy duty! Uses are many and can include tying the bottom of ladders to the wall and securing the top of ladders to the facia, as a hook stay for a gate hook, fixing for a washing line and many more!
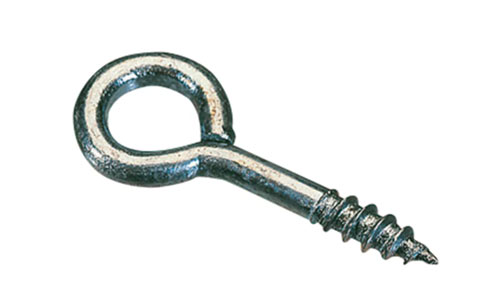
Hook eye
Tingle, or Copper Disc Rivet
A tingle, or disc rivet is mainly used for fixing the bottom of man-made roofing slates down so they are not lifted by the wind.
As they are made of copper they do not rust so are ideal for outdoor use.
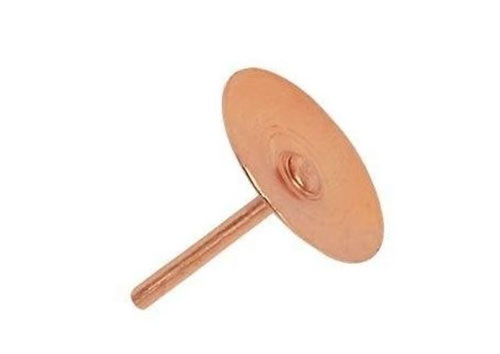
Tingle or copper disc rivet
Black Japanned Fixings
A black japanned finish is an extremely hard type of traditional coating or varnish used to protect screws, bolts and the similar against the elements. For this reason, black japanned fixing are mainly used for out door fixing.
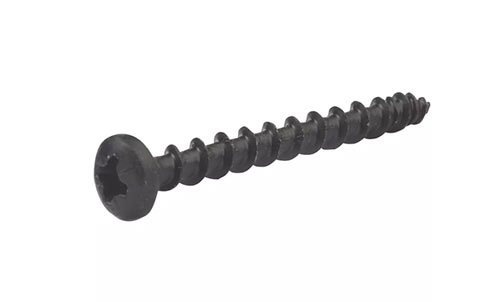
Screw with black japanned finish
Screws
As I’m sure you know, there are literally hundreds of different types of screws available today and although all different they still share the same fixing characteristic in that they are screwed in either by hand or using an electric driver of some kind.
In terms of different types; there are standard screws of varying sizes, diameters and head types (e.g. slotted, Philips, domed, security etc.). These are either used for fixing timber items together or with a wall plug, fixing to masonry. There are also those that are used with concrete and masonry, self tapping with metal and a whole host more.
To complicate things further there is also a huge range of different materials that screws can be made from including steel, stainless steel, brass etc. They can also be plated or coated such as zinc coated so they are safe for use out doors.
As there are so many types, this is a little beyond the scope of this project so for more information, see our types of screw project here.
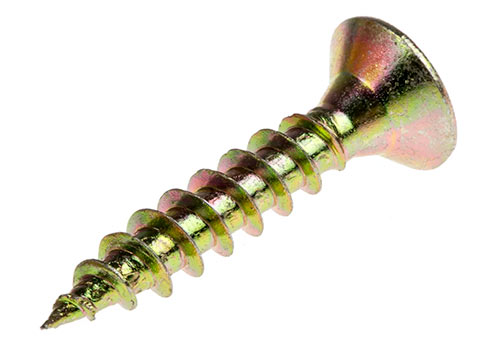
Standard wood screw
Rivets
A rivet is a form of fixing for joining 2 pieces of metal together. Simply, a hole is drilled in each item, the shank of the rivet is passed through and a special rivet gun draws the shank through deforming the head and crushing it down tightly to create 2 heads that pins the objects between them.
More information on rivets and how to use them can be found in our how to rivet project here.
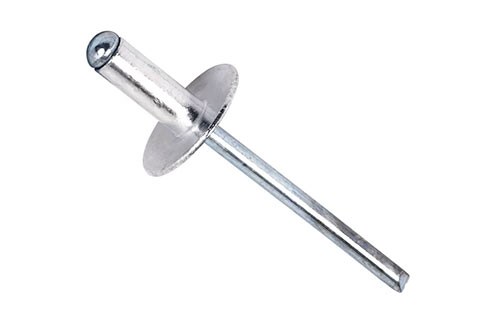
Rivet used with rivet gun
Wire Nail
The Wire nail or round wire nail as it’s also known is the universal nail with a medium head that comes in many sizes from around 10mm all the way up to 6 inches.
They are generally used for joining pieces of timber together in a variety of different ways and situations making them the go-to nail for joining timber.
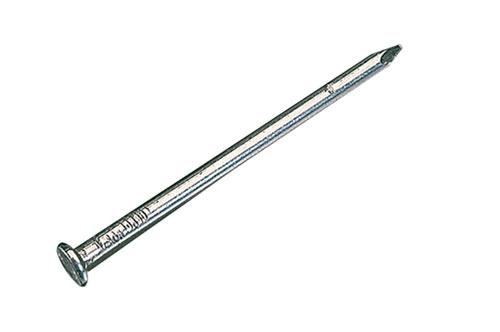
Round wire nail
Cut Clasp Nail
Next is a "cut nail," or cut clasp nail. Generally cut from and made of steel, its square section gives it a larger surface area and a better hold in soft masonry and mortar. This nail is also used as a “flooring brad” for fixing floorboards and is less likely to split wood.
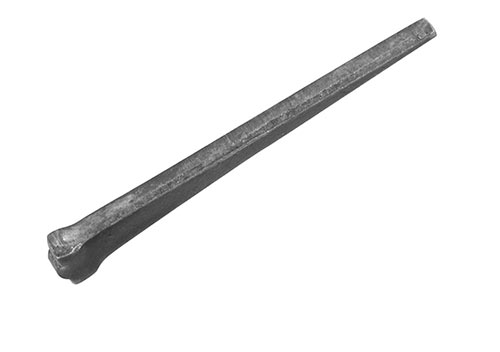
Cut clasp nail
Polypin
These are used specifically for fixing plastic facia boards and cladding. The annular shank (splines that bite into the timber) gives it a good hold in timber and stops it working loose with the contraction and expansion of the materials it connects.
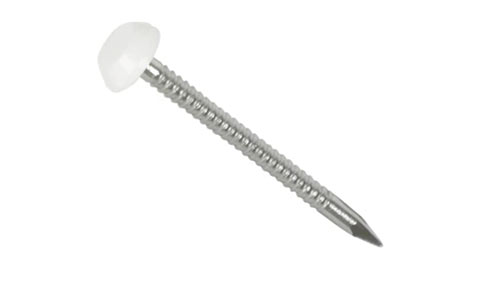
Polypin for use with plastoc facia boards
Lost Head Nail
As its name implies, this type of nail can be driven into the timber and with a small head can easily be punched below the surface of the timber, hiding it away.
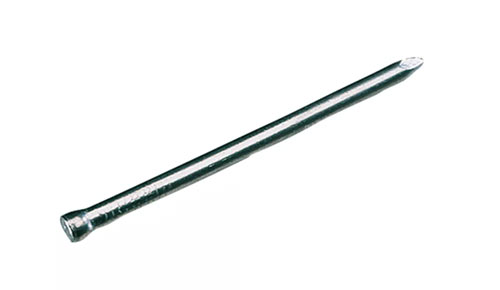
Lost head nail
Galvanised Wire
Next is galvanised wire. This has multiple uses but primarily external as the galvanised finish will protect against rust.
It’s generally used for tying and strapping objects up.
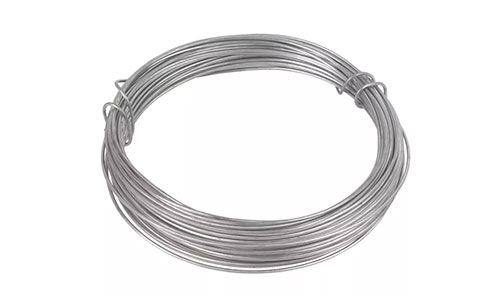
Galvanised wire
Oval Nail
The oval nail is mostly used in carpentry because its cross section makes it unlikely to split the timber especially if you tap the point and blunt it a little.
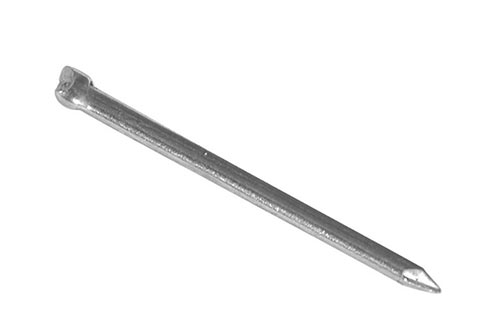
Oval nail
Masonry Nail
The masonry nail is made of hardened steel as it needs to be harder than the solid masonry surfaces it’s driven in to. Generally used for fixing to bricks, blocks, masonry and even concrete.
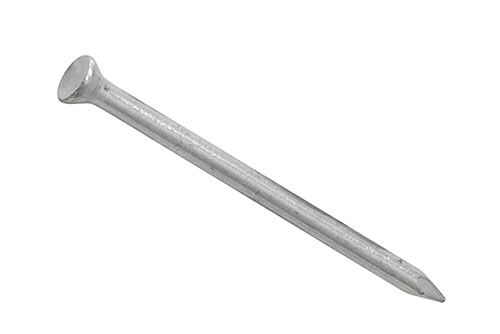
Masonry nail
Galvanised Clout Nail
These are used when a fixed surface will come into contact with water. Fixing plasterboard is sometimes done with these although there is a special jagged "plasterboard nail" which is galvanised without the large head. Also used to hold roofing felt in position.
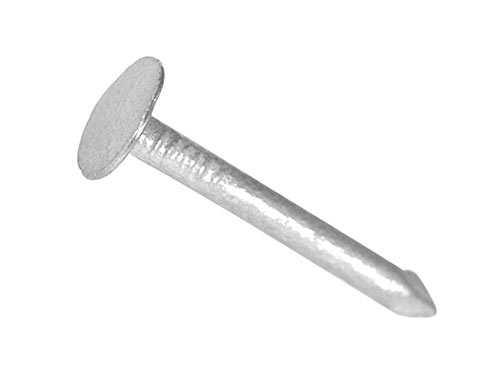
Galvanised clout nail
Annular Ring Nail
The annular ring nail is essentially just a wire nail with rings around the shank which act as barbs and when driven down into timber they grip and hold the timber more firmly than a standard nail. Mostly used to secure timber floors.
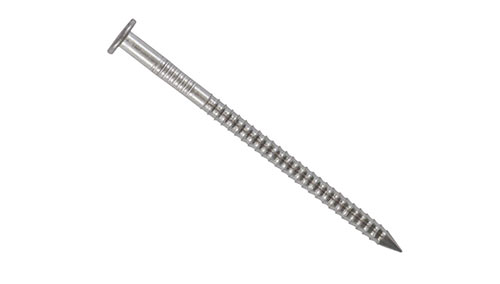
Annular ring nail
This is only a very brief selection of nails as there are literally hundreds. Others include upholstery pins, with a large rounded head for securing fabrics, carpet tacks, hardboard pins, glazing pins and many, many others. For a more comprehensive list of the type of nails, see our project here.
Wall Plugs
There are many different types and sizes of wall plugs available for a whole host of different jobs involving fixing objects to masonry surfaces.
In almost all cases to use them they are placed into a pre-drilled hole and accept a screw by allowing the thread to cut its way into the plastic. As the screw cuts in it expands slightly filling the hole and jamming itself in place.
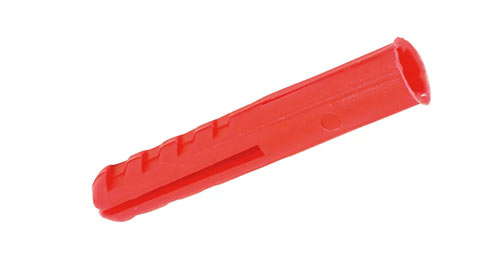
Wall plug
Screw Head Cups and Covers
Screw head cups and covers are generally used for hiding and disguising the heads of screws. In situations where they can’t be hidden by filling over, the cup simply slips over the screw and once screwed in, the cap is closed hiding it away.
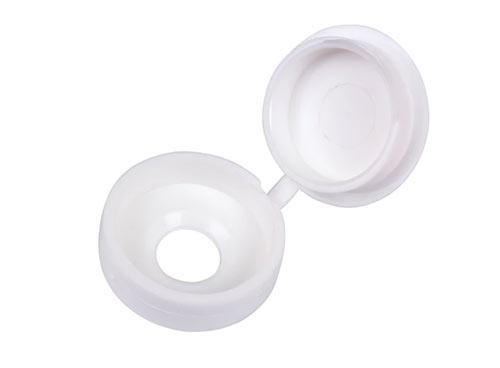
Screw head caps
Nuts and Hex Bolts
Nuts and bolts, as with screws, come in a massive tange of lengths, diameters, thread-types and pitches, head and nut styles etc. Nuts and bolts are used for a huge range of jobs including fixing timbers together, RSJ’s and other steel objects, masonry and pretty much all other material types.
Essentially if 2 items need to be joined together then a nut and both should be one of your first choices.

Nut and bolt
Gutter/Roofing Bolt
Despite its name, the gutter bolt isn’t only used for guttering but many different jobs on and around the roof area, However they were mainly created for joining sections of fibre cement guttering together. They are often zinc plated to resist rusting and their domed top allows water to flow over them easily.
When used for roofs and gutters they are often combined with a fibre washer so they seal the hole they run through preventing any leaks.
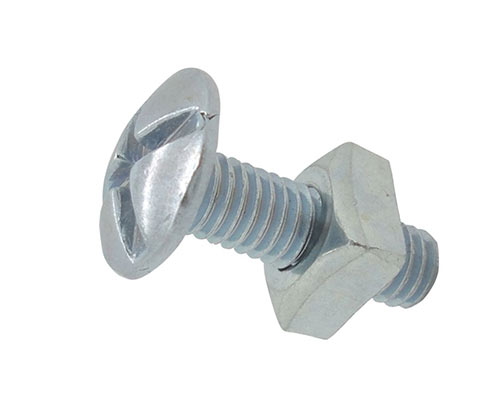
Gutter bolt
Coach Bolt
The coach bolt is predominantly used for timber fixing, generally a pilot hole is required to stop the timber splitting.
The hexagon section under the head fits into a recess and stops the head moving while the nut is done up. The round head allows the free flow of water over it and also prevents it being undone.
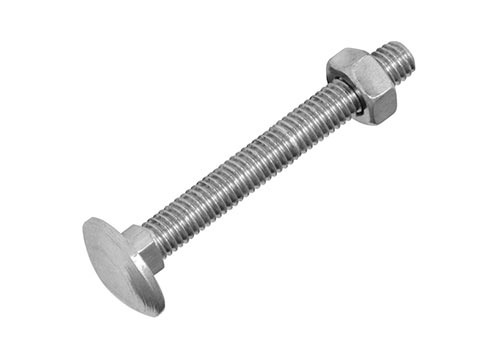
Coach bolt
Wing Nut
The wing nut was developed as a form of quick release nut as the wings on the nut allow you to quickly unscrew it by hand.
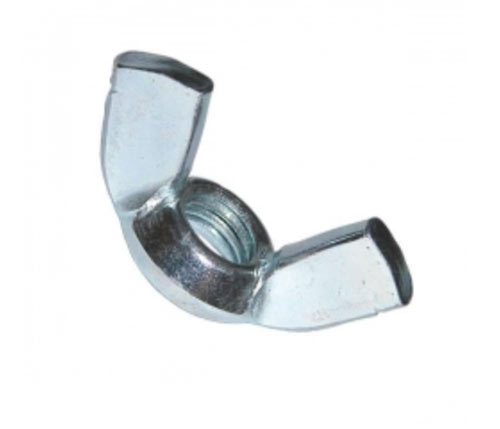
Wing nut
J-Bolts and U-Bolts
Although slightly different, they essentially both do a similar job. Their main use is for fixing items down. The U or J of the bolt fits under or around an object below it and the other end or ends protrude through an item above such as a roofing sheet where a nut is screwed on that then secures the sheet down.
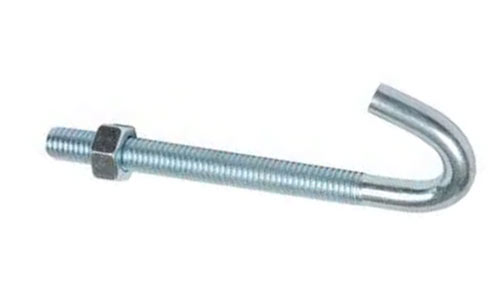
J-bolt
Screw Socket/Wood Inserts
These are very handy items indeed and essentially allow you to tap a thread in a piece of timber. Simply drill a pilot hole and then screw the socket down in.
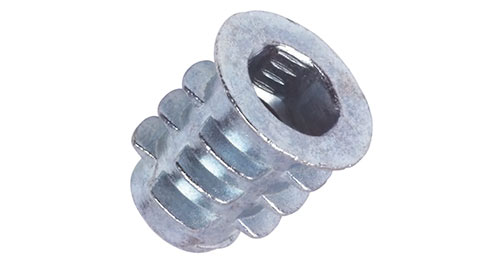
Screw socket
Cross Dowels
Another very useful fixing for timber, and very often used with flatpack furniture. A hole is drilled through the item you’re working with and the dowel pushed in. Another hole is drilled down towards the dowel where a bolt is then insert and screwed into the dowel.
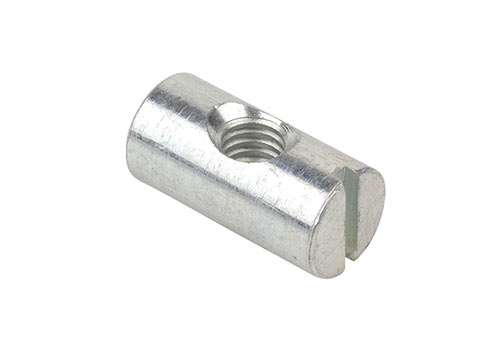
cross dowel
Block Joints
Block joints are used in a great many different situations. Their main task is to join two items together, normally at right angles. They come in many different sizes and variations but essentially all do the same thing.
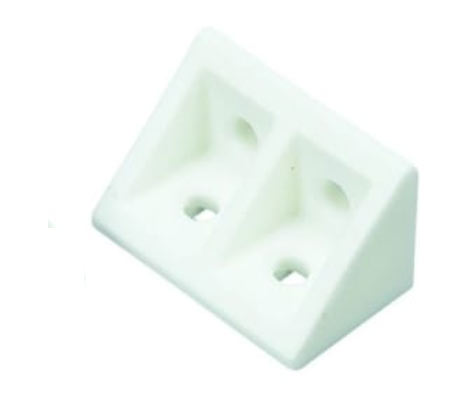
Block joint
Tee Nuts
Tee nuts are ideal for when you need to bolt into a piece of timber. A pilot hole is drilled and the nut is positioned over the hole. The sharp barbs on eth base dig down into the timber holding it firmly in place allowing a bolt to be screwed in.
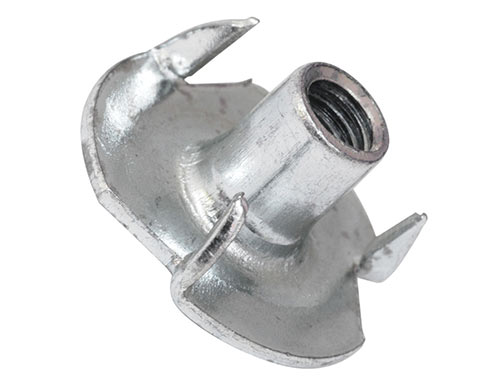
Tee nut
Pipe Brackets
There are a huge number of different types of pipe brackets available today to cope with the amount of different types of pipe there are. Essentially for every different type of pipe e.g. plastic/UPVC, copper, brass, steel etc. there wil be a bracket to match it.
Brackets are essential for use with any pipe as without them, they will inevitably move and ultimately leak.
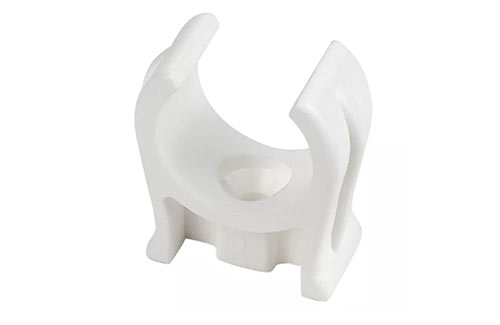
UPVC pipe bracket
Cable Clips
As with pipe brackets, there are a huge range of different sizes, types and shapes of cable clips and each type of cable has it’s own specific type of clip e.g. round clips for flex, flat clips for twin and earth cable, small clips for phone cable etc.
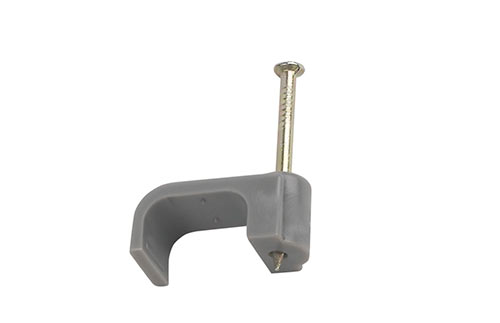
Large flat cable clip
Hammer/FrameFixings
The hammer fixing is a very versatile and effectice type of frame fixing, mainly used for fixing timbers to masonry surfaces.
A hole is drilled through the timber into the wall and the whole fixing is inserted and the screw is hammered through the frame into the masonry, pushing the wall plug sleeve with it. There is also a different "frame fix" screw which looks almost the same but is screwed, rather than hammered in.
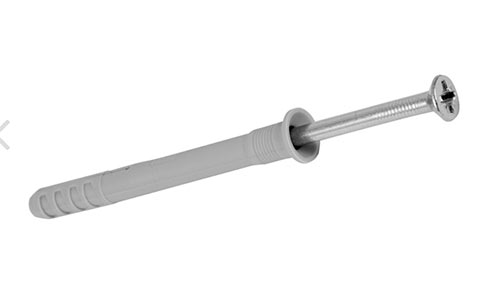
Hammer fixing
Threaded Bar
Threaded bar is again a very vertatile type of fixing. It’s mainly used for making your own bolts as it’s much cheaper than buying actual pre-made bolts. It can simply be be cut to the required length, a nut added to one end, pushed through the item to be fixed and another nut is then screwed on the other open end to create a bolt.
It’s also often used with chemical resin. After resin is inserted into a hole, the bar is pushed in and once cured it creates a solid fixing.
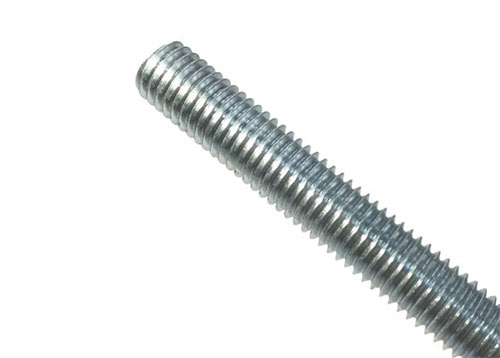
Threaded bar
Rawl Bolts and Sleeve/Shield Anchors
Rawl bolts, sleeve and shield anchors, although all slightly different, all essentially work in a similar way. A pre-drilled hole is created and the fixing is pushed in. Depending on the type of fixing either a bolt is inserted and screwed up or a nut is tightened.
Once this is done the sheath expands outwards and wedges itself solid in the hole. When it comes to needing a solid fix, these types of fixings are about the best and strongest there are.
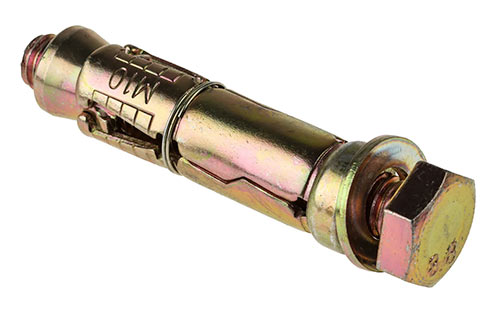
Shield anchor fixing
Resin Fixing
As we have briefly touched on above, resin fixing is fantastic for fixing into holes that keep breaking away and crumbling. Once set, the resin goes off as hard if not harder than the masonry you’re actually fixing into. It also sets very fast so no waiting around.
Squeeze the contents into predrilled and cleaned holes, (It mixes with its own hardener in a spiral nozzle) and insert threaded bar or another similar fixing. Works with vertical fixings as well as horizontal. If the masonry is in really bad condition a meshed sleeve can be used to avoid wastage. Quite pricey, but if all else fails, then this is the way to go.
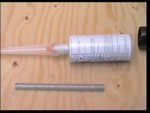
Polyester Resin Fixing
Redidrive Plasterboard Fixing
The redidrive or "easy driva" as it’s also known is a metal or nylon fixing, the main section of which simply screws in to the plasterboard after making a small hole pilot hole. The large broader thread makes it, in our opinion, one of the easiest and strongest plasterboard fixings around.
To fix to it, a sepcial screw that’s supplied with the fixing is simply pushed through the object you’re fixing and it’s screwed down into the redidrive.
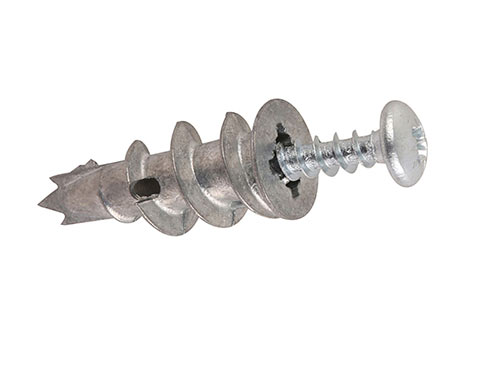
Easy driva, or redidrive fixing
Butterfly Toggle
This type of fixing needs a hole large enough for the wings to be pushed through. Once through the hole, the wings spring open at the back of the plasterboard and as you tighten on the screw, the fixing object is clamped between board and screw.
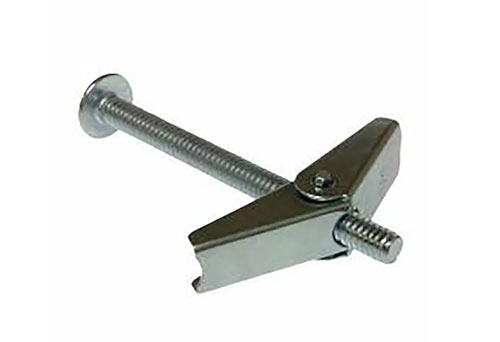
Butterfly toggle
Plastic Spring Toggle
In a similar way to the spring toggle, a large hole is drilled. The triangle is pushed together and passed through the hole, the screw then passes through the end of the toggle, into the point of the triangle, which has sprung open, and tightening the screw draws the point of the triangle to the back of the board, trapping the fixing.
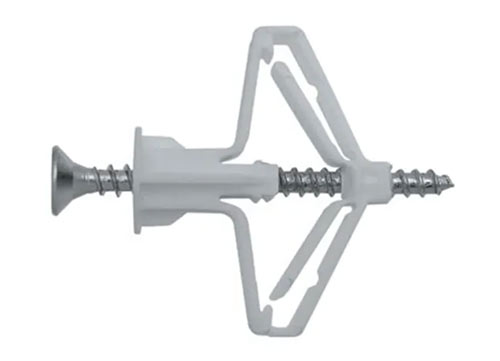
Plastic spring toggle
Hollow Wall Anchor
The hollow wall anchor work on exactly the same principle as spring and plastic spring toggles but with this fixing the flexible metal body of the fixing is crushed against the back of the board by the turning of the screw.
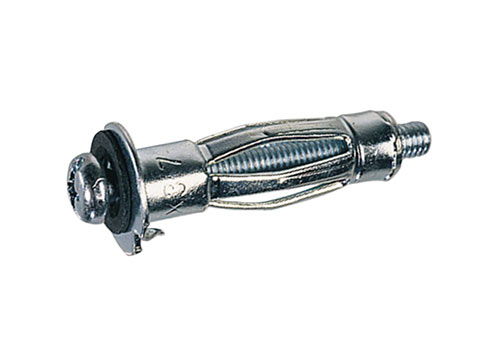
Hollow wall anchor
Hollow Wall Plug
The hollow wall plug is simply pushed into a pre-drilled hole and as the screw is screwed in and opens up the end of this fixing flares open, forcing the two lugs against the back of the board and holding the object to be fixed in place.
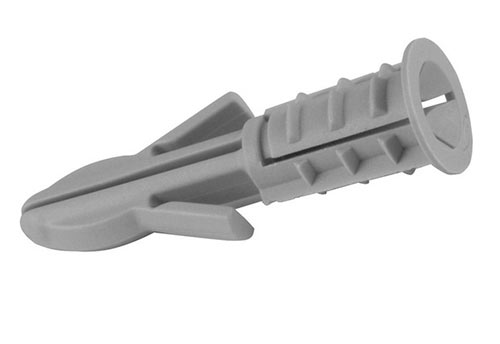
Hollow wall fixing
Please note that plasterboard comes in two thicknesses, half and three eighths of an inch. Some of these fixings are not for dual thickness so check you have the right size for your wall.
This is only a brief touch on the different types of fixings for plasterboard and hollows wall, for a full and detailed run down, see our plasterboard fixings project here.
Timber Spike Plates
Timber spike plates are generally used for strengthening timber jonts and again there are several different types for different types of timber fixing.
The one below is used for strengthening butt joints, where two pieces of timber are simply butted together before they’re fixed, without using any form of joint. When the strength of the joint just relies on the screws, this isn’t always the strongest, but coupled with a spike plate it makes it much stronger.
To use it, it’s simply placed over the joint and hammered down.
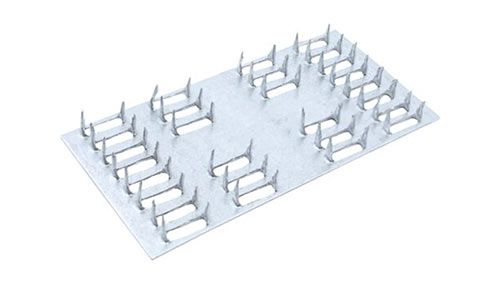
Timber spike plate
In the building trade, there is quite simpy a massive amount of different types of fixings available for all manner of applications, the trick is just selecting the right one for the job you’re doing.