The soldering iron is an incredibly handy tool commonly used in soldering metal which is the process of melting solder wire over or around a metal object or objects that needs joining together.
One of the most common DIY uses for a soldering iron and solder wire is to repair broken electrical wires or electrical circuit boards, join wires together and also for joining copper plumbing pipes.
In this DIY guide you will learn everything you need to know about how to use a soldering iron and wire, read on below.
What is a Soldering Iron?
A soldering iron has a heated element at the tip of a heat insulated handle, normally powered by mains electricity or battery.
The heat tip element works through the process of resistive material having an electrical current passed through it, the same process as an electrical bar fire just not as aggressive or quite so hot.
When the tip of the iron is then exposed to alloy solder wire, the wire melts over the object being joined and then cools, setting hard and joining the objects together.
For most work of this type which involves electric circuitry, a 15w – 30w device will be suitable, any device more powerful than that might do damage to your proposed piece of work.
The technique of soldering is used in many ways but mostly in the areas of electronics, jewelry making and stained glass windows. These other types of jobs generally may require higher powered soldering irons depending on the two metals to be joined.
If you are considering doing more substantial work then a soldering iron which uses a 40w or stronger supply of power will be needed.
Soldering irons can come in several different shapes and styles with each different type being suited to a particular type of job or situation:
- Pencil or pen-type soldering iron. The pencil or pen soldering iron is probably the most common type of soldering iron used domestically and is ideally suited to beginners due to its ease of use and fairly cheap cost (normally around £15 – £20)
- The soldering gun. The soldering gun is a bit of a step up from the pen soldering iron. Solder guns are generally used for more substantial jobs and they are a little more sturdy and they also get up to temperature much quicker
- Battery operated soldering iron. As the name suggests, unlike other soldering irons, this type runs off of batteries. These are ideal for work out in the field where mains electrical connection may not be possible. Ultimately they are not quite as good as their mains counterparts, but do a decent job non-the-less
- Soldering station. The soldering station is effectively a top of the range soldering iron and one that’s generally used in professional applications. The solder station features a pen-type soldering iron that is linked via a cable to a separate control unit. The control unit normally features a range of temperature controls that allow you to finely tune the temperature of the tip much more accurately
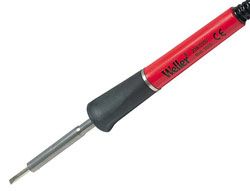
Hand held soldering iron
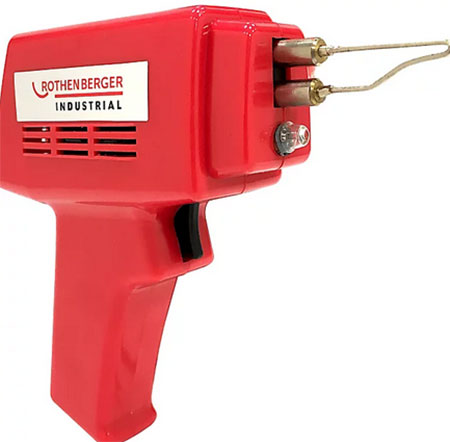
Industrial soldering gun
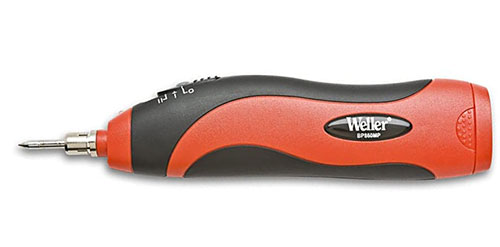
Battery operated soldering gun
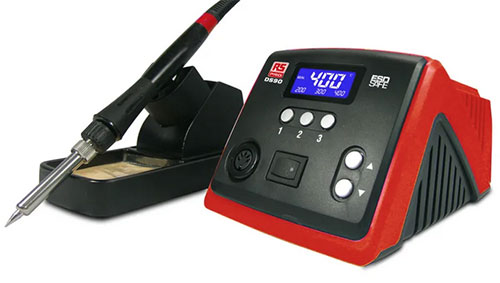
Professional soldering station
What are the Different Soldering Iron Tips Used for?
At the business end of a soldering iron is the tip. This is the part of the tool that heats up allowing you to melt the solder wire over the object you are working on.
To help cover the vast array of different jobs that involve soldering, there is a variety of different styles and shape of tip available and as most soldering iron tips are removable, they can be quickly and easily changed out depending on the job you are doing.
Here follows the most common types of soldering iron tip and what each is generally used for:
- Conical soldering iron tip: The conical tip is normally the tip that comes already fitted in pencil/pen-type soldering irons and through this is in most cases the most commonly used type of tip. Despite this they’re actual purpose is for carrying out very precise soldering work, normally associated with electrical components
- Bevel soldering iron tip: Bevel tips are generally not that commonly used, but despite this are very handy for jobs that involve loading up larger quantities of solder. A great example of this is when joining together electrical wires as this generally requires a fair amount of solder in order to create a lasting joint
- Chisel soldering iron tip: Similar to the bevel tip but not quite as broad, the chisel tip is great for soldering wires and applying larger amounts of solder to a given area
What Tools and Products do you Need for Soldering?
In order to successfully solder objects together apart from an actual soldering iron you will need a few other basic tools, these are as follows:
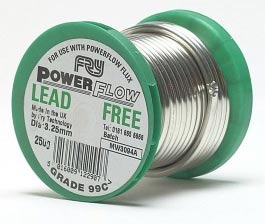
Solder Wire
A fusible metal alloy used to join two metal surfaces together, solder wire comes in different alloy ratios depending on what type of metals you are trying to joining.
On a basic level there are essentially two types of solder wire – lead-free (contains mix of copper and tin) and leaded (contains tin and lead).
In general, leaded solder has a lower melting temperature so its great for use with fragile electrical components. However it does contain lead which is both harmful to the environment and also to you, so if you can, use the lead-free, it does pretty much the same job.
Before purchasing check with your supplier that you have the right kind of solderm wire for the job, they should be able to advise you
Solder wire
Soldering Flux
This is a chemical cleaning agent that helps the flow of the solder when it’s being worked. This product will create smoke when being used which is normal.
In its un-melted-state, flux is fairly safe but be aware, once it’s melted it is extremely corrosive so be very careful not to get it on your skin! The flux is effectively used to reduce and remove any oxidization from the objects you’re joining so that the strongest bond possible is created.
In the majority of cases you will be joining electrical items and components so you will need to use rosin-based flux which is a little less corrosive.
However if soldering larger items such as copper pipes a strong acid-based flux should be used.

Solder flux
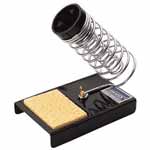
Soldering Iron Stand
This is used to hold your hot soldering iron when not in use. It is also a good idea to have a damp cloth or sponge to hand to clean dirt from your piece of work and also form the tip of your iron.
Having a decent stand is essential as it will safely hold your iron, keeping the hot tip away from anything flammable and also from your hand!
Soldering iron stand
The Helping Hand
This a great piece of kit and if you are doing any form of metal soldering, especially smaller delicate stuff, it really is essential.
The integrated crocodile clips and be used to hold the item you are working on firmly and prevent and movement, while the magnifying glass will allow you to view small objects in much better detail, ensuring that your soldering is accurate to the area your are working in.

Soldering helping hand
Preparing for Soldering
Before you start soldering metal objects of any kind there are a few things that need to be done first.
Before using your iron you will need to go through the process of ‘Tinning’, which is the process of heating up and coating the tip of your tool with a layer of solder.
This prevents the tip from oxidizing by protecting it from the air, increases the efficiency of heat transfer from your soldering iron and also prevents any oxidization from contaminating your work or the solder.
Before you perform any tinning, clean the soldering tip as much as possible. For this you can use a damp cloth or sponge, but the best item to use is either brass or stainless steel sponge.
As brass is softer than steel, this is preferable, but stainless steel is a suitable substitute.
Clean the tip of your soldering iron until it is shiny. This indicates that any and all oxidized chaff has been removed. As soon as it’s clean run through the tinning process so that it is fully protected.
Also ensure that the area you are working in is as clear as possible and that you have plenty of space to work in.
How to use a Soldering Iron
Now that you know what wire to use, what tools and products we need, the ideal area in which you should be performing any soldering work and also how to clean and prepare a soldering iron correctly you now know everything you need in order to get started.
For the purposes of this example we are going to solder together two pieces of wire to create a permanent and lasting joint.
Clean Soldering Iron and Objects to be Soldered
The first job is to give everything a good clean. Using the tips mentioned above, we first cleaned the soldering tip using some stainless steel wool, scrubbing it until any oxidization had been removed and the tip was nice and shiny.
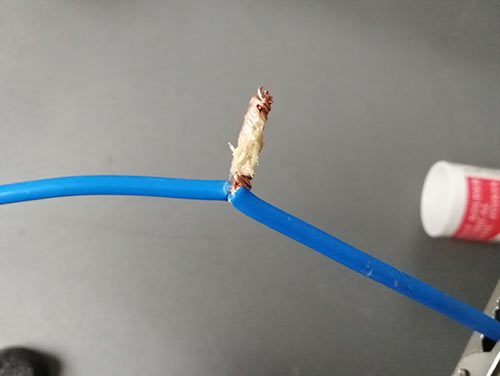
Next, roughly 10mm of insulation was stripped away from each of the wires to expose the core. As it had been covered the cores were nice and clean so didn’t need any further treatment.
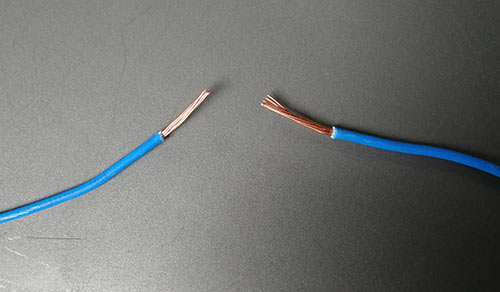
Wires stripped of insulation covering
Prepare Your Work Area
Move any unnecessary objects out of the way so that you have a nice clean area to work in. Open any windows and doors so that there is plenty of ventilation.
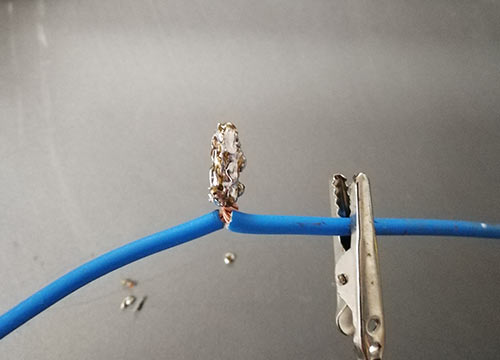
As we are joining some wires together the ideal tool to use here is some “Helping Hands” as the clips will hold the wires firmly in place while they are soldered.
Position the Helping Hands in a suitable area of your work space, and take the two wires, twisting up each core and then twist them both together as tightly as possible. Technically you don’t have to do this but twisting them will produce an even more secure bond.
Once twisted together, clip the wires up in the Helping Hands and move the magnifying glass to a suitable position so that you can clearly see the area you will be soldering.
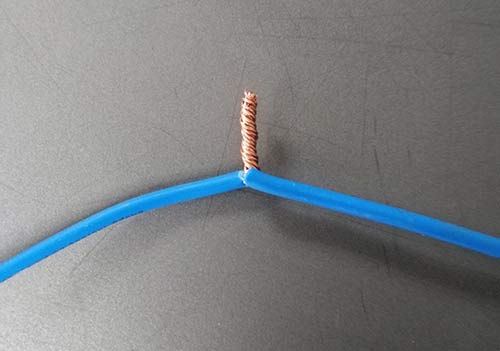
Wires twisted together using pliers
Finally, plug in your soldering iron and get it up to temperature.
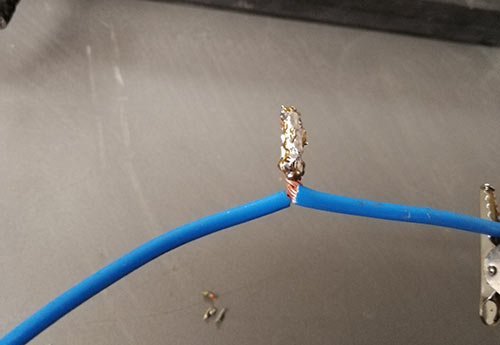
Apply Flux to Object you are Soldering
Using a small paint brush, dip the brush in your flux and brush it on to the bare wires ensuring that everything gets a good coating.
Solder flux brushed on to bare wires
Once your iron is up to temperature, press the tip against the wires to heat the flux until it starts to melt. Keep the tip pressed in place until all the flux has melted and run into the wire strands.
Feed in Solder and Join Wires Together
Once the flux has melted, keep the tip of the soldering iron pressed against the wires to keep them heated.
Take your solder and press the tip against the wires. If the wires are still hot enough the solder wire will start to melt pretty much straightaway.
Keeping the tip of the soldering iron pressed in place, move the wire along the electrical wires coating it as you go.
Solder wire melted on to wires bonding them together
Repeat as necessary to build up a good covering of solder wire over the bare electrical wires, but this time remove the iron tip from the wires and melt the solder over the tip. Keeping the tip in place will start to melt the wire that we have already applied and we don’t want to do that!
Allow Solder to Cool and Harden off
Once your bare wires have been fully covered, wipe any remaining solder off of the tip of your iron using some stainless steel wool and then put your soldering iron back in its holder and turn it off at the mains to allow it to cool.
The second you remove the heat source away from the solder it will start to solidify and within 20-30 seconds it will have fully cooled and hardened at which point the electrical wires will be fully bonded together.
Electrical wires fully bonded together using solder
Soldering Safety Tips
As soldering involves both hot objects, corrosive pastes, potentially using lead and also fumes produced from the heating of flux and solder wire, there are quite a few safety pointers that you need to think about.
- Always work in a well lite and ventilated area with plenty of space
- Ensure there are no flammable objects or fluids anywhere near where you’re working and work on non-flammable surfaces where possible. A plumbers soldering mat is an ideal temporary surface to use
- Always ensure you’re soldering iron is placed in a stand when not in use
- Avoid breathing in any fumes
- If you are using lead solder, the above is essential. Also avoid touching the solder itself and wear gloves! Lead in any form can cause serious chronic health conditions!
- Never ever be tempted to touch the soldering tip when it’s turned on. they can reach temperatures in excess of 375°C
- As soon as you have completed your work or if you are going to be leaving the soldering iron for any period of time, turn it off!!
- As soon as you have finished wash your hands straight away, especially if you have been using lead solder
- Always wear non-flammable clothing, gloves and eye protection
- Be careful when using solder, there can be some spitting that can cause substantial burns
- Any solder waste should be collected up and stored in a container with a secure lid
- Any rags, sponges or similar objects covered in solder should be considered as hazardous waste and disposed of accordingly
Reading through the above it may appear that soldering is fraught with all kinds of dangers but fear not, as long as you take your time working, use some common sense and if you can avoid using any lead-based materials you will be fine.
How to Remove Solder
One final point to make is that one of the great things about using solder is that it can easily be removed if needed using a process called “Desoldering”.
To desolder a previously soldered joint you will need some desoldering wick or desoldering braid as it’s also known.
- Firstly, position the item you want to desolder on a firm, solid base. Alternatively you can also you a “Helping Hand” if you have one
- Plugin and turn on your soldering iron and allow it to get up to temperature
- Unroll a length of desoldering braid, roughly 4 inches long and place it over the area you are removing the solder from
- Place the tip of your soldering iron on top of the braid allowing it to heat the solder below. As the solder heats up and melts, the braid soaks it up and removes it
- Move the tip of the soldering iron along the braid until all of the solder has been soaked up and removed
- Once removed you can then separate the objects easily
Using a soldering iron and solder wire to join two objects together is a fairly straightforward job and after a little practice you will get used to the feel of the iron and how the solder wire flows and will be laying solder as neat as a professional in no time.