As with any decorating project, the overall success of the job is all about the preparation before any finishing coats or coverings are applied. Painting a garage door, be it wood or metal, is no different.
To ensure that you have a great looking finish that will last and not flake and fall off after a few years you have to prepare the surface correctly. A great finish will give your doors a new lease of life and lets face it, it’s a lot cheaper than buying new doors!
When it comes to the different types of door, the most common types are overhead opening wooden garage doors and side opening carriage-style doors. In essence, the techniques and processes used in their preparation and painting is very much the same.
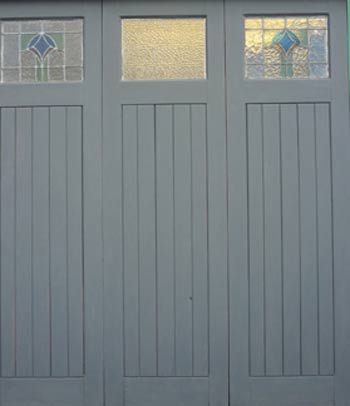
For the purposes of this project we will be looking at preparing and painting swing open, carriage-style wooden garage doors as these tend to be the most popular type of door in the UK (galvanised steel or aluminium being the overall most widely used).
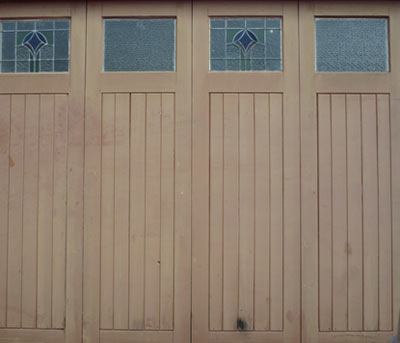
Before we start – unpainted pair of wooden garage doors
Types of Wood used for Garage Doors
The type of wood used for your garage door can also vary quite a bit and this usually comes down to the cost. Each different wood has its own unique colour, shade and grain pattern and in most cases the wood used and its aesthetic features will be down to personal taste.
Some of the most common types of wood used are:
- Cedar: This type of wood is generally used for its beautiful, natural looks and can come in two colours – red and white. A great bonus with this wood is that it has a natural resistance to insect attack and decay. It can be stained different colours to suit the property it will reside in but this will need to re-stained at least every other year
- Mahogany: Due to the fact that this is a hardwood, Mahogany is an extremely strong and long-lasting wood with a beautiful, natural look. Because of this is is also very expensive so when it comes to garage doors it is usually used in combination with a softwood. It can be both painted and stained
- Plywood: On the whole, plywood is a very popular and cost-effective wood and is used right across the construction industry for everything from interior doors to kitchens. It is both lightweight and strong and can be easily cut and shaped to fit in any space. Normally a frame is constructed using a durable softwood such as Douglas-Fir and then covered with plywood to produce a strong, lightweight and durable door. In most situations it is painted but is can also be stained
- Douglas Fir: Unlike Mahogany, Douglas-Fir is a softwood but don’t think that it’s lacking in strength because of this. It is a very durable and dense material and again, is used widely across the construction industry for many different things. It can be painted or stained and if finished in the right manner gives a very attractive natural grain pattern
What Paint to use on Garage Doors?
This is indeed a good question! With so many options available it’s difficult to know which is the best choice. Typically, an oil-based paint is the norm but this may not be the best choice in the long run.
This is down to the fact that they essential ″seal″ the outside of the frame and if water or moisture gets past the paint barrier from a scratch of chip in the paintwork it cannot escape so over time, it will rot the wood from the inside. It is possible to use this type of paint but just make sure you repair any chips, splits, knocks or cracks as soon as possible.
Paints specific to fences should also be avoided as most of these are geared towards rough-cut timber and may not give the required level of protection on the planed or smooth timber used to construct your doors.
The best type of paint to use is one that is microporous or moisture permeable. This paint type will allow the timber to breathe, allowing moisture in the timber to escape but at the same time it prevent any moisture from getting in. Most microporus paints also feature a UV filter that helps to prevent further damage from sunlight.
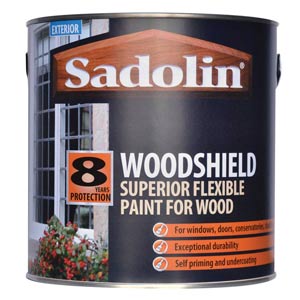
Microporous paint for wooden garage doors
These paints generally tend to be quite high-end and because of this can be quite expensive but over time can prove to be more cost effective.
At this point it’s also a good idea to briefly mention oils and stains:
- Oils are probably not the way to go. It’s not that they don’t give a good finish as they do, it’s more about the fact that to maintain the finish, oiling needs to be done at least every 6 months if not more.
- Using a decent stain will again give a great finish, especially if your doors are constructed from Douglas-Fir, you can really bring out that natural grain pattern, but again, try to use a microporus stain that will allow the timber to breathe.
How to Prepare Wooden Garage Doors for Painting
The first thing we need to mention before we go any further is lead. White lead was widely used in many domestic paints as a pigment right up to 1963 when it was outlawed for use on this level by the government.
It was still available for use by some specialists up until the early 1980’s through to 1992 when it was totally removed from mainstream use by DEFRA (only then being available for historic buildings and some artwork). More information on this can be found on the British Coatings Federation website here.
The reason for mentioning this is because, ideally, you will want to sand or strip the existing paint from your doors and if you have lead paint present on them this could be very risky to your health as you will be releasing lead particles into the air that you could easily breathe in. To find out if your doors do contain lead you can purchase a testing kit – more information on this can be found here.
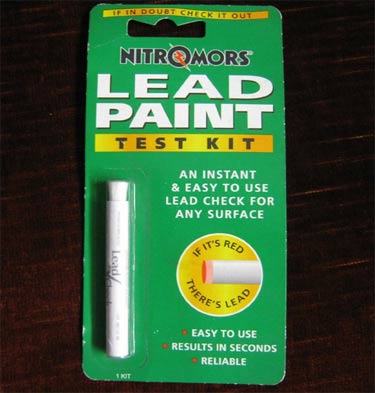
Lead paint test kit
With the above in mind, use the following steps to prepare your doors:
- Firstly, test the existing paint (if there is any) on your doors to see if it contains traces of lead using the kit mentioned above. If so wear a suitable respirator mask for the next few steps
- Using a brush or yard broom, brush over the entire door and frame to remove any cobwebs, moss or flaking paint. Apply a little pressure to make sure that you remove as much debris as possible, paying attention to any gaps or joints
- Next, get a bucket with some warm water and mix in some sugar soap and wash each of the doors and frame over making sure that you get into any and all nooks and crannies. The sugar soap will help to remove any grease and grime build up. Leave it to dry out thoroughly
- You will now have to make a call at this stage – sand down all loose paint and leave the areas that are still intact or strip all the paint off.
- Stripping Paint: If the existing paint has tested positive for lead then you will really want to strip it off to prevent any health risks associated with sanding. For this you can use HomeStrip from Eco Solutions as it is the only product currently on the market that ensures that all lead particles are contained while stripping. Apply the stripper generously over the painted areas and leave it for 5 – 10 minutes before scraping away with a scraper. Depending on how long the paint has been on there and how many layers there are, you may need to repeat the process a few times to get all the paint off.
- Sanding Paint: If the existing paint shows no signs of lead then you can either sand the doors and frame over, removing all the paint or, using a scraper, remove any loose flakes of paint and then sand around the edges of all the flaked areas. Doing this will help to feather them into the surface below and ensure that you do not get any unsightly dips or marks in the finishing coat. For any deep holes or dips (more than 0.5mm in depth) you will need to fill these with a suitable external caulk or filler. In terms of the sandpaper – use a medium grit paper to start with (around 100 grit) and then use a finer grit paper (200 grit) for feathering and blending. Make sure you sand all areas especially any detailed sections or mouldings as you want to create a good ″key″ for the primer and top coat
- If your doors have windows in them it’s a good idea take them out and sand around the inside of each opening. Normally you will be able to remove either the inside or outside beading and then pop the glass out and then remove the rest of the bead
- As we are dealing with timber there is going to be a good chance that may be some cracks, splits or rot. Firstly, remove any rotten areas using a scraper to dig it all out (if it’s really bad in places or is spread over a large area then you may need to consider more drastic repairs or even new doors or framework). With all the rot gone, use an external caulk or decent wood filler to fill all holes and then any cracks that may be present. Allow it to cure for manufacturer’s recommended times and then sand all areas flat if needed
- Once sanded, stripped and repaired give all areas a good brush over to remove any dust and then a wipe over with a damp cloth and the sugar soap solution. Allow to dry completely.
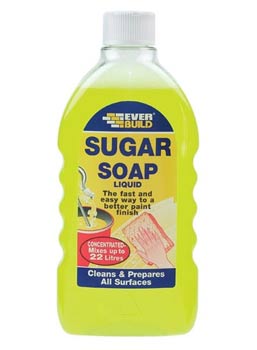
Sugar soap of cleaning and degreasing/p>
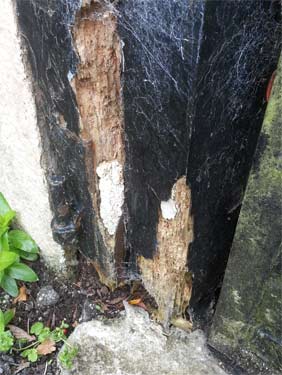
Rot in frame of wooden garage door
Applying Primer to your Garage Doors and Frame
With any repairs made and all the preparation work completed the next job is to apply some primer to the doors and to the frame.
The type of primer you use will depend on the type of top coat you are using – it’s best to use matched types:
- Use a Latex primer with latex top coat
- Use an oil-based primer with an oil-based top coat
- Use a microporous primer with a microporous top coat
Each different type of paint acts in a different way and if they are mixed they may actually fight against each other!
Before you start, lay some dust sheets down around the area you will be painting to catch any spillages. Also slides a dust sheet, piece of cardboard or some newspaper underneath each of the doors so that the area beneath them is also protected.
Mask up any areas that you don’t want to get paint on such as and handles, hinges or locks and latches.
With the lid on, give the primer a good shake and then pop the lid off and give it a good stir with a stirrer or a wooden spoon.
Have a selection of brushes to hand including 1/2 inch, 1 inch and 2 inch – the smaller brushes for detailed areas and the larger brush for the panelled areas.
Use the image below and the following steps to complete the priming of your doors and framework:
Stages of painting a wooden door
- If you have window reveals and beading to deal with, do these first as the quicker it dries the quicker you can get the glass back in and the garage secured. Don’t lay the primer on too thickly around the inside of the reveal as if the glass is a really tight fit and the primer is too thick, the glass won’t go back in again
- 1 – 3: Prime the frame area in full making sure that you cover all areas including the internal section that the doors close into and any visible timber on the inside of the garage
- 4 – 9: Prime the top and sides of each door, again, make sure that you have a good covering on each side. If the timber is slightly ″rough-cut″ then you may need to use the brush in a ″stabbing″ fashion as opposed to a stoke to get the primer into the actual grain
- 10 – 19: Next it’s time to tackle the larger areas. Using the larger brush, start at the top of the left hand door and work your way down to the bottom, moving on to the next panel each time until all have a decent covering.
- The Inside: The final task is to tackle the larger areas from the inside. Repeat the above process on all the large internal panels
- It is recommended that you should also do a second coat of the primer as this will give you the best chance possible in achieving a great top coat finish. Depending on the primer you have used, the manufacturer may state this is not necessary but if not then apply a second coat if you can
With the priming now completed, leave it to dry for the manufacturer’s recommended time. When dry, check the surface over to make sure there are no sunken areas or hard edges. If you do find any and want to get the best finish you can you can fill these with external caulk or a general purpose filler.
Once filled allow to dry and then sand down until flat and level then apply some primer.
Once the primer is dry give the entire surface a very light rub over with some fine sand paper (250 grit or more) as this will give a good key for the final top coat.
Once sanded wipe the whole surface over with a damp cloth to remove any dust. Leave until dry.
Wooden garage door primed and ready for top coat paint
Applying Top Coat Paint to your Garage Doors
We have now reached the final stage of this process – putting on the top coat. As you have already done the bulk of the work in the preparation.
This follows exactly the same process as priming and follows the same steps outlined in the above image:
- Window Reveals and Beading: As with the primer, if you have any window reveals that you have removed the glass and beading from paint this (and the beading) first to give it a decent amount of time to dry. Again, don’t lay the paint on too thick as the glass may not go back in again
- 1 – 3: Starting with the frame, paint the top coat on, starting at the top left hand side. Paint down the frame to the floor and then across the top and down the other side. Repeat this on the inside also
- 4 – 9: Next, apply the top coat around all edges of each door. Again, you may need to stab the brush at the edges to make sure that you get a good covering where the grain of the timber is exposed
- 10 -19: Finally, apply your top coat to all the large panels on the front of the doors, working from left to right and starting and the top of each panel and working down. When you have completed the outside, move onto the inside using the same techniques
- Finishing Touches: Once you have allowed enough time for the top coat to dry thoroughly you should now be staring at the front of a very attractive looking garage! The final job is to refit the glass and beading and you’re done!
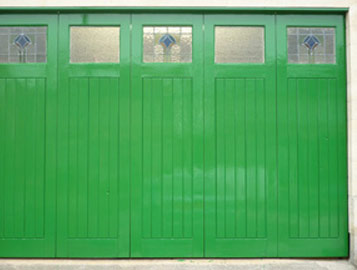
Wooden garage door finished with top coat paint
Final Points and Things to Think About
We have mentioned above about removing any windows (if you have them) and painting around the inside of the window reveal. Although this is possibly a bit of an ″ideal″, if you can do it, that’s great as it will ensure that all exposed timber if then protected.
If not, no worries, just make sure that you sand down, prime and paint as much of the inside of the window as possible and also any beading. Mask around the glass so that you don’t get any paint on it. If you do then check out this project that will help you remove it.
We have also not mentioned anything about the under-side edge of each door. Normally this is left unpainted to give any moisture in the timber a chance to seep out (when using latex or oil-based paints). If you are using microporous paint then ideally you will want to cover these edges also as any moisture can still escape.
As the base of most doors sit only a few millimetres off the ground water and moisture can easily find its way into the timber and over time will rot – that’s why most doors tend to rot at the bottom, so if you can protect this edge also please do so.
One final point to mention that we haven’t covered above is spraying. It is possible to spray the paint on as opposed to brushing. This technique is not hugely popular in the UK but it is on the rise.
Spraying will give you a great, smooth finish and in most cases allow you to complete the job much quicker but please note – if you are spraying outdoors ask any neighbours to move their cars and do it on a day where there is as little wind as possible.
The act of spraying throws a lot of paint particles into the air and these can be blown around and settle on nearby surfaces such as cars, washing etc…. leading to expensive bills and hassle in removing them!