Laying a tarmac or macadam driveway, footpath or other hard surface in or around your home is really a job for the professionals and not necessarily a DIY job due mostly to the specialist tools that are needed and the knowledge required to prepare the existing surface to get a good finish.
Essentially, laying a tarmac driveway involves excavating the area to create a solid base, laying edging stones or kerbs, installing a compacted sub base of aggregate, laying a compacted binder course and then finishing of by laying a top coat or wearing coat that is also compacted down.
With this in mind, the following guide provides a full breakdown of the job as a whole and what steps a professional and reputable groudwork’s or macadam surfacing company should follow in order to give the best job possible and ensure you are totally happy with the finish.
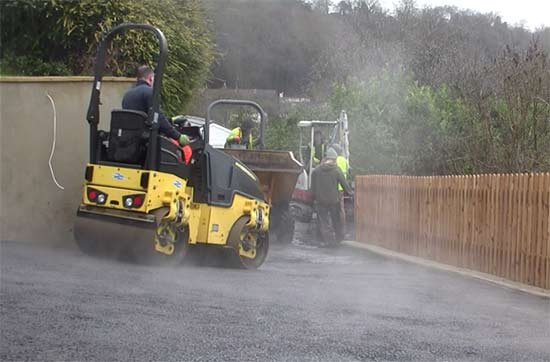
Professional tarmacadam laying team
What is Macadam and Asphalt?
Firstly we should start by saying that there is a distinct difference between both macadam (tarmac) and asphalt depending on where you are.
If you are in Europe or the UK, asphalt refers to a mix of mostly gravel, sometimes sand and bitumen, the tar-like substance used to bind it all together. However, if you’re state-side, the name asphalt is used to describe bitumen, so just make sure you’re using the correct terminology for your location.
Traditionally, macadam was made using naturally occurring tar and aggregate, but today we use bitumen. The bitumen is mixed with aggregates and heated to make it workable. Once laid it is then compacted down before it cools and sets to create a solid base capable of handling heavy traffic and loads.
The name “macadam” is actually an abreviation of the original naturally occurring tar product used as the binder and the person that first pioneered its use; John Loudon MacAdam.
Later, the Welsh inventor Edgar Purnell Hooley, took the basis of MacAdams idea and refined it using some additional materials and then in 1902 patented the resulting surface coating.
Due to the limited supplies of naturally occurring tar a suitable substitute was found in the form of the crude oil refining by-product bitumen.
One other term that is commonly used in macadam surfacing circles is “bitmac”. The name bitmac simply refers to a macadam-based surfacing that uses bitumen to bind everything together.
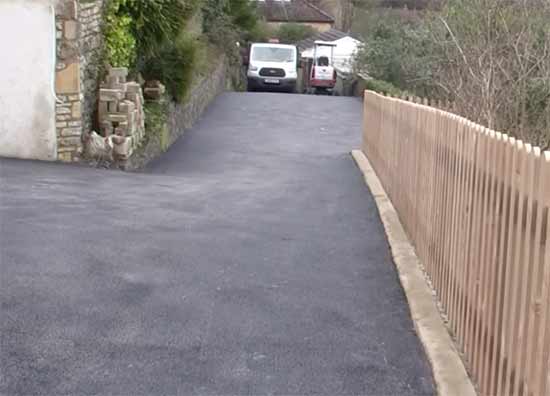
Freshly laid macadam driveway
An Important Note About Drainage and Fall
From the preparation of the base all the way through to the finished top coat, each layer must be correctly levelled and graded to ensure the correct drainage.
Any macadam-based surface, whether a driveway, footpath, road etc must be graded correctly to ensure that any surface water “falls” towards a drain so that it’s channeled away.
When it comes to laying a driveway, the correct fall to ensure decent drainage will be between 1:50 and 1:80.
When using a paving machine, this can easily be set and the machine will lay to the desired fall, but when hand laying you have to be very careful to ensure there are no shallows or low spots where surface water can easily “pool”.

Driveway laid on a slope providing decent gradient for drainage
How to Lay a Macadam Driveway
Now that you know exactly what macadam is it’s time to look at how it’s laid correctly.
In this example we are going to walk through all the steps involved in laying a new driveway from start to finish, including excavating and laying a new sub base.
Some of the images used are from a recent job we did for a customer. Following some extensive property renovation work, much of the existing driveway around the property was removed so the customer wanted a new driveway laid.
One point to note is that in this case, the existing sub base was solid and in good condition so the customer opted for a resurface rather than dig the whole lot out and create a new sub base from scratch, so where relevant we have used images from alternate jobs to explain what’s going on.
Excavate and Clear Area to be Surfaced
The overall quality of the finished job very much depends on how well the existing sub base is prepared.
The first job is to clear the entire area that’s going to be surfaced with Macadam right down to a base level so that a suitable and supportive sub base can be laid to ensure the final finished surface can fully support any and all traffic that passes over it.
In most cases the excavation depth should be around 175-190mm depending on the thickness of the final coating or surface course as it’s known. This is normally made up of a 100mm sub base course, 50mm binder course and then a 25-40mm finished course.
In most instances an excavator is used to dig out the unwanted material and it is then removed, but if it’s only a small job and access is limited then the excavation will need to be done by hand.
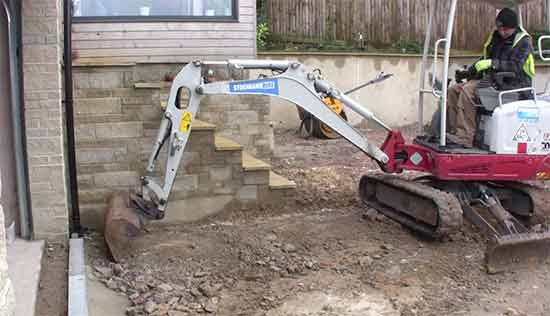
Using an excavator or mini digger to clear and level an existing surface for new driveway
Once the desired depth has been reached and all waste material removed, the excavated area is then smoothed over and levelled off ready for the sub base and edgings.
As this stage, in some cases a weed barrier is then laid over the area to prevent and weeds or troublesome plants or trees from growing up and damaging the final finished surface.
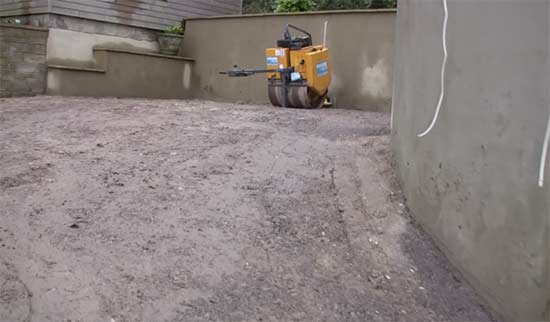
Existing drive fully cleared, rolled and excavated ready for edgings and sub base
Depending on the time of year and weather conditions, it may be a good idea to get the sub base roughly laid at this point. Constant walking and site traffic can easily churn up a soil surface turning it into a mud bath so getting the sub base roughly in place can reduce the mess considerably.
Note: Before we go any further, remember that the top edge of any edgings should define the height of the finished surface level so not only should you check your levels but also depths to make sure that once the sub base, binder course and finished course are down and your edgings are installed they all finish at the same height.
Install Edgings Stones, Kerbs or Timber Supports
For the best level of finish and to guarantee that your new surface lasts as long as possible, all edges need to be contained. By this we mean that any bitmac that is laid should butt up to a solid surface. If it doesn’t, over time it will start to crack and fall apart.
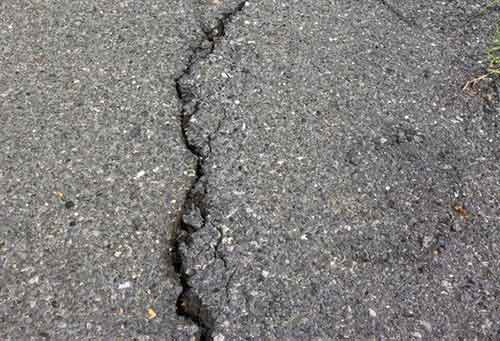
Edge of macadam/bitmac surface cracking and falling apart
The most common type of kerb edging is to use concrete edging stones or concrete kerb stones, timber edgings or shuttering or any existing solid surface such as an existing wall.
Concrete edgings will provide the best levels of support over the longest period, but can be costly and time consuming on a small project.
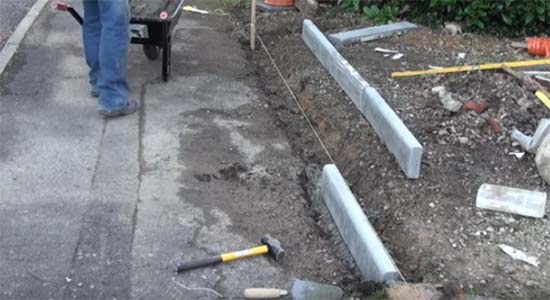
Concrete edging stones being laid along the front of a driveway
Timber edgings are a decent alternative where time and budgets are limited but do tend to fail quite quickly through rot. They do also expand and contract causing bitmac edges to become unsupported and in some cases can be tricky to keep in place when rolling and compacting sub bases and the bitmac itself.
Timber edgings are normally around 100-150mm deep and can either be concreted in place, although this is not common practice or held in place using timber stakes that are knocked into the ground along the outside edge, normal every 300-600mm.
To ensure timber edgings last as long as possible, use pressure treated timber and also coat using an additional exterior timber treatment.
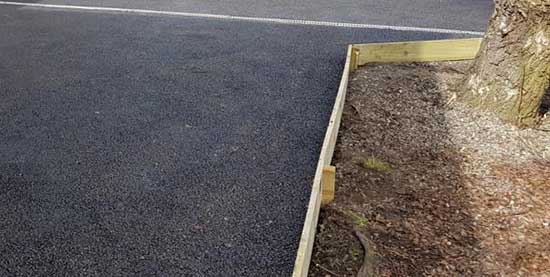
Timber edgings installed to provide a boundary for driveway
In terms of installing concrete edgings or kerb stones, these are laid on a concrete base (medium strength concrete C20 – C30, also sometimes called a kerb mix) or bedding. The bedding should be around 100-150mm thick. For information on different concrete mixes, see our project here.
Once the bedding has been laid it is then “tamped” down with a tamping tool to compact it and provide a flat and level base for the edging to lay on. Once tamped down, go over it with a trowel to smooth it over.
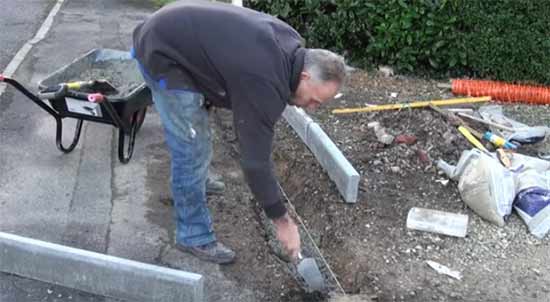
Concrete bed tamped down and ready for installing concrete edgings
Once the base is flat and level the edging stones can then be laid out. To keep everything level and inline, run a string line along the route that the edgings will take and follow the line as accurately as possible, continually checking all faces to ensure everything is inline and level.
If any edgings need to be tapped down, use a rubber mallet and not a lump hammer or similar as this will prevent any damage.
Once all the edgings have been laid and you have checked everything is level and made any adjustments if not, the final job is to lay the “haunching”. The haunching is a section of concrete that runs the length of the edging along the outside edge.
The haunching provides lateral support to the edgings, preventing them from being pushed outwards by the pressure of the finished surface and any traffic that travels over it.
The top edge of the hauching should be roughly around 30-50mm down from the top of the edgings, or a minimum of half the height of the edging, and should ideally be as wide as the edgings themselves to provide adequate support.
In some cases it’s a good idea to also slope them away from the edging for drainage.
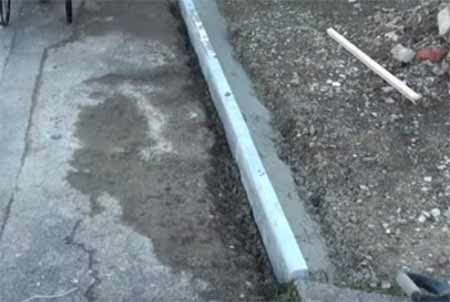
Haunching added to support edging stones
The concrete mix used for the hauching should again be a medium strength concrete preferably either a C20 or C30 mix. Once mixed and laid it should then be compacted and smoothed off along the top edge and left to fully cure.
In the case of this example we were lucky enough to have the entire area surrounded by existing walls and solid surfaces so didn’t need to install any edgings.
Prepare the Sub-Base
With the area excavated and any edgings fully set in place, the sub base can now be laid if it hasn’t been roughly laid already.
The sub base itself is normally made up of a type of aggregate commonly known as 40mm to dust, MOT1 or Type 1 granular sub-base. It consists of, as the name suggests, components the size of dust particles all the way up to 40mm (actually no larger than 37.5mm) stone.
When compacted the precise measurement of solid objects to dust ensures any voids are kept to an absolute minimum plus still allow the correct drainage.
The sub base is spread as evenly as possible over the working area as evenly as possible and then it is fully spread and levelled off using a rake.
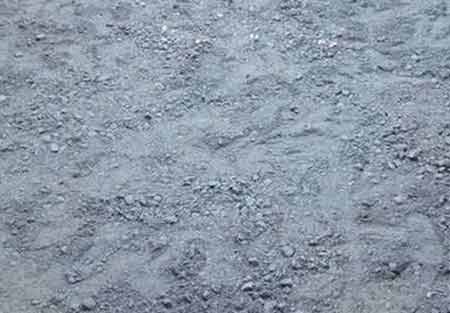
Sub base raked and levelled across working area
Once all levelled and as flat as possible, the entire area then needs to be compacted down, in this case using a heavy smooth wheeled single drum vibrating roller. For smaller jobs where a roller may not be available, you can also use a vibrating plate compactor or wacker plate as their also known.
Once compacted down fully across the entire area, take some random measurements from the sub base to the top of the edging level to make sure you’re still at the correct height at this stage. The sub base depth should be as accurate as possible but an allowance of 10mm either way is reasonable.
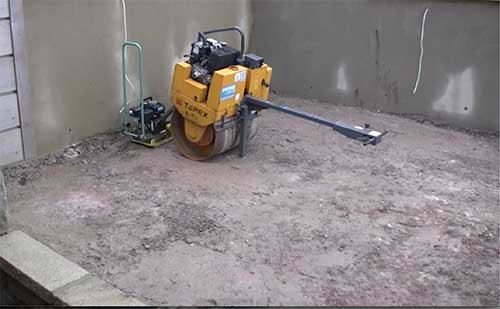
Compacting sub base using a single drum roller
Lay Base Mix or Binder Course
The base mix or binder course is essentially the first layer of macadam or more accurately in terms of trade names, bitmac to be laid down. This is essentially a mix created using larger 20mm aggregate.
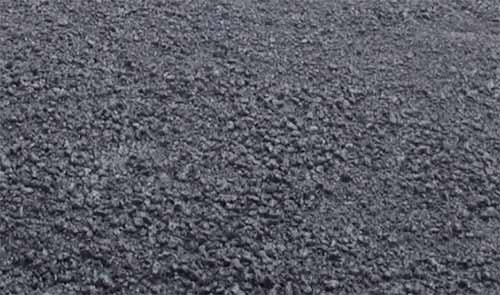
Binder course bitmac
The larger aggregate at this point helps to build up layers of different sized materials, running from big at the base up to small at the finished surface that all works towards creating a stable solid base capable of carrying and distributing loads.
It’s at this stage that using a specialist contractor pays dividends. For this particular job we enlisted the help of a local macadam surfacing company based in Somerset called Trojan Construction and Maintenance.

Somerset-based macadam surfacing specialists – Trojan Construction and Maintenance
The binder course is normally delivered to site at the point that it’s needed as it needs to be kept hot so that it’s workable and can be laid correctly. If it is allowed to cool, it then solidifies and becomes unusable.
If the job is fairly large then chances are to get the base layer and the finishing top coat down as quickly and smoothly as possible, a paving machine is used. This is a fairly large machine that lays the base or top coat down in a nice uniform layer.

Paving machines used to lay binder course quickly, efficiently and to a uniform thickness
If a paving machine is being used then the lorry delivering the binder course bitmac will empty straight into paving machine as the paver itself also heats the bitmac further to make it as workable as possible.
On smaller jobs a paving machine may not be possible due to space restrictions so the base and top coats will need to be laid by hand.
As this is a fairly time consuming job, a substance known as “cut back” is added to the bitmac mix. This is an oil-based substance (normally creosote or kerosene) that keeps the bitmac workable for longer even though it may have cooled a fair bit.
On delivery, hand laid bitmac is usually dumped on a clean surface and then immediately covered over using tarpaulins to help keep it as warm as possible for as long as possible.
In this case, as the working site was a little way away from the dumping site, the bitmac was loaded from the delivery lorry into a dumper using a Bobcat and then transported up the road to the site.
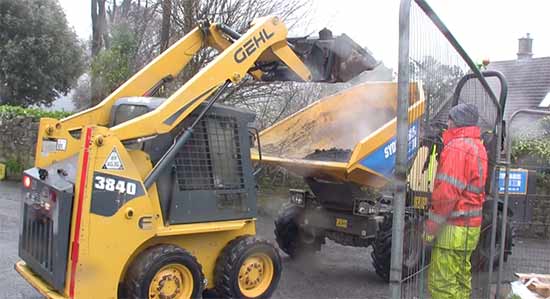
Loading the dumper truck using a Bobcat to transport it to the laying site
When hand laying, the binder course bitmac is then shoveled from its delivery spot into wheelbarrows and then transported to the work area where it is spread out over the working area. The rakers or rake hands as they are also known spread the bitmac out evenly over the surface.
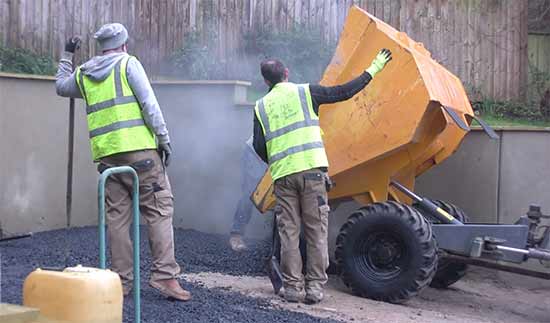
Dumping off and spreading and raking out binder course bitmac
Hand laying is hard, non-stop work as it needs to be done quickly before the bitmac cools too much.
To ensure that the hot sticky bitmac doesn’t stick to everything, all tools, machinery, wheel barrows etc are either coated in red diesel or heated over a flame and any rollers will feature a water spray system that constantly coats the roller drum with water.
As soon as the binder course has started to be laid it’s rolled with a roller. The cool outside air will start to cool it immediately so it needs to be rolled and flattened as soon as possible.
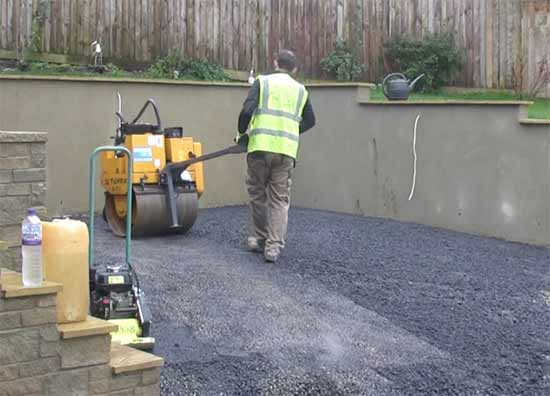
Binder course being rolled out using smooth drum roller
On average it will take somewhere around 6-8 passes of the roller to ensure the binder course is sufficiently compact and any voids or marks from the roller drum have been removed.
Lay Top Coat / Wearing Coat
Once the binder course is laid flat and evenly across the working area and fully roller over it’s time for the top coat or wearing coat as it’s known.
In most cases, especially with smaller jobs, as soon as the binder course is down the topcoat is laid straight on over the top.
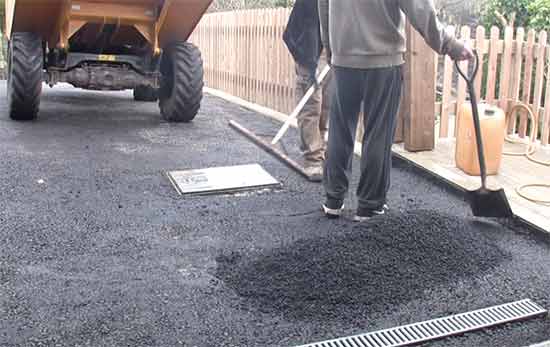
Top coat piled on binder course ready for spreading and compacting
The top coat itself is made using much finer grade material than the binder course so that it gives a nice smooth finish. In most cases the top coat or wearing coat will use 6mm aggregate and will either be classed as open graded or close graded.
Open graded bitmac generally uses more uniform sized aggregate whereas close graded bitmac features 6mm as well as much finer materials including 3mm and smaller making it much denser and more compact.
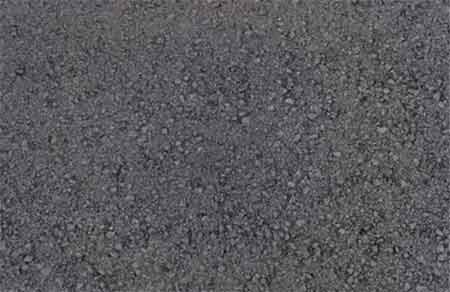
Open grade top coat or wearing coat bitmac
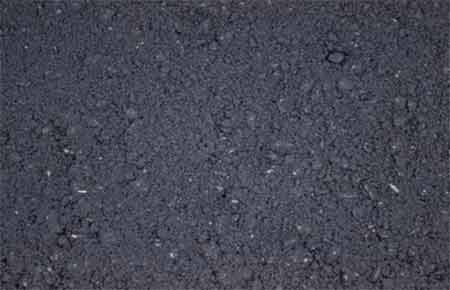
Close grade top coat or wearing coat bitmac
In terms of laying the top course or wearing coat this is done in pretty much the same way as the binder course, either with a paving machine or by hand.
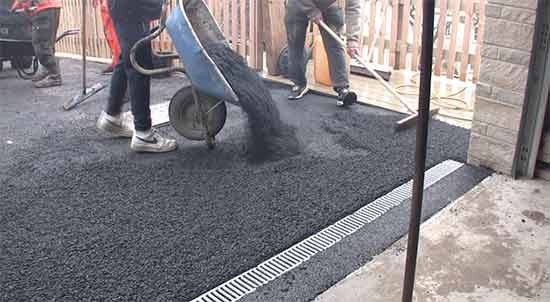
Spreading and laying top coat bitmac by hands
In the case of hand laying, much more attention needs to be paid to levelling. For a much finer finish the rakers will often use w tool called a “lute”. This tool resembles a rake but without the teeth and just a flat edge that creates a fine and smooth flat surface.
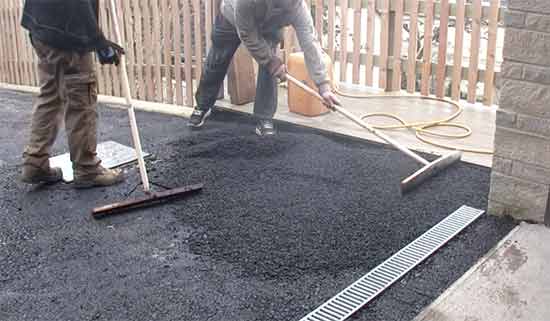
Lute rake used to smooth top coat when laying by hand
Once fully smoothed and levelled by hand, the entire surface is then rolled over with the roller to compact and smooth it even further. Again, this will take around 6-8 passes of the roller to achieve.
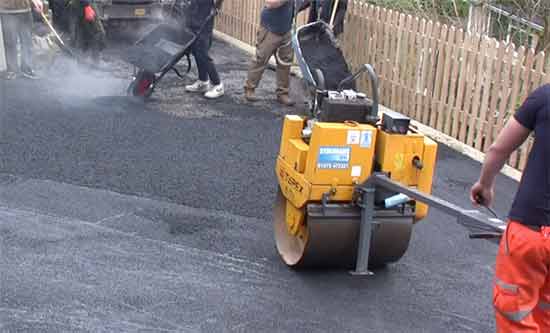
Using a roller to compact and smooth top coat/wearing coat
If any areas are missed or have any slight marks or depressions, a small amount of bitmac is spread over the area and it is then compacted and roller over to remove any imperfections.
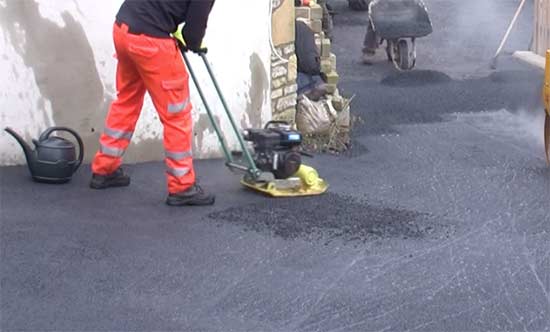
Patching top coat imperfections
Once totally flat, smooth and compacted, your top coat is then pretty much finished and in most cases can be walked over right away, but should be left for a good few hours before driving on, ideally at least 24 hours or more.
If the finished macadam surface is to be used as a driveway then great care will need to be taken for the first few weeks. Wheel spinning, hard braking and turning on the spot can easily scuff and rip up fresh bitmac, ruining the finish so treat the surface with care until it’s fully hardened.
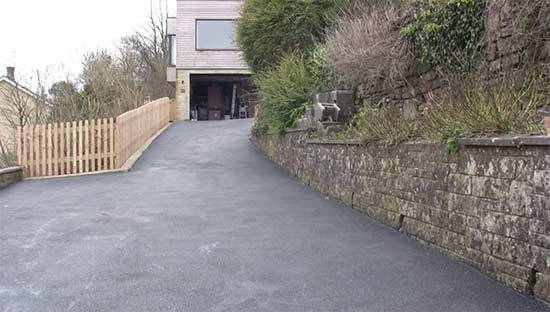
Newly resurfaced driveway job completed
Resurfacing Existing Surfaces
As we mentioned at the top of this guide, some of the images we have used were from a resurfacing job that we did for a customer. In the trade this is known as an “overlay”. Resurfacing or overlaying is simply laying a new top coat over an existing sub base or surface.
In most cases this can be done as long as the existing base you’re laying on to is solid and not cracked or has obviously seen some form of movement in the past. If a new surface is laid on such a base it won’t take long for the new top coat to crack and fail.
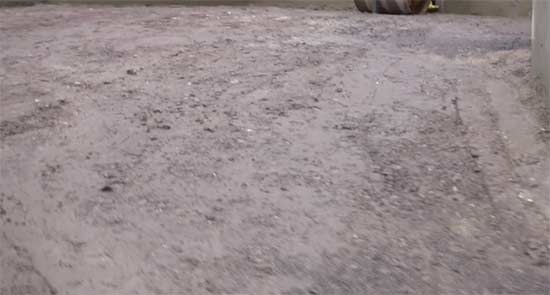
Existing surface in good condition and ready to lay new macadam surface on top of
Regulating Existing Bases and Surfaces
In many cases existing surfaces and bases will features holes and other depressions so these must be filled before any new surfaces are laid using a process known as “regulating”.
Regulating is simply the process of bringing any holes or depressions in an existing base up to level e.g. making the base as a whole the same level.
Any holes or depressions should be built back up using the correct material for that particular level e.g. if the hole goes all the way down to the sub base, then it should be filled using compacted sub base material.
Likewise, binder courses should be filled and compacted using the correct binder course materials.
However in cases where a fairly large area is being resurfaced that features shallow depressions over the entire area a it may be possible to simply lay a new course of suitable material over the entre space to support the new top coat.
One thing to be aware of though it that any courses such as these should generally be no deeper than 30mm.
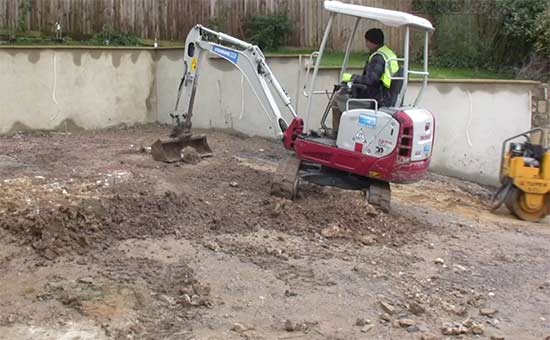
Initial regulating, filling of holes and levelling of surface
Think About the Finished Height of the new Surface
One very important point to note in terms of resurfacing is what the new finished height will be. Any new top coat finishes will need to be laid at a minimum depth of 25mm and this will be on top of any new regulating courses that are laid.
Potentially, the new finished coat could be as much as 55mm higher than the existing surface it’s being laid on.
This can have a dramatic impact on things like damp proof courses, which need to be at least 150mm above a finished surface, garage doors that require a certain clearance to open, existing drains and man holes etc.
In some cases where the new finished height will cause issues a cut out can be created and the new surface feathered down to meet it, but be aware that this may not be possible.
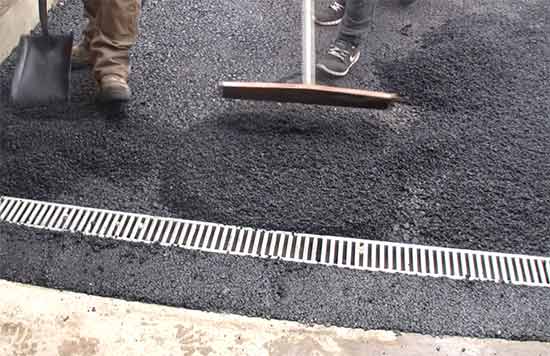
If top coat raises above any drains or man holes it will need to be feathered down to meet the object
Using Tack Coats
Before any finishing top coats are laid, a substance known as a “tack coat” must be applied to the existing surface.
A tack coat is essentially a bitumen-based solution that helps to bond the new finishing coat to the existing surface. It’s application is a necessary step to ensure the new top coat bonds to the base coat correctly and produces a finish that will last.
As well as bonding the surfaces together, the tack coat also prevents the ingress of water between the two layers which can lead to freeze / thaw action and the top coat lifting away from the base coat.
If the resurfacing job is fairly large then the tack coat is applied using a machine that sprays it on to the surface, but for smaller jobs it can simply be painted on, ensuring that the entire area to be surfaced is covered.
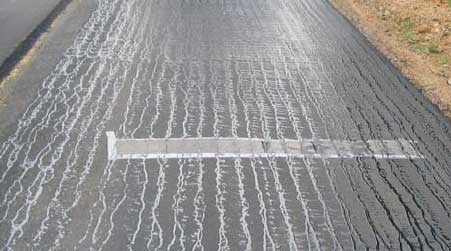
Tack coat applied to existing surface ready for new surface
Patching and Repairs
Time is the enemy of almost all surface coverings. Constant usage, impact damage, vegetation growth, petrol/diesel spillages, UV light etc can all take their toll on a macadam surface and any one of these can damage bitumen-based binders and cause the surface to eventually breakdown and fail.
If an entire surface fails then inevitably it will need to be replaced but where damage/failure is localized to a specific area these areas can often be patched and repaired.
For small patches you can purchase patching macadam from many DIY stores or builders merchants.

Patching macadam available from most DIY stores
In terms of the repair, it’s best to “square up” the area first e.g. chop the sides away and create a square. Not only is this easier to fill but it also looks nicer once completed.
If squaring up isn’t possible then you should at least cut away any crumbling edges to leave a nice clean stable edge to bond to.
For spillage repairs it may be necessary to chop out the affected area, square it up and then repair it from there.
If you can get hold of any, before filling the damaged area with your patching tarmac, treat the edges with a jointing compound. This will help prevent water ingress.
To complete the repair, simply apply the patching compound to the repair area and tamp it down. Fill until you have reached your desired level.
Patch repair filled and compacted
Once totally filled, again if you can get it, treat the seam around the perimeter of the repair with jointing compound to help stop water getting in and ensure the repair last as long as possible.

