Whether it is a useful path to get from one place or another, or a pretty, winding path designed purely to meander through plants, creating a path can add a new dimension to your garden.
Plotting Your Garden Path
A hosepipe is helpful in plotting the course of a path, especially if you want the path to curve. Lay your hose down on the ground and arrange it so that it meanders in a pleasing way.
If you have enough length of hose, you can use it to mark out both sides of the path. Use a yardstick or large rule to make sure the width of the path is even all the way along.
Special road marking spray paint or even a trail of household flour can also be used to mark out the path.
If you have a small garden, you can create an illusion of space by widening the path at a curved corner.
Paving Materials for Your Garden Path
Depending on the purpose of the path, there are a number of options for materials to use. If the path is going to be used daily as an important route from one place to another, then you need to use a sturdy material that is well bedded down. If it is an ornamental path then you don’t need to be so careful.

Three common types of paving materials
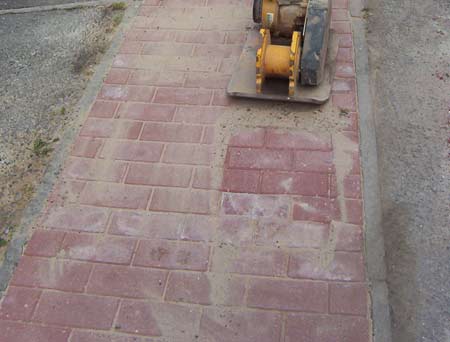
Brick Garden Paths
Bricks can be laid in a variety of patterns for a range of effects. A traditional herringbone pattern will suit a cottage garden, while staggered lines can be used to great effect in a more modern setting. Be sure to purchase proper paving bricks, as they are made to withstand foot traffic and the elements much better than wall bricks, which will break up after a while.
Three common types of paving materials
Paving Slab Garden Paths
Slabs are a sensible choice if the path is going to see a lot of foot traffic. Concrete slabs will not be slippery in wet weather, and if you bed them in with sand and cement they won’t move or get overgrown with weeds. Slabs can be used in a more informal way too though, for example as stepping stones with gravel, moss or grass in between.
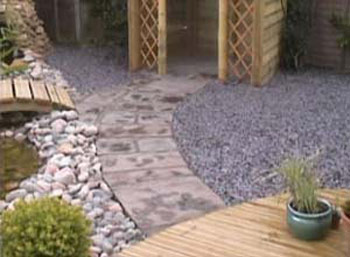
Paving slab pathway
Flag Stone Garden Paths
A patchwork path of flags is a beautiful addition to any garden. Creating a flag path is a bit like doing a jigsaw puzzle without knowing what the picture is of! It’s a challenge to fit in the different sized and shaped pieces of stone, but when you’re done you’ll feel a real sense of achievement. Flags can also be used as stepping stones through a gravel path, across a lawn or interspersed with moss.
Gravel Garden Pathways
A gravel pathway is one of the quickest and easiest to create, and there are a wide variety of stone chipping’s available. Don’t choose stones that are very small, as they will get picked up by muddy or wet shoes too easily.
Beach pebbles, slate chippings in a variety of colours, sparkling white chips, and stones in a huge range of colours are available. For a really natural looking path through a shady grove you could even use bark chipping.
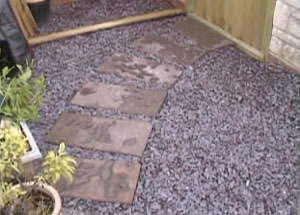
Gravel in-fill and pathway
Preparing the Ground
Once you’ve planned the route of your path and selected the material, you can get started on actually creating the path.
Dig up any turf or plants as necessary, and use a flat shovel or mattock to dig out a trench for your path. For a decorative path dig out the depth of the block/slab plus 2 inches if using sand. For stone chippings and other loose materials, you will need a two to three inch layer.
For paths with heavy foot traffic, you will need to dig out an additional 4 inches and fill with broken stone or scalpings, then compact it down with a hired wacker plate.
Even if you are not adding this base it is a good idea to compress the soil under your path so that you don’t get uneven lumps and bumps when the ground naturally compresses over time.
Laying the Garden Path
Laying Weed Block and Edging Strips
If you are using loose chippings, you will need to dig out a small trench on either side of the path for edging. You can use stone, brick, metal, wood or plastic edging strips. Put down a layer of landscaping fabric or weed block to stop any weeds growing up through the path, and put down your edging if required.
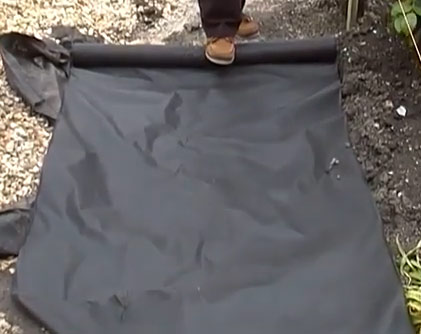
Laying weed block to prevent weeds breaking through your pathway
Laying a Sand Base
Spread a layer of sand over the fabric and use a rake or piece of wood to work it level. If you are laying slabs or flags between chippings, lay down the slabs in place first then fill in around them with your chippings. For a path of pure chippings, fill in between your edging with chippings and rake them level.
Slab, Flag and Block Pathways
For slab, block or flag paths, lay your stones in your chosen pattern, being careful to make sure they are level with one another and pressed down into the sand firmly. A few sharp taps with a paving maul or rubber hammer will help without damaging the pavers or stones.
If you are laying a sturdy path with sand and cement to withstand heavy foot-traffic, see our Laying a Patio project for more help and advice.
Use the wacker again to compact the blocks and get them to settle in place, or stomp on them up and down several times. Spread fine sand over the finished path and brush over to get it to go down into the gaps between blocks.
Do You Want Moss?
If you want moss to grow in the spaces between your stones, fill in the spaces with some soil and place the moss around. If possible, it is cheaper and easier to gather moss that you already have growing somewhere, but if you don’t have any there are a few types of moss and low creeping plants usually available in local garden centres.
Stepping Stone Garden Paths
To make a stepping stone path in a lawn, simply lay your stones in place, making sure that they are positioned so that you can comfortably walk along them. Cut around each stone in turn with a knife or spade, move the stone out of the way and lift up the turf to the depth of the stone. Put a layer of sand in the bottom of the hole to level it, and sit your stone in place, stamping hard to get it to sit firmly in place.
Other projects that you may be interested in could be laying a driveway or path, how to lay patio slabs correctly, how to lay block paving correctly, How to lay a solid shed base and how to correctly point a patio. Using these projects together will give you additional information on laying a path.