Gravel driveways and indeed paths are a popular choice due to the fact that they are cost effective, look good and help to provide better drainage than a concrete or paved area.
Laying a new gravel path in your garden is a great DIY job to undertake and one that can be done fairly easily and cheaply with great results. Read on to find out how.
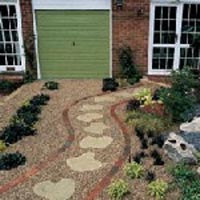
Driveway completed using light scalping’s and patio slabs
How to Lay a Gravel Driveway
As with many jobs, preparation is the key to success and laying a gravel driveway or path is no different. If the initial prep work is not done correctly then it will fail. However if it’s done correctly then it will look good and last for years.
The principles of laying a gravel driveway are pretty much the same as for laying a path and even a patio sub base so these can be applied to these jobs also. The basic steps are as follows:
- Check existing ground conditions
- Excavate area
- Lay weed block in base
- Lay edgings (if required)
- Lay sub base and compact
- Lay finishing gravel topping

Cross section of driveway showing shingle, scalpings, topsoil and marker peg
Step 1 – Check Existing Ground Conditions
The first step to laying a gravel driveway, path or similar is to find out how firm the ground is underfoot (or car!). If the ground is too soft or there are soft spots then parking cars and leaving heavy objects in one spot constantly will cause depressions and sink holes in the ground.
To test the ground we use the same principle as designated by the building regulations for foundations and get a 50mm x 50mm square timber peg about 600mm in length and a lump or club hammer.
From the surface of the proposed path or driveway you will have approximately 200mm of material forming the driveway (150mm sub base, 50mm topping), so as an exploratory measure dig down 200mm for an area of about a square metre and then drive the 50 x 50mm peg in and if it is hard to do after 150mm (6 inches) then the ground is firm enough for your driveway or path. You can now excavate out the full area.
For more help on checking ground conditions, see our how to build a foundation project for this.
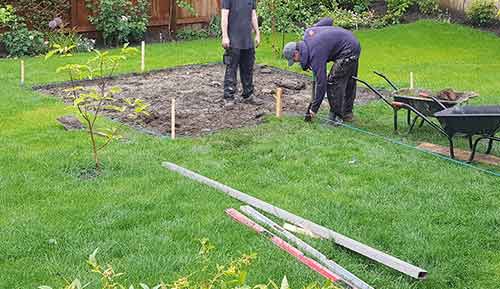
50 x 50mm peg knocked in to check condition of existing ground and mark excavation area
Step 2 – Excavate Area
Using pegs and string or line marking paint, mark out the exact area that needs to be excavated and start digging the area out. Measure the depth regularly to ensure you only excavate down the required 200mm. Keep the base as flat and smooth as possible.
As you dig take care and watch for any services such as water, drainage pipes. gas, electricity etc. Items such as this should be buried much deeper but they’re not always.
If while digging you find any areas which seem softer than the rest, dig these out. The base you are laying is flexible and will sink into soft areas of soil making unwanted dips in your path or drive. Try and find a base which is solid throughout the entire area.
Admittedly this base structure can be "topped up" from time to time, but a little time and effort spent now can save a great deal later on. This does not apply to patio bases where you will not be able to get to the sub base later so it’s vital you fill all soft spots at this stage.
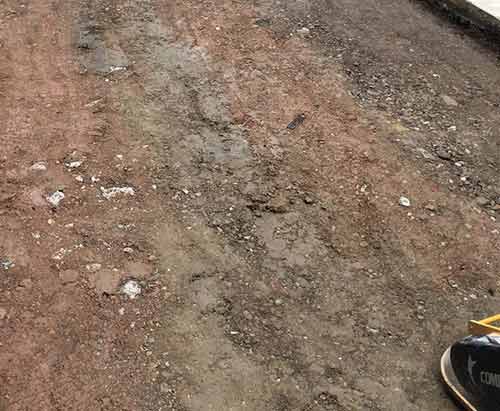
Soft spots in driveway base
A good way of finding any soft spots is to run over the entire area with a vibrating plate or whacker plate as it’s also known (these can be hired fairly cheaply from your local hire shop). This will compact any soft areas down so they can then be filled and compacted to create a flat, level and even base.
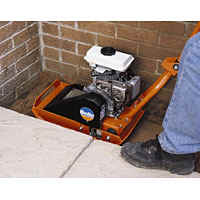
Vibrating compactor plate for compacting base. These can be hired from your local hire store
If you’re only laying a small driveway or pathway then digging the area out by hand is probably the most cost effective way to go, but if you are looking excavate a large area then hiring a mini digger or even a groundwork’s company to do it for you may be the way to go.
One point to remember is getting rid of the excavated soil and material. Good quality topsoil can be sold or given away, other material can be loaded into a skip or taken to a local recycling centre if only a little. When using a groundwork’s company, they should dispose of the excavated material for you.
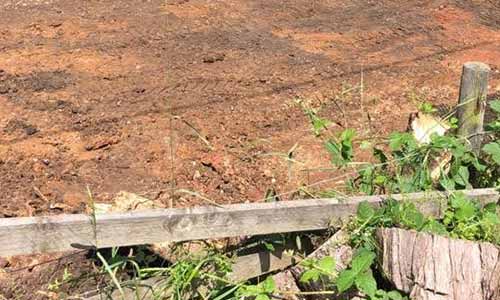
Excavating area ready for driveway
Step 3 – Lay Weed Block Fabric in Base
It is essential that a good quality woven weed fabric is laid in the base of your driveway or path before the sub base is laid. Woven weed fabric is best to use as it’s tough and also allows drainage.
Most say it’s fine to lay between the sub base and gravel topping but for best results it needs to go at the very base as weeds can fight their way through the most compact of materials and getting it right at this stage will save so much trouble later on.
Roll out the weed block across the entire base area, overlapping any joins by 150mm or so. Secure the weed fabric to the base using fabric staples or garden wire
Ensure the sides are also fully covered and stapled in place. Trim off any excess using scissors or a utility knife.
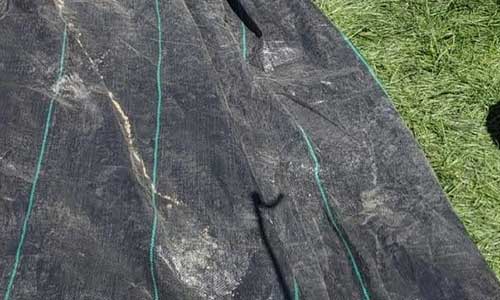
Driveway area fully covered in weed fabric
Step 4 – Lay Edgings (if required)
You have a choice at this stage. As you have dug the side of the drive or path down vertically, when the sub base is in it will obviously keep the soil or surrounding lawn in place and stop it collapsing in.
The finishing layer of shingle, or gravel, when laid down, is very likely to spread when walked and driven on and you may wish to contain this.
If you have a lawn either side of the drive or path, stray shingle can not only damage your mower, but the mower can easily "throw" stones out. This can be very dangerous. To find out how to contain your shingle and support the sides of your path or drive, see our laying edging stones project for more help.
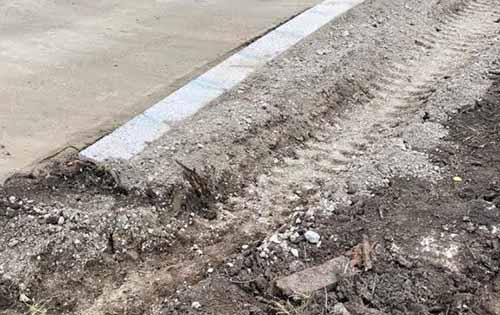
Edging stones laid at side of driveway to contain gravel and stop it spreading
Step 5 – Lay Sub Base and Compact
The sub base is the key to the success of your driveway or path as, once it’s compacted down, it then allows the driveway to cope with any load imposed on it by cars and other heavy objects.
As we have mentioned above, the depth of the sub base should be 150mm. The sub bases for paths and other similar items can be shallower, around 100mm, but to ensure its longevity and prevent any failure stick to 150mm.
In terms of what to use to form the sub base, Type 1 MOT should be used. This is stone up to 40mm in size that goes all the way down to dust. Once compacted down, all the different sizes lock together to form a stable and solid base.
Today, Type 3 can also be used. Type 3 doesn’t have quite as much fine material in it so doesn’t compact down quite as solid. This allows be slightly better drainage, especially in areas that are prone to flooding.
The Type 1 or Type 3 stone used for your sub base should be laid in layers, with each layer being compacted down before the next is laid. Repeat this until you have reached the required 150mm depth.
To calculate out how much sub base and finishing gravel you need for your drive or pathway, see the “How to Calculate Sub Base and Gravel Amounts” section below.
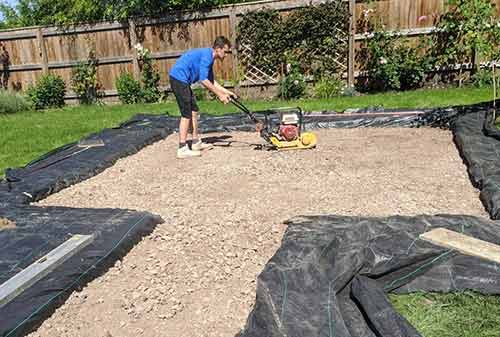
Compacting down Type 1 MOT sub base of driveway using a vibrating or whacker plate
Step 6 – Lay Finishing Gravel Topping
Laying the finishing layer of gravel is the final task and compared to the other steps involved is the easiest.
In terms of what gravel to use, this is really up to you. Grey Limestone gravel, Marble gravel, Cotswold Golden gravel are all good choices along with many others. They look great and provide a fantastic finish to any driveway.
The one thing to be aware of is that it’s best to use larger gravel sizes, around 20mm in size, but no larger. Anything larger can be tricky to walk over. However anything smaller can get spread about too easily and get lost.
To lay it, the best technique is to wheel barrow it to the site and pour it into a mound and then use a rake to spread it evenly over the sub base, ensuring you keep it at a maximum of 50mm deep over the entire area. Once done your new gravel driveway is then complete!
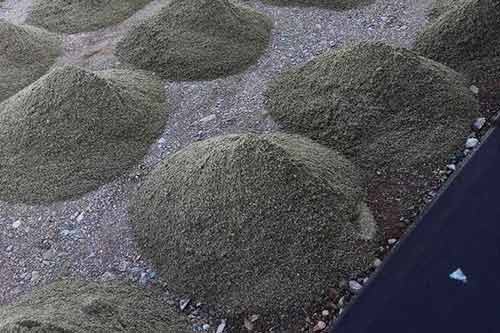
Finishing gravel piles ready for raking out
Laying Gravel Driveways on a Slope or Keeping Gravel in Place
You may be thinking that laying a gravel driveway on a slope is a ridiculous idea as over time all the gravel would simply fall to the lowest point. If it’s not prepared correctly then indeed this is what will happen.
However there are a few things that can be done to ensure that if you need to prevent your gravel drive from rolling away it can be kept in one place.
The first is to always use angular gravel and not smooth as the angular sections will slot together holding everything in place and the second is to lay what’s known as Gravel Stabilization Grids. This is essentially a series of plastic grids that are joined together to cover the installation area and the gravel is then spread over the top.
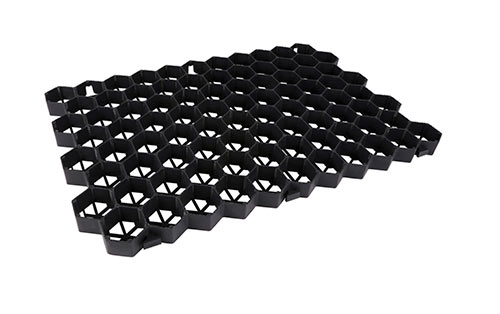
Plastic gravel stabilization grid
All the hollow areas of the grid are filled with gravel and then a thin layer is spread over the top. The contained gravel then helps to hold the surface gravel in place.
Grids such as these are pretty much all constructed for use under driveways so they are more than capable of supporting weight.
To lay a gravel stabilization grid:
- Step 1 Check Ground Conditions – As stated in Step 1 above, check the suitability of the existing ground and ensure it’s hard enough to support any weight
- Step 2 Excavate Area – Excavate the entire area to a depth of 200mm including any soft spots
- Step 3 Lay Weed Block – Lay good quality woven weed fabric over entire base area
- Step 4 Lay Edgings – If needed lay any edging stones around the perimeter to contain the gravel
- Step 5 Lay Sub Base – Lay a Type 1 MOT sub base to a depth of 150mm ensuring it’s fully compacted using a wacker plate
- Step 6 Lay Gravel Stabilization Grid – Lay out and connect all plastic grid sections to cover installation area, cutting to size using a a saw where needed. Each 1 meter square section clips together to the next to form the whole grid
- Step 7 Lay Finishing Gravel – Lay out finishing layer of gravel over plastic grid. Level off using a rake
As long as the sub base you are laying on is flat and level with no soft areas, a gravel driveway laid using stabilization grids will last for years and years. The only thing you may need to do is top up the finishing layer now and again as inevitably some will escape.
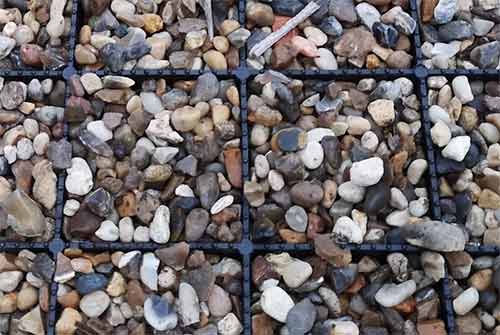
Gravel driveway laid using gravel stabilization grids
How to Calculate Type 1 Sub Base and Gravel Amounts
Working out how much gravel and Type 1/Type 3 stone that’s needed for the sub base can be done fairly easily. Measure the length and width of your driveway and then multiply one by the other to give you the area. Next multiply this by the depth and this will then give you the total volume of material needed.
As an example if the length of your driveway is 4 metres and the width 2 metres, the area will be 8 square metres. If you then multiply this by 0.15 metres (150mm) then this gives a final cubic volume figure of 1.2 cubic metres.
for the volume of finishing coat gravel you would substitute the 0.15 metres depth for 0.05 metres depth.
In terms of how much this actually is in the real world, an “industry standard” sized dumpy bag that you’d get from your local builders merchants would be 850mm x 850mm x 850mm and this would hold something around 0.61 cubic metres of material or 1 metric tonne.
So with this in mind, to get a total of 1.2 cubic metres of Type 1 for the sub base you would need 2 standard dumpy bags of the material, but this is only an estimate. As it will be compacted it’s likely that you’ll need slightly more.
150mm of Type 1 will compact with a vibrating plate to about 125mm. To finish with 150mm you will need to lay approximately 165-175mm. This is not an exact science and it is never going to be absolutely perfect, but as with everything else in the building trade, the better you prepare, the better the job is.
You can also use our graph below to calculate material volumes. Measure the area you need to cover and find it on the square metre range of the graph. Read across to the depth line (150mm for sub base, 50mm for finish layer) and then down to the volume.
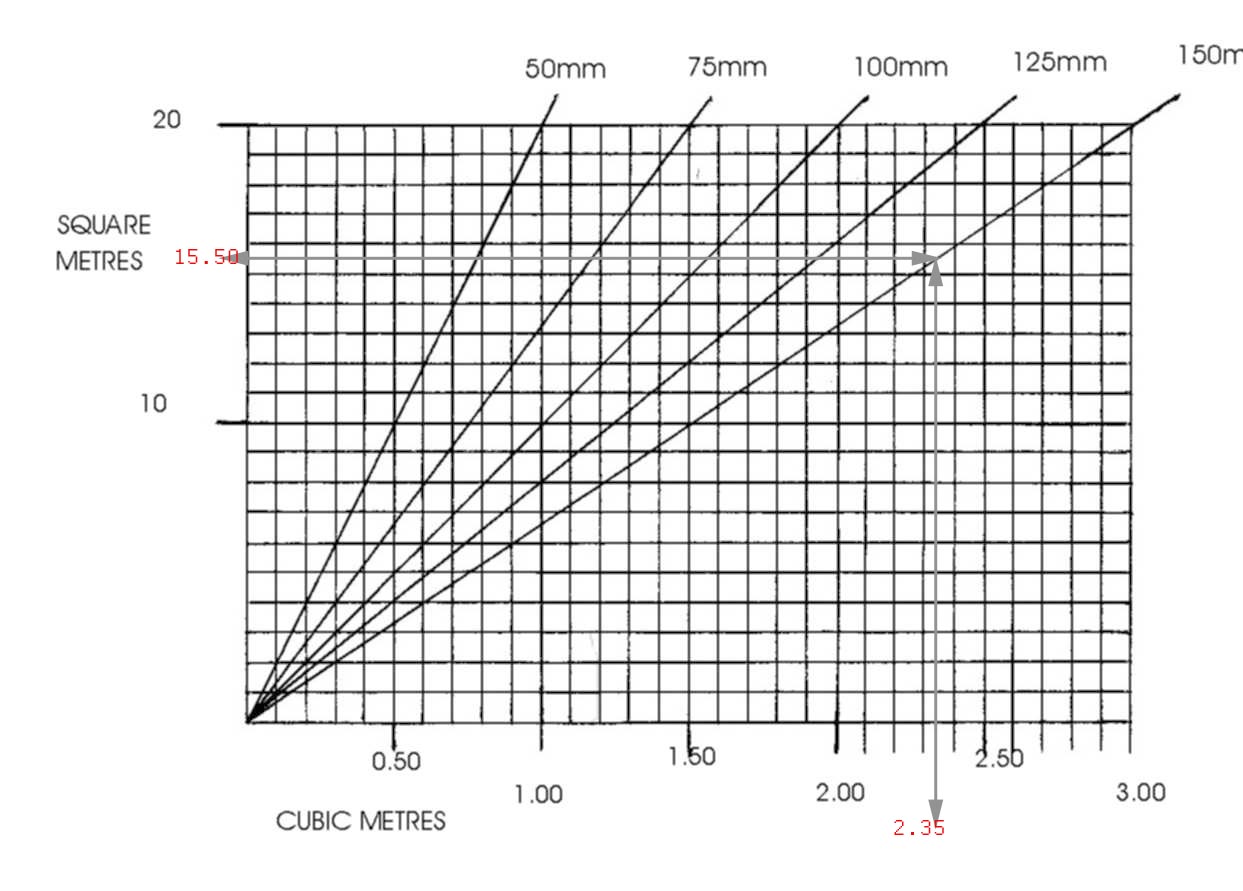
Material volume calculation table for material volumes
For the example above we need to cover an area of 15.50 square metres.
Follow the line across to the 150mm depth line and you can see that we would need 2.35 cubic metres of material.
Once you know the total volume in cubic metres you can then divide it by the volume held in a dumpy bag to work out how many bags you need. In terms of the above, 2.35 cubic metres is divided by 0.61 to give a total of 3.85 bags or 4 with a bit left over.
Aggregates and stone vary quite a bit in weight depending on where it’s come from, how wet it is etc. Ultimately you do not want tonne’s of stone left blocking your garden so it’s best to calculate volumes as accurately as possible. Please note the above figures are only a guide.
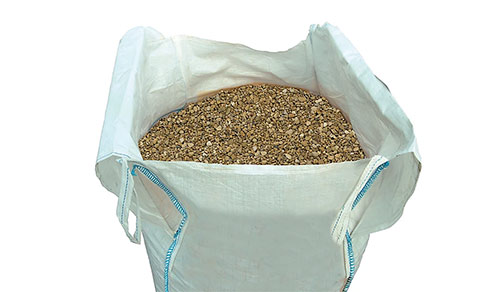
Industry standard dumpy bag of 20mm decorative gravel
How Much Gravel do you Need for a Driveway?
This will depend on how large the driveway is going to be. To work this out, multiply the length by the width to work out the area and then by the depth (50mm for a finishing layer of gravel) to work out the volume.
Once you know the volume you can then speak to your local builders merchant or DIY store and purchase the exact amount or as close to it as possible.
For the volume of Type 1 sub base stone you will need to calculate using a depth of 150mm.
How Deep Should Gravel be on a Driveway?
The depth of a finishing layer of gravel for a driveway, path or similar will be 50mm and no more using the required 20mm size gravel.
For the sub base that the finishing layer is laid over, this will need to be 150mm in depth. Overall this will give a total depth of 200mm for both required layers.
What Kind of Gravel is Best for a Driveway?
The type and finish of gravel you use for your driveway or path is really up to you and the visual finish that you want to achieve.
Ideally you will want to choose a type of gravel that suits the existing style of your home so that it compliments it rather than a mix of different styles that might not necessarily work together.
The only hard and fast rule is that for the finishing layer of gravel, ensure that you use 20mm gravel.
Laying a gravel driveway, path or similar may seem like a hugely tricky job if you have never attempted anything of this scale before. However if you plan everything out and prepare the base correctly there is no reason why you can’t get a professional finish.
For an introduction video to driveways and paving see our Paving and Laying a Path in your Garden tutorial video.

