Regardless of what type of paving you have – be it slabs, concrete, shingle etc…. it will require maintenance to keep it in tip top condition. In some cases a little hard work with a brush and some soapy water can really give tired and un-cared for pathway a completely different look.
When it comes to stains found on paving and patios these are often a result of overspill from pointing the joints with cement mortar. Sometimes brick walls etc…. will have been built on or around the slabs.
In this case, occasionally lumps of mortar will have been spilt or dropped on the slabs and by the time the builder has realised its gone rock hard.
In other situations you might not be dealing with mortar stains and spills but other marks such as algae, lichens and moss. This can accumulate over time when water is allowed to sit in specific areas.
In the case of algae, this really needs removing as quickly as possible as when it gets wet or damp it can become very slippery and poses a potential danger to anyone walking over it.
Weeds can also be a common problem and can grow on top of paving and in joints if left to their own devices and not treated the second they start to rear their ugly heads. If dirt and debris is allowed to settle on top of a paving surface then it is only a matter of time before something takes hold and starts to grow.
General Maintenance for Paths and Patios to Keep Them Clean and Tidy
Brushing
By regularly brushing your patio over, this will remove any debris and dirt that is sitting on the surface. By removing this you will then prevent any seeds from germinating as they won’t have anything to take root in.
The action of brushing will also break off any small weeks that have just started sprouting preventing them from growing any further.
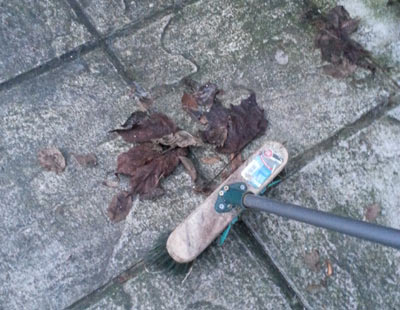
Brushing up leaves and debris will help to prevent and weed growth or growth from Moss and Lichens
Weeding
It is pretty much inevitable that at some point a weed will take root and grow. Whether it’s due to not having time to brush or whether you away for an extended period of time, it’s going to happen.
When you do get a chance to attend to them make sure that you pull up any weeds that have taken root, taking as much of the root with the weed as possible.
Also, remove any weeds that have taken root in any joints. If you have sand filled joints then in most circumstances the weed will take some of the sand with it. Once all weeds are gone and you have cleaned and swept the area you must then replace the sand in the joint, do not leave it partially filled.
Weedkillers can also be a good solution as, obviously, they will kill any weeds when sprayed. In terms of which weedkillers to use, the best are either contact or systemic killers:
- Contact: This type of weed killer is usually fast acting and will kill most things that its sprayed on to as it is absorbed through the leaves and stem etc….
- Systemic: These weed killers tend to be a bit slower acting but are generally much more thorough as they work their way through the entire plant right down to the root
If using a weedkiller, please ensure that you read the manufacturer’s instructions in terms of when and where it can be used, especially if you have children and pets around.
When it comes to weeding the best solution is always to keep on top of it – keep the area keep and tidy and free from as much dirt as possible.
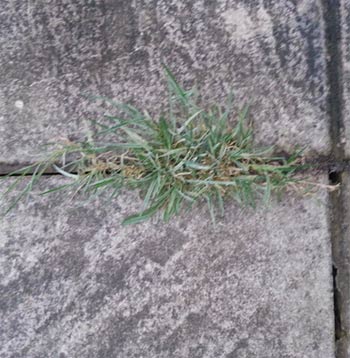
Grass growth in patio joint
Cleaning and Power Washing
Along with simple brushing, the occasional scrub down soapy water can work wonders! Washing up liquid is the best to use but you can use certain floor cleaners, just make sure that they are acid free as acid based cleaners can react and damage some concrete or stone surfaces.
This method simply involves a bucket, some water, a brush and your chosen soapy cleaner. Using either hot or cold water, fill up your bucket and mix in your soap solution and then chuck some over a small area (work in small areas at a time).
Using your brush, scrub the surface backwards and forwards, applying some downward pressure to the brush. The scrubbing action and soap combined will loosen any surface dirt and grime from your paving or patio.
Once you have scrubbed over all the surface use clean water to wash any debris away down a near drain or other suitable area. Be careful about sweeping it into garden areas as in some cases the soap cleaner may contaminate soil and kill plants.
If you are lucky enough to have a steam or pressure washer, this can be very handy. This will allow you really give your paving or patio a deep clean. In much the same manner as the washing up liquid and brush method, work your way over the surface of your patio or pathway removing as much surface grime as possible. More information can be found in our power washing decking project.
Be careful of any detergent that you use as again, this may damage the surface if it contains certain chemicals and also be careful around your all-important joints.
An ill-aimed power washer can clear a sand-filler joint in seconds and can also damage some mortar joints if they are old and a bit crumbly! Also, depending on the size and pressure that the washer exerts, do not dwell too long in one place.
If you have a large industrial size pressure washer, some of these pump out over 2000 psi in pressure. Even half of this would be enough to seriously damage some types of paving so ensure that you gently sweep backwards and forwards over any surfaces.
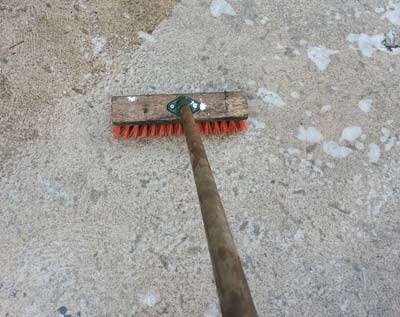
Brush cleaning a patio area using bleach
Joints
As we have mentioned already, the joints that make up your paving are one of the key area. They help to stabilise everything and hold it in place to create a solid structure.
Also, if they look tatty and worn they can completely ruin the look of your patio or driveway area.
To these ends it is important to keep any joints clean, clear and in tip-top condition:
- Remove Weeds: Pull out any weeds that have started growing, removing as much of the root as you possibly can. Again, sweep the area thoroughly removing any dust and debris as this will prevent weeds growing on your patio area that could then spread to the joints
- Fill Gaps in Joints: If you have sand filled joints then in most cases pulling out weeds will take some of the joint with it. If this happens then ensure that you refill the gap with a suitable jointing sand or compound. In the case that you have mortar filled joints, over time these can crack and crumble and weeds can take root. As before, remove any weeds and hack away any loose or crumbling mortar (be careful you don’t damage any slabs or bricks in the process) and fill any gaps with a suitable mortar mix
When it comes to sand-filled joints the use of a jointing stabiliser can be invaluable as this will help to bond the sand particles together preventing the wind from blowing them away and also any light surface wear from eroding the joints too much (emphasis on light wear).
Although a joint stabiliser will help to bond sand filled joints it is not in any way, shape or form a resin or glue so wear from cleaning, footfall etc…. will occur but at a slower rate.
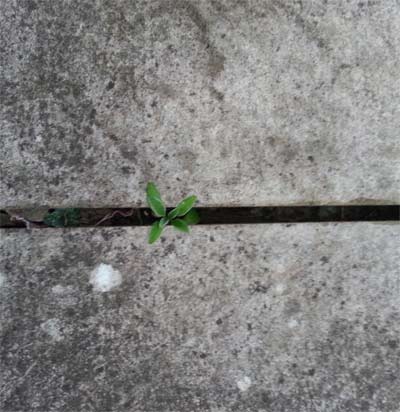
Joint in patio where mortar has fallen away and weeds now grow
Sealing Paving and Patios
Many, if not most patios are laid using patio slabs and the slabs themselves tend to be quite porous in nature (water and moisture absorbing). If installed correctly they look fantastic in the early years but as time progresses they soon start to look old and tired due to moss, algae and weed growth.
As I’m sure you have gathered by now, they require regular maintenance to look their best that includes sweeping and washing but there is also another step that you can take to aid their looks and longevity and that is to seal them using a specialist patio sealer (or block paving sealer in the case of block paved surfaces).
There are many different paving and patio sealers available on the market today including those for more specialist paved surfaces such as Indian sandstone, Limestone and Travertine surfaces.
Due to the vast selection of different sealers it can be a little confusing to know which one to use for your particular surface so always check the manufacturer’s suggestions on the packaging and using the wrong sealer could potentially destroy your paving or patios surface.
The basic job of a sealer is to seal the surface and remove its ability to absorb water, moisture and other substances such as oil etc…. as this will certainly delay the growth of any weeds, algae’s or lichens.
Once sealed, your surface should then have the ability to repel or resist (depending on manufacturer and type of sealer – this is worth checking as there is a difference!) water and moisture and oil etc….
A worthy point to note is that this is not a one stop solution that will protect your paved or patio surface for ever, you will still need to maintain it through sweeping and cleaning. If you would like more information on paving and patio sealers there is a very good guide here.
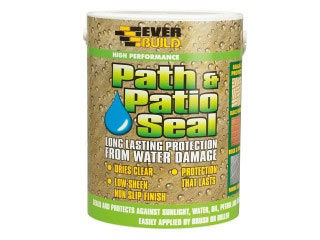
Everbuild Path and Patio sealer
Removing Mortar and Cement from paving and Patios
Unfortunately, like many jobs that involved dried cement and mortar, the only way to remove any lumps is by using a hammer and bolster chisel. This needs to be done carefully as banging the hammer down on the chisel on top of a paving slab can easily crack it if it is not supported adequately. The same can be said for thin, unsupported concrete.
Holding the bolster chisel at around an angle of 30°, position the tip at the base of the concrete or mortar you need to remove. If the chisel is at too acute an angle then when it is struck it will simply dig into the surface of your path or patio.
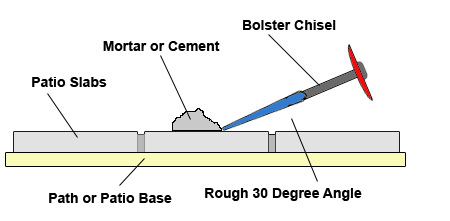
Hold the bolster chisel at around a 30 degree angle to remove dried on mortar from patio and paved surfaces
Additionally, ensure that the tip of the chisel is flat and level with the surface of your path or slab. If it is at a slight angle e.g. one corner of the blade is higher than the other then it may cause the lower angle to dig into the surface and damage it.
With the bolster positioned correctly, tap the striking plate gently with the hammer to gauge how well the mortar is stuck down. Occasionally, a gentle tap will be enough to shift it. If not, tap a little harder with the hammer.
If you are unlucky enough to find that the mortar or cement is stuck hard and fast then the only choice you have is start at the top of the lump and gradually chisel your way down, removing as much as you possibly can.
Once you have chiselled as much away as you can, take a wire brush and get stuck in. Brush the mortar repeatedly until your reach the surface of your path. Be careful at this point as, again, you don’t want to damage or mark the actual surface of the path.
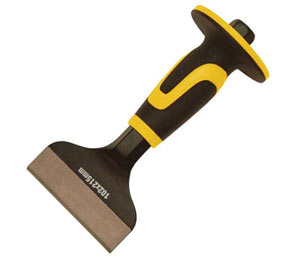
4 inch bolster chisel with hand guard
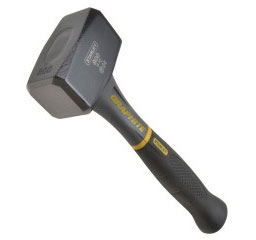
28oz club or lump hammer
Once all the lumps are up and you have removed as much of the remainder as possible with your wire brush you may be left with a stain on the paving or concrete. To remove this you can use a brick or patio cleaner.
Follow the manufacturer’s instructions when using this substance and also pay attention to any materials that it should not be used on as you don’t want to mark or stain any surfaces.
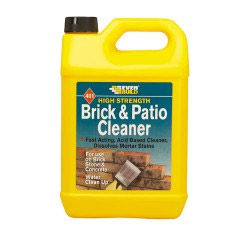
Brick and patio cleaner
When working through the above steps please ensure that you wear the appropriate safety clothing such as a mask and protective glasses and gloves and follow the instructions on the container when using any cleaning substances.
Algae, Moss and Lichen Build up on Paths and Patios
Removing Algae from Paving and Patios
I’m pretty sure anyone that has a patio, paved surface, concrete path, concrete driveway or almost any other outside surface, if they went outside and checked it now that somewhere on it will be a green patch of growth. In most cases this will be Algae.
As said, almost all patios or paved surfaces will feature a degree of algae growth but it can be more extensive in wetter climates as the algae itself thrives off the fact that moisture, particularly rainwater, will dissolve some of the minerals in the surface its resting on that it can then feed off of.
In respect to ridding your surface of this growth, one of the best and most effective cleaners is ordinary house-hold bleach.
Get yourself a bucket or watering can and create a diluted mix of water and bleach at about 50%. Next, sprinkle the mixture over your paved or patio surface and leave it for a few minutes to get to work on the algae. Over large surfaces you can use a yard brush to spread it around evenly.
Once it has had a change to work on the algae for a few minutes you will then need to rinse it off using clean water. Where the growth is quite established you may need to repeat this process several times until it lifts the algae from the surface.
A few points to note is that you will need to be careful when using bleach as it is harmful to both you and any of your surrounding lawns or gardens. In the case of a spillage you will need to wash and dilute with clean water and if you get any on yourself seek medical help right away.
Again, this is not a "be all and end all solution", you will need to do this every few months to ensure no significant re-growth.
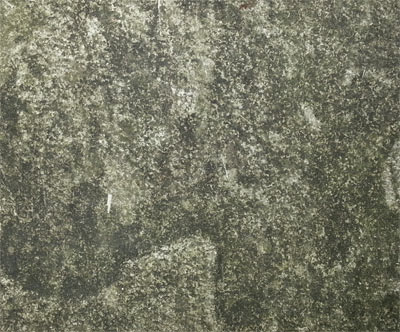
Algae growth on patio slab
Removing Moss from Paving and Patios
In most situations moss growth is down to the fact that dirt and debris has been allowed to rest on a surface. Unlike algae and lichen that tends to adhere to a surface, moss grown on top of it in the affore mentions dirt.
With this in mind, the key to preventing moss growth is to keep your paving or patio area free from dirt buildup. On a regular basis, give it a good sweep or even hose down to remove any dirt traces that will allow moss to take root.
Another typical growth haunt is in the joints between paving slabs and brick and block paving. Not only does dirt and debris tend to build up in these areas but the sand in the joints themselves collects moisture providing the ideal environment for growth.
It’s always best to deal with the root cause of an issue like this but we should also mention weed killers. As with most things today, there are numerous types available on the market and most of them are pretty effective when it comes to killing off the moss itself, but one thing you have to be aware of is if the solution features ferrous sulphate.
If so then its best avoided when it comes to use on such surfaces as, regardless of the surface type, it will most probably leave a rust-like orange stain on any surface it comes into contact with due to the presence of the iron or ferrous.
When it comes to washing down, again, as in the case of algae above, house-hold bleach is the way to go. Mix up a solution and spread over the surface and leave for a few minutes and then wash down with clean water.
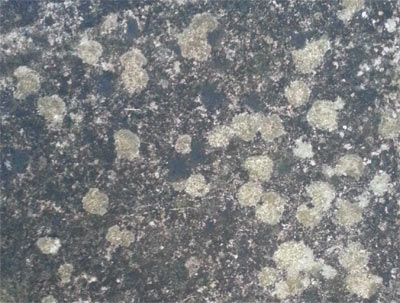
Lichen growth over surface of patio slab
Removing Lichen Build up from Paving and Patios
Lichen growth normally appears as black or white spots on a surface and when tiny can often be mistaken for stains. It’s not until growth has been allowed to take place for a period of time that it becomes apparent that the issue in actually lichen.
The main characteristic of a lichen is that you will find it almost impossible to remove from a surface without scrubbing with a stiff brush or even wire brush. This is obviously not a road you want to go down due to the inevitable damage that will be caused to your patio or paving surface.
Again, as with the other cases above, bleach is the weapon of choice. There are specialist fungicidal cleaners available but in most cases they will achieve the same result as using bleach and a scrubbing brush.
Due to the sheer clinging force of lichen growth it is very unlikely that you will be able to shift it with one bleach application and a scrub. Instead, repeating treatments over a period of time is the way to go.
Working in small areas to start with, apply a diluted bleach solution to the area and allow it to sit for around an hour. Then, wash off with soapy, boiling water whilst giving it a good scrub at the same time (don’t forget to wear old clothes, goggles and gloves).
You will need to work your way around the entire effected area over time until you have removed as much as you possibly can. In some cases, you may not be able to remove the lichen at all and if so, replacement of the slab or blocks will be the only way to go, unless of course you are happy to live with it.
You should also be aware that even if you are able to remove the lichen the chances are that it will leave a mark. This is due to the fact that the lichen has removed some of the minerals from the surface while it has been feeding off of them. Again, you may be able to clean the surrounding areas enough to match but if the pigment itself has been affected then it will always be noticeable.
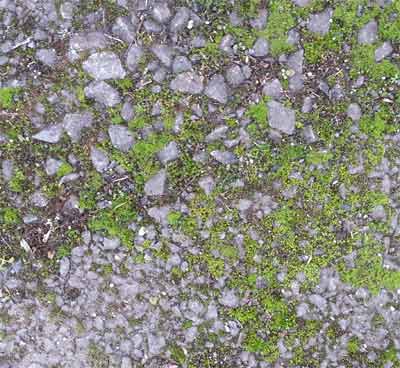
Moss growth over tarmac surface

