One of the first jobs when moving into a new house is to get the TV setup which often involves connecting an aerial, however if the previous occupants used Sky or another service then there may not be an aeriel present for standard TV.
In other cases the coaxial plug on the end of the aerial may have become detached and lost and for the TV work it needs to be replaced. With this in mind this project focuses on wiring up a TV aerial and connecting a coaxial plug.
Types of TV Aerial
There are 2 different types of TV aerial if you need to install one:
Indoor TV Aerials
These are the easiest type to install and in pretty much all cases just involve taking it out of the box and setting it up somewhere close to the TV where it is then simply plugged in.
Although they are very easy to use, this functionality does massively limit their operation and due to the fact they’re indoors, this limits their ability to pickup some frequencies, so you quite often have to constantly move it around until it finally finds them.
To combat this there are also mains electric powered versions that help to amplify signals but they are only slightly better.
Despite they’re obvious disadvantages they are however fairly cheap and easy enough for anyone to install as they are “plug and play” and in most cases with a little time you can get them setup well enough to view most channels.

Indoor or set top TV aerial
Loft/Outdoor TV Aerials
The outdoor or loft TV aerial should be familiar to most as they can be seen on the side wall or chimney of pretty much every home in the UK.
Although they work best when installed outside, they can also be installed in the loft area and used with a signal booster to enable them to pickup pretty much any frequency.
Their main disadvantage is where they need to be installed; as high up on a property as possible and this inevitably means climbing onto the roof which can be very dangerous. If you are in the slightest bit aprehensive about doing so then get a professional in.
Despite this, once installed you will never have to worry about dodgy TV reception ever again.
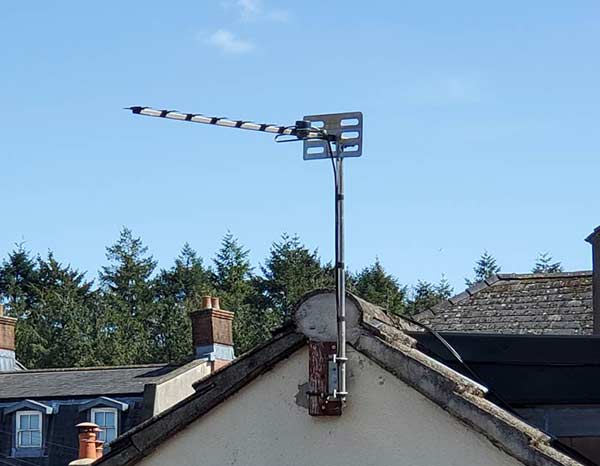
Standard outdoor TV aerial on side of house
What is Coaxial Cable and Why is it Used?
Coaxial cable is used for connecting aerials to TV’s and radios and also for connecting up Sky dishes and boxes. It is used because its make up allows it to transfer high frequency signals while at the same time it is shielded from electromagnetic interference.
The electrical signals run through the centre wire which is separated from the outer mesh-wire, or braid, by an insulator. The outer wire acts as an earth and a shield against electromagnetic interference.
Connecting coaxial wire to a television socket can be a little tricky if you’ve never done it before but the most important thing to remember is that the two wires types are kept separate.
In the event that they do touch and when the plug is fitted they are still touching then the aerial simply wont work.
What do you Need to Wire a TV Aerial?
Erecting your own TV aerial is not the most difficult job in the world and running the cable to the television can also be a relatively easy task, however it’s important to look at exactly what items you will need.
Coaxial Cable
Coaxial cable is the go-to cable to use for transfering high frequency signals (as we have stated above) and is used to connect the aerial that receives the signal to the TV or connection boxes in between.
Coaxial cable can be run externally down the side of a property, through the loft space, through floor voids and even clipped to the top of skirting boards. Connecting up is not difficult either.
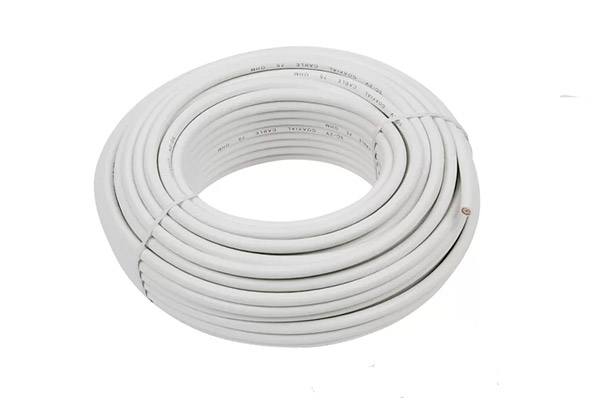
Coaxial cable used for wiring up TV aerials
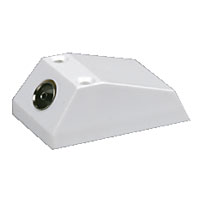
Connection Boxes
When the coaxial cable runs down from the aerial it then needs to transfer it’s signal to the TV. A coaxial plug can be attached straight to the end but a neater solution is to use a wall mounted box or window sill socket.
Wall mounted boxes act a little like a conventional socket in that the coaxial cable runs in from the rear through a patress box and then connects to the rear of the face plate.
A coaxial plug and cable can then be connected to the front of the faceplate and run to the TV.
Note:There are guidelines now on how high sockets can be placed from ground levelFor regulations governing heights of sockets see our project here.
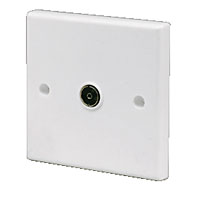
Wall mount coaxial socket
The window sill socket is very similar to the wall mounted box in that in some cases, the wire from the aerial will run down the roof, down the wall and into the corner of a window.
Once the cable is inside the property it is then wired into the rear of the window sill socket which is screwed to the window sill and then a cable can then be run between it and a TV.
Coaxial Socket for window sill
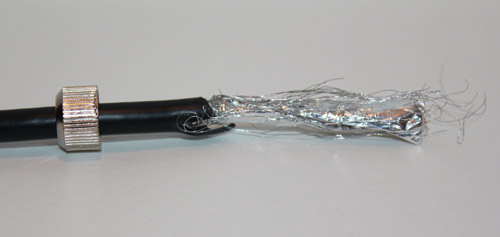
Coaxial Connector Plug
The coaxial plug is arguably the most important piece of kit as without it, nothing can be connected up. When using coaxial plugs to join coaxial cables you need to ensure that the cable remains fully shielded from any interfearance.
There are 2 different types of plug; male and female. When connecting up a coaxial device it’s essential that you first check that you have the correct type of plug for the device or connection you are making.
Both male and female coaxial plugs can be plugged together to join and extend cables.
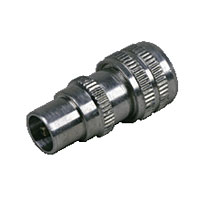
Coaxial plug
Splitters and Joiners
Depending on how many devices need to be connected to a given aerial, you may find that you need to either join lengths of cable together or use a splitter so that you can connect several devices to the same aerial.

Coaxial splitter
Better than the plug in splitter above, you can also now get hard wired splitters as seen in the image below.
These devices can be used to take the main feed of an aerial cable and “T” into it, allowing you to run another cable off to another TV without having to install a new cable or use an internal powered aerial.
The principles of installing one are exactly the same as described below, only you will be cutting the main cable and applying a plug to each end of the cut.
Once the plugs are in place, each one is fixed into the splitter to create the existing run to its original location and you can then plug a new cable into the spare port.
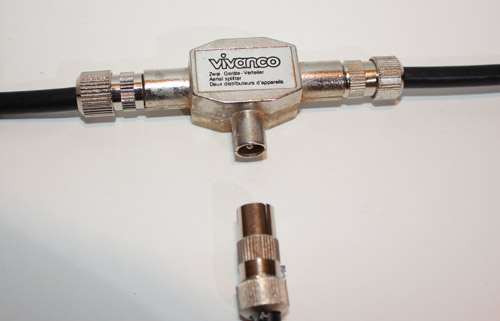
Aerial splitter used to split main signal
Aerial and Pole
At the other end of the cable is the actaul TV aerial or antenna as it’s also known. This device can be used for both radios and TV’s and helps to capture the required broadcast signal that is then piped down to the TV or radio enabling it to work.
There are numerous different types of TV aerial including low frequency, high frequency, DAB etc. so you will need to ensure you have the right antenna for the device you need to connect and the frequencies it needs to receive.
In terms of installation, in the majority of cases the aerial is attached to a pole that is screwed or clamped to a wall or chimney, normally at the highest point of the property.
Sometimes if you have a lot of surrounding houses or obstructions it may be necessary to extend the aerial up even higher on a longer pole so that it can still receive the necessary signals.
Full instructions for a plug connection are below. For fixing a TV aerial to a brickwork or block surface, please see our fixing to masonry project. Please be very careful when erecting TV aerials and use proper access equipment as you will, in most cases, be working at height.
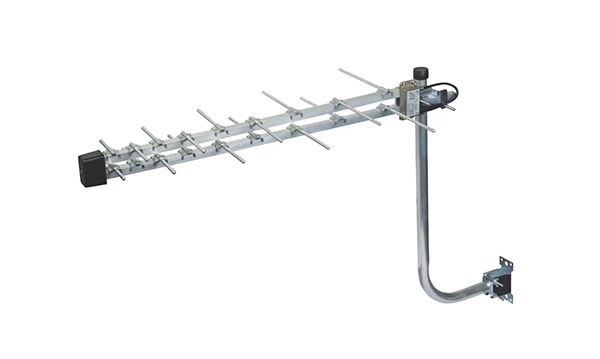
TV aerial suitable for TV’s, radios and similar devices
Full Installation Kit
So that you can be sure that you have everything you need it’s also possible to buy a full TV aerial kit that includes every item you need such as the cable, clips, connection boxes, plugs and even the actual aerial.
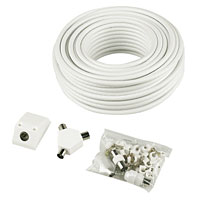
Coaxial cable kit with all fittings
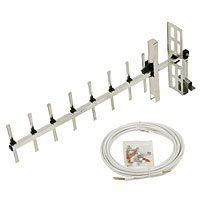
Complete aerial kit
Fitting a Plug to Coaxial Cable
As the majority of properties will already have an aerial and coaxial cable installed, we will now run through the process of how to fit a coaxial plug.
In the majority of cases where work needs to be done it will be the fact that the plug has come loose or is missing or you need to create a new length of cable as an extension so with this in mind we will run through the process below.
Step 1 – Separate Coaxial Plug
Firstly, split your TV plug into its separate parts by unscrewing the top from the main body. Inside there will be a male connector that will slip over the exposed copper section with the cable and a clamp to hold the cable in place and prevent it from being pulled out.
Before you go any further, push the internally threaded top (third image below) onto the cable as you don’t want to assemble it all and the realise that you have to take it all apart just to put the cap one!
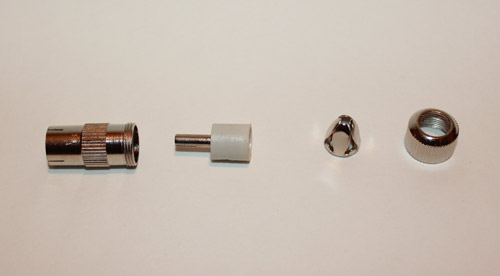
Internally threaded top and parts of the coaxial connector
Step 2 – Strip Outer Sleeve
Next, very carfully, run a hobby knife along a 2 inch length of the outer sleeve of the coaxial cable. Not deep enough to cut through the sleeve or you may cut through the braid underneath.
Using your finger nails and twisting slightly, open up the outer sleeve to reveal the braid. Then cut off the surplus external sleeve.
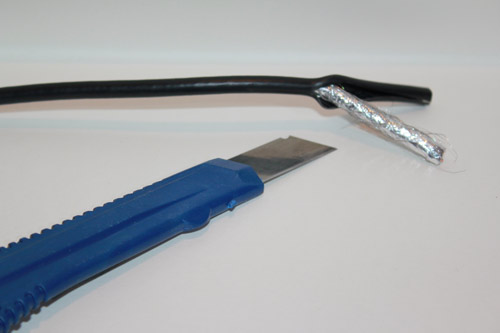
Splitting coaxial cable to identify layers with a hobby knife
Step 3 – Push up Braid and Add Leafed Clamp
Push the braid up to the top of the inner sleeve. It will scrunch up at the end.
Push coaxial braid up
Slide the leafed cable clamp over the inner sleeve next and push it tight to the outer sleeve, trapping the scrunched up braid inside.
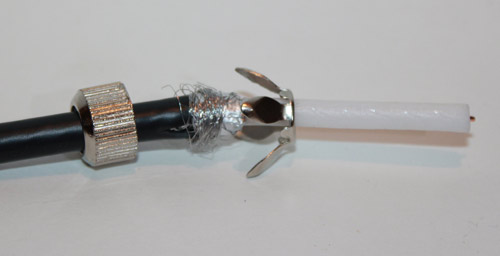
Braid pushed up and leafed coaxial cable clamp pushed on
Step 4 – Close up Clamping Leaves
Push the leaves closed gently around the outer sleeve to trap it in place and hold it firmly in the socket. As commented above, this will help to prevent the cable coming loose and falling out or being pulled out by mistake.

Push coaxial clamp leaves closed
Step 5 – Cut Sleeve to Plug Length
Take the male plug and hold it against the wire clamp. You will see that the plug is slightly dished inside to receive the clamp. Cut the inner sleeve where it reaches the end of the plug, allowing for the plug to slide a tiny bit over the leaf clamp.
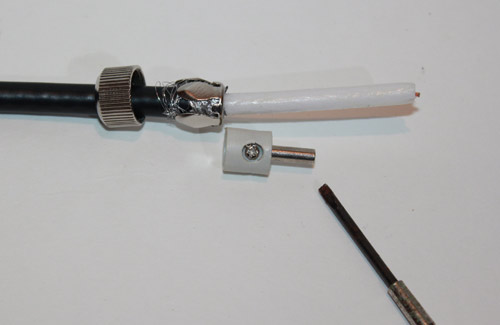
Male plug ready to be fitted
Step 6 – Strip Inner Core Insulation
Strip the insulation from the inner core leaving 2mm of insulation which will slide inside the plug. Take the male plug and now slide it over the end of the cable, ensuring that the inner core copper wire goes down into the thin hollow sleeve at the end of the plug.
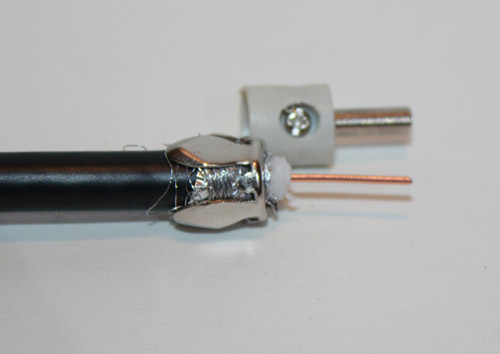
Cut inner sleeve of cable ready for male plug
Step 7 – Screw Cap on to Main Body
With the male plug now in position on the end of the cable, take the main body and slide it over the male plug and leaf clamp. The end of the leaf clamp should poke through the end of the main body just slightly.
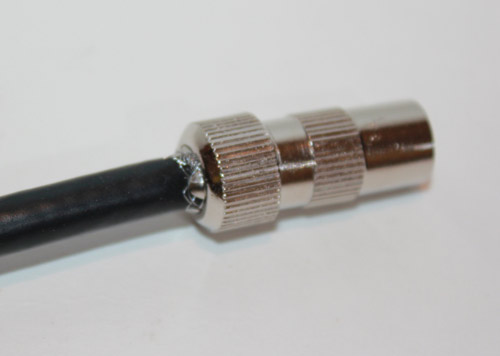
Once in position, screw the screw cap down and tighten onto the main body.
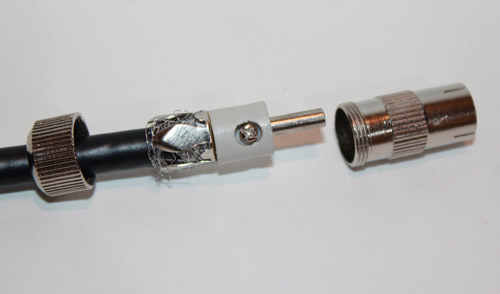
Screwing aerial plug together
Step 8 – Test
With everything now screwed together you’re done! The final task is to connect the cable to a TV and ensure that all is working as it should.
If not you will need to disassemble the plug again and make sure that none of the braid is touching the inner core wire.
Finished cable with connector screwed up
Wiring up a coaxial cable for a TV or radio is a fairly straight forward job and one that can be done by anyone as long as you take your time and ensure that neither of the wires are touching each other.