No matter if you are new to DIY or a time-served trade professional, in many jobs you will need to fix something to a wall or surface and ensure that it stays there.
In this DIY guide we take a look at how this simple job should be carried out on a range of surfaces to ensure a long and lasting fix.
What is Masonry?
Masonry refers to walls or structures built by a bricklayer or stonemason. It includes brickwork, blockwork, and stone walls.
Blockwork (also called breeze blocks, Thermalite, concrete, or cinder blocks) is faster to build than brick, so it’s often used for internal walls in modern homes. These walls are usually finished with plaster or plasterboard for a smooth surface.
If you have a solid wall, it could be brick, block or stone masonry. While concrete isn’t technically masonry, it’s included here because the same drilling and fixing methods apply to concrete, brick, block and stone.
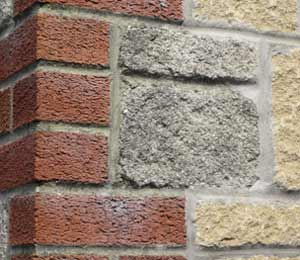
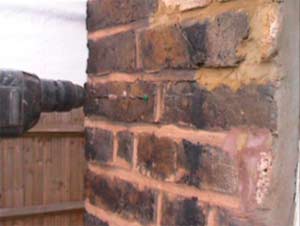
Masonry Wall including Brick and Stone
What Different Methods are There for Fixing to Masonry?
Fixing to masonry can be done in several ways and the right method depends on what you’re attaching, how heavy it is and the type of wall you’re working with. Masonry includes brick, block, stone, and even concrete walls, and each can require a slightly different approach.
Plastic wall plugs are the most common fixing method for light to medium loads such as shelves, curtain rails or picture hooks. Simply drill a hole, insert the plug and secure with a screw. They expand inside the wall to create a firm grip.
For heavier loads, such as kitchen cupboards or TVs, you’ll need masonry anchors or sleeve anchors. These metal fixings expand tightly inside the wall when the screw or bolt is tightened, giving strong support.
Where maximum strength is required, especially in older or weaker walls, resin fixings are ideal. A resin or chemical anchor is injected into the hole before inserting a threaded rod or bolt. Once it sets, it provides an exceptionally strong bond.
You can also use frame fixings for securing door frames, window frames or battens directly to masonry. These longer fixings hold structural items firmly in place without the need for multiple different fittings.
Drilling into Masonry
Whichever fixing method you use that we have outlined below, they will all require a hole of some sort to be drilled first.
Before fixing to masonry, you’ll need to drill a hole. Masonry is tough, so always use a powerful drill with a hammer action, ideally 500W or more. For bigger one-off jobs, such as battening walls for plasterboard, it’s often cheaper to hire a drill. For smaller tasks like shelves, curtain poles or picture hooks, buying your own drill or drill/driver is a good investment.
Masonry drill bits have a wider, flat cutting tip for breaking through hard surfaces
Always use proper masonry drill bits. These have a flat cutting tip slightly wider than the shaft, allowing debris to escape through the grooves. Avoid cheap drill bits of this type, they blunt quickly, force you to push harder and can damage your drill due to this over time.
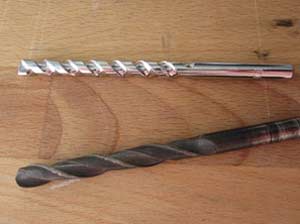
Masonry drill bit (top) compared with a standard drill bit (bottom)
For large holes (e.g. 10mm), don’t try to drill in one go. Always start with a smaller pilot hole, then widen it with larger bits. This keeps the drill accurate, reduces strain on the motor and prevents overheating. Taking this extra step saves time, protects your tools and ensures a clean, well-sized hole every time.
What Fixings Should Be Used?
The most common way to fix items to masonry is with screws, but you can’t drive a screw directly into brick, block, stone or concrete. First, drill a hole then insert a material or object that holds the screw securely.
The standard method is to use plastic wall plugs. Simply drill the correct size hole, insert the plug, and drive in your screw. Wall plugs work well in most sound materials, including brickwork, stone, concrete and Thermalite blocks.
For weaker or damaged masonry, standard plugs may not grip properly. In these cases, chemical resin anchors provide a stronger, longer-lasting hold. These resins bond directly with the wall, creating a solid fixing where plugs alone would fail.
If you’d like to explore other options, we also have a guide to different types of fixings for specific jobs.
Fixing with Plastic Wall Plugs
Plastic wall plugs (often called Rawl or Wall plugs) are the simplest and most common way to secure screws into solid masonry or concrete walls and surfaces.
They work by expanding inside the drilled hole as the screw is tightened, creating a firm grip that holds the screw securely in place. This makes them ideal for brick, stone and block walls.
If you’re working with plasterboard or stud walls, standard plugs won’t hold. Instead, see our guide on fixing to plasterboard and stud walls for the correct methods.
When used on a solid wall that is firm, thick and easy to drill, plastic plugs are a quick, reliable and cost-effective fixing solution for everyday jobs.
Wall Plugs Colour Code
Wall plugs are colour coded to make choosing the right size quick and simple. Instead of checking each plug one by one, the colour shows you which drill bit and screw size to use. Most DIY and building jobs only need the four main colours listed below.
- Yellow – Use with a 5mm drill bit and screw sizes 4–8
- Red – Use with a 6mm drill bit and screw sizes 6–10
- Brown – Use with a 7mm drill bit and screw sizes 10–14
- Blue – Use with a 10mm drill bit and screw sizes 14–18
These colour codes cover most fixings into brick, blockwork or concrete, making them the go-to choice for everyday DIY projects and home improvements.
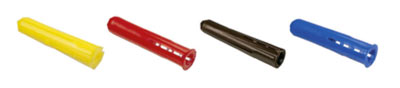
Wall plugs are colour coded to quickly indicate their size
Screws for Wall Plugs
Screws come in different gauges and lengths. The gauge number refers to the screw’s thickness at the head, not the shaft. A higher number means a thicker screw – for example, a No. 10 is larger than a No. 8.
For most household fixings, No. 8 and No. 10 screws are the most common and work well with standard wall plugs. Use larger screws (and plugs) for heavy items like kitchen cabinets, and smaller ones for light fittings such as pictures or shelves.
Screw lengths are shown in millimetres (mm) or inches, so you may see two measurements when buying them. The length you need depends on both the wall plug size and the weight of the item you are fixing.
For detailed guidance, see our Screw Sizes Guide and our Types of Screws Project.
Tools and Products Needed to Fix to Masonry
To fix almost any item securely to a masonry wall, you’ll need a few essential tools and products. The type of plugs and screws may vary depending on your project and we explain these choices further below. If you prefer working in inches, you can use this millimetre to inch conversion tool.
- Electric drill/driver with hammer action
- Masonry drill bits in the right sizes for your fixings
- Wall plugs (Rawl plugs) matched to screw size and wall type
- Screws suitable for the weight of the item
- Tape measure for accurate positioning
- Pencil, chalk, or nail to mark drill points
- Electrical tape for marking drill depth
With these tools ready, you can confidently begin fixing items to brick, block, stone or concrete walls.
Attaching Objects to Brick and Masonry Walls – A Tutorial
Fixing items such as brackets, shelves or hooks to a brick wall follows the same simple steps you would use on any masonry surface. Whether it’s brick, concrete, block or stone, the process of drilling and securing your fixings is almost identical.
Once you know the basics, you can confidently attach objects to walls around your home, garage or garden without worry.
Step 1: Measure the Hole Depth
The hole depth depends on the length of your screw. For example, if your screw will sit 43mm into the wall, always add around 10mm to allow for dust at the end of the hole. This means you’ll need a 53mm deep hole.
Use tape on the drill bit to mark this depth clearly, electrical tape works best as it is bright and sticks firmly.
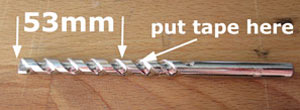
Measure your drill bit and place coloured tape to mark the depth of the hole you need
Masonry drill bit marked with the correct depth for the hole we will need for this wall plug
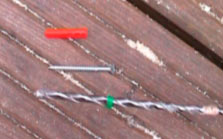
Step 2: Choose the Right Drill Bit and Wall Plug
For this example, we are using a 50mm size 8 screw, which requires a 6mm masonry drill bit and a red wall plug.
Always match your screw, drill bit, and wall plug size correctly for a secure fixing.
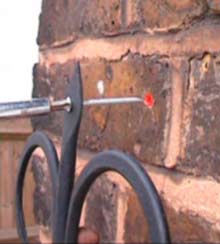
Step 3: Mark the Drill Position
Hold your bracket, hook or item against the wall and mark where the screws should go. If you can’t judge by eye, use a tape measure for accuracy.
Mark the wall with a small “V” shape using a pencil or nail, this is clearer and more accurate than a dot or cross.
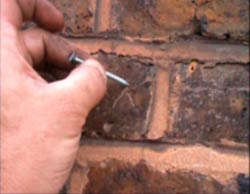
Mark the brickwork in a V shape with a nail where you want to drill your hole to get an accurate position
Step 4: Drill the Hole
Drill straight into the wall at a right angle. Stand comfortably, with your weight behind the drill and if necessary use a ladder safely.
Drill until your tape marker touches the brickwork, then keep the drill running as you pull it out to clear dust from the hole.
If you are unsure about using a power drill, why not check out DIY Doctor’s tutorial video How To Use a Combi Drill on what the settings mean on your drill/screwdriver and how to safely use an electric drill.
Make sure your drill bit is straight and at right angles to the wall
Drill into the wall until the marker tape touches the brickwork
Step 5: Insert the Wall Plug
Push the wall plug fully into the hole until it sits flush with the wall. If it won’t fit, remove dust with a vacuum or blow it clear (wear safety glasses).
If needed, drill in slightly deeper and try again.
Screw your bracket to the wall – you can see the red wall plug in the hole sitting flush with the brickwork
Step 6: Screw the Bracket to the Wall
Place your bracket or fitting in position and screw it into the wall plug until tight.
For safety, most brackets need at least two fixing points, but lightweight items such as a candle sconce may only need one. Always follow the holes provided in the bracket as your guide.
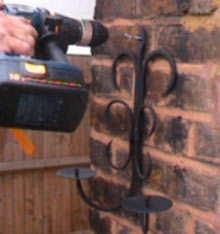
Using a screwdriver screw the screw into the wall plug until it is tight and secure
Step 7: Finish and Check
Once the screws are secure, step back and check your work. A powered drill/driver makes this step quicker and easier, but a manual screwdriver also works and allows for more accurate tightening.
Finally, admire your finished job and ensure the fitting feels solid and stable.
Important Note on Tiled Walls
When fixing into tiles, make sure the wall plug is inserted beyond the tile itself and actually into the surface of the wall.
If the plug expands against the tile, it can crack under pressure.
Fixing Timber Battens to Masonry with Wall Plugs
Timber battens create a flat framework for attaching plasterboard or wall panels. Even though they are hidden, uneven or poorly spaced battens make it almost impossible to get a smooth finish and can cause problems later, so they need to be installed correctly.
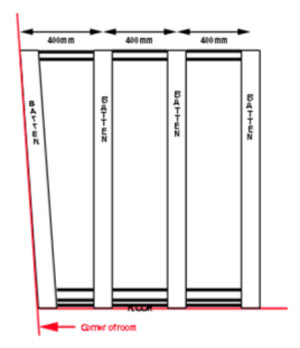
Battens must be straight and evenly spaced at about 400mm (see our Battening a Wall guide)
Step 1: Position and Mark the Batten
Hold the batten against the wall and check it is level with a spirit level. Mark a pencil line along its edge. Drill a small 5mm pilot hole through the centre of the batten for your fixing screw.
Step 2: Mark the Wall for Drilling
Place the batten back on the line. Push a screw through the pilot hole and twist slightly to leave a mark on the wall.
Remove the batten and make the mark clearer by drawing a small “V” with the point showing the exact drilling spot.
Step 3: Drill and Insert Wall Plug
Using a 6mm masonry bit, drill a hole to the required depth (see our guide above for measuring drill depth).
Insert a wall plug into the hole and then reposition the batten, align it with the pencil line, and drive the screw into place.
Step 4: Faster Fixing Method
To save time, you can drill directly through the timber and into the wall using the masonry bit. Adjust your drill depth marker to account for the thickness of the batten.
Push the wall plug through the timber, start the screw, then tap gently with a hammer until the plug slips into the wall. Finally, tighten the screw fully.
Pro Tip
This method avoids marking each hole individually, reducing mistakes and speeding up the job. It may dull the masonry bit slightly over time, but the accuracy and time saved usually make it worthwhile.
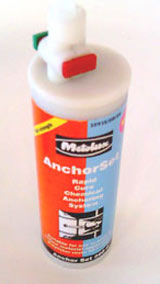
Fixing with Resins and Adhesives
Resins and adhesives are an effective alternative for securing shelves, curtain poles, picture rails, dado rails and other fittings to masonry or concrete walls.
Plastic wall plugs may not work on soft, cracked or uneven masonry. In these situations, chemical resins provide a strong, reliable fixing that holds screws and brackets securely in place.
Types of Resins, Adhesives and Fillers
Anchor Resins: Ideal for securing bolts, studs, and screws into masonry or concrete. Available online or at most DIY and building suppliers.
Epoxy Thixotropic Adhesives: Strong, gap-filling adhesives that let you bond items directly to walls or masonry surfaces.
Epoxy Fillers: Provide a solid base to screw or bolt items securely when the surface is uneven or damaged.
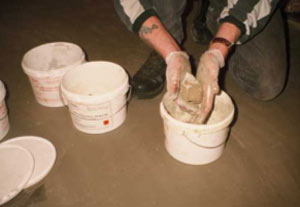
Mouldable Epoxy Putty – fill holes, drill and fix screws and plugs
Anchoring with Resins
Chemical or resin anchors let you secure bolts, studs or other fixings in masonry by filling a drilled hole with a resin adhesive and inserting the fixing. The resin sets or “cures,” holding the anchor firmly in place.
These anchors transfer the load to the resin instead of the wall, making them perfect for soft, crumbly or damaged masonry where traditional wall plugs would fail.
The resin sets through a chemical reaction, similar to two-part glues like Araldite, creating a strong, reliable hold for walls, floors or ceilings.
4-Step Process for Fixing with Resins
Using resin anchors is straightforward when you follow these four key steps. You’ll need a suitable stud (commonly 8mm, 10mm, or 12mm) and a masonry drill bit at least 4mm larger than the stud (e.g., 8mm stud = 12mm drill bit).
- Measure, Mark, and Drill: Identify the fixing location and drill a hole to the correct depth.
- Clean the Hole: Remove all dust and debris using a proprietary brush, compressed air or a vacuum. Always wear eye protection and a dust mask if blowing through a tube.
- Inject the Resin: Use a skeleton applicator gun with the correct extension tube to fill the hole slowly, avoiding air pockets. Pre-mark the tube with tape to control the resin amount, allowing for the stud displacement.
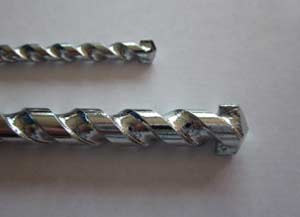
- Insert the Stud: Wrap electrical tape around the threads that will take a nut to prevent resin contamination. Slowly rotate the stud while pushing it into the resin-filled hole. For heavy-duty work, dowels made of high-tensile steel or epoxy-glass (6–25mm) can be used for reinforcement or joining materials.
Injecting resin into pre-drilled holes for secure fixings
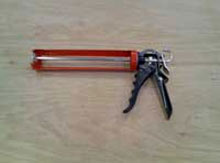
Skeleton gun for precise resin application
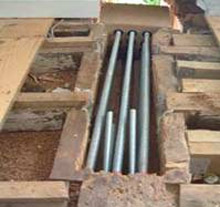
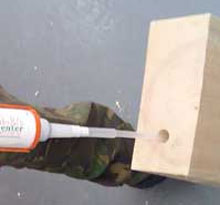
Joining and repairing damaged timber with dowels resins
Types of Resin for Chemical Anchors
Chemical anchors use resin to securely hold fixings in masonry. The two main types are:
- Epoxies – Strong adhesives made from synthetic polymers that cure to form a durable, heat-resistant bond. Learn more about epoxide groups.
- Polyesters – Made from ester-based polymers, these are strong, moisture-resistant and shrink-proof, making them ideal for anchoring fixings.
Polyester anchor resins are available online from property repair suppliers
Resin Setting Times
Resins are available in different cure times to suit your project:
- Fast: 3–6 minutes
- Medium: 15–30 minutes
- Slow: 4–6 hours
Resin Packaging Options
Resins come in three main types of cartridges:
- Single Cartridge – No Mixing Required: Two resins are separated inside a tube and mix automatically in the nozzle of a standard skeleton gun.
- Dual Cartridge – No Mixing Required: Two linked tubes feed into a skeleton gun that mixes the resins in a spiral nozzle.
- Single Cartridge – Hand Mixing Required: The two resins must be mixed manually before being placed in a cartridge and applied with a skeleton gun.
Fixing Timber Battens to Masonry with Resin
Resin adhesives offer a strong alternative to screws when securing timber battens to brick, block or concrete. The key is choosing a fast-setting resin, so the timber bonds quickly without you holding it in place for long.
Modern construction resins are designed to grip timber as securely as mechanical fixings, making them ideal for jobs where drilling is difficult or where you want a clean finish. Always check that the resin is suitable for both wood and masonry before use.
Popular options such as CT1 and similar brands are widely available in UK DIY stores. Read the label to confirm suitability, or ask staff for advice to ensure the resin matches your project needs.
5-Step Process for Fixing Timber with Adhesives
Using adhesives to fix timber battens works similarly to resin or anchor fixings. Apply the adhesive from a tube, press the timber to the surface and hold until it sets. Once cured, the chemical bond provides a strong, lasting hold.
Most adhesives follow these five simple steps:
- Prepare the surface: Clean the wall with a stiff brush to remove loose paint, plaster or varnish. Sand any flaky areas to ensure a smooth base.
- Position the batten: Hold it against the wall, check it is vertical with a spirit level and lightly mark around it with a pencil.
- Apply adhesive: Coat the back of the batten and the marked wall area evenly with your chosen adhesive.
- Fix the batten: Press it against the wall, keeping the adhesive side in contact. Hold or prop it for a few minutes until the adhesive begins to set.
- Use the batten: Once fully cured, the batten can support plasterboard, shelves, radiators or cabinets, allowing you to screw or nail into it safely.
Fixing Common Household Objects to Walls
There are some very common objects that are fixed to walls and masonry surface in the home, here follows a quick run down on how these objects should be attached.
Fixing Pictures and Mirrors to Walls
This guide has mainly covered battens and brackets, but if you want to hang picture frames or hooks, our DIY Project on hanging pictures explains the process for brick and masonry walls.
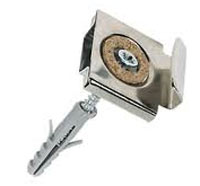
Secure mirror fixing on a wall
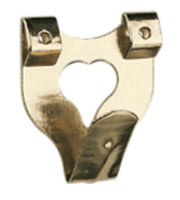
Picture hook installation
For heavier pictures or mirrors, follow the same steps. Our Putting up Mirrors guide covers safely securing larger or heavier items to masonry walls.
Installing a Curtain Pole
Learn how to securely fit curtain poles and rods with our detailed DIY Tutorial on installing curtain poles.
Installing Blinds
Need help fitting blinds? Check out our detailed DIY guides, starting with our main Blinds project page for step-by-step instructions and tips.
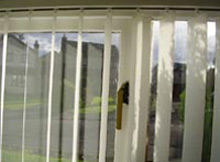
vertical blinds
Dry Lined Walls
Dry lined walls use battens to fix plasterboard to brick, concrete or other masonry surfaces. To learn more about achieving a professional finish, check out our guides on cutting plasterboard and attaching plasterboard to battens. These DIY projects cover:
- Dry lined walls
- Cutting plasterboard
- Fixing plasterboard to brick and walls
- Dry wall screws
- Stud walling
Putting Up a Shelf
Fixing shelves to a masonry wall follows the same process as our Attaching to Brick Walls tutorial. Use a spirit level between brackets to ensure your shelf is perfectly level.
If you want to make your own shelves, see our guide on fitting shelves into alcoves.
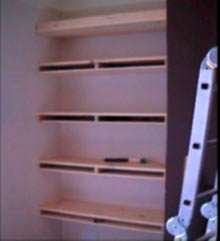
Fitting custom shelves into an alcove
For a modern look, install floating shelves using hidden brackets so the fixings are completely concealed.
Putting Up Decorative Mouldings
Decorative mouldings include skirting boards, picture rails, dado rails and coving. Learn more about the different types of mouldings in our Decorative Mouldings project or follow our step-by-step Coving Installation guide for expert tips.
Putting Up Door Trim
Installing door liners, frames and trim requires a different approach from standard masonry fixings. For step-by-step instructions, see our guides on Door Liners and Frames and Door Trim and Architrave.
This guide covers everything you need to know about fixing to masonry, including wall plugs and chemical anchor fixings for solid walls.
Although we show brick walls in our examples, the same techniques work for stone, block, concrete and other solid surfaces.
For extra help, visit our DIY Forum. Thousands of home improvers and tradespeople use the forum, so you can find answers to common questions or post your own after registering.