If you do or have done any carpentry and joinery in the past then you will know that one of the finishing stages is generally a good sand down to smooth any rough edges and provide a key or paint and the likes.
There are many different methods of sanding an object down, some of the most common are hand sanding or using a power tool such as an orbital sander or belt sander. With this in mind, in this guide we take a look at the belt sander and how to use one.
What is a Belt Sander?
A belt sander is a powerful tool designed to smooth and shape wood, metal, or other materials quickly and efficiently. It consists of a motorised mechanism that drives a continuous loop of sandpaper, or “belt“, along a flat plate at the base of the tool. The sandpaper belt rotates rapidly, allowing it to grind away imperfections, rough edges, or old finishes from the surface of the material.
One of the key features of a belt sander is its versatility. It can be used for various tasks, including sanding large, flat surfaces such as floors or tabletops, as well as intricate shaping or detail work on smaller pieces. The adjustable tension and speed settings on modern belt sanders make them suitable for a wide range of projects.
Due to the power of these tools, they do take some skill to use correctly, as if you’re not used to them, then you can easily cause a fair amount of damage to the surface you’re working on. Proper usage involves holding the sander firmly with both hands, keeping it level and moving it smoothly across the surface of the material, maintaining control at all times.
It’s essential to work methodically and avoid applying too much pressure, which can result in uneven sanding or damage to the material.
As well as sanding, some modern examples are supplied with additional tools that allow them to perform additional functions such as buffing, polishing and grinding. They are also available in 2 power types; corded mains and also cordless battery allowing them to be used pretty much anywhere.
With this in mind, adding a belt sander to your power tool arsenal is a real no-brainer!

Einhell 850 watt 75mm belt sander ideal for DIY use
Different Parts of a Belt Sander
So that you know exactly what we are talking about in the information below, it’s important to run through exactly what individual items make up a belt sander, these are as follows:
- Front handle: Enables full control over machine movement when running
- Rear handle: Enables user to hold machine steady when running
- Power switch: Turns machine on and off
- Dust exit: Dust generated by machine exits here
- Vacuum attachment: Allows attachment of a vacuum
- Rollers: Drives belt and allows it to rotate
- Belt tensioner: Keeps tension on belt, allowing rollers to drive it

The main parts of a belt sander
How to Prepare for Using a Belt Sander
Before you simply dive in and start sanding willy-nilly there are some preparation steps that you should always undertake beforehand. By undertaking these steps, you can be assured that any work will be carried out safely, preventing any damage to the item you’re working on, yourself, any surrounding objects and the tool itself:
- Gather all necessary equipment and materials, including the belt sander itself, sanding sheets, safety goggles, hearing protection, a dust mask to protect against airborne particles and a vacuum
- Clear the entire area you’re working in of movable objects (if any) and cover any other surfaces with dust sheets and the similar
- Open any windows or doors and allow as much ventilation as possible
- Always ensure your tool has a vacuum attachment and attach a vacuum to it. Although this doesn’t remove all the dust it does reduce it a fair amount
- An absolutely crucial step before any sanding takes place is to inspect the object you are going to be working on and use a punch knock any nail heads down below the surface or screwdriver for any screws. Any proud nails or screws will quickly destroy your sanding belt
- Make sure that you are using the correct grade of belt (degree of coarseness) for the item you’re sanding! If in doubt, always go finer than you think you need
- Before powering on the belt sander, familiarize yourself with its controls and features and where they are situated
- Check the tension and tracking of the sanding belt to ensure it’s properly aligned and secured
- Adjust the speed settings on the sander according to the type of material you’ll be sanding and the level of aggressiveness required for the job
- After you have completed any work, allow the belt to stop rotating completely before you put it down
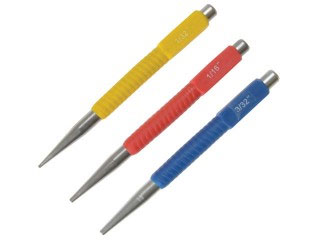
Nail punches for banging down nail heads
The Advantages and Disadvantages of a Belt Sander
As with all products and tools there will be advantages and disadvantages to owning and using them and the belt sander is certainly no different. With this in mind, here are their main pros and cons:
Advantages of a Belt Sander
- Efficiency – they are able to remove large quantities of material quickly, ideal for large areas such as floors, doors and the likes
- Consistent, even sanding – The constantly revolving belt ensure an even and continuous smoothing
- Quicker than manual sanding – Goes without saying
- Variety of surfaces – Can be used on numerous surface-types including metal, plastic etc.
- Adjustable settings – Many modern tools can be adjusted finely in terms of belt speed, angle etc, allowing total control over your work
As with all things there are some down-sides, the most common of these are as follows:
Disadvantages of a Belt Sander
- Aggressiveness – They are very aggressive tools in terms of the amount of material and damage they can cause if not used correctly
- Novices can struggle – Due to their speed of operation, new users can struggle to operate them safely
- Size/weight – They can be fairly large and heavy items to use for extended periods of time
- Dust and noise – They generate a huge amount of dust that covers absolutely everything and do tend also to be quite noisy!
How to Change a Sanding Belt
Eventually you will have to replace the sanding belt when it has worn down with a new one. This is not a hard process.
Sanding belts come in many sizes and many differing grades for use, please ensure you use the correct grade for the surface you are working on.
To change one, work through the following steps:
- Safety: Unplug the sander from the mains or remove the battery if battery-powered
- Release tension: Locate the tension lever (normally on the side) and release it, taking the tension off of the belt
- Remove belt: Slide the old belt off of the rollers and clean the base-plate and rollers if needed
- Choose and install belt: Select the correct grade belt for the job you are doing and align it with the rollers, ensuring the direction arrow is pointing the right way and slide it on, ensuring it’s aligned correctly
- Retention belt: With the belt in place, engage the tension lever and retention the belt
- Adjust tracking: Plugin in the tool or add the battery and run briefly monitoring the alignment of the belt. If tracking is off, adjust the tracking knob to reposition the belt and centre it
- Test: Run the sander at full speed for a few seconds and observe the belt. Make sure it’s sitting correctly on the rollers and fully aligned. Also listen out for any unusual noises of vibration
- Get working: If all is well and good you can then get cracking once more!
Sanding belts from 40 to 120 grit
Using a Belt Sander
Now that you are familiar with the parts of a belt sander and how to operate one safety and correctly, it’s now time to run through the steps on how to use one to actually sand a surface. Work through the below steps:
- Step 1 – Prepare Your Workspace: Ensure the area is well-ventilated and free of any clutter. Select a sturdy workbench or sawhorses to secure your workpiece while you work. Check the object you’re working over in detail, remove proud screw heads and knock nails below surface. See section above for full details
- Step 2 – Gather Safety Gear: Wear safety goggles, ear protection, and a good quality FFP3 dust mask at all times. Use gloves to protect your hands from potential abrasions if the machine slips during use.
- Step 3 – Choose the Right Belt: Select the appropriate grit-grade belt for your project (coarse for heavy material removal, fine for finishing). Install the sandpaper belt according to the manufacturer’s instructions and the steps outlined above.
- Step 4 – Check the Belt Sander: Before any work takes place, fully inspect the sander for any damage or loose parts. Also ensure the belt is properly tensioned and aligned and is in good condition with no damage.
- Step 5 – Position the Workpiece: Secure the workpiece to prevent it from moving during sanding, this is essential to prevent any damage to you or the working object. Ensure the surface is clean and free of debris.
- Step 6 – Start the Sander: Plug in the sander or fix the batter in place and hold it firmly with both hands. Also, connect your vacuum to your sander and turn it on. Turn on the sander and let it reach full speed before lowering it down to make contact with the workpiece.
- Step 7 – Begin Sanding: Lower the sander onto the workpiece gently and evenly so it touches the surface flat and level. Move the sander in a straight line, with the grain of the wood, to avoid scratches and gouges. Keep the sander moving continuously to prevent overheating or uneven sanding.
- Step 8 – Maintain Proper Pressure: Apply light, even pressure; let the weight of the sander do the work. Avoid pressing down too hard, as this can damage the workpiece and wear out the sandpaper quickly.
- Step 9 – Monitor the Sanding Process: Regularly check your progress to ensure even sanding and that you’re not taking off too much material. Adjust your technique if you notice any uneven areas or gouges.
- Step 10 – Handle Corners and Edges with Care: Approach corners and edges carefully to avoid rounding them off unintentionally. Use a lighter touch and slower speed when working on these areas and check progress every few seconds.
- Step 11 – Clean the Sandpaper Belt: Periodically check the belt for clogging with dust or debris and clean it if there is any. Clean the belt with a sanding belt cleaner to maintain its efficiency.
- Step 12 – Finish the Job: Once the desired smoothness is achieved, turn off the sander and wait for it to come to a complete stop before resting it down. Unplug the sander or remove the battery, turn off the vacuum and clean up any remaining dust and debris from the workspace.
- Store the Sander Properly: Clean the sander thoroughly, removing any dust and debris and then pack it away ready for its next use.
By following these steps, you can effectively and safely use a belt sander, ensuring a smooth and undamaged finish on your projects and maximizing you sanders lifespan.
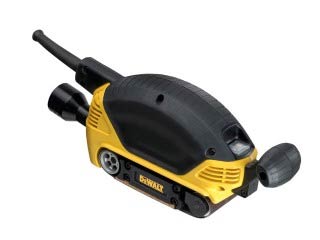
DeWalt 230 volt 64mm compact belt sander ideal for trade use
As we have said, depending what type of surface you are sanding or the kind of finish you are trying to achieve will decide which type of abrasive grade sanding belt you use. See our project on sanding a timber floor for a description of the different grades of sanding belt and paper.
You will also get more information from our project on hiring floor sanders.
Stay Safe When Using a Belt Sander
Always disengage the continuous use lock button before you stop sanding. Forgetting to do this can result in a dangerous tool moving uncontrollably.
Since the sander doesn’t stop immediately when switched off, take precautions. Wear fitted clothing to avoid getting anything caught in the sander, and tie up long hair to prevent accidents.
As always with power tools that create debris and dust DIY Doctor recommend the use of gloves, dust masks and eye protection at all times and due to the levels of dust produced, this is no exception!
By following closely all of the steps we have laid out above you can be sure that you will successfully complete your sanding job to a professional standard!