In modern homes, floors typically feature sheet timber like plywood or OSB over floor joists. However, older homes often have floors made of boards laid side by side.
Laying floorboards can be challenging as rooms are rarely perfectly square. Below, find out all you need to know about the correct way to lay floorboards.
What’s the Correct Way to Lay Floor Boards?
The best method for laying floorboards is to lay the first board at the centre of the doorway, ensuring it’s square to the door so it looks visually correct. Also, consider the orientation of the boards for the best room effect: lengthwise for most rooms, vertically for short rooms, and horizontally for narrow rooms.
Once the first board has been laid, measure the room width on both sides to confirm squareness. Then, calculate the number of boards needed and adjust the first board accordingly for any uniform cuts around the edges.
Check the condition of floor joists before installation. If they sag, learn how to fix them in our floor joist leveling guide.
If floor joists are absent, follow our guide on laying a hollow floor.
Types of Floorboards
Traditionally, floating timber floors used floorboards, flat timber lengths laid perpendicular to the floor joists they sit on. They come in various lengths and widths, typically 90 to 300mm.
Options include flat-edge and tongue-and-groove boards. Tongue-and-groove boards interlock for a solid structure and prevent draughts but are challenging to remove if needed. Flat-edge boards work well with insulation to reduce draughts and are easy to lift if needed.
Today, a more popular choice than floor boards is tongue-and-groove chipboard flooring, offering quick, sturdy installation and when both glued and screwed using a quality epoxy wood glue, these boards ensure a silent, non-creeky floor.
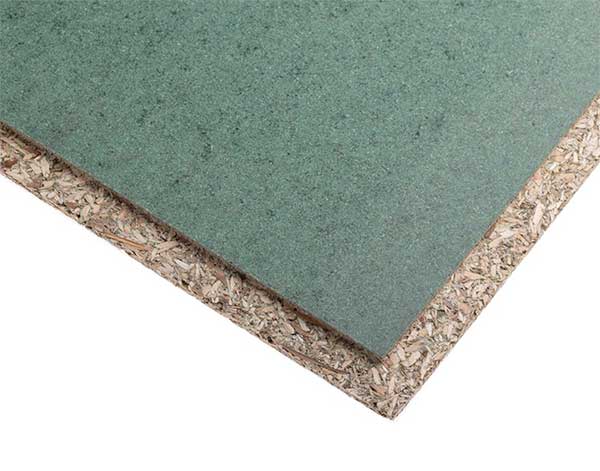
Chipboard tongue and groove floor board
Nails vs. Screws for Floor Boards
Traditionally, floor boards were nailed down. However, for easier access to pipes and cables, screws are recommended.
Screws offer a more secure hold, preventing boards from loosening over time and causing noise when walked on. For an even more secure fix, applying epoxy wood glue to tongue and groove joints ensures a solid, noise-free floor.

Quality epoxy wood glue
Guide to Installing Floor Boards
Regardless of how square a room looks, you can pretty much guarantee that it isn’t, this is a fact! This means you’ll likely need to cut floor boards to fit squarely.
In the diagram below, labeled “Floor plan showing squarely laid floor boards and cuts”, the dotted lines represent a perfectly square room. Numbers 1 and 2 indicate the room’s walls, while letters A, B, C, etc. represent floor boards. Cuts, such as D and G, may be necessary to fit the boards properly.
Step 1: Prepare Floor Joists
Prior to laying floor boards, ensure your floor joists are properly sized to bear the anticipated weight and span.
Support joists at each end using bricks, blocks, or joist hangers. For longer spans, consider additional support such as a dwarf wall. Refer to our detailed guide on laying floor joists for comprehensive instructions.
Step 2: Layout Floor Boards
To ensure uniform cuts and avoid thin boards at room ends, accurately plan the placement of floor boards.
Start by marking a perpendicular line across the joists and doorway centre using a carpenter’s square or the 3-4-5 method (outlined in our carpentry tips). Use a chalk line for accuracy.
Measure the room width and board width. Divide room width by board width to determine board quantity and cut size. Halve the cut size and adjust the line accordingly for symmetrical cuts.
Begin with a board flush to the line, marking joists on the opposite side. Shift the board, mark the joists, and repeat until all positions are marked.
Insert additional support joists, or "trimming joists" as they’re known, near obstacles like fireplaces or chimneys to ensure proper board end support.
Step 3: Lay Floor Boards
With the positions marked, begin laying the floor boards.
Ensure the boards run perpendicular to the joists.
Start with board A, aligning it with the marked line over the joists (X). Secure it firmly in place. Cut subsequent boards to fit the room width.
Continue laying boards B and C, ensuring proper engagement of tongues and grooves (if there are any) before fixing them in place.
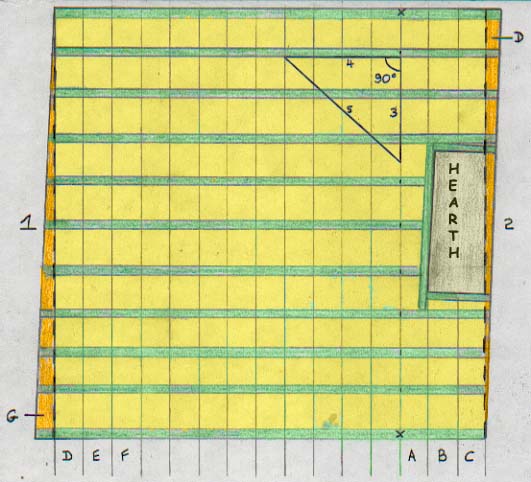
Floor plan showing squarely laid floor boards and cuts
Step 4: Cut Floor Boards to Fit Shapes
Before securing the final boards, make necessary cuts to ensure a snug fit and fix the final few boards all in one go.
Measure and mark the width and length of the cut area required and then mark both widths on the floor board and then also the cut length.
Place another board over the marked one and draw a cutting line from width to length marks.
Ensure cuts are made on the side opposite the tongue or groove.
Use a jigsaw, handsaw, or circular saw to make the cut.
Fit and fix all final boards, D, E, F and G and A, B, C and cut D together, ensuring all tongues and grooves are engaged.
For obstacles like hearths, use the same marking and cutting techniques.
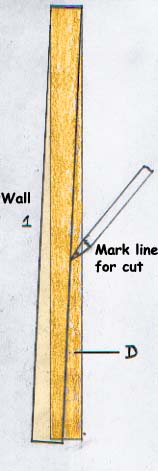
Marking floorboards for cutting to fill awkward gaps
Laying floor boards is a fairly straightforward job as long as it’s correctly planned. The key to success is ensuring they are fitted at 90° to the joists and the doorway. Get this right and you are pretty much guaranteed a great finish.