
Keeping your chimney breast in top condition is essential to avoid many issues, including water ingress and associated damp issues, so keeping your pointing in top condition is an absolute must.
In the information below we look at the process of pointing and repointing a chimney breast, read on to find out more.
Problems Arising From Cracked Chimney Breast Mortar
If you are suffering from cracked chimney breast mortar, this can cause significant issues in your home, impacting both safety and structural integrity, so it should never be left and should always be rectified.
Cracks of this nature often develop due to natural wear and tear, temperature fluctuations, or settling of the building.
Understanding the problems associated with cracked chimney breast mortar is essential and will give you a good idea of why it is necessary to get it sorted as soon as possible. The most common issues are as follows:
- Structural Damage: One of the primary concerns with cracked chimney breast mortar is the potential for structural damage. The mortar holds the bricks together, providing stability to the chimney structure. When the mortar cracks, it compromises the chimney’s integrity, increasing the risk of bricks loosening or even falling out. This can lead to a partial or complete collapse of the chimney breast, posing a serious hazard to your home and occupants.
- Water Infiltration: Cracks in the mortar can also allow water to seep in. This infiltration can cause a range of issues, including dampness, mold growth, and internal water damage. Over time, the moisture can weaken the mortar further, exacerbating the existing cracks and leading to more extensive repairs. Additionally, water damage can spread to adjoining walls and ceilings, causing more damage and costly repairs.
- Fire Hazard: A compromised chimney breast with cracked mortar can become a fire hazard. Gaps and cracks can allow heat and flames to escape into surrounding areas, increasing the risk of a house fire. Moreover, the accumulated debris and soot in the cracks can catch fire, creating an even more dangerous situation.
- Energy Efficiency Issues: Cracked chimney breast mortar can also impact your home’s energy efficiency. Gaps and cracks in the chimney can allow cold air to enter and warm air to escape, making it harder to maintain a consistent indoor temperature. This can lead to higher heating costs as your heating system works harder to compensate for the loss of warm air.
As you can see from the above, cracked chimney breast mortar can lead to some very serious issues, so it is essential that any such problems are dealt with quickly and correctly.
Is Pointing and Repointing Brickwork Easy?
As you can see from our pointing and repointing brickwork projects, the process is not at all complicated, however it can be a little tedious and lengthy. Using our pointing brickwork project, together with the instructions here, will give you full information on how to tackle this task and ensure you get great results.
The repointing process is pretty much the same, whatever the wall you are working on. As you can see from the image below, the particular wall, or stack we will be working on is built from very old, very soft bricks so a gentle approach is required using tools specifically designed for the job.
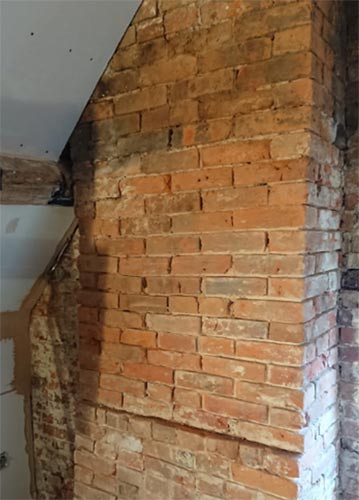
Chimney breast in need of pointing
What if You Find Cracks in Your Walls?
From time to time, in many properties, cutting out old mortar joints may reveal cracks, usually vertical, in the mortar joints. This is enough to make many people panic but in reality, with the number of different materials used to make a house and the different rates at which they all expand and contract, it would be a wonder if a few cracks didn’t appear!!
Worry not, although it may seem pretty serious the remedy is in fact very simple. The repair method is known as stitching and you can see exactly how it’s done by viewing our stitching walls project.
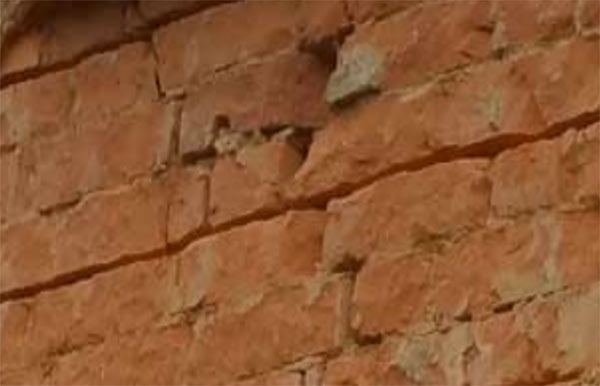
Sizeable cracks in wall that needs fixing
Tools Needed for Pointing Chimney Breasts
In order to successfully repoint a chimney breast, you will need the following tools and products:
- Hammer
- Bolster
- Cold chisel
- Plugging chisel
- Small angle grinder and stone cutting disc/mortar joint blade
- Stitching kit – if you need to stitch repair cracks
- Small stiff brush
- Vacuum cleaner
- Hydrated lime
- Sharp sand
- PPE gear (mask, gloves, goggle, old clothes etc.)
- Additives if required (frost proofer and the likes)
- Mixing bucket
- Shovel/scoop for measuring amounts and mixing
- Bucket
- Clean water
- Rose sprayer, paint brush or similar (for wetting down walls)
- Selection of trowel – Bucket trowel, pointing trowel etc.
- Short length of garden hose – for for finishing pointing
- Softish hand brush – For brushing down after pointing
How to Point and Repoint a Chimney Breast
Now that we have looked at the various issues caused by failed chimney breast pointing and also about cracks that you may find and how they can be easily repaired, it’s now time to go through the process of actually repointing any failed mortar joints.
Step 1 – Chop out old Mortar
The very first job to tackle is the removal of the old, existing mortar from the joints.
If your wall is outside, this task is made a lot easier by using a small angle grinder or disc cutter, together with a bespoke mortar joint blade, to cut out the joints.
Inside however, a disc cutter is far too dusty so it’s down to a good old hammer and chisel I’m afraid!
The chisel for this job is called a plugging chisel and is especially shaped to make the job a whole lot easier.
As you can see the in the image below, the plugging chisel is held with the long edge against the joint and as you tap the other end with a hammer, the mortar is tapped out.
The minimum depth that old mortar should be cut out to is 25mm. This is 25% of the depth of the complete joint and will not compromise the rest of the mortar bed while giving enough depth the allow the new mortar to be packed in tightly to form a solid new joint.
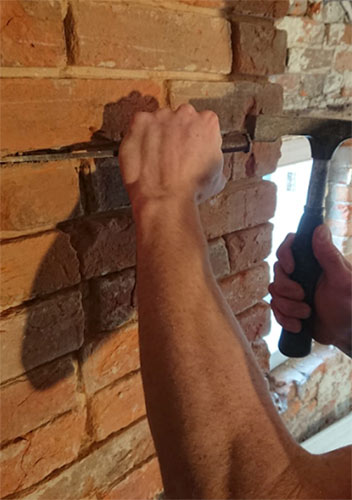
Remove interior mortar joints using a plugging chisel
Step 2 – Remove Dust and Debris
Having chopped out all of the old joints it is now very important that all of the old mortar AND mortar dust is removed. If it is not all brushed and/or sucked out, the new mortar will not “key” to the bricks properly as any dust will prevent a proper bond.
We like to vacuum the wall in stages so every 10mm of cutting out is followed by a vacuum. This ensures that we get all of the dust and that it’s not allowed to build up and spread while the other work is carried out.
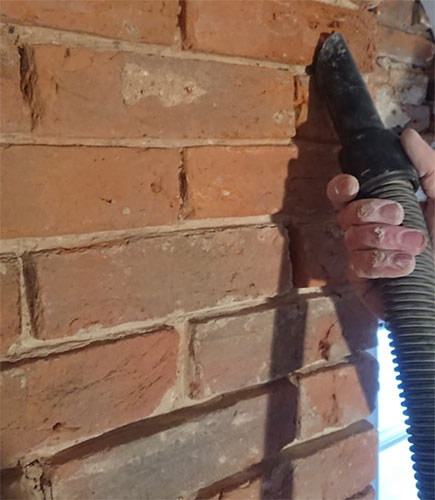
Thoroughly vacuum out all mortar joints
Step 3 – Make up Mortar Mix
The next step is to mix up your mortar and while we used lime mortar on this wall to allow a bit more breathability, your own walls may be pointed with sand and cement. You will need to check your existing mortar to confirm what has been used and you can then use the same again.
If you are using lime to repoint your wall, then a mix of 4 sharp sand to 1 hydrated lime is good. You can buy bags of hydrated lime from most builders merchants.
Please be very careful when working with lime as it can burn skin very easily. Even those of us who have been doing this for years have suffered from lime burns when we have not taken enough care with our PPE (Personal Protection Equipment) and please believe me lime burns are really not very pleasant. Do kit yourself out with a mask, gloves and goggles at the very least.
The sharp sand and lime is mixed in exactly the same way as normal sand and cement mortar. For full information on mortar mixes, see our how to mix mortar project.
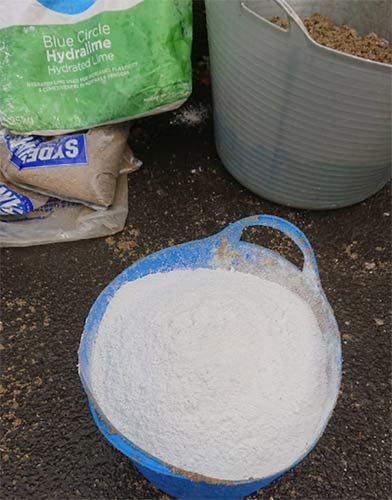
Hydrated lime mix created with lime and sharp sand
Step 4 – Wet Down Walls
When your mortar is ready it’s time to wet down the walls. They do not have to be saturated but damp is definitely the order of the day.
The reason for this is that the brickwork will usually be very dry. If you push wet mortar into dry joints, the dry bricks will suck out the moisture from the mortar very, very quickly.
If the moisture is gone, the sand and cement it is mixed with will not set properly and all of your work will be in vain.
By damping the joints down you will slow down the absorption rate from the mortar, allowing it to set properly.
Step 5 – Replace any Damaged Bricks
If, during the course of your cutting out, you come across any bricks which are very badly damaged e.g. cracked, faces blown off, crumbling etc., these will ideally need to be replaced and now is the ideal time.
For full information on this, check out our replacing a brick project for full information.
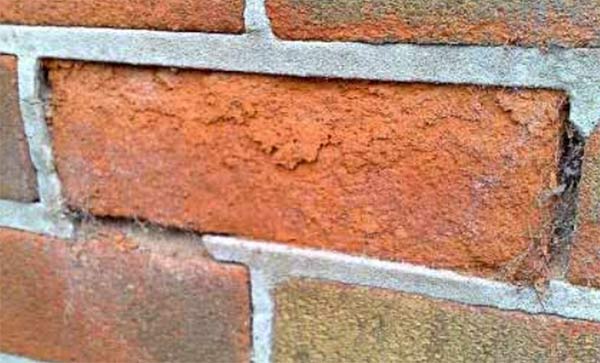
Badly damaged brick with face blown off
Step 6 – Add Mortar to Joints
With everything else now done and ready, it’s time to get all of those cleaned joints repointed and filled.
Start by pointing all the perpendicular (Perps) joints first. This makes it easier to do the horizontal (Bed) joints.
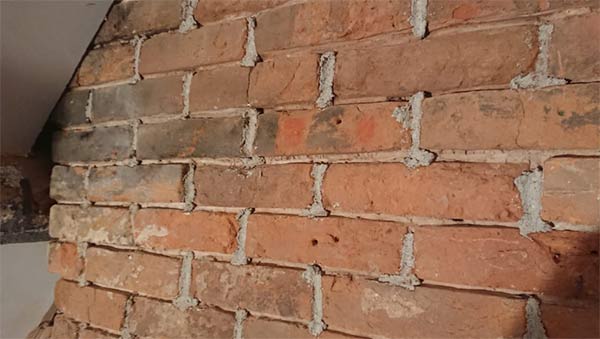
Fill all perpendicular joints first
Once all the Fill all perpendicular joints have been filled, you can then do all of the horizontal (bed) joints. When filling, ensure that you force as much mortar into the joint as possible to ensure that it is fully filled from back to front.
There are various methods used to achieve this, using a trowel is the most common.
Once the joint is filled it then needs to be finished. Our favourite method is to use a simple length of garden hose to create a great finish. This type of finish to a pointed wall is called a bucket handle joint as it resembles the shape of the old, galvanised bucket handles. Once the joint is filled, simply run it over the face to create the concave finish.
When all your joints are full, using the method you choose, you need to give your joints a brush down with a softish brush to finish the wall off and remove any remaining waste mortar.
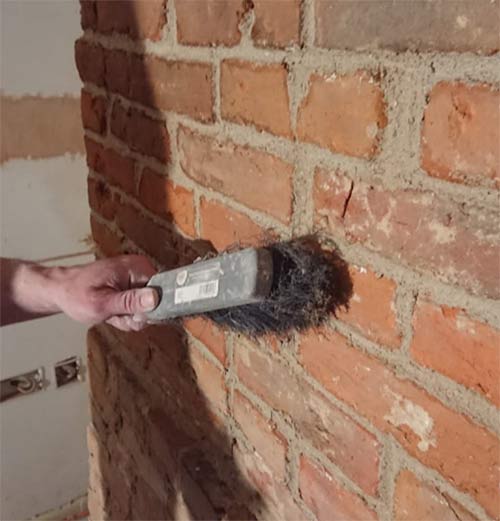
Brushing down joints to finish them off
Once finished, the wall should look similar to the below.
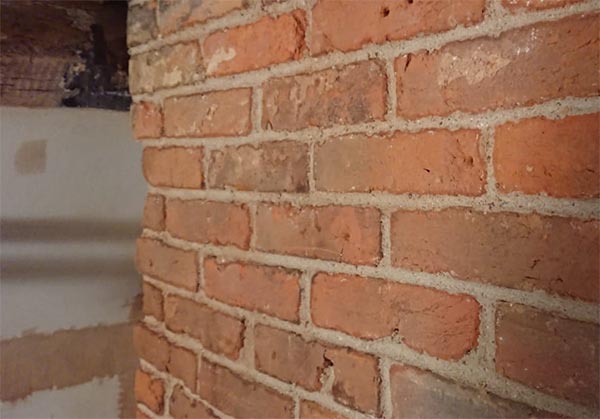
Finished, newly repointed chimney breast wall
If you find that the pointing in your chimney breast wall is slightly less than in good condition then you will need to get it repaired and replaced as soon as possible. By taking your time and working through the steps above, this is certainly something that you can do yourself to a high quality finish.

 DIY Doctor Ltd,
  0845 6342 179


