Before we get in to how to make the perfect mortar mix for your chosen DIY task, it is important to understand exactly what a mortar mix is and how it differs from other mixes such as concrete.
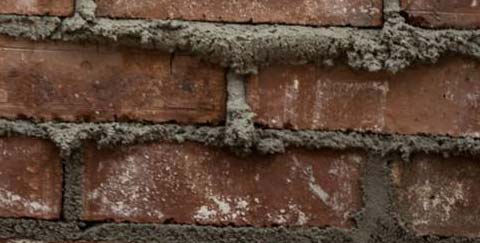
Brick wall freshly re-pointed with new mortar
What is Mortar?
Within trade and DIY circles, the terms cement, mortar and concrete can be used to mean the same thing e.g. a mixture of materials that form a compound that can be used to bond bricks or blocks together in order to form a structure, but in actuality they are three totally seperate things
- Mortar: This is primarily a mixture of sand and cement (can also include lime) that is used to bond brickwork and blockwork together to form walls and other structures. Water is also added to the mix to activate the cement and make the whole mixture harden
- Concrete: Although concrete uses similar base materials to mortar (cement, sand etc….) it also features gravel or other similar course material. It’s primary use is really to form a solid base on which to build or hold items such as fence posts, steels etc…. firmly in place. Water is also added to the mix (at the desired quantities) to activate the cement and start the curing process
- Cement: Cement is essentially the bonding element in any mix. When mixed with water it cures and hardens and bonds anyting else it’s mixed with together to form a solid mass. Quite often refered to as Portland cement due to it’s colour being likened to that of quarries found on the isle of Portland in the UK
As you can see from the above, they are all essentially different substances and mixes and each has a very specific use so should not be confused.
For example, if a mortar mix was used to form a concrete base or a concrete foundation it would almost certainly lack the necessary rigidity to support anything built on top of it, leading to failure and potential colapse over time.

Brand new concrete pad
Essentially, concrete is a much stronger mix than mortar, so you may be asking yourself; why don’t we just make mortar as strong as concrete? This is a good question indeed, but there are a few good reasons not to do this.
When a wall is built, you want the strongest part of it to be the bricks, blocks or other objects to be its strongest part as over time, movement will occur due to expansion and contraction, movement is soil etc….
As the mortar is weaker than the bricks or blocks, it breaks and crumbles leaving the bricks and blocks intact. The mortar can then be chipped out of the wall and easily repointed.
If the bricks ot blocks themselves failed, then the only choice that is left is to rebuild the entire wall. Depending on the type of wall we are dealing with, this could be at huge expense, whereas a simple repointing job is, in most cases, fairly inexpensive.
Potential Issues When Mixing Mortar
The first thing to understand when mixing mortar is that you have to be consistant and use the same quantities or materials each time! Every mix you make has to be identical to the last. If not, the different mixes will dry at different rates and most probably crack.
Additionally, if you combine mixes that are slightly different in terms of their material makeup you will end up with areas that are either stronger or weaker than other surrounding areas. Over time, weaker areas could fail and cracking and potentially collapse.
As we have established, the amounts of sand, cement, lime etc…. that you use have to be the same and this also goes for the water you use.
When water is added it starts the curing process of the cement. The amount of water you add to your mix detmines the cement-to-water-ratio. Too much water and your mix will be sloppy, weak, potentially suffer from shrinkage and also suffer a loss in compressive strength.
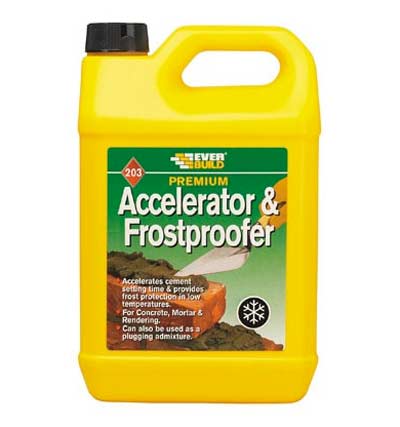
Accelerator and Frostproofer for mortar
One other thing to think about are admixtures. There is a huge range of different admixtures, each with a different purpose, these include; accelerators, retarders, plasticizers, bonding agents, corrosion inhibitors, damp/water proofers, colouring tints and dyes and many more.
If an incorrect admix is introduced this can have a catastrophic effect on a mortar mix, altering its chemical composition to the point that in most cases, either strength, bonding abilities or both are affected.
As you can see, all of the above have the potential to damage your mix and inveitably the strength of any joints in the object you are constructing, so please make sure any quantities or additions are correct.
Can the Weather Affect my Mortar Mix?
In answer to this question; yes it can!
When doing any mortar work, especially outside, it is also important to take note of the conditions you will be working in.
As I’m sure you can imagine, repointing a wall in the dead of winter when the temperature is -5°C is absolutely no good at all. In these conditions, the water in your mix is liable to freeze causing the mix as a whole to fail.
It is possible to add a frost proofing admix to the mix that will help to overcome these issues, but if the work isn’t absolutely necessary, then it’s best to wait for better conditions.
As a general rule, the bare minimum temperature of +5°C is what you should be working in.
At this point you may be thinking that the best conditions to work in would be a nice warm sunny day. In actuality these conditions can be almost as bad as freezing.
In these conditions, as you work, your mixed mortar will be warmed by the sun and so will all of your tools, spot board, bricks and blocks, tiles and also the surface you are applying the mortar to.
If any of these surfaces also happen to be very porous, then the second you apply the mortar to it, it will start sucking any moisture straight out of your mix.
Warm, dry conditions and highly porous surfaces cause “forced drying”. This is essentially starving the mix of water and forcing it to cure much faster than it should do. Ultimately, this will make it weak and brittle.
When it comes to the ideal conditions for working with mortar, these could be described as a “typical English summers day” e.g. slightly overcast and not too hot and even slightly damp but not raining.
In this situation, all surface will have a nice moist layer and ensure that non of the moisture in your mix is sucked out, thus allowing it to dry naturally.
Mortar needs to dry out naturally over the course of quite a few days and sometimes even weeks. Allowing it to do so will ensure that it reaches it full strength capabilities.
Note: If you have no choice but to work in warm and dry conditions, make sure you wet all your surfaces first and keep a rose sprayer handy just to keep things moist while you work.
The Importance of a Good Key When Applying Mortar
The term key is widely used in the building industry and in many of its individual trades. It is mainly used where one thing is to be stuck to another or something is applied to cover something else.
When referring to a “key” in these instances it means cleaning and treating the surface you will be applying the mortar to, to ensure that it sticks to it.
As an example, if you are pointing the mortar joints of a wall, you will want to clean out a suitable amount of old grout (at least 10mm) to give enough surface area of the existing old grout in the wall and also the faces of the bricks/blocks for the new mortar to stick to.
When it comes to fixing to a general surface such as laying a new brick or block on top of an existing one, any existing faces need to be cleanand in good condiion.
If a given surface is in poor condition and crumbling away, if you add your mortar to this then all you are essentially doing is fixing to a crumbling mess and the bond will fail in a very short time, so any and all surfaces need to be clean and solid.
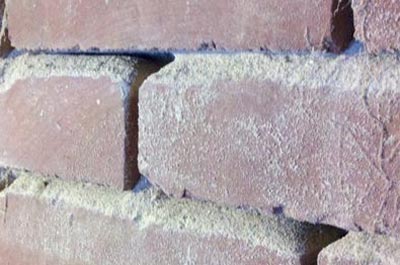
Old wall in need of pointing
Mixing the Aggregate and Making a Mortar Mix – Quick Guide
The process of making a mortar mix is, in essence, fairly simple, the steps are as follows:
- First, mix together aggregates e.g. soft sand or sharp sand etc…
- With aggregate mix created, now add cement and mix, folding over and over until uniform colour
- Add water to the mortar mix and cement and continue mixing
- Turn the mix over on itself continually to mix thourghly
- Add small amounts of water using a watering can to the mix to ensure the right consistancy
In practice it can be a bit more tricky, especially if you are new to it, but with a little time and patience there is no reason why you cannot mix mortar to a professional standard. For a full detailed run down on creating your mortar mix, see below.
Matching Mortar Colours
Before we start on how to make a mix, it’s important to mention about matching mortar colours, especially if you are working on an existing structure e.g. replacing a brick in an existing wall, if you can, you will want to try and match you new mortar to the existing mortar.
There is a variety of ways that this can be done, but in reality it’s down to trial en error in trying to match the sand you are using to the original sand used and then trying to find out the quantity of sand used.
It is also possible to use a dye but again, this is a trial and error process.
If you would like to find out more about matching mortar colours, see our project here.
How to Mix Mortar – Full Guide
Unfortunately there is no “one size fits all” approach to mixing mortar, it’s very much on a case-bycase basis.
As we have established, the quantities you use in your mix will determine how strong it is and therefore what it should be used for.
In order to help you with what quantities are neded for a specific job, see the table below. This table is only a guide and is prepared from the mixes we use ourselves. You may prefer to build retaining walls, for example, out of sharp sand and cement alone. We have also added lime to allow the walls to breathe a little.
| Application | Cement | Builders (soft) sand | Lime (if chosen) | Sharp sand |
| House walls – bricks | 1 | 5 | 2 | |
| House walls blocks | 1 | 5 | 1 | |
| Retaining walls brick | 1 | 3 | 2 | 1 |
| Retaining walls blocks | 1 | 3 | 1 | 1 |
| Coping stones and cills | 1 | 2 | ½ | 2 |
| Chimneys | 1 | 5 | 2 | |
| Haunching for chimneys | 1 | 1 | 4 | |
| Joints for paving | 1 | 3 | ||
| Bed for paving slabs | 1 | 6 | ||
| Pointing brickwork | 1 | 3 | 2 | |
| Floor screed | 1 | 4 | ||
| External render 1st coat | 2 | 3½ | 1 | 3½ |
| External render 2nd coat | 2 | 4½ | 2 | 4½ |
Using the table above, select your chosen job and follow the steps below:
- Select a clean, flat and even surface and lay some boards down or preferably get yourself a mortar mixing board. They’re not a huge amount of money and if you’re mixing a lot of mortar, it’s a good investment
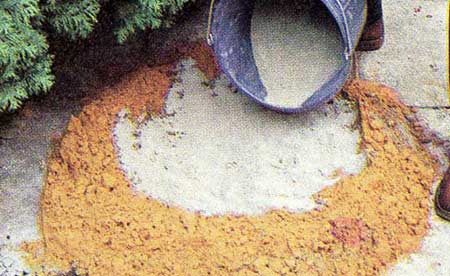
- Mix together your required aggregates e.g. soft sand, sharp sand, lime (if chosen). Put sand heaped on spot board, hollow the centre and add cement (or lime) as required. Mix them thoroughly until all the same colour by folding from the outside in with your shovel
- Once mixed, heap and hollow again and then add the required amount of cement to the centre and then mix by folding and shoveling in to the centre
- When fully mixed and a uniform colour, hollow the centre once again and tip in some water. Start with a small amount and mix by folding from the outside in, adding water in small amounts and mixing as you go
- Mix it thoroughly by folding and turning the mix over on to itself until it is a uniform consistancy
- Add a little water where needed using a watering can as this allows you add in small quantities and continue to mix until the correct consistancy is reached, slightly damp but will easily support itself
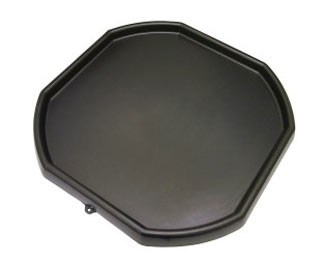
Spot board for mixing mortar
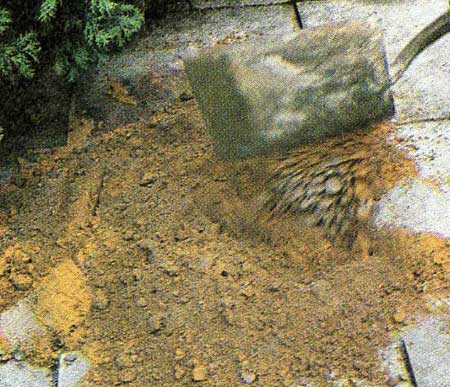
Adding cement or lime to form the dry mortar mix/p>
Mixing mortar and sand together
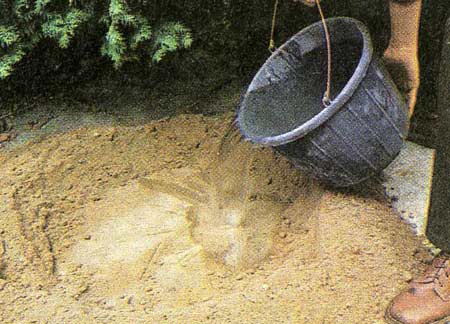
Add water to the sand and mortar mix and continue to mix
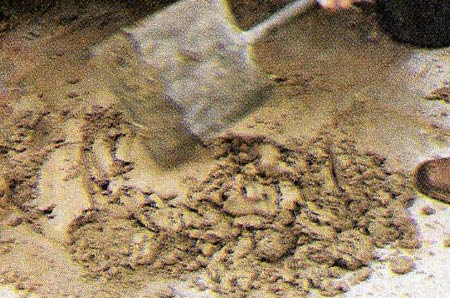
Turn the sand and mortar mix over on itself to mix thourghly

Add small amounts of water using a watering can to the mix to ensure the right consistancy
Tip: Adding water in small amounts allows you to control the mix and not allow it to get wet and sloppy. It is much better to have too little and add some more, than to have too much.
After reading through all of the above information, we hope we have now given you the confidence to go ahead and start mixing mortar and fixing those loose bricks and repointing those failed mortar joints.