
If you have a damaged brick in the wall of your home or another structure then it is highly important that you get it removed and replaced with a new one before it causes and damp or structural issues.
Using this guide you will learn exactly how to replace a damaged brick in a wall, read on to find out how.
Why Replace a Brick?
Bricks fail for several reasons, and replacing damaged ones early prevents damp, structural issues and costly repairs.
Common causes include poor workmanship, using the wrong bricks or mortar, or weak joints that let moisture in and cause damage.
Bricks can also crack, crumble, or lose their face due to age or freeze-thaw action, this surface break is known as spalling.
You may also need to replace bricks where old pipes, vents or fittings have been removed, leaving gaps that must be filled.
Stained or heavily marked bricks (from lichen, tar, roof sealants, etc.) may be swapped to improve appearance.
Installing an air brick or accessing a cavity for inspection or cleaning can also require removing and replacing bricks.
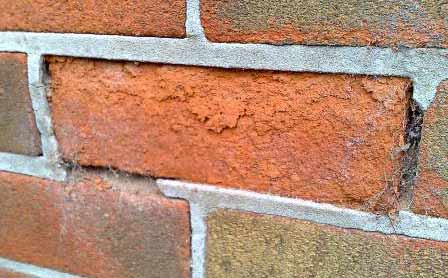
Brick face damaged by frost blowing the face of the brick off causing spalling – Image courtesy of Meyrick Builders
Why Replace a Broken Brick?
A cracked or damaged brick may seem minor, but it can let water into the wall cavity. Once moisture gets in, it can lead to internal damp, unsightly stains and even black mould, which can affect both your home and your health.
Because of this, any damaged brick in an exterior, weather-facing wall should be replaced quickly to prevent further problems and keep the structure sound.
If you notice cracks across several bricks, it could point to a deeper issue, such as movement in the foundations. In this case, speak to a qualified builder or surveyor before carrying out repairs.
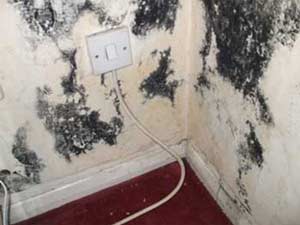
Damp damage to interior wall causing black mould due to broken and damaged bricks
Finding the Correct Size and Type of Replacement Brick
To get a clean, professional repair, your replacement brick should match the rest of the wall in both size and appearance—especially if it’s on a visible part of your home. A mismatched brick may not bother you now, but it could affect the look and value of the property later.
For newer homes (built within the last 10–15 years), matching bricks are usually easy to source from local builders’ merchants. Older properties can be trickier, as bricks may no longer be manufactured.
For period or unusual bricks, try local reclamation yards, specialist brick suppliers or browse the Brick Development Association to find manufacturers and reuse options. You can also ask neighbours or builders working nearby if they have spare bricks.
Remember: modern UK bricks use metric sizes, while older ones are often imperial, so always check dimensions before buying. For rare bricks, specialist companies can help identify and supply the closest match.
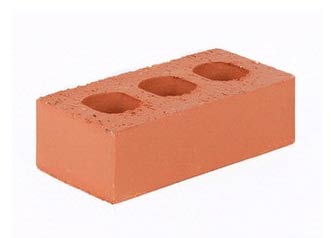
Class B clay engineering brick
How to Match Mortar Colours
To get a neat and professional finish when replacing a brick, you must match both the brick and the mortar. If the mortar colour is wrong, the repair will be obvious and can spoil the look of the whole wall.
Mortar colour comes from the sand and cement mix. Different sands and cement shades produce different tones, so experiment with small test mixes until you find the closest match. You can also follow guidance in our mortar-matching guide.
Getting a perfect match is hard, especially on older walls where weathering has changed the colour over time. To help blend the new mortar with the old, tint and dye products are available, and they can make a big difference to the final finish.
One option used with good results is Bebbington Brick Weather Tint, designed to age and colour-match bricks and mortar. See our product review for more details.
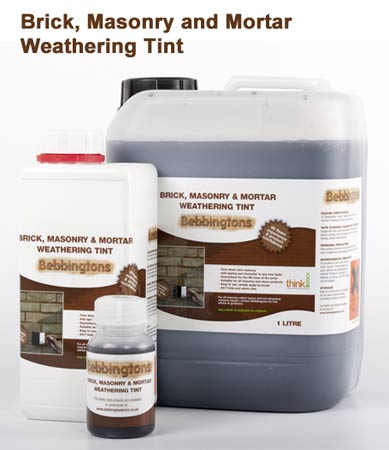
Bebbington Brick Weather Tint and Colour Match
Tips on Removing a Brick
Before you start, it’s important to understand the risks when removing bricks from a wall. The most critical rule: never remove more than two bricks at a time, as this can compromise the wall’s structural integrity. If you have multiple bricks to replace, do two at a time and allow the mortar to cure for at least a week before continuing.
Ensure any old mortar is completely removed from the replacement brick. Leftover mortar can prevent proper fitting and affect curing.
If your wall uses lime mortar (soft mortar), be extra careful. Hammering or drilling can crack surrounding joints. Take frequent breaks and inspect nearby mortar for damage.
For minimal impact, use an angle grinder to cut away the mortar or brick gradually. A masonry saw or hacksaw blade can also cut along the mortar line, though this is slower. If you’re unsure, it’s safer to hire a professional builder.
Tools and Products Needed for Replacing a Brick
When removing and replacing a brick in a wall you will need to use the following tools and materials:
- SDS drill – preferably, but if you don’t have one a standard power drill will do the trick
- Selection of drill bits – roughly 6 – 9 or 10mm or so
- Bolster chisel
- New brick of the correct size and type
- Cold chisel
- Plugging chisel
- Brick laying trowel
- Pointing trowel
- Pointing tool or short length of hose
- Bucket or wheelbarrow to mix mortar in
- Bucket for preparing the brick
- Sand – ensure it’s the right colour
- Cement
- Mortar dye – if you can’t get the right coloured sand
- Ladder or better still work platform
- Safety helmet
- Gloves
- Eye protection
- Old clothes
How to Remove and Replace a Damaged Brick
With your replacement brick and matching mortar ready, you can begin the process of removing and replacing the damaged brick.
Tip: If the brick is only stained, consider carefully removing it in one piece and rotating it so the clean inner face is visible. This can save time and preserve the wall’s appearance, though it requires precision and patience.
Step 1 – Prepare the Replacement Brick
Start by filling a bucket halfway with water and fully submerging your replacement brick. This helps prevent the surrounding bricks from drawing moisture too quickly from the mortar, ensuring a stronger bond and keeping the brick secure.
While often optional, soaking the brick is a good precaution, especially for older or very dry walls.
Step 2 – Drill Out the Old Mortar
Before you start, put on safety goggles, this is essential. Wear gloves and old clothes too, as drilling or chiselling bricks can send shards flying.
Use a powerful drill (preferably SDS, around 800W) with an 8mm bit. For smaller drills, a 6–7mm bit works better. Carefully drill out the mortar around the brick, spacing holes close together to reduce hammering later.
Take care not to drill too close to surrounding bricks, as the bit can slip and cause damage. While an angle grinder can remove mortar faster, it’s risky for beginners and can easily damage nearby bricks if not handled correctly.
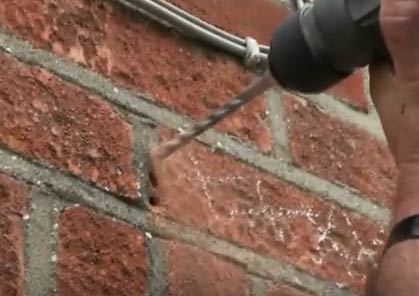
Drilling out old mortar to remove brick
Step 3 – Removing the Old Brick in One Piece
To remove a brick intact, wear safety goggles and use a hammer and bolster (2–3 inches) or a cold chisel. Start by chipping away the mortar on the sides, then the bottom and finally the top.
For tight spots, switch to a plugging chisel. Once the mortar is cleared, wiggle the brick side-to-side while pulling it forward until it comes free. A bolster can also help lever it out gently.
If you plan to reuse the brick, clean off all old mortar by tapping with the hammer and bolster. Learn more about cleaning bricks here.
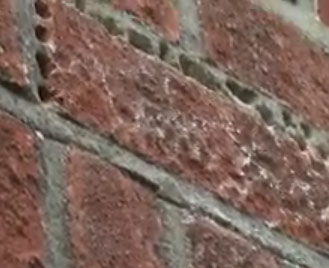
Old mortar drilled out ready for brick to be removed
Step 4 – Removing a Brick by Breaking It Up
If the brick is too damaged or won’t be reused, the easiest method is to drill it full of holes, break it into pieces and remove it with a hammer and bolster.
Start by drilling as many holes as possible in the brick itself, not just the surrounding mortar. This helps the brick break apart more easily.
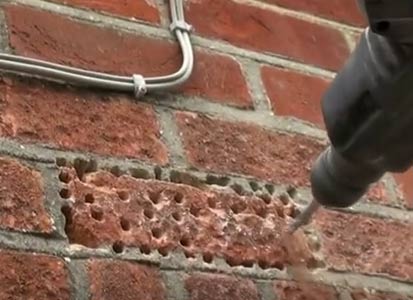
Brick drilled full of holes, ready to be broken up with a bolster
Hold the bolster at a 35–40° angle and hammer along the drilled holes. Work in layers, breaking off small sections at a time. Take care not to damage surrounding bricks or mortar.
Sweep debris to the outside to prevent it from falling into the cavity. Work slowly and methodically to avoid accidents.
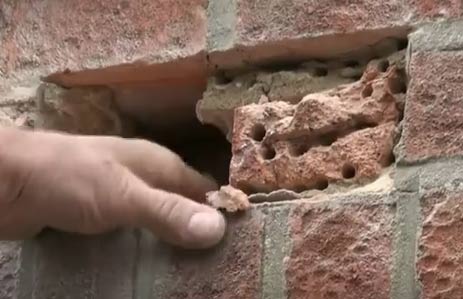
Brick in wall broken up using a hammer and bolster
After removing all pieces, chip away any remaining mortar inside the hole and use a small brush to sweep away dust and debris, leaving the cavity clean and ready for the new brick.
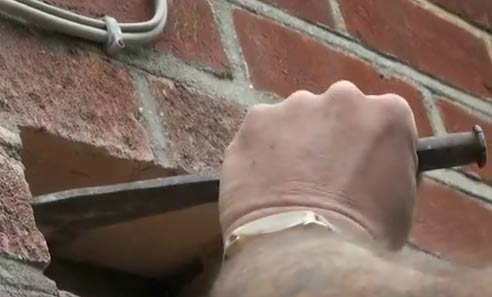
Removing remaining mortar from inside hole
Step 5 – Lay the Mortar Bed
Start by wetting all brick surfaces inside the hole using a rose sprayer or paintbrush. This prevents the surrounding bricks from drawing moisture out of the mortar too quickly, which can cause cracking.
Mix your mortar to a 1:5:2 ratio (1 cement : 5 soft sand : 2 lime). If not using lime, a simple 1:5 cement-to-sand mix works. Add dye if needed, measuring carefully for consistent colour. For guidance, see our mortar mixing project here.
Using a pointing trowel, apply a generous mortar bed to the base of the hole, fully covering the bottom brick.
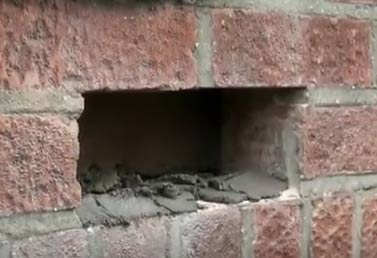
Mortar applied to the base of the hole
Next, coat the sides of the hole with mortar, ensuring the brick surfaces on either side are fully covered to create a strong, secure bed for the replacement brick.
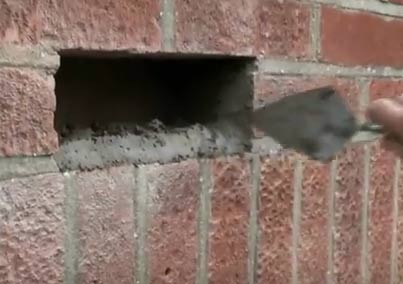
Mortar applied to sides of hole
Step 6 – Apply Mortar and Insert the Replacement Brick
Apply a generous layer of mortar to the top and sides of the replacement brick, ensuring full coverage.
Gently place the brick into the hole, wiggling it slightly to fit. Avoid forcing it, as this can disturb the mortar bed.
Once positioned, make sure the brick is level and flush with the surrounding wall. Use a spirit level or a straight piece of wood across the other bricks to check alignment.
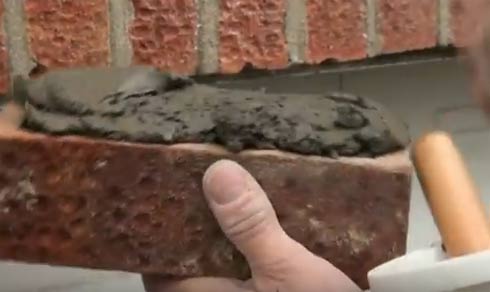
Mortar applied to top of replacement brick ready for inserting into hole
Step 7 – Fill Gaps and Finish the Joints
Fill all gaps around the replacement brick with mortar, pressing firmly but carefully so it doesn’t fall into the cavity. Use the pointed end or side of a pointing trowel to push the mortar into every gap until full.
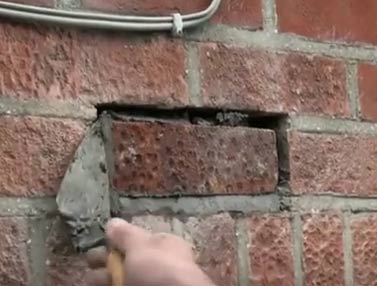
Push mortar into gaps around the brick using a pointing trowel
Once the gaps are filled, smooth the joints with a pointing tool, trowel or a short hose section to match the surrounding brickwork. Ensure the joints are uniform and neat. Well done, you’ve replaced the brick!
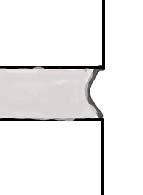
Bucket handle pointing is a common style with a concave finish between bricks
This technique is similar to standard brick repointing. For more tips, see our guide on repointing brickwork.
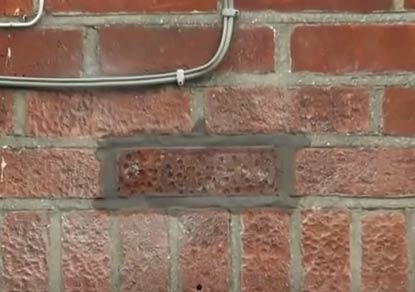
New brick in position in wall
Replacing a damaged, stained, or marked brick is a straightforward DIY task. With care and attention, you can restore the wall so it looks neat and uniform with the surrounding bricks.

 DIY Doctor Ltd,
  0845 6342 179


