We wonder how many of you have clicked into this project to find an easy way of how to clean mortar from bricks and avoid having to do this awful job?
Unfortunately we have to say now that sorry, there just isn’t one! Unless, like us, you get someone else to do it!
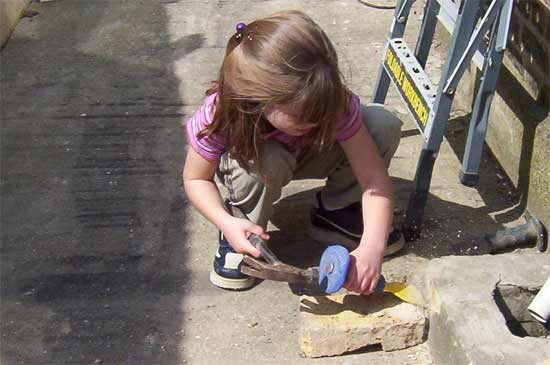
Cleaning mortar with a bolster and hammer
In this project we look at the different ways of cleaning mortar from bricks and blocks, read on to find out more.
Why Use Old, Dirty Bricks?
There are several reasons why old used bricks need to be cleaned of old mortar but in most cases it will probably be down to the construction of an extension that needs to match the property it’s being joined to in terms of the bricks used or just down to the fact that you like a particular style or colour of brick.
In the case of a new property, it may be stipulated by the local planning department that it needs to match the look of existing properties in the area and so bricks of the same style then need to be used.
When it comes to sourcing bricks these are known as reclaimed bricks. In most instances these bricks will come from demolition and restoration jobs from in and around the local area.
They can either be purchased from private sellers or there are specialist companies that supply bricks of this type on mass.
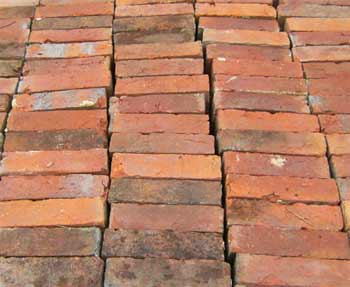
Selection of reclaimed bricks – Image courtesy of authentic-reclamation.co.uk
Most companies or this type either supply them cleaned or uncleaned. The cleaned bricks will have had a professional sprucing up, removing old mortar and stains whereas uncleaned bricks are bought as they come, normally covered in mortar and dirt meaning it’s up to you to clean them.
As you may imagine the cleaning process is very labour intensive so cleaned bricks are a fair bit more expensive than non-cleaned.
Also during the construction process, when mortar is applied to the bricks or blocks you are building with, it can easily get dropped, spilt or splashed over brick surfaces.
If this isn’t cleaned off immediately it then dries on the surface so then needs to be removed so it doesn’t look untidy and spoil the finish.
Why do You Need to Clean Bricks?
The main reason you need to clean bricks of any old mortar before using them is so that you can actually lay them properly and also, once they are in place, they actually look good visually.
If you try and lay a brick in place when it already has 10mm or so of mortar on the base you’re laying it on, by the time you’ve added another 10mm or so of fresh mortar, you’re mortar bed will then be much thicker than it may be in areas where you’ve used bricks with no old mortar.
This then creates a non-uniform thickness of mortar and when things aren’t uniform, this can create weak points where cracking and failure can occur.
Another issue caused by old mortar is that when mixed with new mortar it can suck the moisture out of the new mortar before its cured fully and again this will make it weak and prone to failure.
Methods for Removing Mortar From Bricks
If you want to remove mortar excess and spills from bricks or blocks then there are really only two ways to do this:
- Using a hammer and bolster and a wire brush
- Using a watered down solution of Muriatic acid
If you are lucky enough to have bricks that have a lime based mortar on them this job will be considerably easier as the lime mortar is a bit softer than sand and cement based mortar.
The easiest and most straight forward method is simply to knock the excess mortar off of your bricks using a hammer and bolster. In many cases a decent “whack” will dislodge any mortar in one piece, however stubborn chunks can be a nightmare to get off and involve a lot of chiselling and scrubbing.
Although the cheapest and easiest method, it is the most time consuming and certainly the hardest.
The alternate method if you don’t fancy chipping it off is to use Muriatic Acid or as it’s known in the trades, “brick acid”.
As I’m sure you can guess, acid is strong stuff and in most cases makes quite light work of any mortar, eating through it quite quickly, but at the end of the day it is acid and is highly dangerous, giving off toxic fumes and burning and melting anything it touches, so it needs to be treated with much caution.
Tools and Products Needed for Cleaning Mortar From Bricks
If you need to clean old mortar or other substances off of bricks or blocks then you will need the following tools and products:
- Suitable PPE gear – Googles, rubber gloves, old clothes, boots and respirator mask. If using muriatic acid, ensure your gear is resistant to this (muriatic acid is highly caustic)
- Plastic sheeting to lay down around your work area to protect it – Again, especially if you are using acid
- Hammer
- Bolster
- Cold Chisel
- Clear, solid floor area with solid structure e.g. kerb – the best surface to work on is the ground against a solid object
- Solid, sturdy bench – preferably Workmate or similar if you don’t have a solid floor to work on
- Stiff wire brush
- Stiff bristle brush
- Muriatic acid – if you are going to use this
- Plenty of clean water – Hose if you have it
- Bucket – if using acid, needs to be acid resistant
- Small acid resistant brush – If using acid
- Measuring jug
How to Clean Mortar From Bricks
After examining each method of cleaning old mortar from bricks or blocks it’s now time to run through the steps of how it’s actually done.
For the purposes of this guide we will take a look at both methods.
Using a Hammer, Bolster and Wire Brush for Cleaning Mortar From Bricks
This is pretty much as mundane as it sounds, so get ready for some hard work!
Step 1 – Locate Work Area
Firstly find yourself a nice stable place to work on. An ideal base is a Workmate or something similar as you can make use of the vice section to clamp your brick solid and you won’t have to stoop over as much.
If you don’t have a Workmate or solid floor a bench or old table should be fine. You can clamp the brick down with a suitable G-clamp or ratchet clamp. Don’t apply too much pressure as some older bricks can be quite brittle and they will split if too much pressure is applied.
Failing the availability of a Workmate or bench then you will have to locate a fixed or solid item to steady your brick against, as in the image above, a concrete step is ideal but it’s a good idea to put a solid piece of timber in between the brick and the step as you don’t want to damage the step.
Also, if you have your brick resting on a solid surface put something under it! An old piece of carpet, pieces of timber or similar is ideal. As the hammer and bolster strike the brick this can produce a shock wave and if there is nothing below the brick to absorb the impact then it will take the full force and likely split.
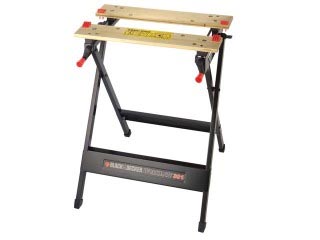
Black and Decker Workmate
Step 2 – Position Brick
With a suitable solid location or bench sorted, clamp your brick or butt it up to a solid surface with the mortar to be removed facing up towards you.
As commented, if you are hitting against an object, make sure there is something such as a thick sheet, pieces of old timber or ideally a piece of carpet beneath your brick or block.
The constant hammering will, over time, cause a lot of damage and you don’t want this to happen.
Step 3 – Position Bolster
Next, take your bolster and position it at the base of the mortar on top of the brick and hold it at around a 25 – 30° angle.
Using your hammer, hit the striking plate on the bolster until the mortar starts to loosen and come off. Continue moving the bolster along the face of the brick, removing large chunks of mortar.
Again, be careful about how hard you strike the brick and at what angle as you don’t want to take any chunks out or split it.
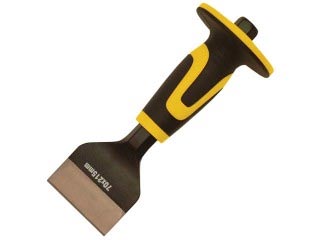
Brick bolster with hand protector on grip
Step 4 – Finish off With a Brush
Use the bolster to remove as much mortar as you possibly can. Once you have removed as much as you can without damaging the brick it’s time to break out the wire brush.
You can use this to scrub as much of the remainder of the mortar off of the brick. Again, be careful not to dwell too long in one place or press too hard as this can damage the brick.

Block style wire brush
This should remove a fair amount of the remainder except a few stubborn parts, and you may also be left with a white stain. The next step should help you remove these if you wish.
As always, make sure that you wear safety goggles, thick gloves and some old clothes. Not only is this a pretty messy job, mortar splinters and fragments can fly off in all directions so be aware of this.
Using a Muriatic Acid Solution to Clean Mortar From Bricks
Muriatic acid is a a type of hydrochloric acid and if you know your acids you will know that this is a potent one so be careful it burns!
Although it is possible to bypass the above step and just use acid to remove the mortar, we wouldn’t recommend it. The volumes and concentration you would need to remove a whole mortar bed section from a brick (and indeed numerous bricks) would cost a fortune and can potentially cause quite a bit of damage to the brick.
However, if this is your only option then follow the steps below.
Step 1 – Remove as Much Mortar as Possible and Lay Protection
As we have stated, to reduce costs and work load, it is well worth trying to remove any loose chunks of mortar if you can using your hammer and bolster first.
Once you have chiselled as much away as you can then use your wire brush to remove any further remaining mortar. Anything remaining after this can be dealt with by the acid.
Before you go any further, lay out plastic sheeting all over the area you are working in to protect your surroundings from any acid splashes.
Step 2 – Prepare Acid Solution
We cannot stress enough here that suitable safety gear must be worn – old clothes, eye protection, suitable grade respirator mask and acid-proof gloves are a must not an option!
Before you start, please make sure you read the manufacturer’s instructions on the Muriatic acid to find out what concentration should be used and also how to keep yourself safe.
In most cases it will state to use a 10% water to acid solution but check first. Once you know, mix up a batch to those specifications using clean water.
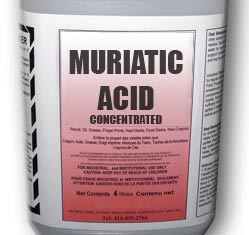
Muriatic acid concentrate
Step 3 – Wet Surface and Apply Acid
Before adding the solution to the brick, it’s essential that you wet the surface you’re working on down with some clean, fresh water. This can be from a bucket washed on with a brush or lightly from a hose pipe.
Once the surface is fully wetted down, using an acid-proof brush, brush the acid solution on to the mortar, leaving a uniform coating.
As the acid solution starts to react with the mortar it will fizz. This is a sign that it is dissolving the mortar off of the brick.
Leave it on for a few minutes until you can see it reacting and then rinse off, again using clean, fresh water. Be careful not to leave it on too long as it will start to dissolve the brick itself.
Step 4 – Chisel and Brush off Remains
If after your first wash you still have mortar remaining you can also try using scraper or wire brush. Your first application should have weakened the mortar quite a bit and the scrubbing action should help to shift and further remains.
Again be aware, the scrubbing action with flick the solution all over the place so ensure that you are fully protected.
On any real stubborn areas you can repeat the above process and even increase the acid concentration slightly in the solution. Don’t get too carried away. As said, this is potent stuff and will ultimately damage the brick if too much is used.
Now that you know how to clean mortar from bricks the only thing left to do is get on with it! As you clean your bricks stack them neatly somewhere where they won’t get knocked over or cause injury.