The cavity space between two walls in a home can, overtime, become littered with dust, debris and other rubbish that can fall down in to the gap from up in the loft space or any other entry points that may exist in the property.
During construction, if the builders are a little sloppy, it’s also possible for mortar, wall ties and even the odd trowel to fall into the cavity gap and if both wall skins are high enough to not be able to access the cavity base then it’s simply left there.
This can cause a range of issues down the line including damp and cold bridging top mention just a few.
If you are suffering from issues such as these then there is the possibility that you have a blocked cavity. In this project we look how you can check your cavity gap for debris and then how to clean it out.
Why do Cavity Spaces Exist?
the point of the cavity it self is to prevent the water and moisture that the outer wall skin is subjected to reaching the inner wall skin and then ultimately penetrating into the interior of the building.
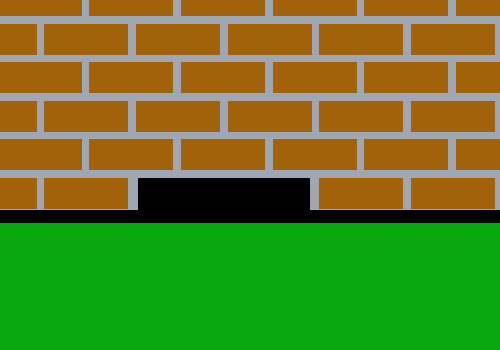
This setup works well when the two skins are separated but when dirt and debris build up in the cavity base, this essentially bridges the cavity gap and allows moisture to pass from the outer skin to the inner skin.
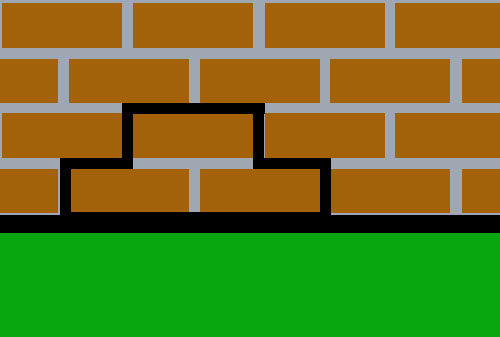
Bridged cavity gap
This isn’t the only issue either. If the debris builds up to the point that it rises above the damp proof course then the water and moisture that the dpc prevents from rising up the wall can jump above it and thus soak into the wall causing rising damp and a host of other damp-related issues.
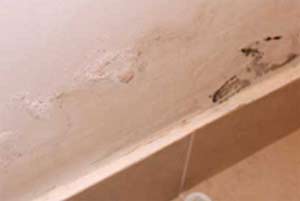
Rising damp issues can be caused by a bridged cavity gap
If you have ever lived in or spent any time in an older property that only features a single solid wall and no cavity or proper dpc you will be well aware of the damp issues associated with tis type of construction method.
So as you can see it is essential that your cavity space is kept clear and free from any debris or you could be opening the door to a range of potential issues and damp-related headaches.
Are my Damp Issues Caused by a Blocked Cavity?
This is a hard question to answer without actually physically checking the cavity first.
However, there are some telltale signs that could indicate that you have a blocked cavity:
- Wallpaper peeling or paint blistering around the base of the wall
- Walls at the base feel damp to the touch
- Dark patches along the bottom of affected walls
- Damp or rotting skirting boards
- Mould growth
- Damp seemingly moving up the wall
- Tide marks
If your walls are showing signs of any of the above issues the next task is to check your cavity area for any blockages.
One point to be aware of is that if the property has cavity insulation, either the pumped type or solid insulation then in some cases this can cause bridging issues allowing water and moisture to penetrate to the inside wall if it hasn’t been inserted correctly.
Diagnosing damp issues caused by cavity insulation is a specialist job and one reserved for the many companies out there that specialise in this area.
How to Check and Clear a Cavity Space
If you are experiencing damp issues in your home that appear to be originating at ground level there is the possibility that these issues are being caused by rubbish in your cavity void.
However as we have said, damp issues are unpredictable. What may seem like the obvious cause of a given issue in some instances turns out not to be the case and the actual cause is something seemingly totally unrelated.
To these ends check out all of our damp projects in our damp section also and see if any of these are related to your particular problem as well as checking and clearing your cavity if necessary. You may find that your particular damp problem is a combination of a few issues.
How to Check a Cavity Wall for Issues
There are several different methods of checking a cavity space for potential bridging that can cause damp and other related issues.
the first method is the more traditional one and involves physically removing a couple of bricks (no more than 2) from the exterior base of the troublesome wall around the location that you are seeing the damp issues and then looking inside to see if there is indeed rubbish and debris in there.
Removing bricks from a wall to check the cavity
This method is effective as you can check the cavity first hand but a fair amount of work is involved in actually removing the bricks to inspect.
However there is now a much easier but equally as effective method of checking a cavity space and that is to use a cavity inspection camera.
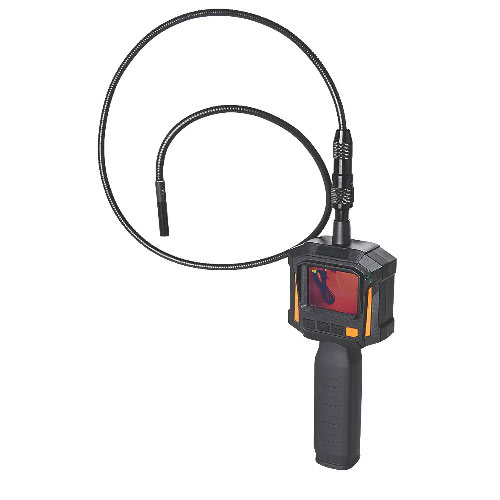
All-in-one cavity wall inspection camera
Cavity inspection cameras or endoscopes or borescopes as they are also known are available in a range of different types.
The all-in-one unit pictured above that features an in-built lcd screen with flexible camera range in price and quality, with the more expensive versions generally having better quality cameras and screens to the mid and lower end offerings not being quite as good, but still featuring at least a 1080p HD camera and screen, more than good enough to get a good view of the cavity.
With the advancements in mobile phone technology over the years it’s also now possible to get a camera attachment for your phone so that you can view images form the camera on your phone screen. Again these are available for very little money now and most feature at least a 1080p HD camera.
The majority of different makes and models of camera will also feature the ability to record the viewing results on to an SD card for viewing on a larger screen.
For the cost of a camera of this type nowadays it’s certainly worth just buying one, however if you don’t have the funds available then you can hire one for very little money from your local hire shop.
In order to use an inspection camera to check a cavity, work through the following steps:
- On the outside of the problem wall, locate the rough area where you are seeing issues on the inside walls surface
- Using a decent drill and a 10mm masonry drill bit, drill a hole through a mortar joint as close to the base of the wall as possible, preferably in the mortar joint on top of the first course of bricks or blocks
- Once the hole is drilled, turn on your camera, the recording feature and the high intensity light that surrounds the camera lens and poke it down through the hole
- Turn the camera to the left and run it down the cavity space looking for any obstructions and then pull it back and repeat for the right side of the cavity. If there are any obstructions they should be pretty obvious
- Once you are done inspecting that area, mix up some new mortar and fill the hole you created. Ensure it is packed fully with new mortar to prevent any water and moisture from gaining access to the cavity. See our project on mixing mortar here for full information
If you need to inspect any other areas then simply repeat the above steps.
How to Clear Debris From a Cavity
If after inspecting your cavity you have fond that it is indeed full of rubbish that could potentially be causing damp issues in your property then it will need to be cleared.
Clearing a cavity involves removing 2 or 3 bricks from the base of the problem wall and then physically scooping the rubbish out with your hand and/or a scraper of some kind. This may sound fairly daunting but it can certainly be done on a DIY basis.
To clean out a cavity, work through the following steps:
- Firstly, on the exterior of the wall, locate the approximate area where you have identified the debris in the cavity
- Next, mark the mortar joints along 2 bricks across the base and the brick above that spans the 2 bricks. Mark the mortar joint all around the perimeter of these 3 bricks with some chalk. Removing the third brick above will provide a little more space to work with, however do not remove any more than 3 bricks at a time!
- Using a suitable hammer drill and masonry drill bit (6 or 8mm drill bit should be fine) drill out all of the mortar from the perimeter of your 3 bricks. Ensure you are wearing full PPE gear including gloves, goggles, mask etc. Once all the mortar is drilled, use a bolster chisel to chisel the remainder away
- Once all the mortar is removed the brick should be loose, if not tap it gently with a hammer ensuring you don’t damage it and then remove it when it comes loose. Repeat for the other 2 bricks. For full help and guidance on removing and later replacing and bricks you remove see our project here
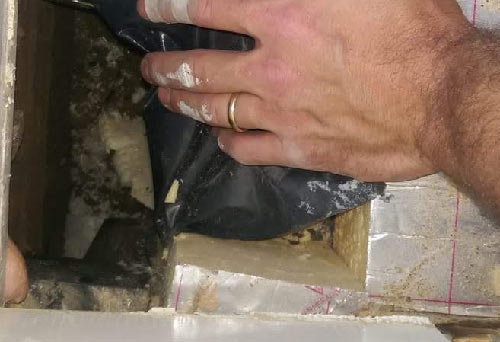
- Once you have access to the cavity pop your hand in and the start removing as much debris as possible from as far as you can reach in
- When you can’t physically reach any more you can use a scraper or other similar tools to pull debris towards you. Drain rods are a great tool to use as they are flexible and you can extend them. Use them in conjunction with a half round drop scraper and you can reach a long way along the cavity
- Once you have removed as much large waste as possible you can then use a decent industrial vacuum to remove any fine dust and smaller items. Again the flexible hose will reach a fair way into the cavity
- Once as clean as possible, use the inspection camera to check that all debris has been removed
- Once fully clear the last job is to then mix up some mortar (see the mixing mortar project linked to above for details) and then replace the bricks
- If you need to clear other areas of the cavity simply repeat the above steps, but wait for the mortar to fully cure at your first site before removing any further bricks

3 bricks marked using chalk or similar
Mortar removed from around bricks

Bricks removed from exterior wall to access cavity

Flexible drain rods and a drop scraper are great for getting in a cleaning a cavity

Bricks replaced back into wall to close up cavity gap
Once you have fully cleared your cavity area you will then need to repair any damage that has resulted from the bridging issues. In many cases this will involve drying out walls and plaster and if the damage is too extreme then removing all the existing plaster, drying the wall out and then replastering.
However this is quite a simplified version of the potential repairs needed. For full and in depth guidance on repairing the causes of damp read through our damp and condensation projects found here.
Accessing and clearing out a cavity void may seem like quite a complicated job, especially when you are having to remove bricks from the walls of your home but in actuality it is a fairly straightforward job if you take your time and work with care.