Grout for either wall or floor tile, dries very quickly and can be a very frustrating and time consuming job to remove if left long enough to go hard as it goes off like concrete.
A very popular question that we receive at DIY Doctor is: I have left the grout on my tiles for too long and now it’s hard. How can I remove it? Fortunately all is not lost and there are ways to clean dried grout off tiles, read on to find out how.
Methods for Cleaning Grout off Tiles
There are 3 main methods for removing grout from wall and floor tiles once its gone hard and that’s to:
- Dissolve the grout (without affecting the tile)
- Scrape, scratch and rub the grout off the tiles
- Replace the tile(s) if you can’t get the hardened grout off
You shouldn’t need the last alternative but you will probably have a long and frustrating job ahead of you scraping or trying to dissolve it. In practice, to remove the grout you will have to use a combination of both scraping, rubbing, and dissolving.
Grout takes time to become fully hardened, around 8 hours in a standard centrally heated home, so the quicker you can wipe it off when applying it the better and you can avoid this whole torrid affair.
The main ingredient of most grouts is Portland Cement so you can see why it goes off so hard.
One of the main points to follow is to avoid the temptation to chip it off quickly; this is likely to result in damage to the tile, either cracking or breaking it and certainly scratching the glaze which makes the tile water proof.
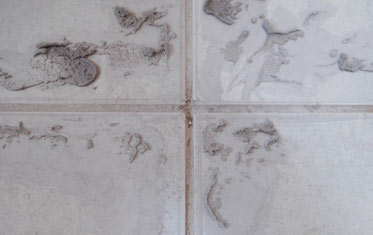
Grout on a ceramic tiles that has hardened
Removing Grout Haze From Tiles
Grout haze appears as a milky white dusting over the face of wall or floor tiles after they’ve been grouted and makes them appear dull and discoloured. To remove it, simply wipe it away using a clean damp sponge or cloth, rinsing between wipes.
After tiles have been grouted it can take anything form a few hours to a few days for the haze to appear.
The best way of grouting wall or floor tiles is to use a grouting sponge to push the grout into the joints, forcing them full. Whilst doing this the grout is wiped all over the face of the tiles and then any remaining grout is wiped away.
Grout haze is essentially a very thin film of grout that is left on the surface of the tiles after this final wipe over by the tiller.
To remove grout haze, simply keep wiping the tiles over using a damp sponge that’s been dipped in clean water and then rinse it between every wipe.
In pretty much all cases you should be able to simply wipe away grout haze, however if it has been sat for a length of time and become more engrained then you may need to use something a little more substantial such as a grout residue remover that can be bought from most DIY stores.
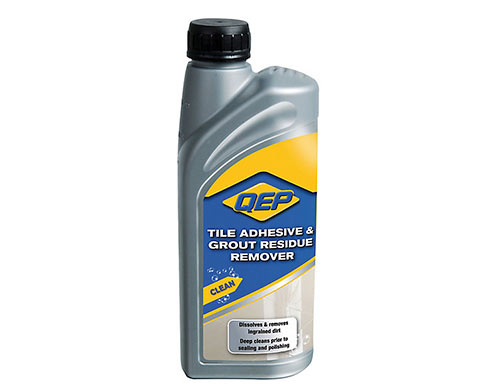
Tile adhesive and grout residue remover
Tools and Products for Removing Grout From Tiles
To remove dried grout you will need the following products and tools. The products you need will depend on what method you use:
- Bucket of clean water
- 3 or so smaller buckets or paint kettles (for sugar/vinegar solutions if needed)
- Green scouring pad
- Sponge
- Stainless steel wire wool
- Small piece of wood, ideally hardwood (for scraping grout)
- Decent plastic scraper (also for scraping grout)
- Sugar
- Vinegar
- Sulfamic acid
- Brick and patio cleaner
- Razor blade or metal scraper
- Multi-tool with grout removal blade (if removing tile)
- Grout rake (if removing tile)
- Decent rubber gloves (if using acid)
- Old clothes
- Goggles or face mask
What Not to Use For Cleaning Grout off Tiles
You should never use any metal scraping objects such as paint scrapers or putty knives as they can easily dig into the surface, damaging the tile and scratching the glaze which affects its water proofing abilities.
Although keeping the blade as flat as possible to the surface of the tile will minimise any chances of causing damage, it only takes one slip and the tile is ruined.
Instead of metal items, use plastic or wooden instead.
Do not use metal scrapers to remove dried grout from tiles
How to Clean Grout off Tiles
There are numerous different techniques for removing dried grout from tiles and depending on how hard it is will depend on which one works best.
Even if you opt to scrub and rub away the grout you will need to lubricate it using water or another solution. We prefer warm water as this will certainly not harm the tile while it will also start to loosen the grout.
However, this might not be enough to shift your grout so we have listed other options more suited to tougher grout. Before using these you should test them on a small area that is out of sight, to make sure you know they’re effect on the tiles.
Here are some of the more popular solutions that people use to assist the removal of hard grout:
Method 1 – Warm Water and Scrubbing
The most simple and straightforward method to clean grout off tiles, if it’s not been on there too long, is to soften it using warm water and then scrub it off using an abrasive object.
To do so, use warm water and wipe over the surface of the tiles with a sponge and then try rubbing gently over the grout using a scouring pad which should then begin to dissolve and rub it off at the same time. The water also acts as a lubricant, helping to prevent any scoring and scratching of the tiles surface.
We suggest that you start “soft” and work up to using tougher and more abrasive materials as you go if the grout doesn’t come away easily. Here are some of the most common tools that you might consider using:
- Sponge – Use a sponge on particularly delicate and expensive tiles as this is the least likely to cause any damage. A sponge is not very abrasive, therefore it will require more time and effort to remove the set grout from the tile surface
- Nylon Scouring Pad – This is more abrasive than a sponge and therefore will be able to work at the surface of the hardened grout more effectively, but this might also cause damage to delicate tiled surfaces, so you will need to work with care
- Stainless Wire Wool – This is an ideal abrasive for removing hard grout but it can also scratch tiled surfaces so needs to be used with care and time. Wire wool is also metal which can leave marks often called “metal marks” which wil then need to be removed. Always use stainless steel wool as water can cause normal wire wool to rust, causing marks and staining
- Wood – Wood is a perfect material to use as a scraper to remove hardened grout after it’s been moistened with warm water. Hardwood is even better to use at getting the most firmly stuck grout off
- Metal Scraping Tools – As stated, if needs must you can use tools such as these, but generally it is not advisable due to the damage that they are likely to do to the tiles surface
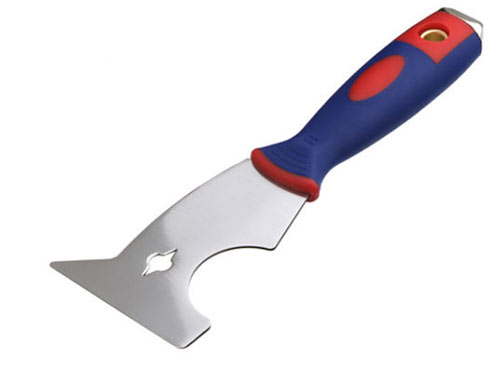
- Razor Blade or Razor Scraper – This is the preferred method of removing grout that has dried on the surface of ceramic and glass tiles if you have to scrape it. The window scraper shown in the image is ideal if the grout is not too heavy. It also allows you to stay at the desired shallow angle to avoid damaging the tile
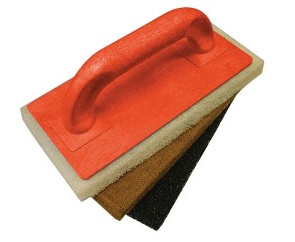
Faithfull scouring pad set with soft, medium and hard pads
Once the tile is clean and has no more hardened grout, wipe over with a damp cloth and leave to dry and then polish the tile with a dry cloth to finish the job.
There is no ideal method and tool for scraping away the hardened grout, so you will have to approach this particular task with an element of trial and error. When working on this basis, again, it is important to first test your method on an area, which is relatively inconspicuous before attacking the whole project. You need to be sure that you are not going to do any lasting damage.
Tip: To increase the effectiveness of the below techniques you can also combine them with some of the abrasive tools mentioned above, for example you can use a scourer or piece of wood along with the sugar or vinegar solution mentioned below.
Method 2 – Sugar Water Solution
It may sound strange but using a solution of white sugar dissolved in water can help to soften grout for removal. This is not to be confused with Sugar Soap, which is a different substance.
Add some normal white sugar to some warm water and stir it in at the ratio of approximately 1 part sugar to 10 parts water. You may need to experiment with the ratio to get one that is fully effective for the type of grout you’re working with.
Once you have mixed the solution up, sponge it into the grout you want to remove and then leave for an hour or so and then try rubbing and scraping it off, while applying more sugared water to keep it lubricated.
One of the big advantages with this approach is that it’s very kind to tiled surfaces and should cause no damage.
Method 3 – Vinegar Solution
Similar to the sugar solution above, you can also use vinegar. As vinegar is an acid it helps to break down the grout and soften it allowing you to easily wipe or scrape it away.
As vinegar is an acid, you need to be careful that you do not damage any tiled surfaces so test on an inconspicuous area first to see how the tile copes. Have plenty of clean water to hand to help dilute and wash it away if it gets where it shouldn’t.
Make a solution using 1 part vinegar to 4 parts water and then dip a sponge in the solution and then work it into the grout, being careful not to get it on any areas other than the hardened grout
Scrub or scrape it while applying small amounts of the vinegar solution until all the hardened grout has been removed and then wash the whole area down thoroughly with clean water as you don’t want to allow the vinegar to sit on the surface of the tile for long.
One thing to be aware of is that you should never use vinegar on granite, marble, travertine or similar tiles as it will certainly damage them!
Note: To increase the effectiveness of using warm water, sugar solution or vinegar you can also mix in Bicarbonate of Soda/Baking Soda, sea salt or the similar. This adds a little more abrasiveness that helps to wear down the grout a little quicker.
Method 4 – Using Acids
Aside form using weaker acids such as the vinegar above you can also use stronger acids such as Sulfamic acid to remove hardened tile grout. Using these substances is the same process as with the vinegar.
Wearing gloves, dip a sponge in the acid solution and then gently work it into the dried grout, being careful not to get it anywhere other than on the grout, If you do, wipe it away using clean water.
Work it into the dried grout and it should start softening it at which point you can then simply wipe it away. Clean everything down with clean water after you have finished.
Make sure that you test a small hidden area first to ensure you don’t ruin your tiles. Ensure there is plenty of ventilation and that you wear gloves and goggles at all times.
Watch out for splashes and flicks of acid – these need to be washed off whatever surface they land on immediately with the water you will have handy.
Brick and patio cleaners also fall under the “acid” banner as they are acid-based, more often than not Muriatic Acid and due to this you would use them in exactly the same way.
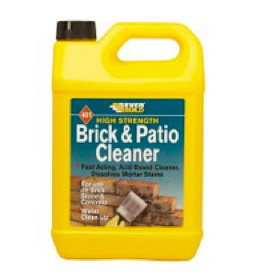
Everbuild brick and patio cleaner
Method 5 – Using a Scraper or Razor Blade
As we have stated above, you should never use any metallic scraping objects to get dried grout off tiles as the chances of damage to the glaze are extremely high.
However in some extreme circumstances the only way to remove fully dried grout from a tiled surface is to very slowly and gently pick it off using a razor blade scraper by holding it at a very acute angle as flat to the tiles surface as possible.
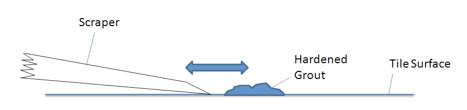
Scraping Hardened Grout from a Tile – keep the angle of the scraper as acute as possible
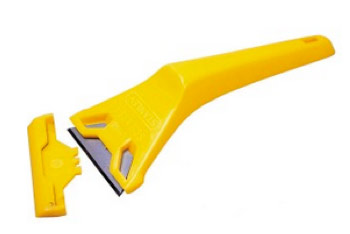
Window or glass scraper
As we have again stated above a better alternative to metal-based scrapers is to use a plastic scraper or a wooden stick (preferably hardwood). Although not quite as good, there’s much less risk of damage.
Even when scraping you should always douse the dried grout in warm water and also keep applying the water as you work to ensure everything is lubricated. This will reduce the risks of damage and also help the blade to slide much easier.
Replacing a Single Tile if you Can’t Clean the Grout off
In extreme situations, removing hardened grout will be an immense and very time consuming task so it may actually be easier to replace the tile rather than remove teh grout. Also, perhaps your efforts to remove the dried grout has damaged the tile to the point it needs replacing.
To replace the tile, you will first need to break the old one up in situ and then remove it from the wall or floor. Start by removing the surrounding grout with a grout rake so that all joints are clear then use a drill to drill out as much of the tile as possible and then use a cold chisel or similar to remove the remaining tile pieces and adhesive. Once this is done, you can then fix a new tile in place.
If you would like some more information on this we have a complete project on replacing a tile which goes into more details should you need it.
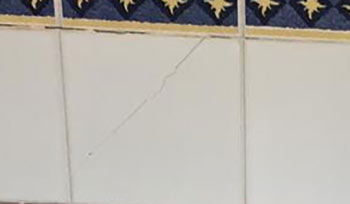
Cracked tile that needs to be replaced
Cleaning Grout off Stone, Porcelain and Floor Tiles
In the majority of cases, stone and porcelain tiles are used on floors as opposed to walls and due to this they have to cope with a lot of foot traffic and wear and tear. As any grout is also subjected to the same footfall it is generally a lot stronger than the grout used for wall tiles.
With this in mind, the warm water and other solutions that we have suggested for use in the above steps will probably not be enough to dissolve the cement-based adhesives used for these tiles, so in these cases, a patio, or brick cleaner will do the trick but you will need to wear rubber gloves and eye protection as these cleaners are acid based.
Before you go ahead and clean the desired area, as always test in an out of the way corner to make sure that the cleaner is not too strong for the tiles and glaze as it canl etch them and ruin them.
The container for your brick or patio cleaner will also state clear rinsing instructions. You will need to follow these carefully and fully as any overspill can easily contaminate surrounding areas.
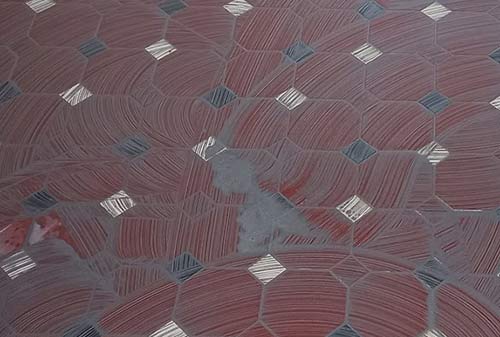
Dried grout on floor tiles
Cleaning Scarred and Untidy Grout Joints
Often when you have left grout too long in and around the actual joints, they will look scarred and untidy.
To rectify this they can be raked out a little using a grout rake and then they can be repointed using fresh grout. This will make them look much nicer and tidier.
On the subject of cleaning grout lines, as I’m sure you are aware, over time they can become mouldy and stained and to get them back to their former glory they need cleaning.
For a full and detailed run down on how to clean tile grout and also remove it if it’s too bad, see our how to remove and replace tile grout project here.
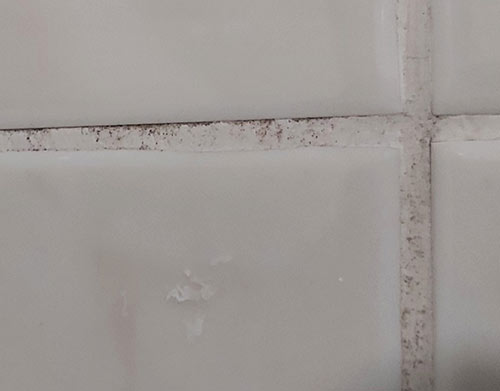
Mouldy grout joints that need to be cleaned or replaced
Cleaning dried grout off tiles is certainly not the most enjoyable job in the world and on the whole it is always better to remove the grout before it dries, however if you are too late, removing it is certainly possible, even if it’s not fun.