Removing and replacing tile grout or “raking out” as it is known is not a nice job. Care must be taken to avoid damaging the tiles and it is a very repetitive job.
Despite these downsides it is, however, a fairly easy job to do and one that is necessary to ensure your tiles remain water tight in the event any grout is cracked or damaged.
Why do you Need to Remove Tile Grout?
There are a couple of reasons for wanting to re-grout a tiled wall. Here are some of the most common:
- The existing colour of the grout that you have needs changing to match a new style
- The grout has badly cracked or is crumbling out of the joints, perhaps because it was not done well in the first place. To successfully replace it, it all needs to be removed
- The Grout is stained, brown or black and mouldy and it is past the point of cleaning
Why Does Grout go Mouldy or Stain?
Black staining on tile grout is generally caused by black mould growth. If you have a mould problem you should attempt to address this as soon as possible.
Cleaning or even removing and replacing the grout might make your bathroom look lovely again, but this will only be for a short time if you do not address the cause of the mould.
See our project on the causes of black mould in bathrooms and kitchens and how you can stop it happening.
Once you have fixed the cause of any mould problems, we strongly recommend that before you start raking it out you spend some further time trying to clean it off. If it all comes off when cleaned properly, there may be a chance you can save yourself having to re-grout.
If you have brown staining it can mean that water is getting in behind the tiles somehow and soaking through the joints. In this instance the water generally brings some salts with it from the wall behind the tiles and this tends to leave a brown stain in the joint.
If you discover a place where water could be getting in, there is no point re-grouting until you have stopped the leak.
It might be the case that cracked or failing grout elsewhere is allowing water and moisture in behind the tiles. If so then you will need to remove all the grout and regrout correctly to prevent any further damage or worse damage to the point you have to start removing tiles. Black mould growth on tile grout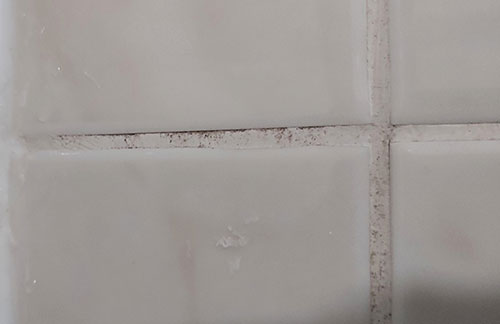
Can you Salvage Tile Grout?
You can salvage some tile grout if mould growth or staining has not penetrated too deep into it.
In some cases it can be cleaned with mould killers and “revived“ with some of the many grout reviving products that are on the market. The success of any of these really depends on the quality of the product, some are better and more longer lasting than others.
Generally, any bleach-based household cleaner tends to work quite well as the bleach kills off the mould very effectively, but you may need to experiment until you find the most effective one.
Another fairly effective solution is to mix baking soda and bleach into a paste and then use a cloth or sponge (wearing gloves) to scrub the grout lines. If not too bad this brings them back quite well.
When using products such as these always wear appropriate safety gear including goggles, gloves old clothes etc. Bleach burns skin so cover up!
It’s also possible to make your own grout cleaner using simple household products, see the “Homemade Grout Cleaning Solutions” section below for further details.
Tools Needed for Removing Grout
To remove grout from in between tiles, you will need the following tools:
- Suitable PPE gear; old clothes, goggles/face shield, gloves etc.
- Handheld carborundum or carbide tipped grout removal tool
- Multitool (if you can get one) with grout removal blade or grout removal tool
- Utility knife
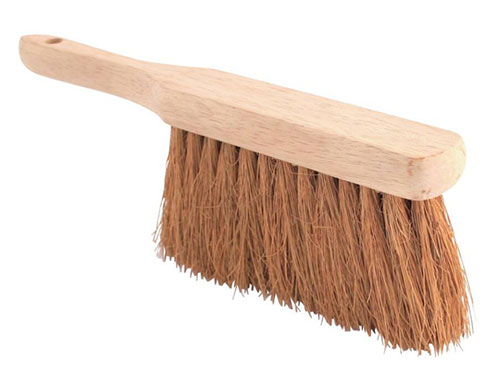
- Stiff brush and dust pan
- Vacuum
- Small flat blade screwdriver
How to Remove Tile Grout
There are 2 ways to remove grout from between tiles. The first is to use a hand held carborundum or carbide-tipped grout rake to rake the grout out and the second is to use power tools such as a multitool with a grout removal blade or specialist grout removal tool.
Any old grout must be removed to a depth of at least 3mm, preferably all removed for re-grouting to work properly.
Removing Tile Grout by Hand
The cheapest and most straight forward way of removing grout over a small area is to use a hand held carbide or carborundum tipped grout rake. Carbide-tipped grout rake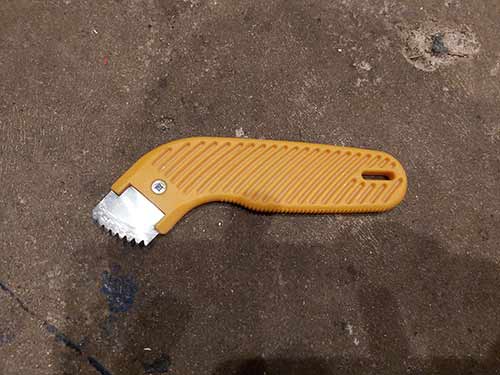
For the purposes of this project we are going to be replacing some grout in a bathroom. To find out how, follow the steps below:
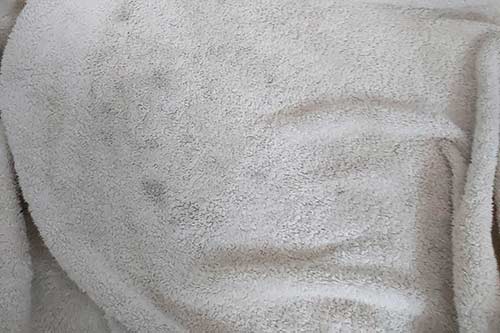
- Step 1 – Lay out Dust Sheets: As you scratch and scrape the grout it turns to dust so lay out dust sheets below the area you’re working in to catch it
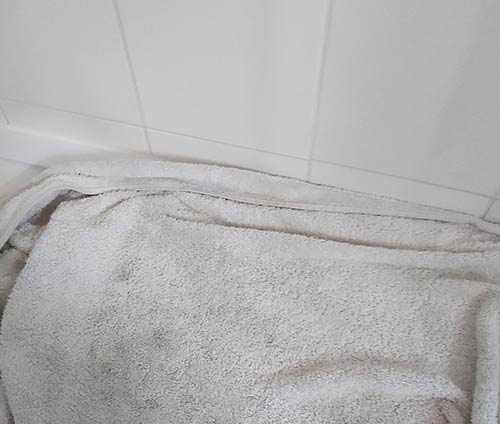
Old towel laid out to catch grout dust
- Step 2 – Remove any Objects: If there are objects present such as sponges, flannels, toothbrushes etc. move it all out of the way so it doesn’t get covered in dust
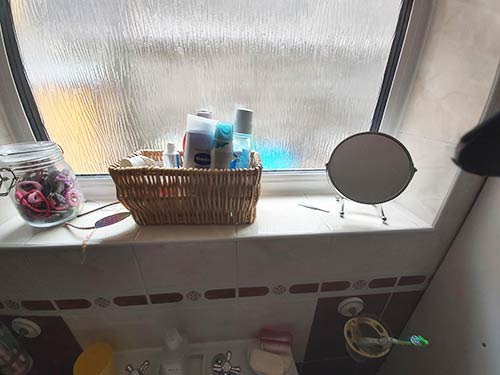
Remove any objects that may get covered in dust
- Step 3 – Position Grout Rake: Starting in a corner somewhere, hold the rake and position the blade over the grout you want to remove, ensuring it’s on the grout and not the tile
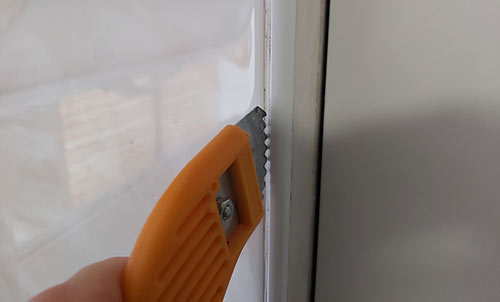
Grout rake positioned on grout to be removed
- Step 4 – Scrape out old Grout: Gripping the grout rake and applying some pressure, push the rake upwards and downwards over the grout, allowing the blade to bite in and scrape it out. Grout is tough so will take a bit of effort to get through it. Work over small areas at a time. Keep scraping until you remove all of the grout from the joint
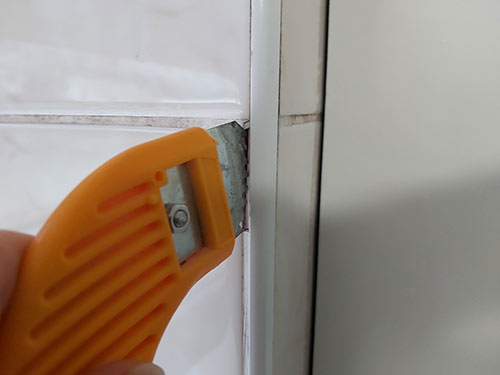
Scraping old grout out of joint
- Step 5 – Remove Stubborn Grout: Some grout will be stuck fast in the joint. Use a small flat blade screwdriver or utility knife to scrape and prise these chunks out taking care not to damage any tiles. Remove any trace of any remaining grout as if left it will affect the new grout
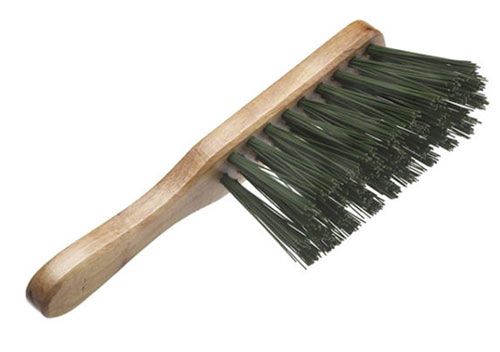
Stiff brush ideal for cleaning out grout joints
- Step 6 – Clear out Joints: Once all joints are fully cleared of grout use a stiff brush to brush down through all joints, pulling out any chunks that have dropped behind tiles and then use a vacuum to suck out any dust and remaining debris. Once all joints cleared they are ready for re-grouting
The good thing about the grout rake is that once the teeth on the blade have worn down they can then simply be removed and replaced with a new blade. Using this tool takes a fraction of the time it takes to do the same job with an old nail (historically a nail was the go-to object for this job)!
Grout rakes are pretty cheap, typically less than £5 and if you are going to be tackling a larger area ensure that you get a few spare blades.
Some rakes allow you to fit two blades side-by-side which can be useful if you are working on grout which is in larger gaps between the tiles. Have a look here for our full range of Grout Rakes
When using a rake, take your time and be careful. It’s quite easy to slip and score or mark surrounding tiles and if you accidentally crack one or more tiles, you may also end up replacing these along with your grout. Scraping grout from tiles with a rake – Grout rakes are available here from our online toolstore
Removing Tile Grout Using Power Tools
For large areas of grout removal it’s much better and quicker to use a power tool such as a specialist grout removal tool as seen below. The Vitrex Grout Out grout removal tool – Available here from our online toolstore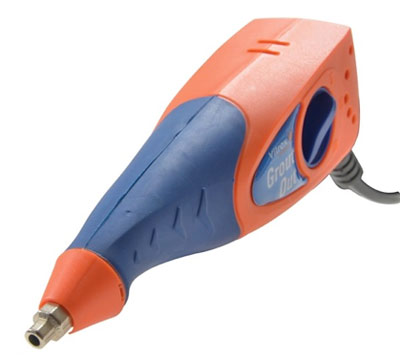
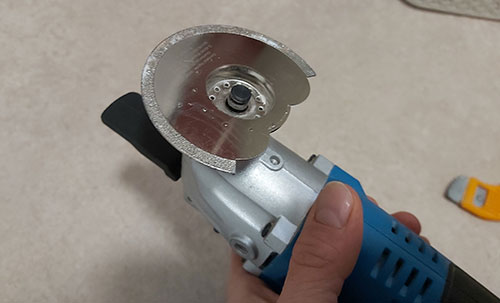
Dedicated grout removal tools are good for the job, but they aren’t very flexible, which is why we would tend to use a Multitool with a grout removal blade fitted. For the purposes of this example this is what we will be using. A Grout Removal blade for a Multitool – Multitool blades available in our online store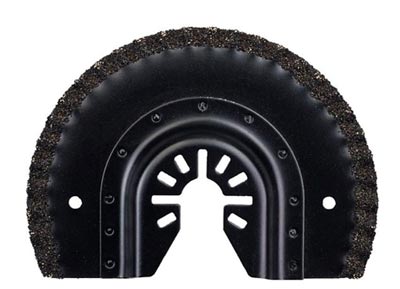
These tools are generally pretty light weight making them easier to use, particularly for long periods on larger projects. As they oscillate rather than spin, like a grinder or drill, it makes then much easier to control, which is important if you are working between expensive tiles. Using a Multitool to remove or rake out grout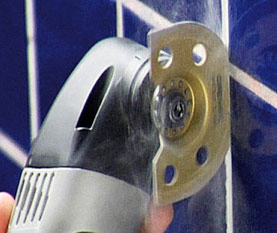
- Step 1 – Lay Dust Sheets and Clear Area: As the blade grinds the grout into dust it can get everywhere so lay out dust sheets all around the area you’re working in
Lay out dust sheets to catch grout dust
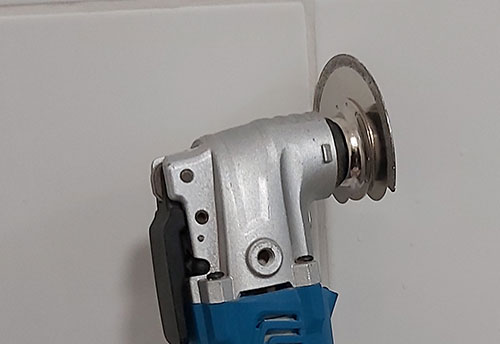
- Step 2 – Insert Grout Blade: Take the multitool and first insert the battery (if it isn’t already) and then the grout cleaning blade. This is usually done by flipping up the catch on the top, setting the blade over the locating pins, pulling back the clip under the catch and then flipping the catch back down. This holds the blade firmly in place
Fix the grout cleaning blade on to the multitool
- Step 3 – Position Grout Blade on Grout: Position the edge of the blade on to the grout that needs to be removed. Ensure it’s touching the grout and not any tiles
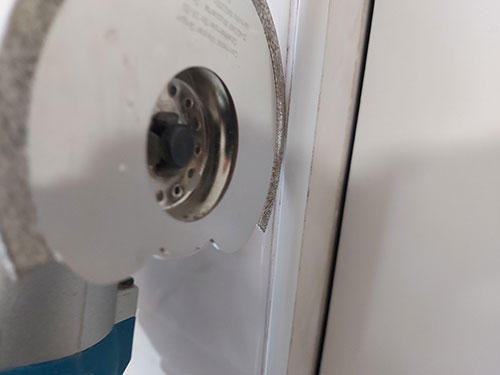
Position edge of grout removing blade on grout
- Step 4 – Remove Grout: Hold the multitool firmly and turn the power on. As the blade moves it can jump around a bit so ensure you’re holding it with 2 hands. Gently move the blade back and forth and allow it to bite down through the grout. Grout is tough so may take a little time. Once it’s penetrated all the way down gently move the blade upwards, cutting away any grout. Hold the tool with both hands to keep it in place
Chiseling away tile grout using a multitool
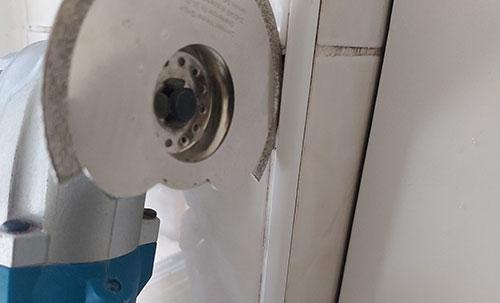
- Step 5 – Fully Clean out Joint: Once the main bulk of the grout has been removed, insert the grout blade back into the joint and with the multitool running, gently roll the blade side to side removing any remaining grout that’s still stuck to the sides of the tile
Angle blade in joint to remove grout stuck to side of tile
- Step 6 – Brush and Vacuum: Using a stiff brush, brush all the joints down through to remove any loose grout that’s fallen behind. Once all joints brushed out use a vacuum to suck up any remaining dust. Once all cleared, all joints can then be re-grouted
Brush out all tile joints using a stiff brush
When using any form of power tool with a blade on an object, the blade can easily bite into the surface and send it scooting off in any direction, causing lots of damage to tiled surfaces so it’s a very good idea to do a little practice in an unseen area first before you move on to more exposed areas.
Homemade Grout Cleaning Solutions
If there is a chance that you can save your tile grout by cleaning, rather than using the off-the-shelf products it’s good to know that it’s possible to make your own grout cleaning solution by mixing a few common household items together.
There are various recipes available online and as always, they vary in success. Some common recipes are:
- 1/4 cup of bleach, 3/4 cup of baking soda – Mix up your solution until it forms a paste and then apply it in sections to the grout and allow it to sit for around 10 minutes and using an old toothbrush, green scourer or nail brush, give it a good scrub. You may need to repeat this several times depending on the level of mould or staining. Once finished, wash everything down with clean water. NOTE: As you are using bleach, always wear gloves, old clothes and suitable goggles
- 1/4 cup of hydrogen peroxide, 1/2 cup of baking soda, 5ml of liquid soap – Mix the items together into a paste and then apply it to your grout and leave it for 5-10 minutes to start working. Using an old toothbrush, gently work the mixture in and then once done, wash all surfaces down with clean water
On the whole we have found that homemade grout cleaners do work to a certain degree, but in most cases they never get your grout lines looking like new, but if you are happy with this then give then a try. If you are looking for that “as-new” look, then it’s best to go with a specialist product.
Do I Have to Remove all old Grout Before Regrouting?
For any newly applied grout to last it is essential that any old grout is fully removed first, so in answer, yes you have to remove all the old grout before applying any new.
For example, if you have a 4mm tile joint and you use a grout rake to rake out a 2mm channel, then trying to force 2mm worth of new grout into that gap and hoping that it bonds to the old grout and lasts is unlikely.
To stand the best chance of any new grout lasting and remaining water proof it needs to bond to the tiles correctly and more importantly, totally fill any and all joints and the best way to do this is have as wide a joint as possible, so all old tile grout should be chipped away to allow for this.
How to Apply new Tile Grout
Once you have removed all the old grout, before you can use the bathroom, kitchen or other area its been cleared from you will first need to re-grout everything.
Grouting tiles, whether they are wall or floor tiles is a fairly straight forward job and is done in the following way:
- Step 1 – Mix up Grout: The first job is to mix up the tile grout (if using the powder type). Pour some powder into a paint kettle or similar container and add a little water at a time whilst still mixing. Keep mixing until you reach a consistency the same as toothpaste
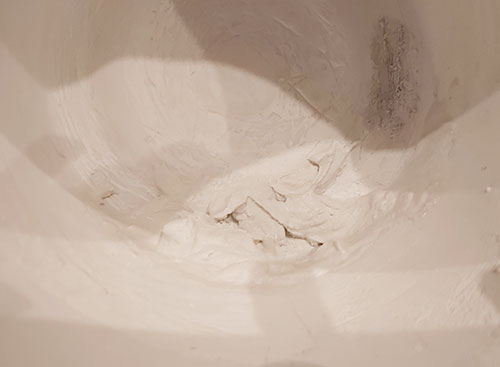
Tile grout mixed to correct consistency
- Step 2 – Scoop Grout onto Sponge: Using a clean grout sponge (can be bought from any DIY store), scoop some of the tile grout from the bucket onto the sponge
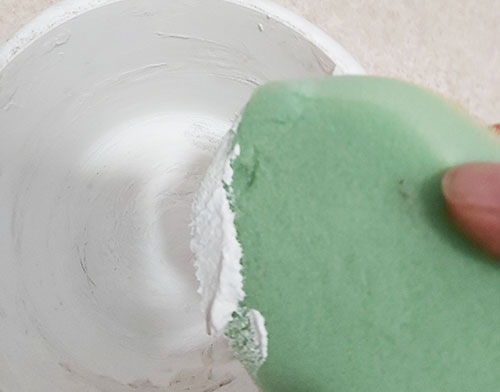
Tile grout scooped onto sponge
- Step 3 – Sponge Grout into Joints: With a good amount of grout on the sponge start pushing it into the tile joints by spreading it over the surface and then using your finger through the sponge to force it into each joint, ensuring the joint is totally full. Repeat this for the entire area
- Step 4 – Clean off Excess Grout: Periodically stop and rinse all the old grout off of your sponge and then ring it out. Once clean use it to wipe away all of the surface grout left on the tiles, taking care not to wipe it out of the joints
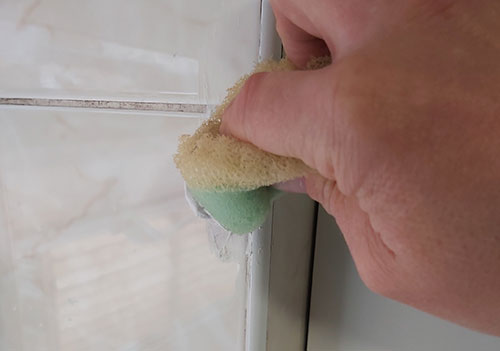
Wipe off any excess grout using a clean sponge
The grout we have used in the example above is standard tile grout powder that can be bought from pretty much any DIY store. One of the better ones we have found is the Everbuild Forever White Tile Grout seen in the image below.
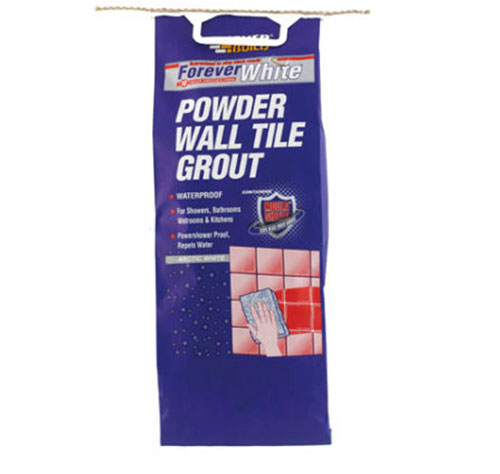
Everbuild Forever White Tile Grout – Available form our online store here
Removing and replacing tile grout isn’t one of the nicest jobs around and can be very tedious, however despite this it is a necessary job to ensure that your bathroom, kitchen or similar clean area remains water tight and without any associated leakage issues.
For more help with all aspects of tiling and grouting see our projects on ceramic tiling and also our project on how to grout wall and floor tiles.