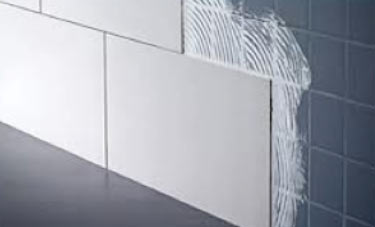
Pulling tiles off of a wall is never a very nice job, it’s messy, time consuming, can damage the wall and you end up with hundreds of small really sharp tile shards all over the place.
Fortunately, in some situations, it’s actually possible to tile over existing tiles with your new tiles, read on to find out how.
Problems With Tiling Over Tiles
Although tiling over existing tiles will save you a huge amount of time, there are some catches in that the new tiles will only be stuck to the wall as well as the old tiles and also the overall thickness will obviously increase which can be as much as 15mm in some cases.
In terms of how they’re stuck, as you’re effectively sticking them on to the existing tiles, they will only stay in place as long as the existing tiles are firmly stuck. If the old tiles are loose and not stuck to the wall particularly well then it’s only a matter of time before everything comes loose and falls off.
As for the thickness, in some cases this may not matter too much if the room is fairly large and you have plenty of depth on things like architrave, window frames and the likes.
However, if these are fairly shallow, by the time you have added a good thickness of adhesive and then the tiles on top this may then protrude beyond such items where it will then need to be replaced.
What Tiles can you use When Tiling Over Tiles?
Another consideration is the type of tiles your going to use. Many people make the mistake of going to a DIY store or tile shop and just picking the tiles they like without any thought as to the walls they are going on to. These walls make a huge difference!
If your walls are perfectly flat, you can pretty much use whichever tiles you like, but if you live in an older property, just put a straight edge, such as a spirit level, on the walls to see how much they undulate.
If they are really wavy, you will need to use small tiles to follow the contours of the walls to make sure every part of each tile is actually stuck to the wall and there are no proud edges.
Also what the actual wall is made of is another thing to think about. If it’s a solid brick or block and you want to use large heavy tiles this shouldn’t be an issue, however, if it’s a plasterboard stud wall then adding too much weight could cause the whole lot to collapse!
What Tile Adhesive for Tiling Over Tiles?
Now that you know what to use when tiling over tiles, the next most important thing is what’s going to hold them on the wall, in this case the adhesive.
You should choose your tile adhesive carefully and this is going to make or break your over tiling job. Generally, the pre-mixed adhesives are great for tiling on top of tiles, especially the instant grab, or non-slip adhesives, these are the ones to go for.
Do not worry about it being “water resistant” or “weather proof” if you have tiled and grouted properly then any bathroom water will never get behind the tiles.
Our preferred adhesive for tiling over tiles is Everbuild’s Super Plus Non Slip Tile Adhesive. Non slip tile adhesive is good to use tiling over tiles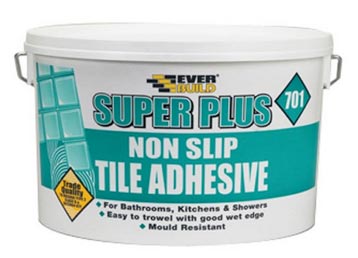
Preparing old Tiles for Tiling Over
As the entire success of this job relies on your new tiles sticking to the surface of the old ones, it’s absolutely essential that you prepare the existing surface correctly so that the adhesive has the very best chance of bonding.
The first job is to go around all of the surfaces you’re intending to tile over with a sharp scraper and dig it into the grouted joints. Try and lever the old tiles off. The idea of this is to check for anything that’s slightly loose.
If many of them move or come off, do not tile over them. The only real solution you have is to strip them all off and start again, it simply is not worth the risk.
If you only have one or two loose tiles, or a few broken or cracked ones, you might consider just removing and replacing them. Only when replace and then grouted should the surface then be solid enough to work with. This page will help you replace broken or cracked tiles. Removing ceramic tiles from a plasterboard wall with an electric tile scraper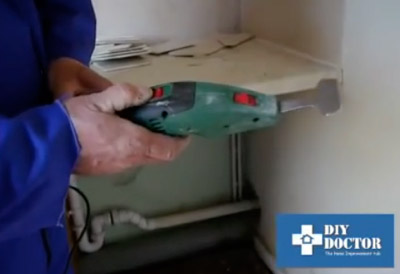
Also, as you are looking over the surface, use your scraper to scrape off any proud lumps of grout or the similar. Also, if the existing tiles are fairly rustic and have a textured surface, look for any raised areas. You can also lay a spirit level over the surface to see. Any gaps will indicate raised sections.
Ideally these will need flattening off so that they are level with the surrounding area so that you get a uniform thickness of grout.
Although quite dusty and messy so you will need to wear a good quality mask, old clothes and decent eye protection, these sections can be ground off using an angle grinder and stone grinding disc. This is especially important if you are tiling over existing floor tiles.
Make sure you don’t grind down too deep or create depressions. Once flattened off, vacuum the area fully to remove the huge amounts of dust that will be created.
The next job is to check over all the grout lines. Although a pain of a job, it most certainly would not hurt to get as much of the old grout out as possible. It is in the grout joints that mould spores collect and if allowed to stay warm and wet, these spores can grow regardless of what you place over them. See our page on replacing grout but when you have raked it out, there is no need to replace the old grout with new. It will not affect your new tiled wall. Removing tile grout before you tile over old tiles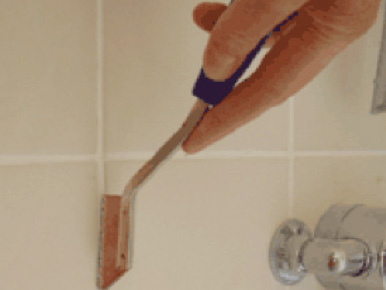
The final preparation job is to then thoroughly clean all surfaces over. Bathroom tiles get greasy as a result of the soap suds, shampoo and shower gel and this is also the case in kitchens where cooking grease and deposits can also get everywhere. It is also not uncommon for paint to be splashed onto bathroom and kitchen wall tiles and this needs to come off too.
For this we recommend using some white spirit on a rag or with some wire or steel wool and please remember to open any windows when using white spirit to help remove any fumes. Also it’s a good idea to wear gloves when rubbing down with wire wool.
Use coarse wire wool as shown in the images, there is no advantage, or indeed point, in using medium or fine grades. Using wire wool to clean tiles makes life easy
Wire or steel wool can now be bought in sanding sheet pads to make life really easy. Just use as you would a normal sanding sheet. Using wire wool on sanding sheets can be easier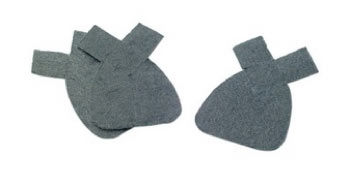
You can also use Sugar Soap to clean the walls down as opposed to white spirit. Apply as per the instructions and then wipe off after the time stated. You will need to rinse the wall and let it dry. Sugar soap is best used with warm water. Use sugar soap to clean down walls and remove greasy marks and residue from your walls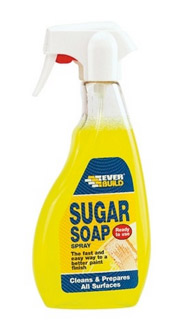
A further fantastic preparation tip from Rob Tester, a tiler from Surrey is to mix a little sand with PVA adhesive (see our project on PVA to buy cheaply) and simply paint it on the wall. When dry this creates a very coarse surface which any tile adhesive will have no problems sticking to. PVA is great for sealing and preparing walls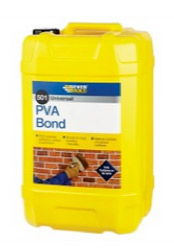
Tools and Products Needed for Tiling Over Tiles
To successfully tile an existing tiled surface you will need the following tools and products:
- New tiles – enough to fully cover surface
- Good quality non-slip tile adhesive
- Decent sharp scraper
- Clean rag
- White spirit
- Sugar Soap
- Tiling trowel
- Angle grinder and stone grinding disc
- Spirit level
- Vacuum
- Appropriate PPE – Gloves, goggles, mask, old clothes etc.
- Tile cutter
- Tape measure
- Tile grout
- PVA and sand (if you are going to apply to surface as a base)
- Plastic D-mould trim
- Construction adhesive
- Hacksaw
- Pen for marking tiles
- Grout sponge
- Tile spacers
The float for example is one of the least expensive you can buy. It has a plastic sole plate with a plastic handle but it is one of the best floats we have ever used and are still using! Tiling tools come in sets like this one from DIY Doctor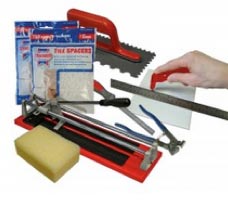
How to Tile Over Tiles
As we have now looked at preparing existing tiled surfaces for tiling, what tiles and adhesive to use and what tools you’ll need, it’s now time to get started.
Step 1 – Prepare Existing Tiled Surface
The first job to do before any form of tiling commences is to correctly prepare the existing surface as we have detailed above.
In short, this involves checking for any loose tiles and grout and if it’s not too much, removing and then replacing it, however if there is too much you may have no choice but to strip all old tiles off and start from scratch.
The next task then is to flatten back any proud sections of grout or tile so that you have a uniform surface to work with.
Next, everything needs to be fully vacuumed over to remove any dust and debris and then wiped down using Sugar Soap or White Spirit on a rag or using some course wire wool.
Once that’s done, a further measure you can then also take is to add a coat of PVA mixed with a little sand over the old tiles and once dried, this will provide a great key for your adhesive.
Step 2 – Setting Out
Once all cleaned down, the next task is to set out exactly where your new tiles are going to go. You may think this is failry obvious and that you would simply follow the placement of the existing tiles, but this isn’t the case. Existing tiled wall showing straight joints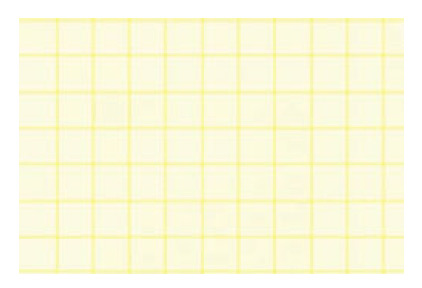
The most important thing to remember when tiling over existing tiles ceramic tiles is that you must stagger the joints.
All new joints should be placed over an old one e.g. a new tile should be placed in the middle of two existing ones. For this reason, it is essential that you first set everything out before you start tiling.
In the below image, the original tiles in yellow are tiled over with new tiles which are in red. As you can see, the new tiles are staggered over the old tiles so that they sit central to old joints of the old tiles. Always stagger your joints when putting new tiles onto old tiles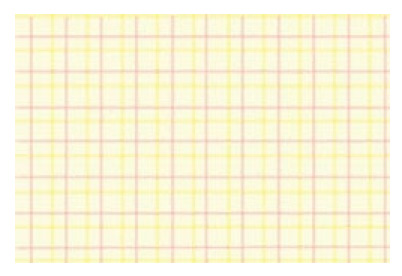
Setting out walls and finding the right place to start when tiling on old tiles is no different to tiling on new walls from scratch and our page on ceramic tiling will show you exactly what to do to set out and minimise cutting and get the best visual effect you can.
In short, take a length of flat timber, 3 x 1 or similar, and then place a tile at one end, use a felt tip to mark the joints either side and then move the tile to the right next to the joint line, mark the right hand joint and so on until you reach the end of the timber. This is called a gauge rod.
You can then position the timber on the wall so that each tile space is over the centre of the old tile and then mark the new tile position on the wall. This is done both horizontally and vertically so that you end up with an individual tile square for each new tile.
When marking tile positions you may need to make some adjustments to ensure that the new tiles sit directly centrally over the old ones to ensure the joints are staggered.
Step 3 – Fix Batten
Once you have completed the setting out, the next job is to fix a straight piece of batten to the base of the wall so that the top edge is aligned with the base of the bottom tile joint. This is levelled using a spirit level and then fixed to the wall using wall plugs and screws.
This will then provide a perfectly level base for you to tile up from and ensure that they are all perfectly level as you move up the wall.
Step 4 – Fix Tiles in Place
With everything now successfully set out and ready it’s time to start getting some tiles on the wall.
Take a tile and scoop up some adhesive and spread it over the back of the tile. Make sure the entire surface is covered with a decent coating.
Next, take your tiling trowel and flip it over so you’re using the combed edge and then drag it over the adhesive, ensuring the combs hit the rear of the tile. This will then remove all the excess and leave you with a series of ridges or adhesive.
Scoop the excess adhesive back into the container.
Flip the tile over and then position it up to the wall, pushing it on the surface over the markings you created in the setting out stage above. As you push the tile on wiggle it side to side and this will close all of the ridges over ensuring that the entire rear of the tile is coated with adhesive. Finally, position the tile so it lines up with the setting out marks.
Once your first tile is on, repeat this process until you reach the end, ensuring you place tile spacers up right in the joint gaps so they can be removed once the adhesive has cured.
Once all whole tiles have been fixed in place you will be left with the cutting in to do. This is essentially cutting tiles to fill the gaps around the edge. When measuring the gaps remember to take off 6mm or so to account for the grout joints either side.
Once the wall is completely tiled you should then leave it for at least 24 hours for all of the adhesive to fully cure before it can be grouted.
The above is a quick run through on the process of tiling a wall, but for a detailed explanation, see our ceramic wall tiling project here.
Step 5 – Grout Tiles
Grouting tiles properly is even more important than laying them. The tiles themselves are watertight, no doubt about that. The vulnerable place in a tiled wall is the joints. If there is a leak in any bathroom tiles, it is always through the joints.
In terms of what grout to use, the grout in the image below is one we use all the time and we love it. It mixes well, spreads well, cures fast and easy to work into the joints.
When it comes to getting the grout on the wall and into the joints there are several tools that you can use. The first is a grout float. This is essentially a soft trowel that you use to spread the grout over the wall and into the joints, however the best tool we find is a simple sponge.
Simply scoop some grout on to the sponge and then you can use your finger to force it into the joints, making sure they are completely full.
For a full and detailed description on grouting, see our project page on grouting tiles here. Always use the best tiling grout for your job, we love the Everbuild Super White tile grout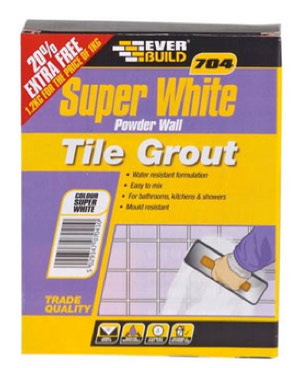
Step 6 – Finish Edges
As we have mentioned, one of the big issues with tiling over tiles is the increase in depth that in many cases this creates exposed edges that are no longer hidden by architrave and the similar.
As we have mentioned, one solution for this is to replace architrave, skirting etc. with deeper versions to hide the new exposed edges, but this is a lot of work.
At DIY Doctor we have found using double glazing plastic trim hides these edges very well. Plastic trim comes in many different widths, is easy to cut with a hacksaw blade and can be very easily glued to the exposed edges of your tiles with Stixall, or a similar construction adhesive. D moulding plastic trim can be used as tile trim in bathrooms and kitchens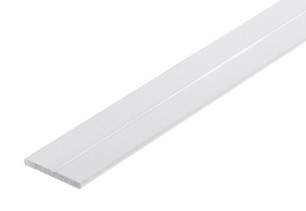
Once cut to size, simply apply the adhesive to the rear, pop it in place and allow it to dry and you’re done!
Cutting and Drilling into Tiles for Bathroom Fittings
Drilling into tiles for fixing toilet roll holders, towel rails etc is not as hard as some would have you believe and our page on cutting and drilling and fixing to tiles will show you how this is done effectively.
We even have a page on how to drill, the hardest tiles of all, porcelain tiles and even these, with the right tools, are easy.
The most common hole to be drilled into tiles for toilet roll holders, soap dishes, towel rails etc. is the 7mm hole for a red wall plug and a number 8 screw.
This requires a 6 or 7mm hole and as there are usually quite a few to do in a bathroom it’s a good idea to buy a quick change diamond drill bit to do them with. Use a 7mm quick change diamond bit to drill your ceramic tiles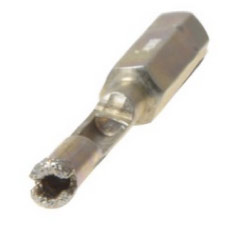
Popular FAQ’s for Tiling Over old or Existing Tiles
Can you tile over tiles?
Yes it is possible to tile over an existing tiled wall or surface with new tiles providing that the existing tiles form a solid and stable surface to tile on.
If there are any loose, proud or uneven tiles present on the surface then this can cause your new tiles to become loose and ultimately fall off.
Do I need to prepare the existing tiles first?
Yes you do. You should ensure it’s solid, free from any lumps and bumps and also wiped down with Sugar Soap or White Spirit to ensure it’s free from grease and dust.
Is tiling over tiles a good idea?
As long as the existing surface is sound, tiling over existing tiles is a great idea as it will quickly, easily and cheaply allow you to completely update the look of a kitchen, bathroom or other tiled area.
What’s the best adhesive for tiling over tiles?
Generally a good quality powder or pre-mixed adhesive is ideal for use using when tiling over existing tiles, however it’s always best to go for an instant grab or non-slip version. Stagger the joints when tiling new over old tiles – Image courtesy of suretile.co.uk