Plastic compression wastes are not used a great deal by plumbers who normally prefer to use solvent weld waste systems as with the required experience and knowledge that you would expect with a seasoned plumber, they generally find this system quicker and easier to work with over the screw-type plastic compression wastes.
In terms of this type of fitting, one disadvantage of plastic compression fittings is that they do tend to be rather big and bulky which makes them unsuitable to use in tight spaces as slotting pipes into the compression fittings and ensuring that the rubber washer is not twisted and won’t leak is hard going, especially if you cannot see all the way around to check this before tightening it up when working in a confined space.
One other disadvantage of this is actually tightening the compression nut up – if you can’t get your hand around the nut to tighten it enough to prevent leaks due to the surroundings that you are installing in e.g. under a bath or below floorboards then this seemingly quick job can turn into a nightmare, and potentially come back to bite you in the future through leaks and their subsequent damage.
Benefits of Using Plastic Compression Waste Fittings
Despite the above minor disadvantages, push fit plastic compression wastes do have many advantages that can be seen below:
- Waste pipes used for push fit fittings and solvent weld fittings are two entirely different sizes and one of the easiest ways to join the two is by using compression fittings
- One other really invaluable use for plastic compression plumbing fittings is when you are refurbishing and trying to join old pipes to new pipes including old lead wastes (which should be replaced if you get the chance) and odd sized imperial waste plumbing pipework, they are absolutely ideal for this
- For those that are new to plumbing, compression fittings provide the ideal introduction as they are easy to fit and adjust
- If a connection breaks down and fails, they are easy to remove and refit with a new one whereas with solvent welded fittings you have to start cutting pipes which can get complicated
What Makes up a Plastic Waste Compression Fitting?
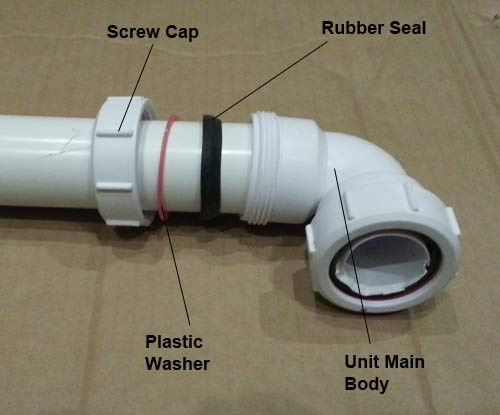
There are several core parts to the compression connector, these can be seen in the image below:
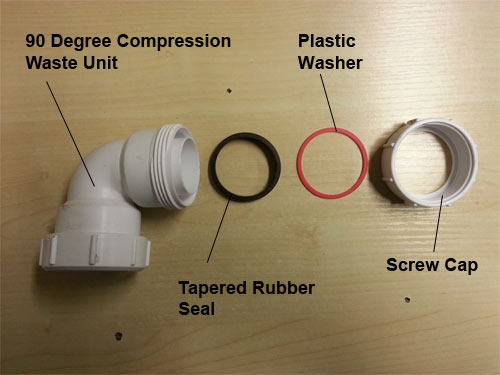
Parts of a plastic compression waste connector
Each part has a specific job as described below:
- 90° Compression Waste Unit: In this case, this part is a 90° bend but can come in many different shapes. Made of solid plastic, it forms the main body of the compression joint
- Tapered Rubber Seal: This is pretty much the core part of the system – the tapered part of the seal pushes into the gap against the main compression body which also pushes in on the pipe holding it firmly in place and creating a seal between the pipe and the compression unit body preventing any leaks
- Plastic Washer: Once the below screw cap is screwed up it applies pressure to the washer which in turn presses down on the rubber seal, holding it in place and ensuring it seals
- Screw Cap: The final piece of the puzzle, this holds everything in place and ensures that the rubber seal provides a complete seal between the pipe and the main body
In most situations, you don’t need to screw the cap up too tight for it to provide enough pressure to create a seal. They are designed to be done up using hand pressure only so no grips or pliers are needed.
Tighten until the screw cap goes tight and then give it one final pinch and all should be fine. If you do find it leaks, simply screw up a little tighter.
An important point to mention is that if you do tighten it too much this can damage the rubber seal or push it past the point of creating a good seal and leaks will start. In this case you will need to take it all apart and replace the seal if you can find an exact match or replace with a new compression unit if not.
How to Cut Plastic Pipes for Compression Fittings
Before you can actually fit a compression fitting you will most probably need to cut a section of pipe to the correct length for your needs. There are really only a couple of ways that this can be done, considering the size of the pipes (e.g. 32mm an upwards):
- Using a hacksaw
- Using a pair of plastic pipe cutters
Using a Hacksaw to Cut Plastic Waste Pipes
If you have ever dabbled in DIY, chances are you are going to have a hacksaw knocking around somewhere so this is one of the “go to” tools to use. Before you start cutting, make sure you have a decent blade installed as trying to cut with a blunt blade will not only take ages but will create large amounts of friction, could cause melting and create unnecessary amounts of burrs.
Firstly, mark the exact point on the pipe that you need to make your cut, use a thin soft pen or felt tip. Remember, when marking the cutting point, if you make your mark at the exact length you will need to cut past the marking, leaving it on the pipe as otherwise your cut will be a millimeter or so too short!
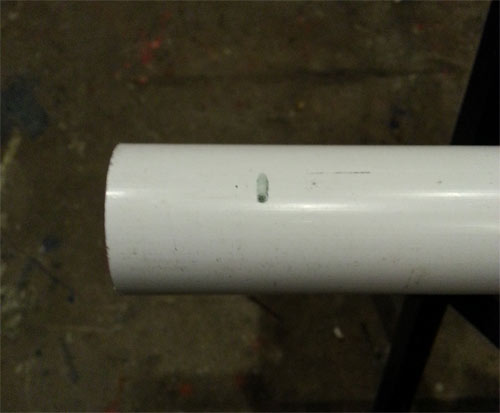
Mark the exact point on the pipe to make your cut
In order to make sure the cut is as straight as possible, get yourself something flexible that will bend around the pipe with enough of a step to allow you to run your pen around to mark the pipe.
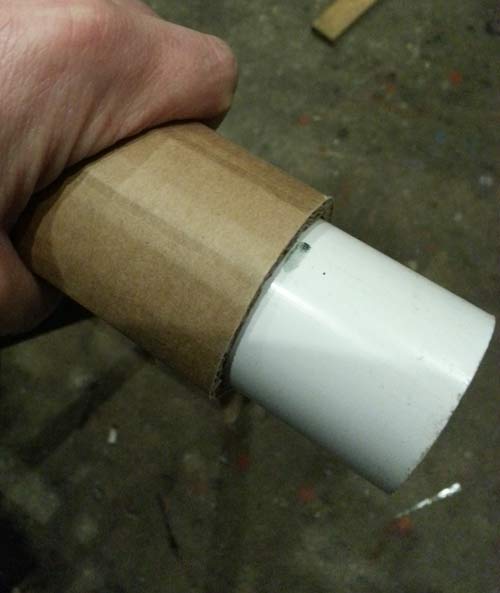
Use a piece of thick card to help mark all the way around the pipe
If you have a Workmate or vice, clamp up the pipe in this (not too tight, you don’t want to crack it) to hold it firmly while you cut. If you only have a vice, a handy tip is too put some thick card between the pipe and the jaws of the vice on both sides. This will prevent marking.
If you don’t have either of these, use a chock of wood underneath the pipe to lift it off of the ground on the floor, or you can use another sturdy object at waist height such as a table. Grip the pipe tightly in your hand to stop it moving.
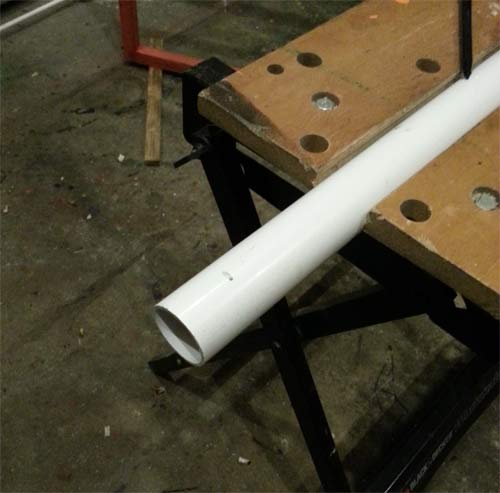
Hold the pipe tightly while you cut it to stop it moving using a Workmate or vice
Place the hacksaw blade on the exact point you want to make your cut and start by pulling the saw back and forth in small movements until you have broken the surface, when at this point you can take longer draws on the saw.
Whilst cutting, keep your eye on your line and ensure the saw stays straight and true. Keep going until you are all the way through.
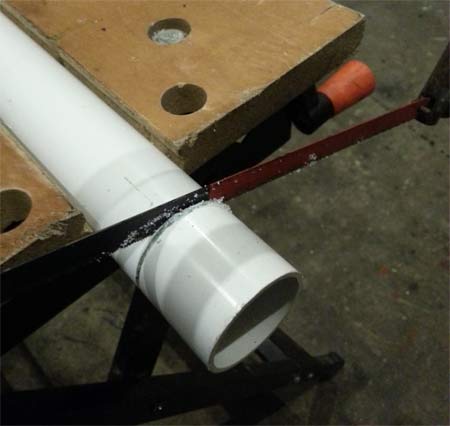
Cutting plastic waste pipe with a hacksaw
Using a hacksaw will create “burrs” around the edges you have just cut and these will need tidying up before you actually fit the pipe.
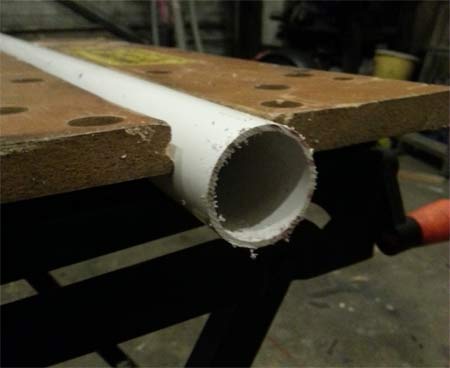
Burrs and roughness left from cutting
To do this, use a fine piece of sandpaper, at least 280 grit or greater or a small file and gently run it around the edges until smooth – Don’t press too hard as you will scratch the pipe and this may cause leaks. Once done, the pipe is ready to fit.
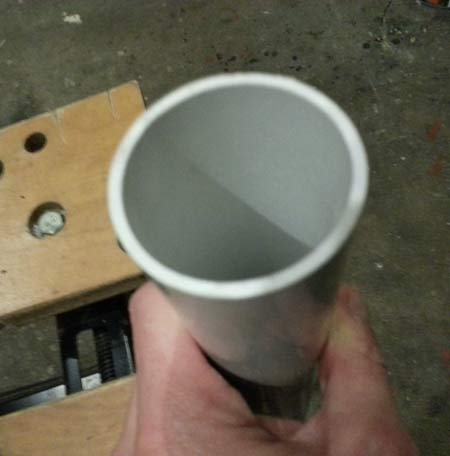
Burrs smoothed off using a piece of sandpaper or small file
Cutting with a hacksaw is totally fine but the saw can easily run out of true and leave you with an non-straight cut. If you have or can locate a pair of plastic pipe cutters, these are even better. Not only will they create perfectly straight cuts, but they also avoid creating any burrs.
Using a Plastic Pipe Cutters to Cut Plastic Waste Pipes
This process is much easier than using a hacksaw but unless you do a lot of plumbing work you may not have a pair of plastic pipe cutters knocking around.
If not, and you can justify the cost, then it’s worth buying a pair. They tend to range in cost from about £5 up to £50. The cheaper ones are okay, but at the end of the day you get what you pay for, so don’t expect them to last that long if you have many cuts to make. For a few quick cuts, it’s worth spending a fiver!

42mm plastic pipe cutters
Due to the size of pipe you are cutting (32 or 40mm), you will need to get some of the shear-type cutters.
As above, measure and mark the position on the pipe that you want to cut, mark your point with a soft pen.
Open up the shears to their full width and place the pipe on the base of the jaws. It does help to rest the cutters on bench or stable surface to support them and the pipe.
Pump the handles which will operate the jaws of the shears and start closing them. As this is a ratchet system, one pump on the handle will close the jaws 10mm or so. Do this until the top cutting jaw is about 1mm off of the top of the pipe.
At this point, position the pipe so that the top cutting jaw is directly over the mark on the pipe, or just to the side if you have marked the cut point exactly on the line.
Squeeze the handles again and let the cutting jaw bite into the pipe. Make sure before you do this that the cut is in the correct point.
Continue pumping the handles until the jaws close and cut all the way through the pipe and you’re done!
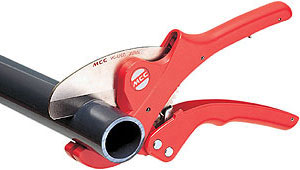
Cutting plastic pipe with a pair of plastic pipe cutters – Image courtesy of pvcworkshop.com
As mentioned, the advantages with the shear-type cutters is that they leave no burrs so the pipe is ready to fit straight away.
Assembling a Plastic Waste Compression Unit
Assembly of the unit is pretty straight forward. If you have several sections of pipe to put together it’s best to get it together on a bench or open space if you can, then insert it into it’s final resting place in one piece and slot together the final sections. Assembly is as follows:
- First, slot on the screw cap, making sure that the threads are pointing in the right direction
- Next, slot on the plastic washer
- Now comes the rubber seal. Again, make sure that the taper is pointing in the right direction so that it slots into the main body of the compression joint. Ensure that it is not twisted and that it sits flat on the body of the pipe
- Slot on the body of the compression unit. Push the pipe right down into the collar to ensure that it is in as far as it will go. Push the rubber seal down into the unit body, checking that it is sitting nicely and is not twisted
- Push the plastic washer down onto the rubber seal
- Screw down the cap. Take your time while doing this and keep your eye on the seal and washer making sure they do not twist and that all is flush with the main body and pipe. Screw up until it starts to go tight and then give it one final pinch to create your water tight seal
The above is the basic steps and will apply to pretty much any and all types of compression unit.
Below is an image of how the unit and pipe should go together.
Compression unit assembled on plastic pipe
Sizes and Types of Plastic Waste Compression Fittings
Compression fittings are made mostly to use with 32mm or 40mm pipe work or to provide a conversion between two different sizes e.g. joining a 32mm pipe to a 40mm pipe.
Normally, these situations are encountered during DIY and home improvement works, especially when converting older properties that may still be using imperial sized plumbing pipes and fittings and any new work will be done using modern metric.
As a quick reference guide, the most common types are listed below with a description of where and when they can be used:
- Compression waste conversion bend. This bend allows you to change direction and convert from 40mm pipework to 32mm pipework and vice-versa
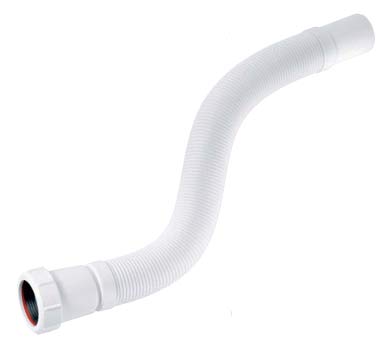
- Flexible waste straight coupling allowing you to join two pipes from 38mm to 45mm and absolutely ideal in a conversion or renovation situation. This fitting is also available to convert from 30mm to 38mm and can be bought as a flexible bend from 40mm to 48mm
- This is a compression waste reducer fitting which will take pipes sizes from 40mm to 32mm
- Compression waste adjustable bend taking two pipes of the same size (32 or 40mm) round from a straight line up to 90 degrees. Again, invaluable in a conversion or renovation situation
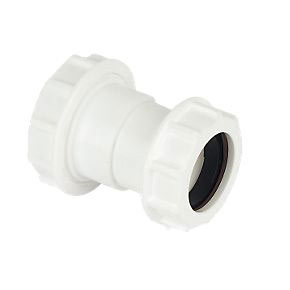
- A compression straight coupling, joining two pipes of the same size in a straight line. 32mm and 40mm
- A flexible fitting which will allow to you connect a 32 or 40mm pipe round a wide bend to another sized pipe
- The T-joint comes in a range of different sizes and fittings, both 32mm and 40mm, imperial and also reduction. Most commonly used when teeing into an existing pipe run
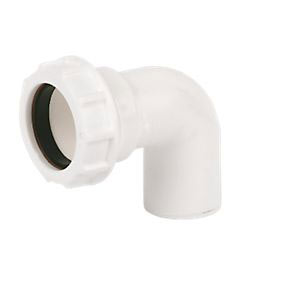
Compression waste conversion bend for joining different sized pipes

Straight but flexible waste connection for connecting different sized pipes
Compression waste reducer for joining larger pipes to smaller ones
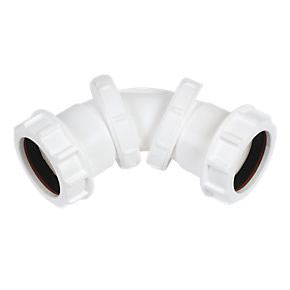
Plastic adjustable compression bend
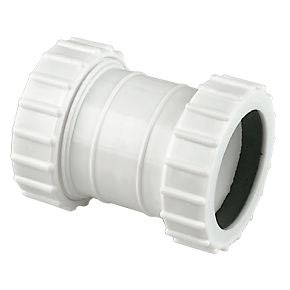
Compression coupling for joining pipes of teh same size, either 32 or 40mm
Flexible adaptor for joining different size pipes
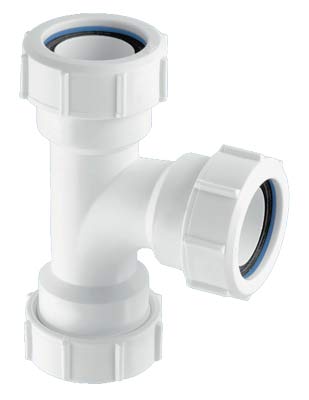
Plastic T-piece for teeing into existing runs of pipework
This is only a small selection of the sizes and types available. On basic level, if you can think of a type of joint or pipe size you would like to joint, there will be a fitting to do it! To find out about all the different types of fitting there are and applications they can be used in, check out this handy PDF on the McAlpine website here.
As you can see from the above, plastic waste compression fittings are handy to have in the DIY plumbing kit for use in the right situation or even just as a stop-gap fix. Due to their straight forward fitting, they are also suitable for use by anyone no matter what their DIY skill level.