What is Solvent Welding?
Solvent weld or solvent welding is, as I’m sure you may have gathered from the name, a method of joining two pieces of plastic waste pipe permanently together by using a special glue that’s known as solvent weld cement.
In the paragraph above, you may have noticed the word “permanently” – we have used the word deliberately, as once the solvent cement is applied and the pipes joined together, that’s it, they will be joined for the rest of eternity.
With the above in mind, solvent weld is often not regarded as a DIY option when it comes to creating a waste pipe run, with the push fit and compression waste systems being an easier option to work with, but we disagree strongly.
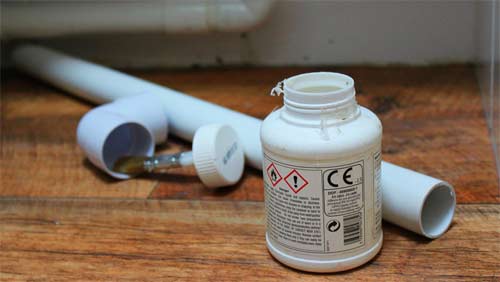
All the components needed for solvent welding including pvc pipe, solvent weld joint and solvent weld cement
A solvent welded waste pipe run will very often last much longer than using one of the other options, reduce the chances of any leaks massively (especially if you are plumbing a shower waste that will be hidden under a floor) and it’s also much more streamline and compact than it’s counterparts, meaning it can be hidden away and boxed in much easier.
For sure, it’s a great option if you need to plumb a waste for a sink, bath or even a washing machine, but before we go fully into how to use solvent weld waste pipes, it’s always a good idea to firstly look at all the other options available.
What About the Other Waste Pipe Systems Available?
Despite the fact that we would, in 99% of cases, always recommend going with solvent weld, to truly know it is the best option for, it’s important to look at the other options available that can also be used for making waste pipes.
Compression Waste Pipes
The compression waste system is similar in principle to solvent weld, in that straight runs of pipes are inserted into joints and couplings, but instead of using a glue to hold them together and prevent leaks, a rubber seal is forced into the gap between the pipe and joint and a screw down cap holds it in place.
If you have ever done any plumbing and used a copper compression joint, this is exactly the same, only a bit larger and made of plastic as opposed to copper.
Although, if assembled correctly using the correct sized pipework and components, compression wastes are perfectly suitable in almost all situations, the joints and fittings themselves are quite big and bulky and they do stand out a fair amount making them hard to conceal and cover up.
Additionally, in comparison to solvent weld, compression pipes and fittings are also rather expensive. If you would like to find out more about compression waste fittings see our project here.
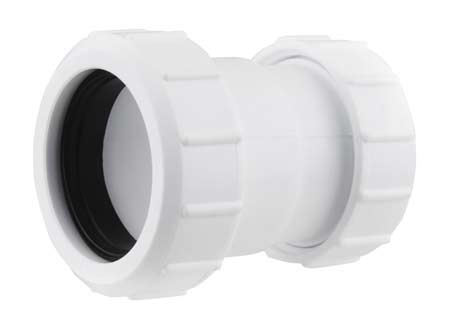
Standard compression waste fitting
Push Fit Waste Fittings
Push fit waste systems work on a similar principle to compression fittings, in that they feature a rubber seal in order to fill the void between the fitting and the pipe and make the joint water tight, but in this case there is no compression cap to force the seal in to place and hold it there.
With push fit fittings, it’s the actual rubber seal the holds the pipe in place due to the fact that it fits tightly around pipe, preventing any movement and also making the joint itself watertight.
As with compression wastes, this waste system also tends to be a little bulky and unsightly (not quite as much as compression wastes) and it’s also quite costly in comparison to solvent weld.
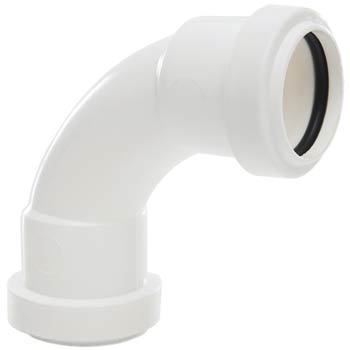
A typical push fit waste fitting
As a bit of a summary, push fit fittings and compression fittings are big, bulky and in many ways, quite unsightly and although they have their place and are sometimes invaluable, solvent weld tends to be much easier, much more reliable, much neater and much cheaper to work with.
What are the Different Types of Solvent Weld Fittings and Pipework?
The list below indicates each item in the image below (the labels run in a clockwork direction starting from the pot of solvent weld). These are some of the most common types of pipe fitting and in most cases, will provide you with enough options to construct pretty much any type of pipe run:
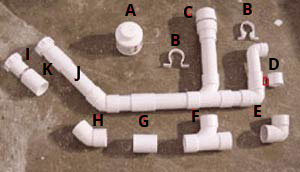
Selection of waste pipes to be solvent welded
- A) Solvent Cement – This usually comes in a 250ml tub and has a application brush fixed in to the lid. In most cases solvent weld will set fully in about 10 minutes, but will be pretty much solid after 1 minute and fully cured within 24 hours, but this may vary depending on manufacturer so please read their guidelines
- B) Pipe Clips – Plastic waste pipes can sag a little as they get hot and it is important that any near horizontal runs are clipped at least every 500mm or so. If a pipe sags, it stores water and slows up the run. If the run slows a blockage can easily occur
- C) Air Admittance Valve – More can be found out about this fitting in our project called gurgling sinks, baths, basins and showers. Essentially, this is caused by fast flowing water that creates a vacuum behind it and can cause water in a trap to bubble and gurgle
- D) Pipe Reducer – Slotted and joined into a 40mm pipe, this then allows you to easly joint to or insert a 32mm pipe to continue a pipe run or connect into an existing run
- E) 90° Quick Bend – Bends in waste pipes are either quick bends or easy bends. A quick bend turns in a short distance and the easy bend takes longer. An easy bend is shown in the image below. One isn’t necessarily better than the other, but in general, the less resistance e.g. the smoother the flow, the less chance of any blockages or similar issues
- F) Equal Tee Piece – All openings on this fitting are of an equal size, hence equal. T-pieces can be bought which allow 32mm waste pipe to join 40mm and 50mm waste pipe and vice-versa. These are especially handy for branching into or off of existing waste pipe runs
- G) Straight Coupling – This is used for connection two lengths of waste pipe in a straight line if you need to construct and extra long run.
- H) 135° Bend – To gradually turn a pipe run around a gradual corner or to follow uneven surfaces
- I) Short Length of 32mm Waste Pipe – Pretty self explanatory. In most situations, 32mm waste pipe will be the pipework to go for, unless you need something a little more high flowing
- J and K) Show Joining an Access Plug to a Waste Pipe System – If a run of pipe changes direction quickly via a Tee piece or a quick bend a blockage can occur. If you can insert an access plug into the run you will be able to clear any blockages quickly and easily. This is essentially just a screw cap that you can remove to access inside the pipe. See our project on fitting waste traps you will find the access plugs in part two of this project
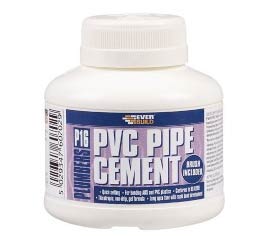
Everbuild solvent weld cement
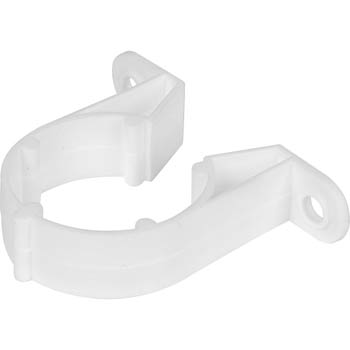
40mm PVC pipe clip

Solvent weld air admittance valve
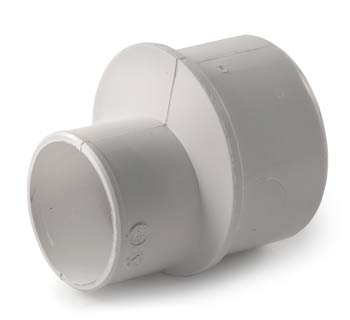
Solvent weld pipe reducer

90° plastic waste pipe easy bend
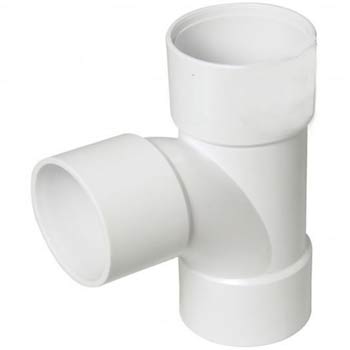
Solvent weld equal-t
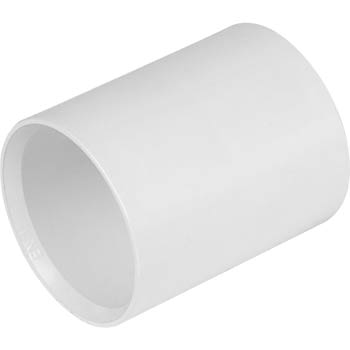
Solvent weld straight coupling

Solvent weld 135° gradual bend
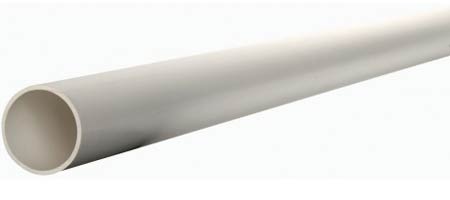
32mm solvent weld waste pipe
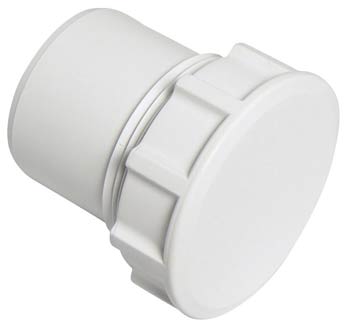
Solvent weld access
As you can see, there are quite a few different options in terms of solvent weld fittings and pipework so you can be sure that you should easily be able to construct any shape or length of waste pipe run you could imagine and shape it around almost any flat or irregular surface.
How to Join Solvent Weld Waste Pipe
For the purposes of this project we are going to join a new sink in an upstairs bathroom to a soil pipe.
The bathroom is part of a loft conversion, so a new soil pipe was added for the toilet waste and the sink waste was them plumbed into this.
Plan Your Pipework Before Solvent Welding it Together
Due to the fact that once the pipework is solvent welded, it cannot be taken apart again, or at least certainly not into its individual parts, the most important thing to do before you actually weld it all together is to set out the run by cutting all your pipework to length, dry fitting the fittings and then placing the whole lot into position to make sure it fits.
By doing this you can be totally sure that everything fits as it should and if not, you can still easily remove sections.
If you weld it all together and then fit it and find that something is wrong, you’re pretty much going to have to start again and will also most probably have wasted a fair few fittings and lengths of pipe.
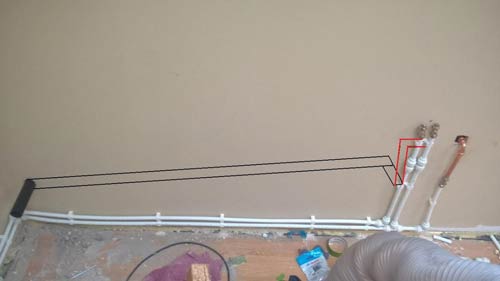
A planned solvent weld waste pipe run for a new sink – Image courtesy of diynot.com
Position Sink and Waste Trap to get Accurate Positions
As the sink waste is going to run straight through the wall behind the sink and into the storage void between the living space and the eaves, luckily, there was plenty of room to play with, so we had more then enough room to position and test the pipework prior to connecting up.
As the sink was new, it had not been fixed into place as yet, so the first job was to put the sink in place with the waste trap attached to the sink outlet so that we could see exactly where the pipe will exit through the wall.
With the sink in place, we measured as accurately as possible up from the floor to the centre of the waste trap exit and then marked this position on the wall.
We then used a 48mm holesaw to cut the hole in the wall. This would also give us 8mm of leeway around the pipe itself for movement and adjustment.
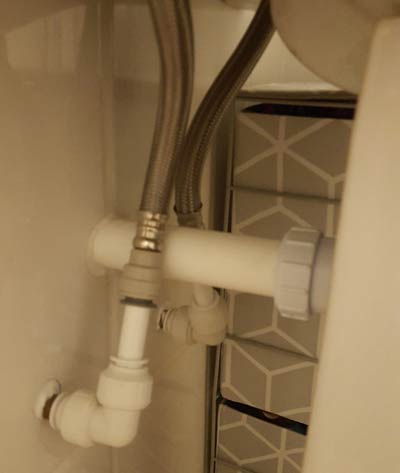
Sink waste pipework going through wall into storage void
Measure and Cut all Your Pipework to Length
A tape measure was then inserted through the hole back to the trap. A second pair of helping hands made sure the tape went all the way into the trap right up to the collar.
A measurement was then taken from inside the void to determine the length of the first piece of pipework. There was a little guess work involved at this stage as we had to guesstimate by eye the point where the 90° turn would be to take the sink waste down to meet the soil pipe so that everything was nicely inline.
With our measurement taken, it was now time to cut a piece of pipe to length.
Using a tape measure, we measured and marked the cutting point on our piece of pipe and then cut the pipe to the desired length. When cutting any pipework, make sure that the cut itself it totally square.
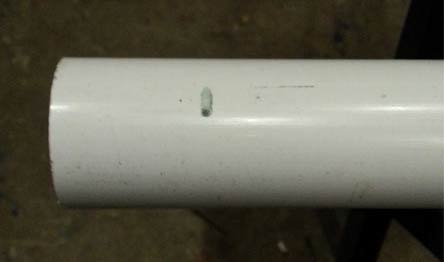
Pipe marked ready for cutting
Any angled cuts could cause the pipe to not fully sit in the joint it’s inserted into and this can increase the risk of leaks.
Tip: to get a square cut, it’s useful to have an accurate line to follow. To get a true line, wrap a piece of cardboard or similar flexible material with a straight edge around the pipe at your cutting point, making sure that the straight edge meets up with itself and that it’s inline and then draw a line around your pipe following the edge.
The above tip will give you a nice straight line that you can then cut along to give you a nice square edge.
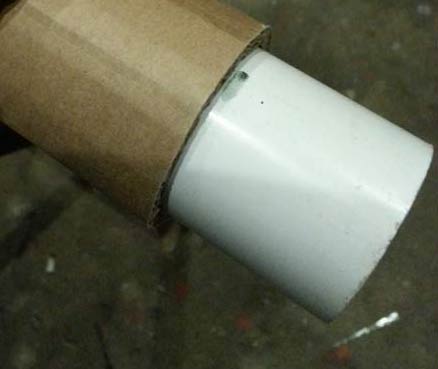
Using cardboard to mark straight line around a pipe
In terms of what to use for cutting, the best thing is a hacksaw as this will give a nice fine cut, but it is possible to also use a standard saw. It’s also worth mentioning that you can buy specialist PVC pipe cutters that normally work on pipes up to just over 40mm.
Once you have made your cut you will need to tidy it up. If there are any “burrs” or fragments remaining from the cutting process then these can also cause the pipe to not fit correctly in the joint or result in cutting fragments filling any voids in place of the solvent weld.
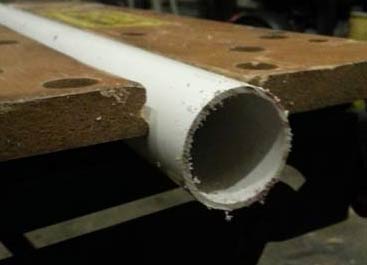
Burrs and debris left from cutting
All of these can cause weak points and increase the potential for leaks.
Run around the inside and outside of the cut edge of the pipe with a file or a fine piece of sandpaper (around 240 grit) and give it a really good clean, removing any waste and burrs until you are left with a nice smooth edge.
Additionally, it is always a good idea to clean all surfaces to be welded with a suitable degreasing cleaner and also ensure that they clean and free of dirt and dust
With our pipe cut and cleaned, we then fitted it through and into the sink waste.
A 90° solvent weld bend was then dry fitted to the other end so that we could then measure the length of pipe needed to run down to the soil pipe.
To fix into our soil pipe we are going to connect to a strap on boss (more about this below). Before we run through actually fixing this in place, for now, slip the boss over the pipe in the exact place it needs to be so that you have an accurate point to measure to.
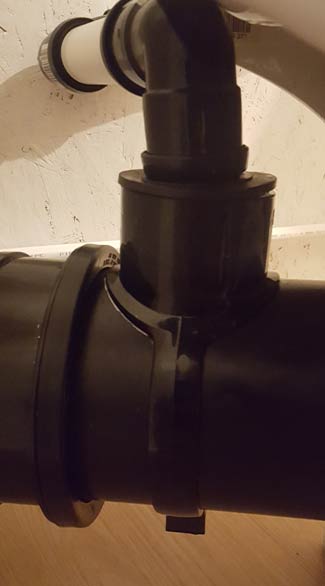
Strap on boss with waste pipe inserted
Once measured, cut this section of pipe to the correct length using the techniques above. Once done, finally cut your final section of pipe that will be insert in to the boss adaptor
Remember, when measuring, make sure you have your fittings dry fitted and in place to that you can measure right up to the base of each fittings collar.
How to Connect into a Soil Pipe
You might be thinking at this stage; How do you actually connect your new sink waste into a soil pipe? To the un-initiated, this is certainly a valid question.
In order to do this, we will be using a strap on boss. This is essentially a collar that is fixed to the soil pipe that then allows you to insert your waste pipe into.
To fit your strap on boss, you first need to use a holesaw to cut a hole in the soil pipe. Before cutting any holes, mark the exact point on the pipe for your hole, ensuring that it’s in the right place for the actual waste pipe.
To cut your hole, use the 48mm holesaw that we used above. This will be a little smaller than needed, but it’s better to be able to make fine adjustments than make the hole too big.
On the underside of the boss there is a slight raised lip. This lip sits into the hole you have just cut to ensure a decent seal and no leaks.
The lip itself is slightly larger than the 48mm hole cutter so you will have to use a file to file out the hole so that it fits correctly. Again, once it’s fitting, clean off any burrs and then run a bead of silicone around the outside of the lip before slipping on to your soil pipe.
Once you have slipped your boss on to the pipe, clip or screw up the clip that hold the boss on to the pipe.
The final job is to insert the relevant push-fit boss adaptor for the size of waste pipe you are using. You should have both a 32mm and 40mm adaptors to choose from.
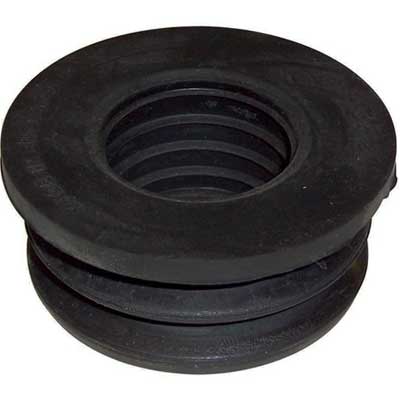
32mm push fit boss adaptor
These handy little rubber adaptors slot into the top of yout boss and then your waste pipe slots in to the adaptor that then forms a watertight seal between both.
Tip: Inserting the adaptor into the boss and also slotting your waste pipe in can be quite tricky as they are both a tight fit. To help with this, spread a little washing up liquid over all surfaces and this should allow everyting to slip together nicely.
Dry Fit and Test Before Solvent Welding Together
With the strap on boss in place and all of your pipes cut to length, it’s now time to test fit everything before sticking it together.
Firstly, fit the section of pipe into the boss adaptor and then add the fitting onto the other end. In this case we are using a 90° bend, but this could be any type of fitting and will depend on what you are doing.
Next we fitted the long section of pipe to run up to the waste pipe coming through the wall and also added another 90° bend to this.
Lastly, we then pushed the 90° bend onto the waste pipe from the sink.
With all of the pipework in place, we looked over it carefully to ensure all the fittings we snug and that nothing was being pushed, pulled or put under any stress.
Once we were sure that everything was fine, we pulled the long section of pipe off, including the fittings ready to weld it all together.
Before we started sticking, we ran around all the ends of the pipes and fittings with a cleaner/degreaser to be sure any and all grease and dirt had been removed.
Starting with the boss end, we unscrewed the top of the solvent cement pot to reveal the brush that is fixed to the lid itself. With a decent (but not too much) amount of solvent cement on the brush, we spread this around the area of the outside of the pipe that will be inserted into the fitting and then also ran around the inside of the fitting itself.
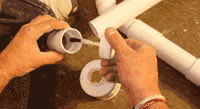
Applying solvent weld cement to the sections of pipe
As you are doing this, make sure that you give all surfaces a good covering.
Once fully covered, insert the pipe into the fitting, making sure it’s pushed fully down in until it touches the collar so that it’s fully engaged.
Some recommend giving the pipe a twist as you insert it, to help spread the solvent cement around, and others say that you should never do this.
In all honesty, we’ve tried both approaches with no issues and as far as we can see, as long as there is ample cement in the joint, then you shouldn’t get any problems.
As you push the pipe into the fitting, you will probably have some excess solvent weld that is squeezed out. Wipe this away with a cloth.
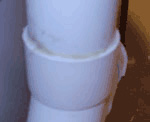
Two plastic pipes successfully solvent welded together
Solvent weld cement is pretty rapid when it comes to drying and it will start going off almost straight away with most manufacturer variations being waterproof in around 10-20 mins. Most will also be fully cured in about 8 hours, but it’s always recommended to leave for 24 hours before using.
With the first joint now welded you can now confidently move on to the others, using the same process each time for gluing.
If possible plan all your welding so that you do not need to “force” anything apart in order to get section of pipework into place. In pretty much all cases, you should be able to get everything fitting nicely without the need to pull things apart or bend pipes to get them into a fitting.
Now that all is successfully solvent welded, as we have suggested above, give it 24 hours to fully cure and then give it a full test, with running water, inspecting each joint closely for any signs of water seepage.
If there are no leaks, you’re done, top job!!

