Drilling into Concrete Lintels
Drilling into concrete or steel lintels and also fixing into concrete and steel lintels has presented problems for years to DIY enthusiasts and professional alike.
For concrete lintels the answer is to start your fixing holes with the smallest masonry drill bit you can get, normally 3mm, and work up to the size you require. The smaller the drill bit the easier it will go through concrete
If you hit steel reinforcing in the concrete lintel however, there is no choice but to move the fixing hole or follow the instructions and diagrams below.
In respect to this, if you have a few spare pounds it’s well worth investing in a specialist drill bit set, purpose made for this job as it is now possible to buy drill bits that will go through both concrete and steel. Some of these particular drill bits are SDS bits, which will require an SDS drill for you to use them.
Due to how tough lintels can be it is recommeneded that you only use an SDS drill and drill bits.
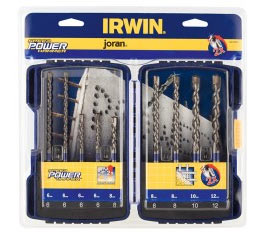
Irwin Speedhammer bit set for concrete and steel
When drilling any holes it is also important that you hold your drill straight so that the hole you drill is also straight. You don’t want to drill any holes at an angle as when you insert your fixing or screw in any screws these will also go in at an angle!
Fixing to Concrete Lintels
With your hole drilled to the correct size for the wall plug or fixing you have chosen (some fixings can be used without the need for a wall plug), position the holes in your lintel and the item you are fixing over each other and insert your screw or fixing.
Screw the screw in using an electric screwdriver or cordless drill/driver (make sure you are using the correct settings on the drill e.g. set to screwdriver as opposed to drill, hammer action is turned off and the torque settings are correct) and you’re done!
Drilling into Steel Lintels
Steel lintels are even more difficult to fix to as, once you have drilled through the plaster and reached the steel lintel, you must then swap drill bits for a high speed steel bit and then use self tapping screws to fix the item you wish to hang.
This is a very difficult process not least because once you have drilled the hole for the self tapping screw, you then have to locate it again to put the screw into it.
Considering there is always at least 20mm between the surface of the plaster or plasterboard to the lintel, this is no mean feat.
If you decide that drilling is the best option to use other than the one outlined below then ensure that you have a decent drill to hand, a range of different sized drills bits and also ensure that they are sharp.
Trying to drill something as hard as steel and concrete with a blunt drill bit will take a lifetime and also put a large amount of un-needed pressure on the drill itself.
As mentioned above, always ensure that you hold your drill straight.
Fixing to Steel Lintels
When you get to the fixing part of the job and inserting a screw make sure that you have a decent electric screwdriver or cordless drill/driver as cutting the screw into the steel can be a tough job.
Also ensure that you have a decent drill bit that fits the screw head tightly and also a decent bit holder to ensure the bit does not slip and become wedged in the bit holder.
With your hold drilled in both the lintel and also the item you are fixing to the lintel (if needed) position the two with the holes aligned and pop your screw in and screw it up.
Ensure that you have the driver set to the correct torque setting and it is set to screwdriver and not drill and screw it up tight. Take your time and don’t drive it in too fast to ensure that you don’t damage anything.
Other Options for Fixing to Steel and Concrete Lintels
A much easier option which will always give you a good fix is to glue a section of timber to the head (soffit) of the window opening and fix to that. The construction adhesives available these days are wonderful and as strong as any mechanical fixing.
Always read the manufacturers instructions as some construction adhesives recommend the surfaces to be glued together should be damped down slightly first.
In the example we have given here the client chose to have a timber glued the full width and depth of the soffit. At which point it could have been filled with wood filler and decorators caulk and painted. You could just fix a narrower timber up to the soffit and fill and paint it.
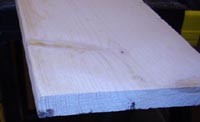
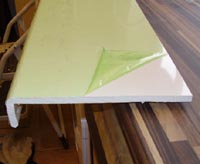
8 inch x 1 inch timber to be fixed at top of window recess
A piece of planed square edged (PSE) timber was cut to length and a heavy weight construction adhesive applied to the back. Plenty of adhesive is used.
The timber is pushed up into place "wiggled" about to make sure the adhesive spreads between the soffit and the back of the timber and then the timber is pulled down again. This is to make sure no air is trapped in the adhesive to spoil the adhesion.
The timber is then pushed back up and pinned into position with props made from 2 x 2 inch sawn timber with an off cut of the 8 x 1 inch timber cut down and fixed across the top.
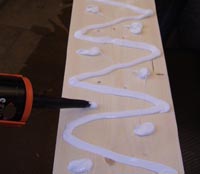
Construction adhesive added to rear of timber ready for fixing
Once the adhesive had set (24hours) the props were removed and at this point we would ordinarily have filled any gaps or nicks in the timber and primed, undercoated and glossed the wood to match the room.
On this job however the client wanted the soffit to match the window frame itself rather than the plaster opening so we fixed a length of PVCu facia board "Cappit" in position over the timber.
Cappit is one name for the section of plastic used to cover facia boards when the property is being made "maintenance free" The gutters are then re fixed to the facia covering.

Timber pinned in position in window recess
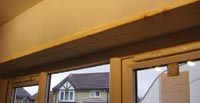
Finished timber fixed in position in window recess
Plastic cappit

Cappit fixed in position and held in place with supports
The cappit is glued up to the timber and the same procedure is used to hold the cappit in place for 24 hours. When completely set the soffit is ready to fix to.
Using pilot holes (see our related projects, right) normal screws can be driven up through the plastic and into the timber for a solid reliable fix for any kind of window blind, curtain poles or curtains.
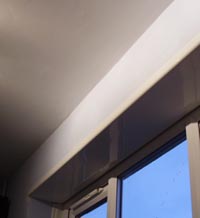
Completed job with cappit fixed into place in window recess
Note: When using construction adhesive to fix to the top of a windows recess, in most cases the recess itself will be painted plaster. In order to ensure a secure and lasting fixing you will need to ensure that the plaster is solid and in good condition and not flaking or coming away.
If you find that it is loose and coming away then the timber itself will not have a solid surface to fix to so it will need to be repaired.
Likewise, if the paint or other covering is loose and flaking away then the adhesive you use will simply stick to the loose paint and therefore fail in no time.
To ensure a secure and lasting fix, any loose flaking paint needs to be scraped off back down to the plaster. Ideally for the most secure fix any paint should removed back down to the plaster or similar covering if there is one and the timber fixed to this, but in most cases as long as the paint or similar is in good condition and fully bonded to the surface beneath it should be fine.
One final point, as we have touched on above, if you are fixing directly to bare plaster, dampen the plaster surface first before fixing your timber in place as this will prevent the very porous plaster sucking the moisture out of the adhesive before it has fully cured.