A very frequent question that we get at DIY Doctor is; How do you fix to ceramic tiles?
Whether its fixing a huge heated towel rail, a mirror, a toilet cistern or toilet roll holder to a ceramic tiled wall, in pretty much all cases you are going to need to drill into at least one tile and use the correct fixing if you want to guarantee a decent and sturdy fix.
Without a sturdy and solid fixing, ultimately, whatever item you are trying to fix will come loose and fall off, damaging the object itself and most likely the wall and tiles too.
Problems Encountered When Fixing to Ceramic Tiles
When fixing to tiles that are mounted on to plasterboard, one issue comes from the thickness of the tiles and plasterboard combined. Most standard wall tiles are around 8mm thick, couple this with a 10mm piece of plasterboard and you’re looking at a thickness of 18mm!
The next problem comes with actually drilling into the tile itself. If you are new to DIY, drilling into a glazed ceramic tile can seem like a bit of a daunting task and one that needs a full explanation. For this, see our project on cutting and drilling ceramic tiles here.
One other problem comes from the way in which the tiles themselves are fixed to the wall.
The correct method for tiling is to apply a uniform layer of adhesive to the whole of the tile (as can be seen in our ceramic tiling project), but in some cases tiles are fixed using the dot and dab method.
If tiles are fixed using dot and dab, large areas are left unsupported and as soon as you apply any pressure or the slightest vibration e.g. a drill, they can easily crack.
One common mistake that many people make is using normal wall plugs inside of ceramic tiles, these will not do!
Normal wall plugs rely on the screw expanding inside them which in turn grips by creating pressure on the inside of the hole. As the plug expands when the screw is tightened, the tile simply cracks as it’s not strong enough.
Another common question we get related to this is; can I use normal Rawl plugs in plasterboard? Again this is a big no as the board itself is not strong enough and will crumble as the plug expands. The tiles are also again not thick enough to offer much surface area for grip.
One final problem comes when you have made your holes, inserted your fixings and are screwing your object in place. It’s very easy to overtighten your screws and crack the tiles below due to the amount of pressure applied to them from the item you’re fixing in place.
What Different Fixings are There for Ceramic Tiles?
The first thing to do is choose the fixing you want to use for the type of material you are fixing into.
Today there is a vast range of different plasterboard and tile fixings available but for the purposes of this project we are going to look at the most commonly used. For a full rundown on the different fixings for plasterboard, see our project here or for masonry fixings see this project here
Remember, a towel rail, even the lightweight plastic kind, is not just fixed to support its weight, the fixings also have to withstand the pull of people tugging towels from the bar or bars and even a toilet roll has people tugging from it, so it needs to be strong.
Choose a good solid fixing so you only have to do the job once. The fixings we show here, and below, are suitable for most jobs in the kitchen or bathroom but always read the instructions on the packet first which will also tell you what size hole to drill to allow the fixing to pass through the tile and into the surface beneath as this is the key to a successful job!
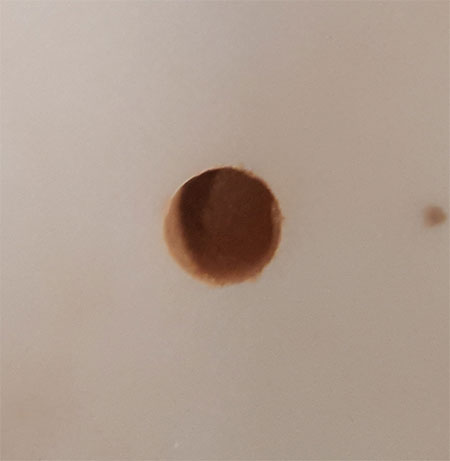
Hole in tile ready for ceramic tile fixing
The top image shows the hole in the tile, the next image below shows an extended plasterboard wall plug.
Extended plasterboard wall plug
The 3rd and 4th images below are strong wall plugs for differing thicknesses of plasterboard and the last image is a hollow wall anchor fix which, in our opinion, is the best of all for plasterboard with ceramic tiles on.
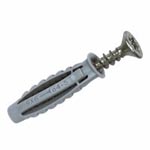
Strong wall plug for plasterboard
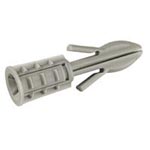
Strong wall plug with anchor wings for plasterboard
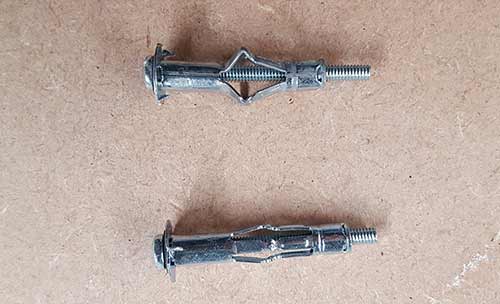
Hollow wall anchor plasterboard fixing, in our opinion the best fixings for tiled plasterboard walls.
The following 2 types of fixings also offer a very sturdy and solid fix so are also good options.
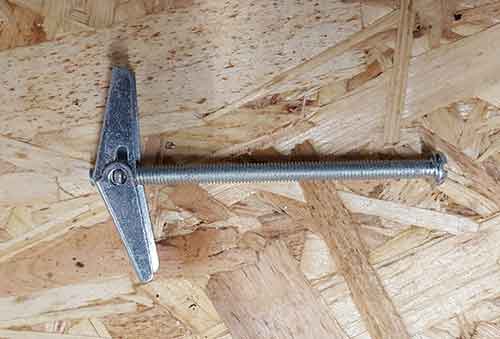
Spring toggle plasterboard fixing
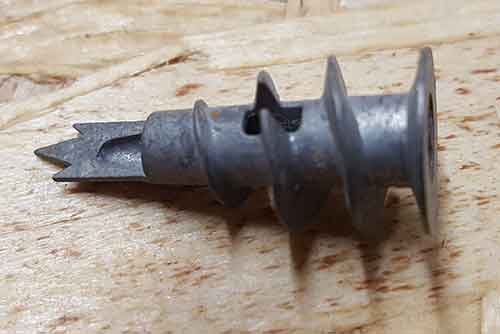
Redidrive or metal plasterboard fixing
for solid masonry walls e.g. bricks, blocks or stone, use a standard red wall plug through the tile.
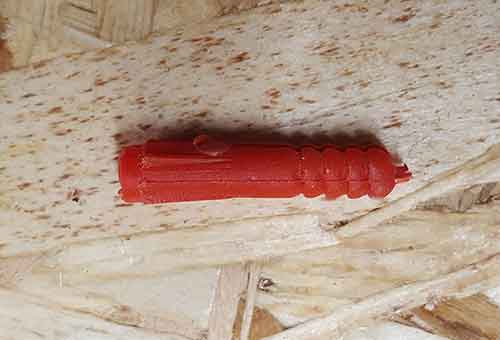
Standard wall plug for fixing into masonry walls and surfaces
What are my Walls Made of?
Before you actually get started with any fixing, you need to know what you are fixing into e.g. what type of wall your tiles are mounted onto. In pretty much all situations it’s going to be one of the following or possibly a combination:
- Plasterboard
- Masonry
- Sheet timber (plyboard, OSB etc)
- Plasterboard and masonry (dot and dab)
If you have sections of the wall un-tiled then give it a tap. If it sounds solid it’s probaably masonry but if it sounds hollow, more often than not it will be plasterboard.
If however the room or surface you’re working with is tiled floor to ceiling, then you’re going to need to drill through a tile first to find out. Read on for more information on this or see our cutting and drilling ceramic tiles project linked to above.
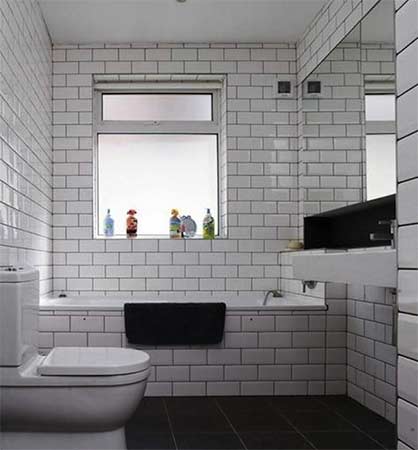
Bathroom walls tiled floor to ceiling
You can also make an educated guess – if the walls in other rooms in the building or property are solid masonry or plasterboard partition walls then the chances are that the room you’re working with will be constructed from the same materials.
How to Fix to Ceramic Tiles
Now that we have looked at the potential problems we might face and also established what surface matrial we are likely dealing with it’s time to get the tools out.
Tip: Before drilling any holes in a wall, you should always check that there isn’t anything behind such as pipes or electric cables. See our project here on using a stud finder for more information.
Step 1 – Mark out Fixing Holes
The first job is to mark the points that need drilling out on the surface of your tile or tiles. This may be just 1 or it may be 3 or 4, it will entirely depend on the item you are fixing.
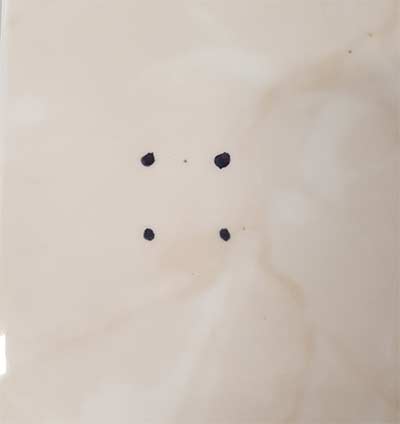
Tile marked out with all points that need drilling
When marking out, make sure everything is level. For example, if you are hanging a mirror, make sure it is square on the wall when you mark the fixing points. Use a spirit level and ideally a second pair of hands when you do this, it’s much easier than struggling.
Step 2 – Drill out Hole(s) in Tiles
With your required fixing points levelled and marked out, it’s time to drill some holes. As we have mentioned, if you are not familiar with drilling into ceramic tiles then checkout our project mentioned above for a full explanation, for a quick run down, read on….
We find the best way to keep the drill exactly where you want it and stop the drill bit slipping or wandering on the tile is to push a tile scribe or the tip of your drill bit or tile drill bit against the ceramic surface and twist. This scores the glaze and stops the drill bit from moving.
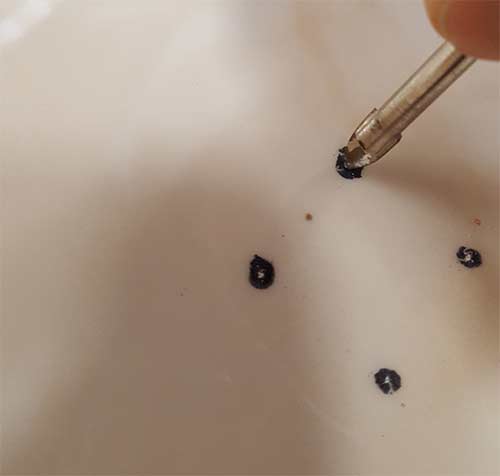
Scoring the glaze of the tile using the tip of a specialist tile drill bit
If you don’t have a specialist tile drill bit you can use a masonry bit, but it will need to be a carbide-tipped bit as regular bits will not penetrate the glaze.
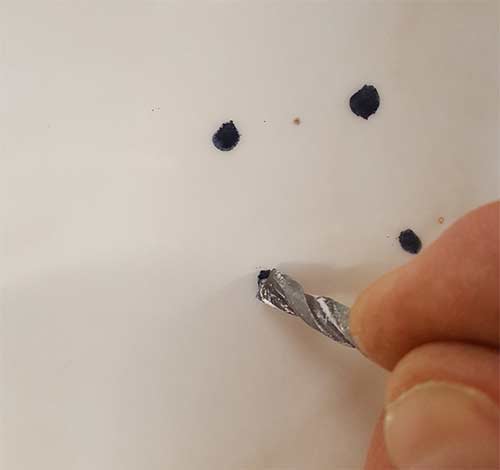
Scoring tile glaze using a masonry drill bit
In most cases you will need to drill at least a 10mm hole to get your fixing through, but this is too large to do in one hit so you need to start small and work up. Start with a 4/5mm bit, pop it in your drill and position it on the mark on the tile.
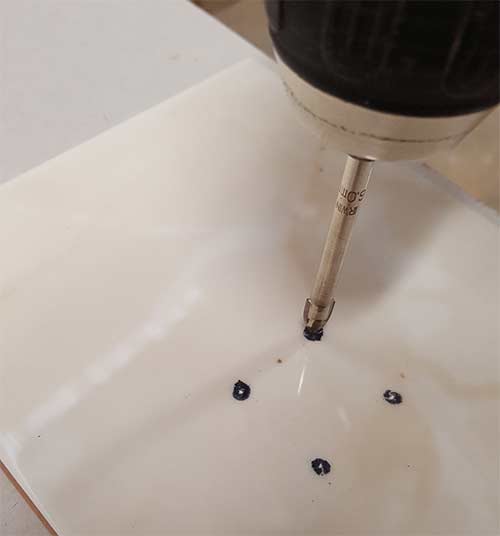
First holes drilled in tile using a 4mm tile drill bit
Start the drill slowly to get it going. Do not press hard and never ever have the drill on hammer, the vibration will crack it, just push gently and let the drill do the work.
In terms of what drill bit to use for a ceramic tile, specialist tile drill bits are best and will leave a much neater hole.
You can use a masonry bit, but be aware, the larger the hole you have to drill, the untidier it will look using a masonry bit as the “teeth” tend to chip the edges of the hole.
The object you are fitting over the hole should hide any evidence of this though, but just make sure!
In the event that you do damage the tile badly, you will need to replace it with a new one. To find out how, see our replacing a damaged tile project here.
With your first small hole made, work up in increments e.g. 6mm, 8mm etc until you get to your desired hole size.
If you’re fixing to a solid masonry wall then you will need to use a standard wall plug, so you’re hole shouldn’t need to be any bigger than 6-8mm or so, but if you’re fixing to plasterboard using hollow wall anchors or redidrive fixings, as mentioned, you’re looking at atleast a 10mm hole.
With your hole now formed in the tile you can now get your fixing in place.
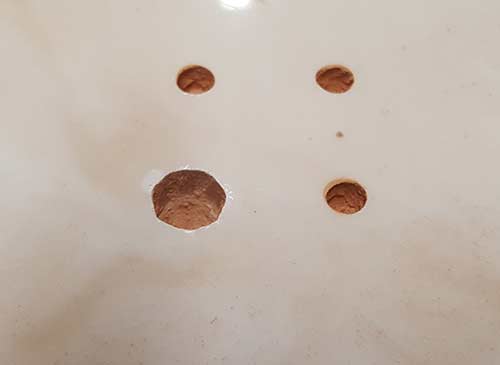
To get an anchor fixing or metal plasterboard fixing in, a 14mm hole is required in the tile
Step 3A – Fixing into a Masonry Wall
How you now get your chosen fixing into the wall beneath will depend on what type of fixing you’re using and what type of wall it is.
If the wall is solid masonry, this is one of the easiest to deal with. Simply use the correct size masonry drill bit (should be around 6mm) and drill your fixing hole in the masonry to the correct depth.
Hold the drill straight and level as you go to make sure that it does not touch the inside of the hole in your ceramic tile as it will chip it, or worse, crack it.
Once you have reached the correct depth, run the drill back and forwards to clean the hole out.
Now take your rawl/wall plug and push it into the hole. If it’s a bit tight, push it in as far as you can with your thumb/finger and then use a screw with the head on the wall plug as a punch, tapping it gently with a hammer to get it all the way in. With this done, repeat for any further holes/fixings and then you’re ready to fix your object in place.
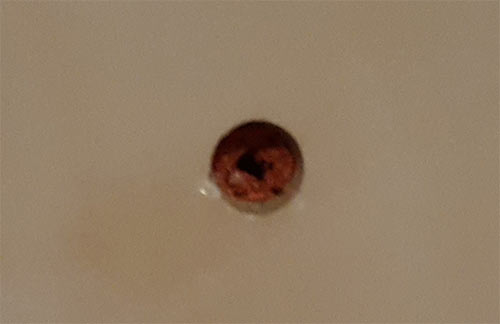
Wall plug inserted into hole drilled in masonry wall through ceramic tile and pushed through tile to walls surface
Step 3B – Fixing into a Plasterboard Wall Using Redidrive, Metal or Nylon Fixings
If you are fixing into a plasterboard wall using redidrive, wall anchor, spring toggle fixings or drywall plugs then this is where it can get a little tricky due to the size of hole required.
If you are not familiar with using any fixings such as these, we would suggest going with the metal-type redidrive plasterboard fixings. Although wall anchors are the best, the metal fixings are very good and should provide more than enough support.
On the packaging of your chosen fixing, the manufacturer should state the size of the hole you will need to drill in both the tile and the plasterboard to get the fixing through.
For redidrive and the nylon or metal self-drill plasterboard fixings, these are self-tapping e.g. as you screw them in, they make their own hole, but we would suggest drilling a small pilot hole first as this prevents the fixing moving off centre. Around 6mm should be fine.
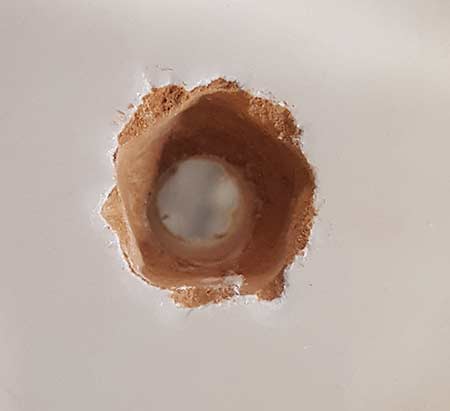
Pilot hole drilled in plasterboard ready for redidrive/metal plasterboard fixing
With the pilot hole drilled, pop a Phillips screwdriver bit on your driver. Look inside the top of the fixing and you will see a Philips/pozi driver slot.
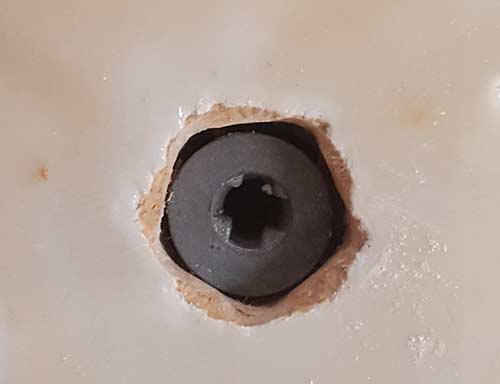
Phillips driver bit adaptor built into metal plasterboard fixing
Check that your driver is set to the “driver” setting (not drill) and adjust the torque setting down. Position the fixing over the pilot hole and slowly screw it in until it goes tight.
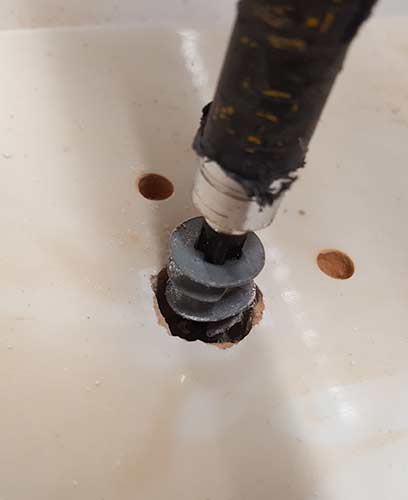
Screwing in metal plasterboard fixing using a drill driver
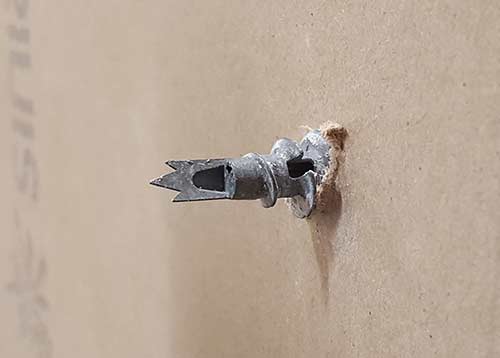
Rear view of readydrive fixing screwed into plasterbaoard
Step 3C – Fixing into a Plasterboard Wall Using Hollow Wall Anchors or Spring Toggles
If you are new to fixing to plasterboard walls and ceramic tiles then these types fixings can be a little tricky to master, but do provide the best and most sturdy support.
The hardest part about working with anchor or spring fixings and plasterboard is the hole size. It needs to be big enough for the anchor or toggle to pass through but too large and you decrease the area the anchors or toggles have to provide support.
If you haven’t got info on teh size of hole needed you will need to hold the fixing against the body of a selection of drill bits until you find the correct size. Or you can use a ruler to measure the width of each to get the correct sizes
Pop the corect size bit in your drill and drill out the fixing hole in the plasterboard in the dead centre of the hole in your tile.
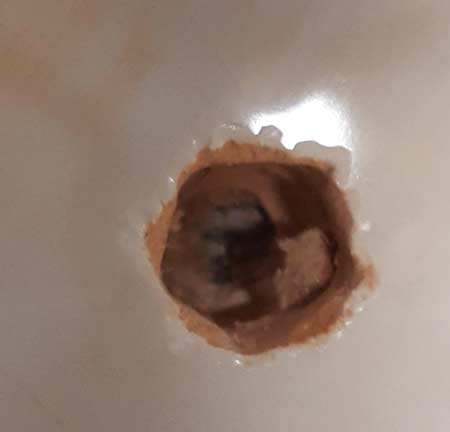
Hole drilled in plasterboard ready for wall anchor
If you are using a spring toggle-type fixing, you will need to pop the item you are actually fixing to the wall onto the toggle screw first, before you push the spring section through your hole.
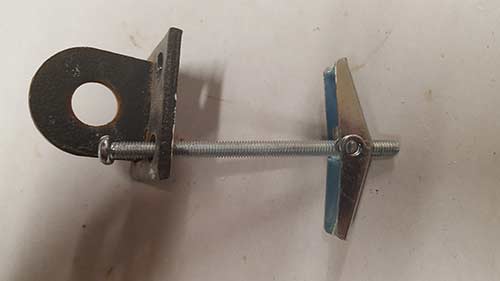
Spring toggle screw inserted through bracket and then toggled screwed back on ready to be inserted through hole
If you’ve opted to use wall anchors, these are a bit easier to work with than spring toggles. Push the anchor through the hole right up to the collar ensuring the little teeth on the underside of the collar are pushed firmly into the plasterboard.
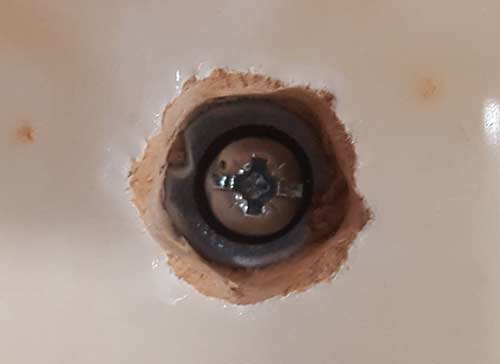
Anchor fixing pushed into plasterboard right up to collar
The teeth stop it twisting as you screw it up, enabling the wings to pull back and hold it firmly against the rear of the board.
Insert the screw into the fixing if it isn’t already and start screwing it up. It should be loose to begin with and then will go stiff as wings start to pull out.
Keep tightening until you can’t do any more. At this point the wings should now have fully extended out against the back of the plasterboard, holding the fixing firmly in place.
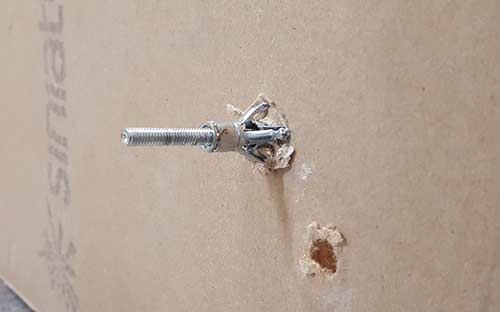
Anchor fixing screw screwed up tight and wings pulled back tight against the back of the plasterbaord
You can see quite clearly from the back how these fixings work and using the wall anchor shows its virtually impossible to pull the fitting off the wall.
Now simply unscrew the screw from the anchor fixing, locate your object in place and then screw it up tight – job done!
Step 3D – Fixing into a Sheet Timber Wall
As I’m sure you have guessed, this is by far the easiest of all.
Firstly, drill a hole through your ceramic tile that’s around 2mm larger than the screw you will be using to sure your object (to allow a little wiggle room) and there you have it!
In most cases, if you are dealing with sheet timber then this will be in some kind of loft conversion and due to this, the timber itself should be at least 18mm thick which should be more than enough to ensure a firm fix.
If however the timber is less than 9mm thick you should consider using a spring or anchor fixing.
With the hole in the tile done, it’s as easy as just screwing your toilet roll holder, towel rail or whatever straight into the timber – sorted!
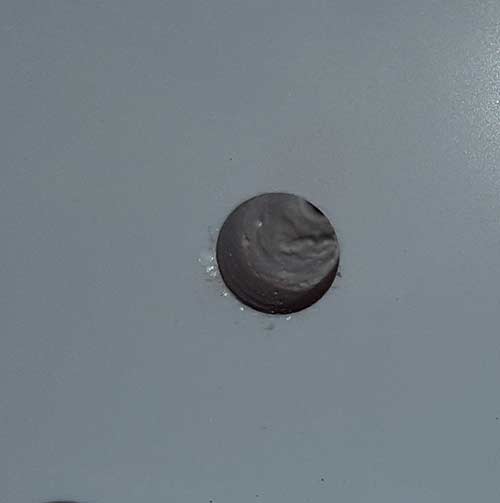
Hole drilled in tile ready ready to fix into sheet timber beneath it
Step 3E – Fixing into Plasterboard and Masonry (dot and dab)
How you fix into a tiled dot and dab wall will very much depend on the distance between the plasterboard and the masonry behind it.
In most cases the gap should be around 10-20mm but in extreme cases it may be up to a few inches.
If the gap is only slight (max 20mm) then you can use use a wall plug and fix into this. See the step 3A above for details. You will just need to use a slightly longer screw to ensure it bites nicely into the plug itself.
If however the gap is larger than this you will need to use some special dot and dab fixings. Some of the best that we have found are the Corefix fixings, see our full review of them here.
Fixing to ceramic tiles can be a tricky job if you have never attempted it before but as long as you take your time and use the right fixings you can certainly achieve a great result.
Quick Start FAQ Guide for Fixing to Ceramic Tiles
- Q – What screws should I use for ceramic tiles?: A – This will largely depend on the type of fixing you are using and the wall-type. Most standard wood screws or countersunk screws can be used with most types of fixing, unless specialist screws are supplied with the fixing itself
- Q – Can you use a masonry drill bit on tiles?: A – In short, yes you can use masonry drill bits of ceramic tiles. Carbide-tipped drill bits are best as they can penetrate the tile glaze
- Q – How do you stop a drill bit slipping on a tile?: A – The best method is to use a tile scribe, specialist tile drill bit or masonry bit. put the tip of the drill bit on the point you want to drill, apply a little pressure and twist it. This will score the glaze and stop it slipping
- Q – Can you use a hammer drill on ceramic tiles?: A – No! Do not use hammer action on a ceramic tile. The shock and vibration will at least crack it, if not smash it to pieces
- Q – What are the best fixings for a tiled plasterboard wall?: A – The best fixings to use for tiled plasterboard walls are hollow wall anchors. You can also use toggle or spring fixings or metal/redidrive plasterboard fixings
- Q – Can I use normal wall plugs for ceramic tiles and plasterboard?: A – No! wall plugs rely on the plug expanding and biting into the hole when a screw is inserted. Tiles will crack when the plug expands and the plasterboard will just crumble as neither are strong enough
- Q – What are the best fixings for a tiled masonry wall?: A – The best fixings for tiled masonry walls are standard wall plugs
- Q – What different fixings are there for ceramic tiles?: A – There are many fixings for ceramic tiles such as standard wall plugs, plasterboard plugs, metal plasterboard fixings, spring fixings, toggle fixings but the fixing you use will depend on the wall your fixing in to.
- Q – What drill bits can I use to drill through a ceramic tile?: A – The best drill bits for ceramic tiles are specialist tile drill bits but you can also use masonry bits or porcelain drill bits
- Q – What size hole do I need to drill to fix to ceramic tiles?: A – Hole size needed for a ceramic tile will depending on the fixing you’re using. Wall plugs will need a 6-7mm hole but metal plasterboard fixings, toggle fixings etc will need 10mm or bigger
- Q – Can I drill a 10mm in a ceramic tile in one go?: A – No! This will be too large to do in one go. Instead do it in stages starting small e.g. 4mm and work your way up in increments e.g. 6mm, 8mm etc
- Q – How do I fix to a ceramic tiled wall?: A – First, you need to drill a hole in the ceramic tile. Next, choose a suitable fixing, wall plug for masonry, hollow wall anchor or metal fixing for plasterboard and then pop the fixing through hole in tile and secure it in place
- Q – How do I fix to a dot and dab tiled wall?: A – If the gap is less than 20mm you can use a standard wall plug but if it is greater you will need to use a special dot and dab plasterboard fixing
- Q – Why do I need to drill through a ceramic tile to fix to it?: A – Tiles themselves are not strong enough to take much weight so you will need to drill through them to fix to the wall behind them
- Q – Are plasterboard anchors and fixings necessary?: A – Yes they are. Plasterboard is not strong enough to support a screw directly and over time it will work its way loose so special fixings are needed
- Q – How long does it take to drill through a ceramic tile?: A – It should take around 10-20 seconds or so to drill ceramic tiles, taking your time and using medium drill speed and either a special tile drill bit or masonry bit. Porcelain tiles will, however, take much longer as they are much tougher, somewhere around 4-5 minutes taking your time

