Natural stone is an attractive, rustic option for garden steps. While it may not fit every situation, stone works beautifully for a decorative winding path with steps or a secondary access point in the garden.
In this guide, we’ll show you how to install flagstone steps in your garden. Read on to learn more.
What are Flagstone Steps?
Flagstone is a versatile term for flat stones with relatively even surfaces, ideal for constructing steps, paths, patios, and other flat walkways.
These stones are also used as coping stones to cap brick or stone walls.
Flagstones come in a wide range of shapes, cuts, and sizes, from standard patio slabs to large cut stones and small pieces for patchwork paths.
One of the great features of flagstones is their versatility. Many are cut to a uniform size, making them quick and easy to lay, allowing you to cover large areas efficiently.
Flagstones are also cost-effective. Basic concrete paving slabs can be very affordable, although more unique and stylish options can be pricier.
However, there are some downsides. Flagstones can be brittle and may break easily. If not laid correctly, they can crack over time.
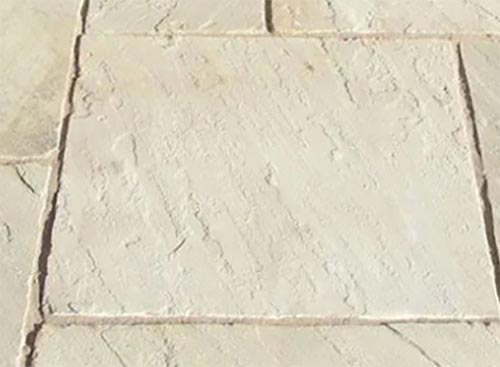
Natural cut stone flagstone paving slab
What to Put Under Flagstone Steps
There are a few methods to lay flagstone steps. You can use a hardcore and sand base or the brick and foundation method, as shown in our patio steps project.
The hardcore and sand method involves laying a base of hardcore or scalpings, compacting it, and then adding a layer of sand or mortar on top before placing the flagstones.
The brick method requires laying a concrete foundation for the first step, building a brick front, backfilling with hardcore, and then adding a mortar bed for the flagstone.
The brick method is generally more stable, ensuring the steps are solid and immovable. However, the hardcore and sand method is easier for novice DIYers, as it doesn’t involve bricklaying.
Whichever method you choose, ensure the base is solid and immovable to prevent the steps from shifting or cracking.
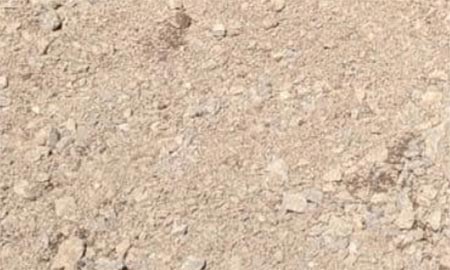
Hardcore case that needs to be compacted down
Measuring and Calculating Step Length and Height
Installing flagstone steps helps navigate slopes or drops easily. To ensure uniform and even steps, follow these calculations:
First, measure the total length and height the steps will cover.
Divide the height by 50mm (the height of a typical flagstone or the stones you’re using). Then, divide the length by 300mm, a comfortable step size for most people.
With these measurements, you can mark out your steps on the ground, ready for construction.
For more detailed guidance on measuring and marking steps over a slope, see our patio steps project.
Here are the dimensions to keep in mind:
- Length: Distance from the front to the back of a step
- Width: Total width of the steps, side to side
- Depth: Foundation or base depth
- Height: Vertical height from the bottom to the top of the steps
Tools and Materials for Laying Flagstone Steps
To lay flagstone steps like a pro, you’ll need the following tools and materials:
- Shovel
- Wheelbarrow
- Sharp sand
- Cement
- Whacker plate or tamping pole
- Flagstones
- Hammer
- Bolster chisel or petrol cutoff saw (for cutting flagstones)
- Rubber mallet
- Spirit level
- Bucket trowel
- Pointing trowel
- Hardcore or scalping for the base
How to Build Flagstone Steps
This guide will help you lay a simple set of flagstone steps over a short slope. We’ll use a solid hardcore base and set each stone on a bed of mortar for durability.
We’ll use uniform flagstones measuring 300mm x 300mm, making each step 600mm wide and 300mm deep (front to back).
The image below shows what you aim to achieve when laying your flagstone steps.
How to lay flagstone steps in the garden
Step 1 – Mark Out Your Steps
First, calculate the size and number of steps needed. Next, mark the area where the steps will go to create a guide for installation.
Since stone sizes can vary, it’s best to source your flagstones before preparing the ground, based on your calculated measurements.
Lay out the flagstones to plan your steps. Dig approximately 100mm deep for hardcore, plus 25mm for concrete and another 25mm for sand or mortar.
Use string lines to outline the width of the steps and mark the position of each step’s nosing.
Step 2 – Set the Foundation for the First Step
To ensure the stability of your steps, start by creating a solid foundation for the first step and riser.
First, dig a hole 100mm deep, 300mm long (front to back), and 600mm wide. Make sure the base is flat and smooth.
Mix concrete with a ratio of 6 parts ballast to 1 part cement. The mix should be fairly dry. Fill the hole with the concrete, using a tamping stick to remove any gaps and ensure a solid fill. Let it cure for 24 hours.
See our Mixing Concrete project for more details.
Step 3 – Lay the Bottom Step
After the concrete foundation has cured, you can lay the first step.
Prepare a mortar mix with a ratio of 6 parts sharp sand to 1 part cement, until it holds its shape. Spread this mortar over the concrete foundation.
Position the flagstones on the mortar bed and level them using a spirit level. Adjust with a rubber mallet as needed, ensuring the stones slope about 5mm towards the nosing for proper drainage.
Let the mortar cure for 24 hours.
For mixing tips, check our Mortar Mixes project.
Step 4 – Construct the First Step
To build the first step, dig a trench measuring 280mm (8”) long and 150mm (6”) deep. The top of this step should overhang the bottom step by 20mm on your 300x300mm slab.
Fill the trench with 100mm (4”) of hardcore, compacting it with a club-hammer. Then, add a layer of concrete, levelling it to the top of the trench. Allow the concrete to cure for 24 hours.
Once set, mix a 6:1 mortar (6 parts sharp sand to 1 part cement) and spread it over the hardcore base, levelling it as you go.
Place your flagstones on the mortar, ensuring they are level and have a 5mm slope towards the nosing for proper drainage.
Step 5 – Lay the Remaining Steps
For the remaining steps, follow the same process as before. Mark out and prepare the bases for all steps at once to save time.
After setting the hardcore bases, mix and spread mortar, then lay the remaining flagstones. Ensure each stone is level with a 5mm slope towards the front for drainage.
To ensure nothing is damaged before it’s ready, allow all steps to fully cure before using them.
Tips for Laying Flagstone Steps
Here are some essential tips for successfully installing flagstone steps:
Using Large, Heavy Flagstones
When using large flagstones for each step, their weight will help keep them in place. However, ensure each step has a solid base to prevent sinking.
To provide stable support, lay each flagstone on a well-compacted layer of hardcore or scalping’s.
Laying Patchwork Flagstone Steps
For patchwork flagstone steps, you must mortar each stone to ensure stability and prevent movement.
First, dig out the area within your concrete foundation and fill it with compacted hardcore. Apply a layer of mortar over the hardcore base.
Place each stone carefully, ensuring they are level and free of trip hazards. Fill gaps between stones with more mortar, using a pointing trowel for a smooth finish.
Proceed to the next step by repeating the digging, filling, and mortaring process. Allow the mortar to set before starting on subsequent steps. Each new step should slightly overlap the previous one, but minimal overlap is needed for small stones compared to larger flags.
Continue this process for each step and let the mortar cure for a few days before use.
Laying flagstone steps offers a quick, cost-effective way to build steps over sloping ground, making it easy and safe for people to navigate such sloped terrain.