The principle of making steps in your garden is exactly the same as anywhere else. Steps (and stairs) have to rise while we go up them. The height they need to go up in total is divided by the number of steps required to get from bottom to top.
The distance up is called the rise, and the distance forward is called the going. Find out more about stair terminology here.
To begin you need to lay out the area where your steps will go. There should be a slope, but this will not always be the case, such and when the steps are up to a patio and are against a wall. We cover this in more detail below.
The first step (no pun intended!) is to mark out the area where the steps will be. In our example the sides of the steps are marked by walls but if you do not have this luxury, you will need to mark the edge out with pegs and run a line marking the parallel edges, or build your own walls.
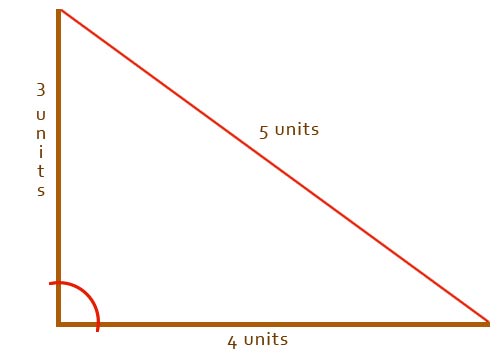
3, 4, 5 method for getting an area square
Check that the area that you have marked out is absolutely square. There is a simple method for getting things square in the home or garden; it’s called the 3, 4, 5 method. We have translated the Pythagoras mathematical principle for you and You can find out more by looking at our tips and tricks page.
Once you have marked out the area into which your steps will go, you need to work out the number of steps you’ll need in your flight. You do this by measuring the overall length and height (going and rise) of the flight and dividing by 200mm, which is a typical step.
In our example we had exactly 1m or 1000mm to rise and we had to do that rise in a going of 1.5m or 1500mm.
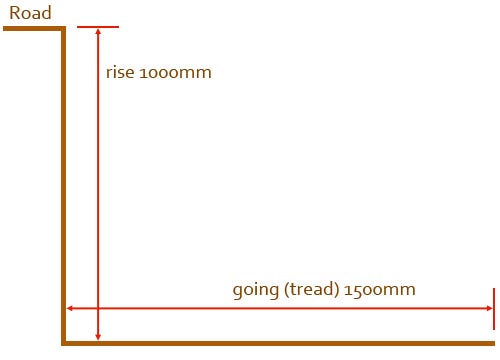
Work out the Rise and Going for your Garden Steps
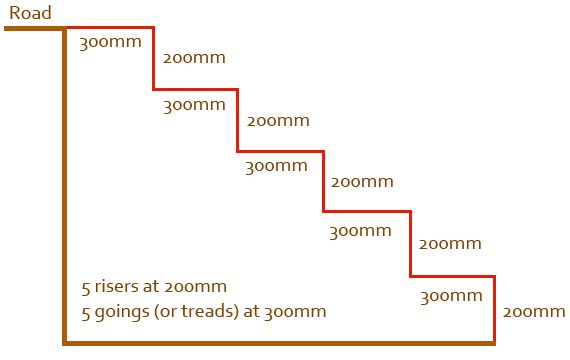
As we have mentioned, the average rise (although there are no rules in the garden) for a garden step is 200mm or thereabouts, so it was pretty easy to work out that there would be 5 steps and to make the most of the going space available each step would be 300mm wide or, to put it properly, each step had a going of 300 mm. Making a sketch like the one above makes the job a lot easier when it is visual.
While there are no rules in the garden as the height of the riser or the depth of the tread, it is always a good idea to keep each one the same. Stairs and steps, with different size treads are a real nuisance and can be a trip hazard.
Work out how many steps you will need
Now you can mark out where each of the steps will be in the area you have already marked out. You will need to dig out the steps, digging back about 100mm behind the risers to give yourself space to work. You will need to dig out around 100mm below the level of the paver to add compacted hardcore or concrete, depending on the method you are going to use.
Either way, start at the bottom step and work up.
Concrete and Block Method for Patio Steps
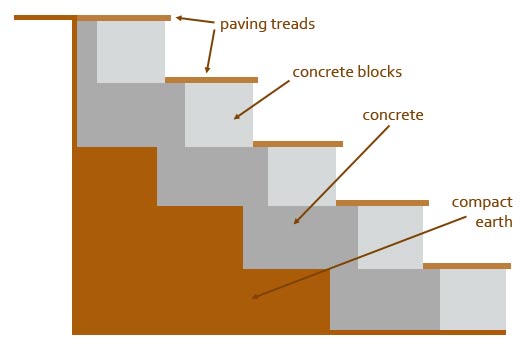
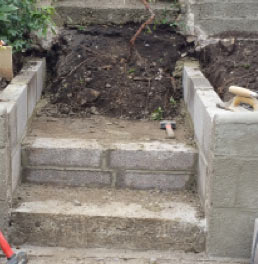
Profile of garden steps built using concrete and pavers
As you can see from the “before”; photograph below, our original step was intact. So we were able to use a breaker to break out the second and third steps, and then dig down behind the first to put in a concrete base for step number two. This continued all the way up to the top.
Making garden steps from scratch and cutting in to earth
If you are starting from scratch you will need to and building your steps into “virgin” earth, you will need to dig a 125mm deep footing under the bottom riser to support it. Ensure that this footing is level and hard before your continue.
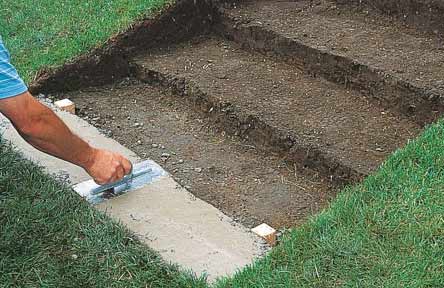
The footing under the first step or riser – Image courtesy of diy.com
Two concrete blocks are laid flat to form the shuttering or formwork for the concrete behind. The concrete is mixed as a 6-ballast – 1-cement fairly dry mix.
As it’s fairly dry the blocks can be laid on it almost immediately and the steps (with care) can continue in one. It would take a week if you had to wait for each step to dry before moving on to the next.
In this example the blocks and concrete are laid wider than the opening that is needed. This allows the use of the extra width as a stepped foundation for the walls up either side.
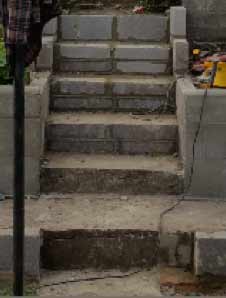
Laying blocks to form walls either side on extra width of step
The treads were cut to size and laid from the same paving as the patio. Each tread overhangs the step below and slopes downwards towards the front about 6mm.
This allows the water to run off the step and drop onto the next one rather than run down the face of the render which we had spread on the face of the blockwork.
See our project page on foundations and also our project page on rendering here as well as our page on laying bricks and blocks.
Building the Rise on the Paver Slab Method
Alternatively, behind the brick or block work, scalping or hardcore can be laid and compacted. This should rise to the point the second step will be built which will ensure that the water runs off the front of the step, much in the way described above. A 6mm difference is sufficient to give you an effective slope.
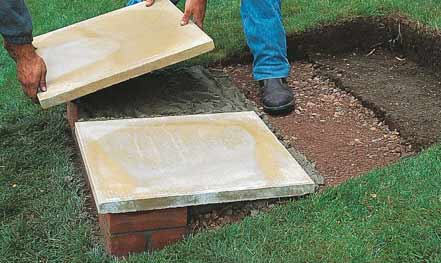
Laying the paver tread when making garden steps – Image courtesy of diy.com
The lay a bed of mortar to place the pavers onto and lay them with an overhang of about 25mm on the front and sides of the steps. You should use a pointing mortar between slabs if required.
In this method you build the next riser on top of the paver or tread of the step below. The disadvantage of this method is that you either have to wait for the mortar under the pavers to go off before you start the next step, or be very careful.
Unlike the image above, we always prefer to fill the void behind each riser. If this cavity is left open as shown in the diy.com image above, it can (and will) fill with water which may wash out further infill and even seep through the brickwork joints.
This in turn will stain your steps. See our project page on efflorescence.
Building Steps From Railway Sleepers

Railway sleeper steps formed in grass verge
Building railway sleeper steps is very popular in the garden and you can see a project page on how to do this here.
The setting out and working out the rise and the going is very similar except sleepers, being a set size, do not give you quite the flexibility you have with bricks, blocks and a masonry tread of some kind. At least with masonry you can vary the depth of the joint to add or subtract a few cm where necessary.
Make sure that you measure the position for the steps are even all the way up the flight.
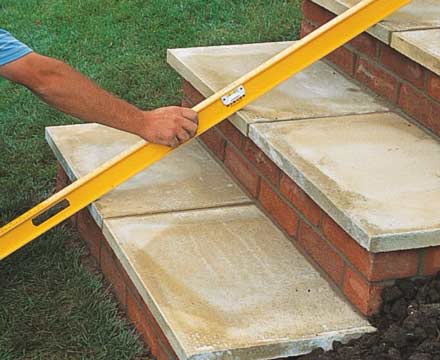
Check that the flight of steps is even – Image courtesy of diy.com
Steps That are not on a Slope
This sounds like a contradiction in terms, however sometimes it is necessary to build steps up to a patio where there is no slope, such as where the steps meet a wall. In this case it is important to anchor the steps into the wall by toothing it in to the adjoining wall.
For more information about how to do this see our project on tying into existing brickwork.
The easiest way to build steps like this is to build low walls with bricks or blocks where the risers and sides of the flight will be. You will end up with a series of boxes which you fill with scalping or ballast before adding your treads.
For up to 5 steps you can build these steps of strip footings, but over 5 steps you should create a concrete pad.
The nice thing about building steps in the garden is that you have a great deal more freedom that you do in the home, however you do need to ensure that they are safe and sound. If you use either of these two methods you will achieve just that; safe patio or garden step made with pavers.