Laying a level floor screed over a large area is difficult and to do so “By eye” requires years of practice and experience.
To get a great finish using this practice for a first time floor screeder is almost impossible to do, however there are ways that newbies can screed a floor successfully and get a great finish.
In this DIY guide you will learn how to screed a floor using level timbers as guides and get a great flat and level finish.
What is Floor Screed?
The word screed actually means “An accurately leveled strip or area” of material laid on a wall or floor as a guide for the even application of a covering.
So in this case, our screed is not a floor screed but a floor covering and to get the covering level we must introduce some screeds as guides that we can use to lay a flat and level floor in order to lay a finishing covering such as carpets, laminate flooring or the similar.
Floor screeds are used in many situations from domestic to industrial and in most cases are applied over an uneven floor in order to level it.
In most situations today a floor screed is laid on top of underfloor heating which in turn is laid on top of a layer of insulation boards such as Celotex, Kingspan and the similar. A point to note here is that any insulation should be totally solid without any movement, as any movement will cause cracks!
Once the underfloor heating has been laid on the insulation, The whole lot is then screeded over to cover the pipework. The sand and cement mix used is excellent at absorbing and emanating the heat produced, enabling the entire floor to act as a heating source.
In terms of the screed itself, as we have mentioned above, traditionally a floor screed was a mixture of sand and cement but today there is another choice in the form of pumped liquid floors screeds that are also available in several variations; anhydrite and liquid cement.
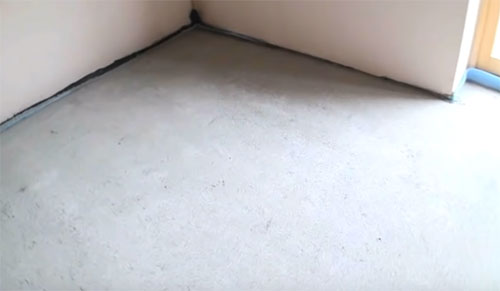
Traditionally laid sand and cement floor screed
What Types of Screed are There?
Today there two different main types of floor screed – the traditional sand and cement mix floor screed and the newer more modern pumped liquid screeds.
Traditional Sand and Cement Screed
Traditional sand and cement floor screed is generally mixed and prepared on site prior to laying using a cement mixer for most smaller jobs, however when working at scale e.g. on large housing estate construction sites it is often delivered ready mixed in a similar way that cement is sometimes delivered ready mixed.
In terms of the mix itself, as it’s a floor and will be subjected to loads such as footfall, furniture etc. it needs to be strong and therefore a strong mix is used, generally 3:1 (sharp sand to cement) or 4:1 (sharp sand to cement).
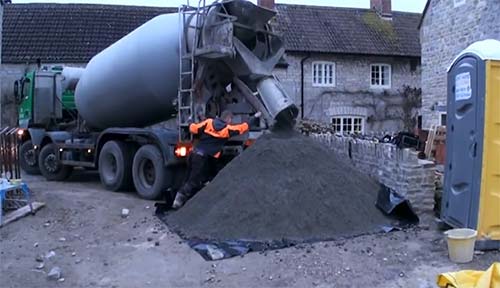
Ready mixed 4:1 ratio floor screed
As with all things there are advantages and disadvantages and sand and cement screed is no different.
Starting with the disadvantages, shrinkage can occur and cause cracks or the finish itself can undulate if not laid correctly. Due to it’s required thickness of 65-75mm this can cause issues with underfloor heating.
Despite these, sand and cement screed is pretty and effective, it can be laid on a DIY basis and doesn’t require a huge amount of preparation.

Traditional sand and cement floor screed mix
Modern Pumped Floor Screed
There are in essence 2 types of modern pumped floor screeds; anhydrite and liquid cement. Anhydrite is the more commonly used here in the UK and accounts for roughly 25% of the screed market.
Anhydrite screeds are comprised using calcium sulphate, anhydrous or dry substance, which when mixed with water forms Gypsum, a material that’s widely used across the construction industry, mainly in place of cement as a bonding agent.
Pumped screeds have several advantages over traditional screeds in that they cure and dry over a much shorter time, normally 24-48 hours. They can also be laid in thinner layers (around 45mm) and much quicker.
They are also self leveling which is a huge time saver compared to traditional screeds and also suffer less from shrinkage over time meaning less cracks.
However pumped screeds are a specialist business and should only ever be installed by a company or individual that knows exactly what they are doing, as if it goes wrong, huge expense can be incurred to put it right.
Also due to their expense, around 50% more than traditional screed, when ordering or booking a liquid screed pour you have to accurately calculate exactly how much you need, which can be tricky if the surface being laid on is uneven or uses modern beam and block which can undulate.
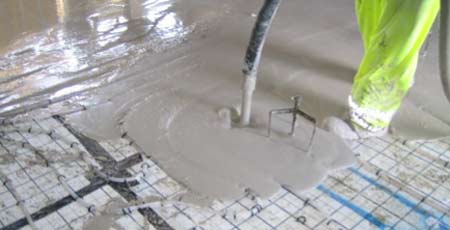
Laying a pumped liquid floor screed
We have a full and detailed information on poured floor screeds here in our project if you would like to find out more
Classifications of Floor Screed Installation Types
Aside form the 2 mains types of floor screeds, sand and cement and pumped, each of these can fall into several different classifications in terms of how they are installed and what featured they have, these are as follows:
- Floating Screed: This type of screed is normally laid on top of solid insulation that is in turn laid over the existing floor or surface. Common with under floor heating installs, it must be ensured that the insulation is totally solid as if not the screed will crack and fail
- Unbonded Screed: As the name suggests, unbonded screed is not joined to the existing floor or surface and is normally laid on top of a membrane to help prevent damp and moisture penetration
- Bonded Screed: Bonded screeds are essentially bonded or joined to the existing surface they are laid on normally using a bonding agent or epoxy. This creates a strong and durable screed that resists cracking much better than other screeds
- Leveling Screed: As it sounds, a leveling screed is used to level an existing floor surface prior to laying laminate, carpet or another similar finish. Leveling screeds are generally liquid-based as they’re liquid nature allows them to self-level
- Wearing Screed: Designed for areas subjected to lots of wear and tear and heavy traffic, wearing screeds are built for durability and normally feature crushed aggregate
What is the Right Mix for Floor Screed?
The right mix for a sand and cement floor screed is a strong mix of 3:1 or 4:1 sharp sand and cement. The mix should also be fairly dry and sharp sand should be used.
The best way to tell if you have the right mix is to grab a handful of mixed screed (put your marigolds on first) and squeeze it. The mix should stay in one firm lump in your hand but very little liquid, if any, should come out.
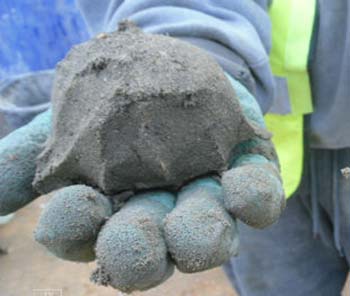
Screed mix ball tested for mix consistency – Image courtesy of screedscientist.com
To get the best mix, add the sand to the mixer and then the cement. Turn the mixer on and mix the two parts thoroughly. Splash in a little water at a time, allow it to mix and the stop the mixer and do a squeeze test. If the mix is correct, good work, if not continue this process, adding a little water at a time until it’s spot on.
As mentioned, if you are mixing up a screed mix to screed the floor in one room you are best off doing it yourself using a cement mixer. If possible enlist some help as this makes the job much easier. As you are laying the screed your helper can be mixing.
One further point to note at this stage concerns admixtures. These are basically chemicals that can be added to a screed mix that changes certain features such as increasing its strength or thermal abilities, decreasing drying time etc.
In most cases these are best left to the professionals that understand them fully.
The key to a successful screeding job is not only getting the right mix consistency, it’s allowing it to dry or cure correctly over a number of days.
How Much Floor Screed Will I Need?
The exact amount of floor screed that you need for the floor you are screeding will very much depend on the size of the floor.
As a rough guide, 1 tonne of flooring grit or sharp sand mixed at 4 sand to 1 cement (4:1) will cover approximately 15 square metres of floor when laid at 40mm thick.
Laying at this thickness is generally done when the surface you’re laying on is solid and all you’re aiming to do level it up.
If laying a screed to be used as the final surface before laying carpet or similar or if you are incorporating underfloor heating, then your screed will need to be somewhere between 65 and 75mm thick.
If, however, you are opting for a pumped floor screed then as mentioned, the volume required needs to be calculated accurately. As pumped liquid floor screeds need to be professionally laid then this calculation is best left to the pros.
Preparing a Floor for Screeding and Laying Timber Screeds
Aside form creating the correct mix, preparing the surface you are laying your floor screed on is just as important.
For this guide we are laying a screed directly on to an existing concrete floor to slightly raise it and also level it.
The first job is to remove any dust and debris. First sweep up any large items and visible dust and dispose of and then if you have an old vacuum, run this over the whole area.
For the purposes of this guide we are going to be using timbers to form our “screeds”, of which we will lay our actual screeds against and once cured they will then provide a level guide to lay the remainder of the floor.
To ensure each screed is laid level the timbers themselves firstly have to be straight and level and secondly need to be laid level.
When purchasing or sourcing timbers to use, check along their length and ensure they are straight and true.
It is possible to use just 1 timber as your screed guide and move it to the next screed position once the first has been laid.
However, if you are brand new to laying floor screeds then it’s a good idea to lay out a level timber frame first and then you can fully concentrate on laying your mix screeds flat and level.
Lay the timber onto the floor, following the plan shown below or slightly adjusted to fit the room you are laying yours in.
Lay your first timber down against a wall and use a spirit level to level it. If it is out of level, mix up some screed mix and pack up the timber in appropriate places until it’s level.
Lay your next timber out and use the same technique to level it. When checking its level, check along its length and against the first timber you laid.
Repeat this technique for the remaining timbers across the room area ensuring each is totally level itself and also to any timbers surrounding it. Once done your room should look similar to the image below.
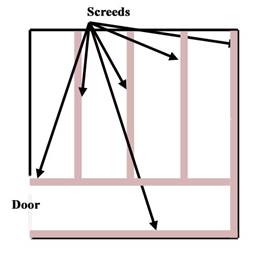
Screeding layout diagram
Laying on Alternate Surfaces
As we have stated above we are laying our screed on an existing concrete surface that’s not in bad condition.
This is pretty much the most basic and straightforward install that can be done, however it’s not always that simple.
If you are laying over underfloor heating pipes and insulation boards then you have to ensure that the boards and pipes are fixed firmly in place and don’t move at all. The slightest movement in the base can easily cause the screed floor to crack and ultimately fail, so in preparation for this scenario extra attention needs to be focused on the screed base.
Additionally, if you are laying your screed over a membrane or bonding it in place then you need to ensure any membrane is laid down so it’s flat and level and also extends up any walls enough to cover the screed and if bonding, ensure the correct bond has been laid down and covers the entire floor and any door openings.
When laying your timber guide frame over underfloor heating pipes you will need to again ensure they are level across the entire area by packing them up with screed mix where needed.
How Long Does Floor Screed Take to Dry?
In short, a sand and cement screed floor can be walked on after around 48 hours, but before anything else is installed or laid on the floor it first needs to cure and then dry.
Quite often in the building trade, the terms drying and curing are interchanged and are used to mean the same thing. When it comes to floor screed there is a distinct difference between the two.
Curing is the process of allowing the screed to gradually set over a period of days, ensuring it doesn’t dry out too quickly as this can make it too rigid and cause it to crack.
This is achieved by laying a thick polythene sheet over the screed and sealing it so it retains most of it’s moisture as it cures. This process can take anyting up to 7 days, but it will depend on the temperature and humidity in the room you are working.
The drying process happens after the screed has cured. Once cured, the polythene sheet is removed and any remaining moisture can then dry out over 24-48 hours or so.
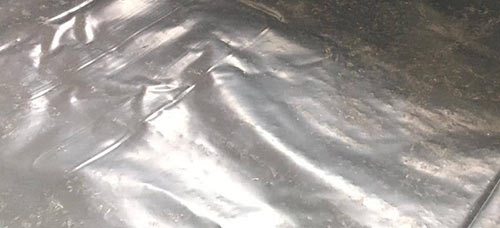
Polythene sheet laid over screed floor allowing it to cure
How to Screed a Floor
As we now know exactly how to prepare our existing floor and lay out all of the necessary timbers to create our screed template frame, it’s time to now start laying some screed.
It’s fairly simple to lay a few screeds across a floor and level them as you go and it’s even easier if you have help laying the screeds.
For the sake of this example we are going to be laying on an existing concrete floor in good condition to level it and raise it slightly.
we will work with a 50mm covering and to lay our screeds we will use some 75 x 50mm timbers (3 inch x 2 inch). This is a standard size timber. For most room sizes a timber of a standard 4.8m long is plenty and this can be cut down as required.
Prepare the Floor to be Screeded
The first job is to prepare the floor or surface that’s being screeded. Brush the area thoroughly, removing any dust and debris.
If you can it’s also a good idea to vacuum the area if you can.
If you are laying over insulation sheets, membrane or underfloor heating pipework then check everything over and ensure it’s solid and nothing can move.
If you are laying a bonded screed then you will need to brush apply any bonding solution.
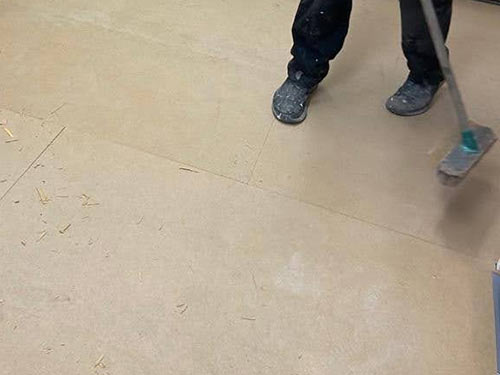
Brushing concrete floor to be screeded
Layout Timber Screeding Battens
The next task is to set out your timber screed frame. Using 3×2 timbers lay them out around the room along each wall and across its width or length, spacing them evenly, leaving roughly a 400-500mm gap between each.
It is essential that they are all level both along their length and with any timbers at their side. The overall success of the whole job and how level your screed floor is depends on this.
Where any timbers need to be raised, mix up some screed mix using a 4:1 sand and cement ratio and pack it under the timbers to raise them up until they are level. Pack some of the screed mix every 300mm or so under the timber to support it.
Once all level it’s a good idea to leave everything to dry out before going any further as if you apply pressure down on a given timber that’s been packed up this could crush the screed mix and the timber won’t be level any more.
Once all dried and laid out your room space should look similar to the below.
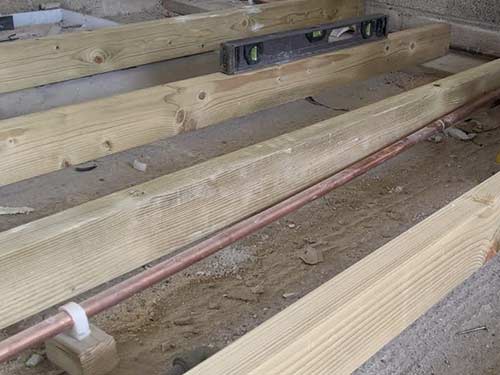
Timber screed battens laid out and ready for laying screed
Mix Floor Screed Mixture
With all your timbers in place you can now start to mix up some floor screed mix. To ensure it’s mixed as thoroughly and well as possible you do need to use a cement mixer. Mixing by hand for this particular job just isn’t quite good enough.
To ensure uniform strength across the entire floor each mix that’s done needs to be identical to the last one so everything needs to be measured out.
With this in mind the best method to ensure this is to use a measuring jug of some kind.
As we are mixing up a 4:1 mix, 4 sharp sand to one cement, using your measuring apparatus, starting with the sharp sand fill it and level it off and tip it into the mixer, repeat this for 4 loads.
Next, fill and level with cement and add this to the mixer and turn it on and mix these first 2 components fully. Ensure you are wearing old clothes, gloves, goggles and a mask as the mixer can occasionally chuck out sand or cement and you don’t want to breath it in or get it on your hands.
Splash it a little water as the mixer is running, watch your hands as you do this and allow it to mix, add a little more and again let it mix and then turn the mixer off. Once stopped grab a handful of the mix and scrunch it into a ball to test it. If more water is needed add more and mix further.
Once it’s correct e.g. you can scrunch it into a ball and it supports itself and no water or moisture comes out as you squeeze it, it’s ready to go and start laying.
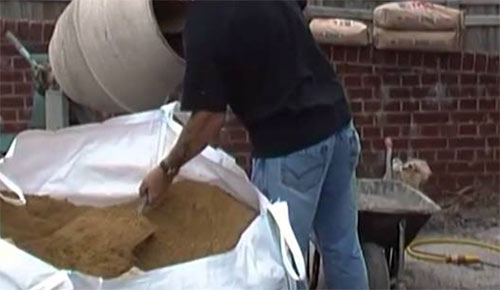
Mixing up floor screed mix using a cement mixer
Lay Down Floor Screeds
With the timber screed frame in place and a screed mix fully prepared, just before laying any screed wet down the edge of the timber you will be laying against using a paint brush and jug of water. This is to prevent it from sucking all the moisture out of the screed mix before it cures properly.
Place a shovel full of the mix every 300 mm along your first timber and flatten out with a plasterer’s polyurethane float. The mixed screed should be about 75mm wide.
You will see that the screed you are placing naturally falls away at an angle at the side. When you have finished each run of screed, cut this back square to the timber screed as shown by the white cut line in the diagram below.
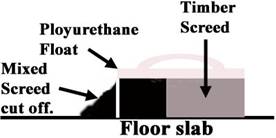
Side profile of screeding
Repeat this for the remaining timbers, working carefully as you go and wetting each timber before you lay against it. Ensure each screed line is totally flush and level with the top of each timber.
Once you have laid all of your screeds down allow 24-48 hours for them to cure thoroughly and then gently remove each of the timbers, taking care not to damage any of screeds as you go.
Fill in the Gaps
With the screeds cured and dried the next task is to fill in all the gaps. Mix up some more screed mix in the cement mixer and once done start shoveling it into the first gap between screed lines, piling it slightly higher than the levels of screed.
Just before you start laying and filling in, position a polythene sheet at the back of the room across it’s width. Tape it up to the wall to keep it out the way as you work. As you work your way across the room pull the sheet over to cover the screed that’s been laid.
This will be needed at the end to cover the screed and help it cure and to prevent you having to walk over your nice flat and level surface to lay the sheet it’s much easier to pull it over as you work.
Level across the screeds using your a spirit level or a straight edged piece of timber, moving the mix around with your level or straight edge until it is absolutely level between your two screeds.
Fill in any voids there may be in the surface by scattering some of the screed mix over the area and then using a polyurethane float to smooth it in.
As you work your way down the screed strip, once you have leveled and filled any voids run over the levelled surface using a polyurethane or steel float. Rub in the float in a circular motion over the surface to “close it”.
Closing a screed surface effectively means running over it and closing up any pits or pours in the surface leaving you with a totally smooth finish.
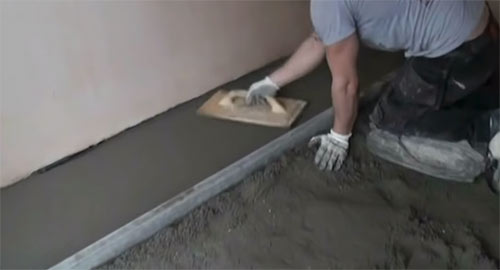
Closing surface of screed
Once you have closed surface of a section move on and fill and smooth the next area and repeat this until you have reached the end of the run.
With the first run complete move on to the next until you have worked your way across the entire room and you have a perfectly smooth and level screeded floor.
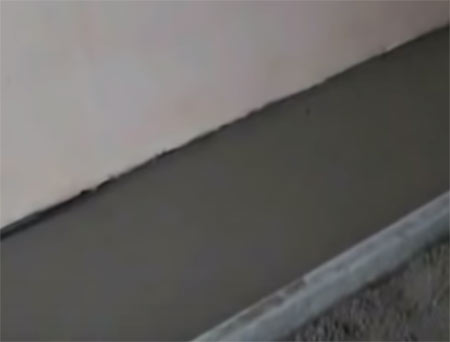
First run of screed laid and levelled
Allow Floor to Cure
Floor screeds should be cured rather than just dried out quickly. Curing in this instance means dried out very slowly over a number of days and a floor screed needs to retain its moisture for as long as possible. This is necessary because of the high cement content as rapid drying could lead to cracks.
To cure your newly screeded floor you need to place a polythene sheet over the entire screed floor and it should be sealed down as best as possible at the edges.
If you have followed the advice in the last step then the sheet should be pretty much covering the entire floor as you will have pulled it over as you work.
The sheet will need to stay in place for 5-7 days to allow the floor to fully cure. There is no speedy way around this or short cut, it will take as long as it takes!
This also includes opening windows and doors, using fans or dehumidifiers etc, you simply can’t do this, just leave it to cure in its own time.
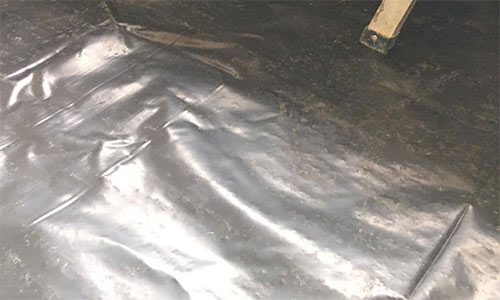
Screeded floor covered with polythene sheet to allow it to cure
Allow Floor to Dry
The final job, once the screeded floor has been allowed to cure correctly, is to allow it to dry.
To do this simply remove the polythene sheet that’s covering the screed and expose it to the air.
Again as with curing the same goes! To ensure the screed retains its strength and flexibility it must be allowed to dry naturally with no interference so don’t use any artificial drying and keep windows and doors closed.
It will take somewhere between 24 and 48 hours to dry and to determine that it is dry and ready for a final floor covering to be laid, an Air Hygrometer Test should be performed.
This types of test that is recommended by British Standards and effectively measures the volume of moisture that is released by the screed into a sealed area. More information on this can be found here on the Screed Scientist website.
Once the test indicates that your screed has dried to a level that a final floor finish can be laid you can then go ahead and get it down!
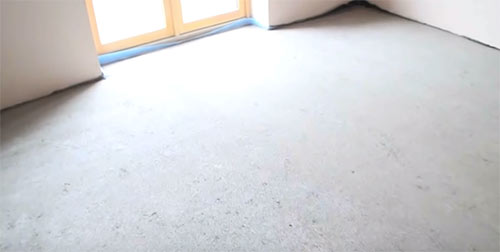
Completed screed floor dried and ready for final covering
Laying a screed floor may seem like a complicated job if you have never done it before but as long as you prepare your existing floor and lay out a timber guide frame it’s certainly one that you can do yourself and get equally as good results as the pros!

