Liquid or pumpable screeds are a relatively new invention and can be an excellent alternative for traditional screeds. They are being used more and more for a number of reasons, primarily because they can be laid much thinner and more quickly than traditional screeds. We will cover the pros and cons of liquid screeds against traditional screeds below.
They can be referred to as a range of different names, such as pumpable screeds, self-levelling or self-smoothing screeds. We will use the term “liquid screed” predominantly although the terms are used interchangeable.
What is a Liquid Screed and How is it Different to a Traditional Screed?
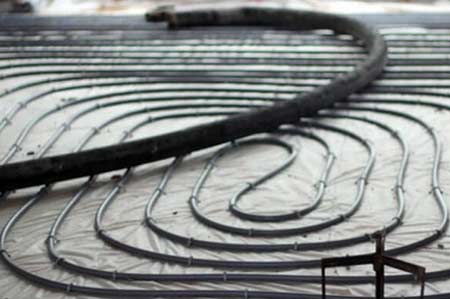
Screeds are not a structure element of your building; they are applied over the flooring surface to provide a smooth, level and flat surface that the finishing materials, such as carpeting or tiles, are applied to. If you are using under-floor-heating it will be laid under the screed, which is poured over the top and surrounding the heating elements.
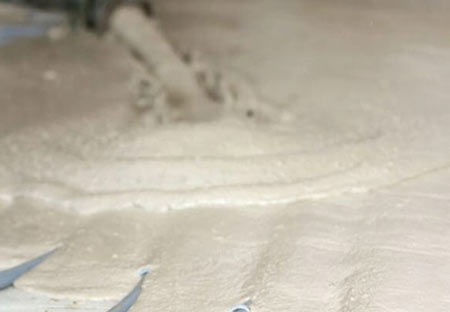
A liquid screed being poured over under-floor heating – image courtesy of Easyflow
Traditionally a screed would have been laid by shovelling in the screed mix and then levelling it with a screeding bar and/or polyurethane float. We explain the best technique for laying screed yourself in our project here.
A liquid screed is pumped in and poured across the floor surface. This liquid finds it own level so will be perfectly level and will be hard enough to walk on in about 72 hours, although it will take a fair bit longer before it is completely dry and you can finish the floor – we will discuss drying times in details after explaining how to pour your liquid screed below.
Liquid screeds are ready-mixed, delivered to site where they are then pumped into the room requiring the floor. They are a larger scale version of the approach you can take using a self-levelling compound to level a concrete floor, which we how you can do yourself in our project about using self-levelling compounds here. This approach is not feasible for large areas or often with under-floor heating.
Different Types of Liquid Screed
The most common type of liquid screed is a calcium sulphate which is the active ingredient making up around a third of the volume. This becomes gypsum when water is added, and as a result can be referred to as a “calcium sulphate screed”, “gypsum screed” or even “anhydrite screed” which refers to the form of the mineral – anhydrous calcium sulphate – which is used.
More recently cement based pumped screeds have become available. These can be pumped like a gypsum screed, but does not have the downsides. The active ingredient is cement rather than calcium sulphate.

Pouring liquid screed over under-floor heating pipes – image courtesy of JCW Floor Screeding
Different manufacturers and suppliers will have different proprietary products so there will be some variation and they will be able to provide specific details. While there is this range in practical terms you have the following choice:
- Traditional cement screed
- Pumpable calcium sulphate screed
- Pumpable cement based screed
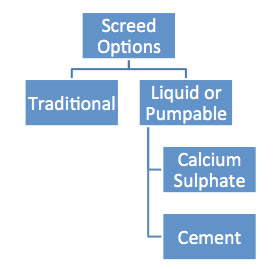
The different available liquid screed options
The choice that you make will be based on the different pros and cons of the various options. However for more detailed information on the different types of screed available there is a lot of information published by the Concrete Centre here.
Advantages and Disadvantages of Liquid or Pumpable and Traditional Screeds
As we have discovered there are essentially three board options for your screed. We will summarise the relative pros and cones of these to help you make the right choice.
Benefits of Traditional Screeds
- Possible to self-mix so you can ensure the right amount and are not dependant on an outside delivery
- Can be ready mixed and delivered to ensure consistency while reducing significant amounts of effort and time (additives can included to ensure that slow the screed going off for larger loads)
- Possible to create a flat surface which is not level; this can be necessary particularly in wet-rooms for example
- Material costs are cheap – certainly the cheapest of the screed options
Benefits of Pumped Calcium Sulphate Screed
- Very quick to lay/pour – a 25m2 area will take around 20 minutes start to finish
- While the material costs are typically about twice that of traditional screed because it is so quick to lay you will save on labour and time which means the cost are broadly the same
- Can be laid as thin as 35mm (check with your supplier for the recommended minimum depth for their product) which reduces material costs and means that heat from under-floor heating is more effective
- It is very level – much more so than is possible with a traditional screed even with a experienced professional
- Calcium sulphate is less prone to shrinking which means you need less expansion joints and large tiles laid on it will be less prone to cracking
- Under-floor heating is more effective, not only because it is not heating a larger depth/volume of screed, but because the liquid flows all around the pipes so heat transfer from the pipes on more effective
Disadvantages of Calcuim Sulphate Screed
- The floor surface needs to be prepared before the finish can be applied. A substance called laitance needs to be removed – see below in the section about preparing the screed for finishing
- The drying time is not insignificant, although broadly similar to a traditional screed, and care needs to be taken during the first 72 hours where drying should not be too fast
- Most suppliers will not allow DIY laying; they will insist that you use an experienced contractor to measure and pour the screed
Benefits of Pumped Cement Screed
There are many general benefits which are similar to a pumped calcium sulphate screed, but over and above these there are the following:
- Once dry they do not need surface preparation, as the calcium sulphate screeds, before laying the finishing floor surface, particularly tiles
- They have quicker drying times than calcium sulphate
Disadvantages of Pumped Cement Screeds
- Availability is limited so you might need to hunt for a supplier
- The material cost is about 20% higher than a calcium sulphate screed although in a similar way you will make this up with the reduced time and labour involved.
- They require more expansion gaps than a calcium sulphate screed
Preparation for Laying Your Liquid Screed
As with everything in the building game, preparation is everything. And laying a liquid screed is no exception – in fact it is probably even more important than ever; you only need to imagine wet screed spilling out and flowing where it shouldn’t be!
There are a number of steps that you need to take to prepare the floor for screeding. The actual screeding is likely to be done by an experienced tradesman as this is a typical requirement from many suppliers. You can find one local to you here.
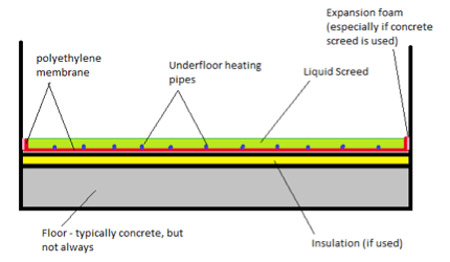
Cross section of a screed floor with under-floor heating and insulation
The first step will typically be done by your chosen contractor:
Step 1: Measuring the Amount of Screed Required
As it is so critical to get the right amount of screed, the contractor you are using will probably not leave this to you but come and measure the amount of screed that is needed. Too little and you will have to try and get your supplier to deliver some more as soon as possible before your current batch goes off. This is fraught with problems as mixing batches will lead to inconsistencies, assuming that they can even get another batch to you.
Too much is a waste of money and also cause a problem as you have to dispose of it as the ready-mix concrete supplier will probably not take any excess back with them.
Top Tip – Have a “Hippo Bag” at the ready into which any excess can be poured. It will collect the screed, allowing any water to pass through. You can then dispose of the harden screed at a later date. Even if the right amount is delivered there will be excess in the pump and pipes which will be cleaned into this bag.
Step 2: Remove debris and lay insulation
The most important thing is to ensure that the area to be screeded is made water tight, but before you do this is it worth a good idea to remove all the dust and debris from the floor. Then if you adding insulation this should be done below the waterproofing membrane.
Step 3: Lay the watertight membrane
Use polyethylene sheeting to create a waterproof membrane to ensure that there is no leakage of the screed when it is pumped in wet. Use 1000 gauge or thicker – ideal for this is the polyethylene use for the DPM under your concrete subfloor.
The polyethylene needs to be curled up at the edge of the area to be screeded and stuck to the walls. It should be folded into the corners as neatly as possible and again stuck. All joins should be taped – gaffer tape is ideal for this job.
It is likely that you will need to have some expansion foam around the edges of the room, against the wall between it and the screed when it had been poured. This will allows slight movement of the screed as it warms and cools and therefore expands; the size of the room and therefore the amount of screed and the type of screed will influence what is needed.
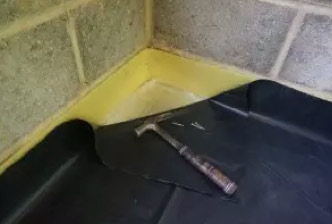
Polyethylene membrane with expansion foam – Image courtesy of Southern Screed
When you have finished you will have a shallow, water-tight polyethylene “pool” where the screed will collect.
Step 4: Waterproof Shuttering
Form work will be needed around obstacles and troublesome pipe work etc so that you can ensure that water and screed does not get to them.
Where there is shuttering, such as across doorways or steps, this needs to be sealed with mastic or expanding foam so that it is watertight. Expansion foam will generally be needed across doorways.
Step 5: Secure Under-floor Heating Pipes
If you are using under-floor heating then you should secure the pipes or trays inside the polyethylene. The clips are generally self-sealing, but it is important that nothing is able to float up when the liquid screed is poured.
Clip central heating pipes so that they cannot float up when the screed is poured – Image courtesy of Easyflow
Now that everything is sealed and watertight and you are sure that the screed will be kept in the location where it should be, then you are ready to pour the screed. It is a very good idea to fill the under-floor heating pipes, if you have them, as this will stop them floating up in the liquid screed, and stopping them being squeezed by the weight of the screed.
How to Pour a Liquid Screed
The liquid screed can be poured when you are watertight and the under-floor heating pipes are filled. The same “rules” apply for screed as do for concrete; do not lay over 30°C or under 5°C and falling. You’re good to go if the temperature is over 3°C and rising.
As we have mentioned it is unlikely that you will be left to do this on your own, so the contractors will arrive a few hours early to get ready before the mixer arrives with the screed. They will check that the area to be screeded is watertight and then will work out the level that the screed will go to across the room.
They will use a number of screed levelling tripods positioned in various points across the room. These are adjusted so that the flat plate at the centre of the tripod is at the height that the screed will be. This is done using a datum which is transferred to each tripod using a laser level.
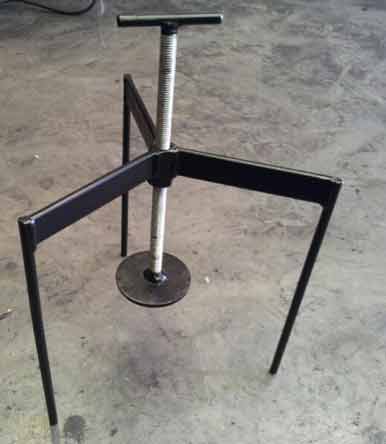
A screed levelling tripod
They will also get the pump ready so that when the mixer arrives with the screed in it it can be poured straight into the pump and piped to where needed.
The screed is sloshed into the area where it is needed and spread out by someone wading through it. It is the consistency of cream so runs to all corners of the polyethylene pool you have created. It is filled up until the level of the screed touches the plate on the screed tripod. At this point you have enough screed to the pump will be stopped and the tripods are removed.
The screed is tamped using a Screed Dapple Bar twice; once fairly vigorously to get any air bubbles out of the screed and the second time more gently without leaving the surface to get a smooth finish.
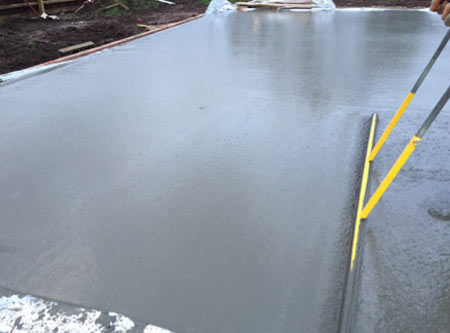
A Screed Dapple Bar – Image courtesy of Maxi ReadyMix
They will work back to the doorway leaving the whole surface smooth, ready to start drying. This whole pouring process will not take long; 15 minutes for around 25m2. Now close the doors for up to 72 hours so that the initial drying does not happen too quickly as cracking might occur; you want to keep the humidity high to slow the drying.
Drying Time for Liquid Screed
Liquid screeds dry at a broadly similar rate as normal, traditional screeds; 1 day for ever mm up to 40mm, and 2 days for depths over 40mm. You can get more accurate drying rates from your supplier.
For the first 72 hours you should keep doors closed to reduce ventilation so that drying does not happen too quickly and lead to weaknesses or cracking.
After about 24 hours you should be able to walk on the surface and it will be a week before you can start to build non-load bearing structures like partition walls.
It is possible to speed the drying process but using a dehumidifier after 72 hours, and if there is under-floor heating this can be turned on gradually from the lowest setting after 7 days. Removing the laitance will also help the screed to dry out more quickly (see below for more details about this).
The screed should be totally dry before finishing with your desired floor covering.
Preparation for Laying Floor Covering on a Liquid Screed
One of the issues with using a liquid screed is that there is a little work to be done before the floor finish can be laid. We are referring to calcium sulphate or gypsum screeds which are the most common types of liquid screeds used currently – apparently this does not happen with a liquid cement screed.
As the screed dries a thin crust forms on the top which is called laitance. This needs to be removed by sanding before the floor is tiled, however if other floor coverings that do not need an adhesive are used you only need to brush and vacuum the residue.
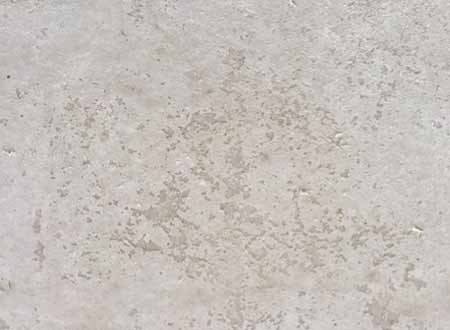
The laitance flaking off a dried liquid screed – Image courtesy of Express Liquid Screeds
As we have discussed above, removing the laitance is one of the disadvantages of a (gypsum) liquid screed. It will need to be sanded off, ideally after about a week as it gets harder to remove if it is left too long.
Once the laitance has been removed the floor needs to be sealed before your adhesive is applied as it is a porous surface and will absorb the moisture from the adhesive causing it to dry too quickly. Find out how to lay floor tiles here.
It is easy to see why using a liquid screed has become so popular. It is quick and requires much less labour that a traditional screed. It is not effective on a small scale or where there needs to be a slope on the floor, but almost anywhere else it is fast becoming the preferred solution.