To keep your central heating system in tip top condition and ensure that it operates at peak efficiency it is necessary to ensure that no rust, sludge or limescale which is commonly found in heating systems is allowed to buildup and restrict the flow of water around the system.
If any such material is allowed to build in the system this this can result in the system using more fuel and taking an age to get to temperature and also reducing the lifespan of your system causing it to fail well before its time meaning huge costs to fix or replace it.
To reduce the risks of this occurring a heating system inhibitor is added to help keep these issues to a minimum. Read on below to find out all you need to know about central heating inhibitor.
What is Central Heating Inhibitor and how Does it Work?
Central heating inhibitor is a chemical additive that is mixed directly in to the water that flows around the system and it helps to break down rust and sludge buildup in your heating system that can cause huge issues and reduced efficiency and sometimes failure.
The pipes, radiators and other elements that make up your heating system are mostly made from metal and as we all know when metal is exposed to water e.g. the water flowing around the system, it causes it to rust.
Over time this rust and other debris that inevitably gets into heating systems can form a thick dark sludge, full of rust chunks and other objects that can cause blockages, restrict water flow around your system, create a barrier between the heated water in the fins on the inside of the radiator reducing heat transfer outwards that warms your home and also failure of components in your boiler.
By adding a central heating inhibitor to your system, the chemical solution helps to reduce the reaction between the water and metal and break down the resulting corrosion, keeping your heating system flowing efficient and ensuring it’s lifespan.
We often get asked; Should I add inhibitor into my central heating system? As you can see from above this most certainly a yes, you definitely should. Another question we get asked is; Can I add inhibitor into my central heating system myself? Again, the answer is yes you can. Information on how to do so can be found below.
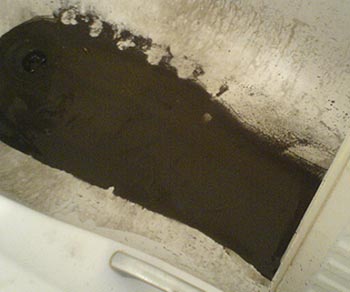
Black sludge form heating system – Image courtesy of radiatorsludge.co.uk
How Often Should Inhibitor be Added to a Central Heating System?
You should add a full dose of inhibitor into your heating system roughly once a year. As you should get your system serviced annually this is the ideal time.
Over time the chemical additives in the inhibitor themselves break down and loose efficiency so topping up reinstates the protection for your heating system.
Additionally if your system looses pressure over the course of a few months and you find you have to top it up this could be the sign of a leak and if you have a leak then inevitably you will loose some inhibitor due to this.
Also if for any reason you have to drain down your heating system to replace an item such as a radiator, section of pipework or boiler component then obviously, through this process you will loose all the inhibitor so you will have to add it back again.
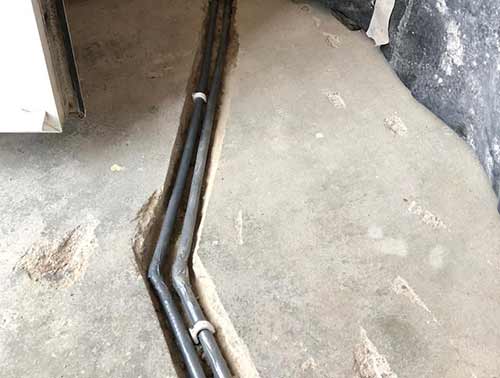
Section of central heating pipe repaired in floor requiring new inhibitor to be added
What Else is Needed to Keep my Central Heating System Healthy?
As we have established it’s very important to keep your heating system in top condition to ensure it remains efficient and lasts its full potential lifespan, and this can be achieved by adding central heating inhibitor to break down any corrosion and debris.
As good as the inhibitor is at dealing with corrosion etc. it doesn’t physically remove it from your heating system, so what should you do to get rid of it?
Well in answer to this and to further help keep your heating system running like a well oiled machine, here follows the complete process for maintaining heating system efficiency:
- Power flush the system: Power flushing your central heating system involves draining it down and then high pressure flushing the whole system with a chemical cleaning solution. This breaks down and removes and rust and debris that may be present. This can be done on a DIY basis also, but not to professional levels. More information can be found in our power flushing project here
- Re-prime and add inhibitor: Once power flushed the heating system then needs to be refilled with water and during this process you can then add back inhibitor to fully protect your system once again
- Fit a filter: As we have said, once the inhibitor has broken down and rust and debris, without removing it, it just sits on your system. By fitting a magnetic filter system this then removes any debris and rust from your system before gets back to your boiler. More on these below
- Add limescale inhibitor: As well and rust and debris, limescale can also pose a significant threat to your heating system, especially if you live in one of the many hard water areas in the country. In the same way that rust and sludge can build up on the inside of radiators, pipes and also on the internal of your boiler, tis is also the case for limescale, so adding a decent quality limescale inhibitor can prevent this from happening. Today, most central heating inhibitors contain a limescale inhibitor also
What are Magnetic Boiler Filters?
A magnetic boiler filter is an object that is fitted to the return pipe to your boiler e.g. the pipe that brings the water from your radiators back to the boiler for re-heating and removes small rust particles and the similar before it is allowed to turn to sludge.
Preventing objects such as this from entering into your boiler can really help to reduce any damage to the sensitive components within it.
In terms of how they work, as water passes the magnet, any particles contained within it are attracted to the magnet where they stick. As over time quite a bit of debris can get stuck to the magnet it should be cleaned regularly, normally during your annual boiler service.
You may now be asking yourself if getting a magnetic boiler filter installed in your heating system is a good idea and in answer we can definitely say yes it certainly is they work very well and provide good levels of protection to your system.
In actual fact if you have a new combi boiler system installed today it is now a legal obligation to install a magnetic filter also.
In terms of who can install one, technically this could be a DIY job, but if this is done incorrectly then there is a good chance that it will void the warranty on your boiler so it’s best done by a professional plumber with the knowledge to do it correctly.
When it comes to installing a magnetic boiler filter this is a fairly straightforward job and involves cutting away a section of pipework on the boiler return pipe, usually fitting a valve to either end of the cut pipe and then fitting the filter in between.
If you are interested in finding out more about central heating magnetic filters then some of the best are the MagnaClean filters by Adey, find out more on their website here.
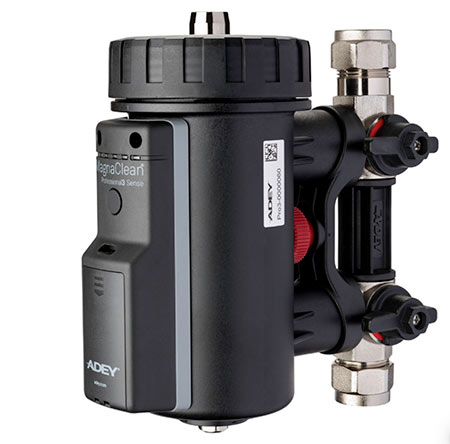
Magnaclean magnetic boiler filter
How Much Inhibitor Should I add to my Central Heating?
The amount of central heating inhibitor that you add to your system will very much depend on how big it is and how many radiators you have in the system.
As a very rough general rule normally 1 litre of central heating inhibitor will treat a heating system with up to 10 radiators, but this is only a rough estimate.
A more accurate approach is to read the usage direction that are printed on your chosen inhibitor packaging. The manufacturer will state exactly how big a system a single container will treat and if you need to use more, simply use an additional container.
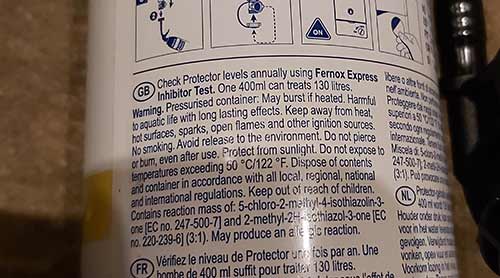
What volume of water 1 container of Fernox F1 can treat
Should I Top up the Inhibitor in my Central Heating?
Yes you should definitely top up the central heating inhibitor in your heating system once a year, normally during your annual system inspection. Over time the inhibitor itself breaks down and becomes less effective so an additional dose will protect your central heating system once again.
Additionally, leaks within your heating system, normally signified by a drop in pressure over a few months, will also allow the inhibitor to escape your system and due to this it will become diluted over time.
How to add Central Heating Inhibitor
Now that you know exactly what inhibitor is it’s now time to look at how inhibitor is added to a central heating system, particularly the 3 most common types of heating system found in homes in the UK; vented, sealed and combi-boiler supplied.
Adding Central Heating Inhibitor to a Combi Boiler System
Adding inhibitor into a combi boiler system is a fairly easy job and one that can be done without having to drain your heating system down, which is a big bonus.
In this particular instance we are going to use some Fernox F1 inhibitor, but it’s up to you which product you use, just ensure that it’s good quality.
Also ensure that it has an adaptor included with it, this makes the job of getting it into your radiator much easier!
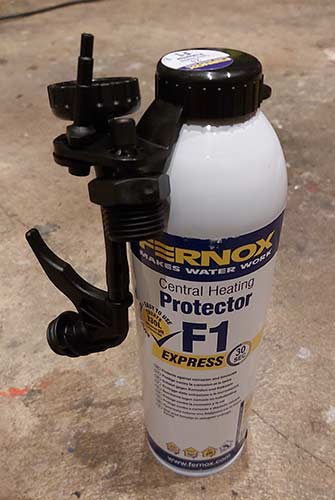
Fernox F1 express central heating inhibitor
1. Turn Heating System Off
The first job to do is to turn your heating system off. This can be done at your heating controller or by simply turned the boiler off, however you also won’t have any hot water. Allow all the radiators to fully cool down.

Turn off heating system at heating controller
2. Select Clear Radiator
Next, select a radiator in your home that is clear and has plenty of space around it for access.
The inhibitor itself is added into the system through a radiator and to get it into a radiator this is done through a bleed valve.
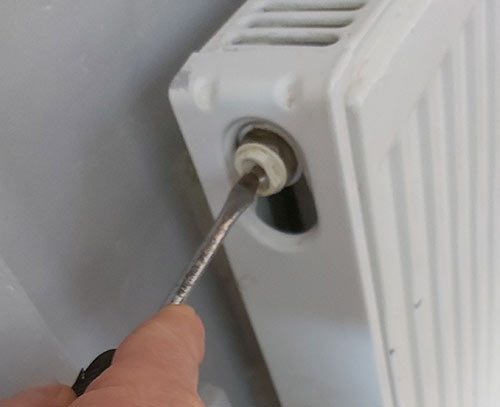
Radiator bleed valve used to add inhibitor into central heating system
3. Turn Off Radiator Valves
Just before undoing anything you will need to turn off both valves on the radiator to hold any water within it as we are going to need to loosen one of the valves to drain enough water out to allow our inhibitor to take its place.
When turning off the lockshield valve (the smaller valve not the TRV) make a note of how many turns it takes to close it off as when you open it back up you will need to ensure that you only turn it the same number of turns that were used to shut it off.
This is due to the fact that if your system has been balanced then opening the valve any more can upset the balancing and cause all sorts of issues.
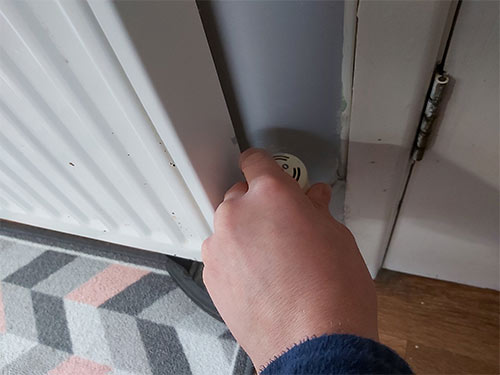
Turn off both radiator valves before adding inhibitor
4. Loosen Valve and Drain
As mentioned we now need to loosen one of the valves and drain out the equivalent amount of water for the amount of inhibitor we have. Wrap a towel around the base of the valve and put a tray under it and then loosen it off using an adjustable spanner and allow the water to drain out. To allow the water to flow freely loosen the bleed screw a bit.
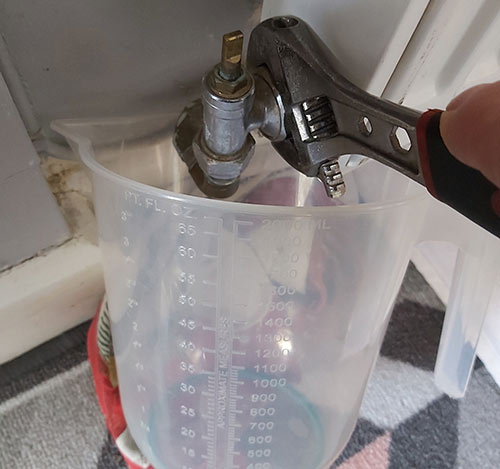
Draining water out of radiator for inhibitor to be added
5. Re-Tighten Valve
Once the water has been drained out, tighten the valve back up fully, but don’t over tighten it and tighten the bleed screw also.
6. Loosen Plug Opposite Bleed Screw
Next locate the plug on the opposite side of the bleed screw and use your adjustable spanner to loosen it off and then undo it. Once undone assemble your chosen inhibitor container adaptor and screw it into the plug housing that you have just removed.
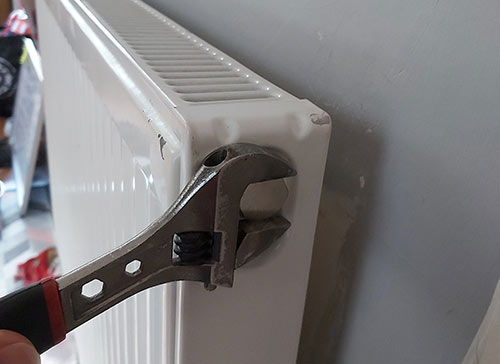
Loosen plug to add inhibitor
7. Add Inhibitor
Pour, squeeze or tip (depending on how its dispensed) the inhibitor into the radiator ensuring it’s all worked in there. Once done, remove the applicator or easy pour and screw the plug back in and fully tighten it up
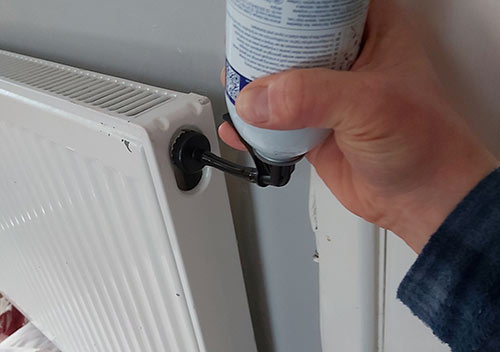
Adding central heating inhibitor to a radiator
8. Re-Tighten Everything, Turn Valves on
Once the inhibitor is in the radiator, just check over anything that you have loosened to ensure you have tightened it all correctly and then you can turn both the radiator valves back on, remembering to turn the lockshield valve the same amount of turns that you turned it off.
After opening the valves, just open the bleed screw again and allow any air to escape until water flows.
9. Check Boiler Pressure
Finally go down to your boiler and check the pressure (either digital display pressure gauge) and if pressure has dropped, open the filling loop and allow some more water back in to re-pressurise the system.
When the heating comes on, check the radiator once again to make sure that it is heating up and also open the bleed screw again to bleed any final traces of air out.
Adding Inhibitor to a Sealed Central Heating System
A sealed central heating system is a totally closed system i.e. it does not feature a header tank in the loft.
If further water is needed in the system, the header tank features a ball valve that drops with the water level and when it drops low enough the valve opens and allows water to pass in topping up the system.
With a sealed system this doesn’t happen as it is totally sealed and the only way to get additional water in is via the filling loop (as seen in the image below).
1. Locate Filling Loop
So to add our inhibitor in to the heating system it will need to be done through the filling loop, so firstly locate the filling loop for your boiler.
2. Close Filling Loop Valves, Loosen Pipe
To do so, simply ensure that both valves are closed off and then undo the end of the flexi pipe connected to the incoming water supply (the one on the left in the below image). In the case of our example below this is easily done as it uses a specific filling loop flexi hose that can be undone by hand.
If this is not the case for you and whoever installed the system used a standard flexi hose, loosen it off using an adjustable spanner.
3. Open Valve and Add Inhibitor
Once undone, open the valve under the boiler and pour in your inhibitor.
In respect to this you will need to use a special pressurised applicator similar to Fernox F1 that we have used in the example above.
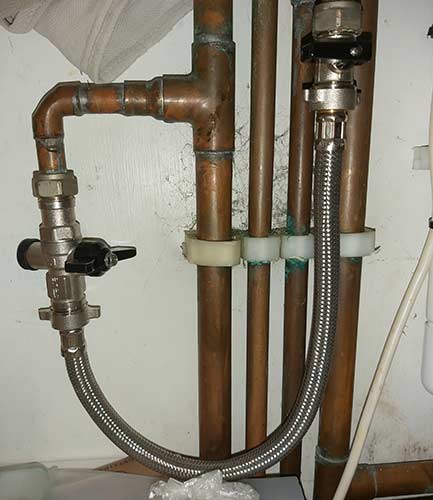
Filling loop where inhibitor can be added into a sealed central heating system
Adding Central Heating Inhibitor to a Open Vented Heating System
Adding inhibitor into an open vented heating system is arguably the easiest out of all the different heating systems.
1. Locate Loft Tanks
In an open vented heating system you should have two tanks in the loft, the smaller one is called the F and E tank or feed and expansion tank. The large one should be the hot water supply for all of your taps.
2. Turn Off Heating and Hot Water
The next task is to turn off both your heating and hot water. This can normally be done on your heating controller by setting both to the “off” position.
3. Locate Drain Off and Drain
Next, locate a drain off point for the heating system and then locate a length of hose and attach it to the end of the drain off. Once attached open up the valve using a spanner or valve key.
4. Shut Ball Valve Off and Drain Tank
Now go back into the loft and you should now see that the ball has dropped and the valve has now opened allowing water to flow into the tank.
We now need to shut this valve off and the simplest method is to put a piece of timber over the tank and then tie the valve up to the stick closing it off, unless the valve itself has an isolation valve that can simply be turned off. Now allow the tank to fully drain until it’s empty and then go back down and close the drain valve off.
5. Inspect and Repair/Replace/Clean Tank (if needed)
Once the tank is empty inspect it’s condition. If it is particularly worn or damaged in any way now is a good time to replace it. If it’s dirty or has a fair bit of buildup in it, scrape any debris out and give it a really good clean.
6. Add Inhibitor
With the tank now empty, open your inhibitor bottle and pour all of the contents in the tank ensuring you add enough for the amount of radiators you have.
7. Re-Fill Tank
Once added, allow the ball valve to drop down again and open up and fill the tank all the way back up to the top. Put the lid back on and put any insulation back.
8. Bleed Radiators
Once it has stopped you will then need to go around every single radiator and open the bleed valve and let any air to escape.
9. Turn on Heating and Test
Once all radiators have been bled, turn your heating system back on and once up to temperature, check all radiators and ensure they are also.
It’s worth going over each radiator and bleeding them again after a few days just to ensure there is no air left in the system.
Adding central heating inhibitor to your central heating system on an annual basis is vital to the continued health of your heating system and it’s certainly a job that you can do but if you don’t feel confident then ask your heating engineer to do so during your systems annual service.

