What is Lead Flashing?
Flashing is a term applied to any thin strip of material used to prevent water ingress into a property. Before the introduction of lead flashing, which now forms most major applications, a number of methods were employed. The most common of these was to mix lime mortar to cover the joint where two surfaces met. Another commonly used method was to use timber shingles (small thin timber roof tiles).
Flashing can also be constructed from any other thin, sheet material such as copper flashing, aluminium flashing and even zinc flashing.
It is quite common these days, admittedly more often on commercial roofs, to have galvanised steel made up in sections of flashing and also as box gutters.

Lead flashing comes in different thicknesses and widths
Who fits Lead Flashing?
Is it a plumber or a roofer who fits my lead flashing? This is a question we get asked a lot. The name plumber comes from the Latin noun Plumberium which translates as a worker of lead. Years ago all plumbing pipework was made from lead and so lead work and plumbing became synonymous.
The Latin for lead is Plumbum and it was used in Roman times for pretty much everything it is still used for today. Our pipework may have been replaced by copper but much of the original Roman jobs that were done in lead, are still being done in lead today.
These days, in 90 percent of cases, it is the roofer who will fit the flashings unless there is a great deal of dressing to be done. If this is the case, there are still many plumbers about who are practiced in the art of lead dressing.
Lead is used as roof coverings as well as flashings
What Does Working or Dressing Lead Mean?
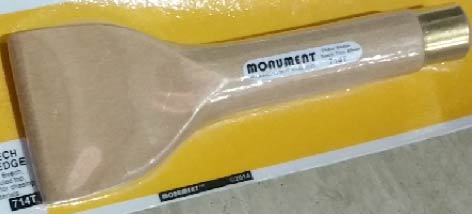
Dressing lead is to make sure the lead is fitted as close to the surfaces it covers as possible. Lead is very pliable and can be stretched to make sure it covers some very odd shapes. This stretching is done by using special tools called Lead Dressers.
Lead can be worked into the most complicated of shapes and some lead dressing can almost be described as art.
Lead Dressers are historically hardwood timbers cut and shaped to suit the type of covering required but this stretching, or dressing, is done very slowly, stretching the lead a tiny bit at a time. If you try and dress lead too quickly it will split.
It is important not to dress lead with any form of sharp edge. All lead dressing edges should be rounded.
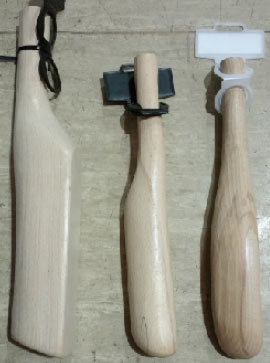
Dressing lead is done with lead dressing tools
Why is Lead Flashing Used?
When any part of a roof meets a vertical surface or any kind of abutment as with an extension, roof window, a dividing wall between two terraced properties or between a property and a conservatory, there is potential for the joint between the surfaces to leak and it is this joint needs to be sealed against leaks.
Lead is usually used for this because it is completely waterproof and very flexible.
The different parts of a house are made of different materials and, especially on a roof where temperatures vary greatly with different weather conditions, they can move around a lot as the expand and contract.
Lead is a great choice to fit over the joints between different materials as it will expand and contract with all of them given it’s flexibility.
As mentioned, the lead is worked by using different tools to stretch it and get it to take the shapes necessary to form a water-tight seal.
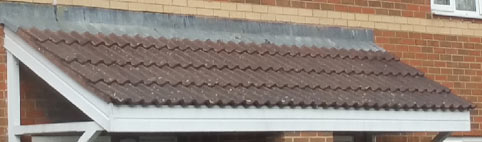
Lead is dressed over the shape of the tiles on a long porch roof
What do the Various Lead Codes Mean and why are They Used?
British Rolled Lead must be supplied in accordance with British Standard 12588. Historically it is coded, or labelled, into various weights per square foot. These days the codes remain the same, but metric measurements have been applied and the results can be seen below.
In imperial measurements, Code 3 lead weighs 3lbs per square foot, code 4 lead weighs 4 pounds per square foot and so on.
You can see the various codes and uses for them in the paragraphs below. Obviously, if code 4 lead weighs more than code 3 lead for the same sized piece, the heavier (code 4) must be thicker. This means that different codes of lead must be used for different jobs of varying difficulty.
Code 3 lead is generally the thinnest lead used on roofs
Lead is also used for jobs other than flashing and it is very unusual for flashing to be completed in lead greater than code 5.
Flashing is usually done in code 4 lead. Roofs and gutters however, where there is much greater movement and potentially wear and tear, are usually done in a very thick code 8 lead.
Lead Flashing and Colour Codes
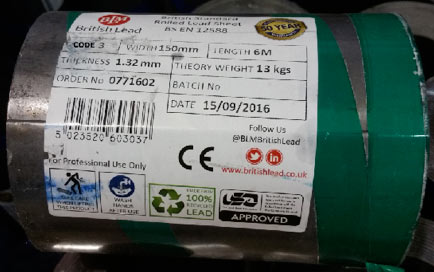
You can see from the rolls of lead in the images on this page that they have tape wrapped around them. This tape is of different colours. This is a deliberate coding system used to identify lead rolls and lead sheets at a glance. The different colours refer to the different codes and these can be seen in the table below.
| Code 3 Lead | Code 4 Lead | Code 5 Lead | Code 6 Lead | Code 7 Lead | Code 8 Lead |
| GREEN | BLUE | RED | BLACK | WHITE | ORANGE |
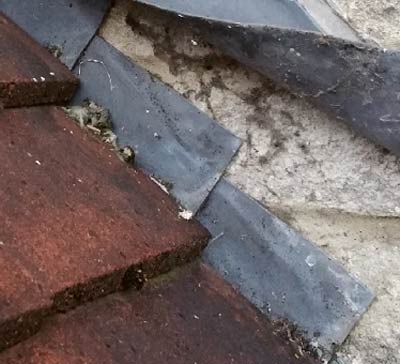
Code 4 lead is usually used for roof flashings
Lead Flashing Codes and Weights
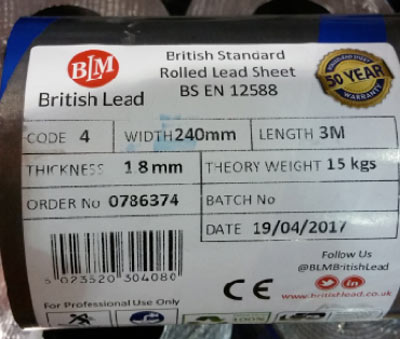
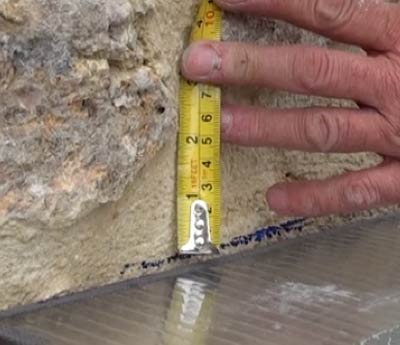
Lets have a look at how the codes for lead work and how they have survived the metric changeover! The roll of lead shown in the image above is Code 4 lead. This means is should weigh approximately 4 pounds (lb) for every square foot.
It is 1.8mm thick, as it should be, and 240mm wide. It’s total length is 3m and we can see from the label it weighs 15kg in theory.
This means that the weight has been calculated by multiplying the length of the lead roll by the width of the roll and then multiplying the area by the weight of the given code.
Our table below shows what these weights should be but we can work backwards from the theoretical weight just to see how the transfer from the original coding system works.
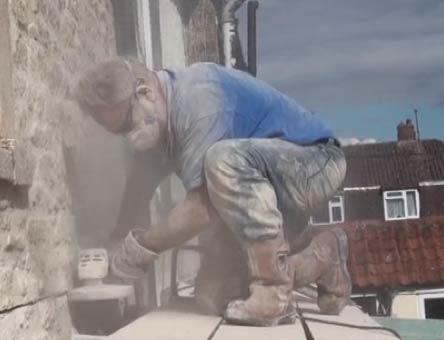
Chasing Code 4 flashing into stonework requires a straight cut
The lead in the image above weighs 15kg so this should mean that it is 33lbs.
The area of the lead is 3m (length) x 240mm (width). This is 0.72 square m.
So with this in mind, Code 4 lead weighs 46lbs for every square metre.
A square metre is 10.76 square feet so each square foot of this Code 4 lead weighs 4.2 lbs, slightly more than the 4lbs given in the code.
We can see therefore, that the metric system, when applied to lead flashing means we get more for our money!!
What are the Different Codes of Lead Used for?
- Code 3 – is pretty much used exclusively for soakers as it is comparatively thin and too much movement in a roof could make it split if it were used as a roof covering or flashing
- Code 4 – is used for soakers sometimes, lead flashings, lead roof valleys and lead hip flashings. It can be used as cladding also for small roof or wall sections
- Code 5 – is used for all the above, although rarely for soakers, and is used for valleys and pitched gutters where the water flow is large
- Code 6, 7 and 8 – are all used almost exclusively for roof coverings
What is a Lead Soaker
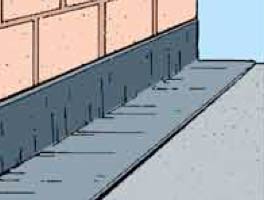
Lead soakers are squares, or rectangles of (usually) code 3 lead which are fitted to slat roofs or plain tile roofs where the tiles butt right up to a vertical abutment.
Each soaker sits on the top of the last slate or plain tile and the next tile or slate is laid on top. Half the soaker is folded up the wall.
The soakers then form a flat gutter between the tiles and the wall and the top of the soakers is covered by an apron flashing or sometimes a stepped flashing.
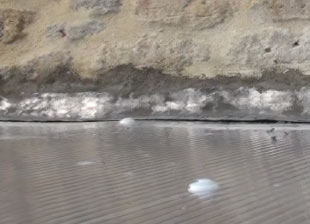
Lead soakers on a plain tile roof with an apron flashing
What is a Lead Valley?
Where one roof meets another at right angles, such as in the addition of a dormer window, a joint is formed between the two roofs. This joint is called a valley.
This valley can be made in lead before the tiles are laid. Lead valleys can be made with Code 4 lead but the thicker code 5 is much better as a great deal of water, and movement, occurs in roof valleys.
What is an Apron Flashing?
Where a flashing simply hangs down from its fixing point (usually a chase in masonry) and is cut square at the bottom, it is called an apron flashing. Apron flashings are often seen at the front of chimney stacks and covering soakers on a plain tile roof.
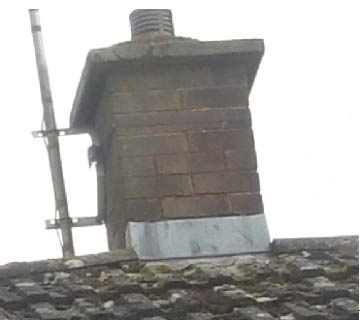
Chimney stacks often have apron flashings
What is a Stepped Flashing
Where it is impractical or would look untidy to cut out one long chase for an apron flashing, the much trickier stepped flashing can be fitted. This gives a waterproof and tidy finish to the flashing.
Putting an apron flashing into a sloped chase would invite the back edge of the apron to lift. This could easily cause a leak so stepped flashings are installed on the side of chimneys and when one gable end abuts the roof of a semi detached property.
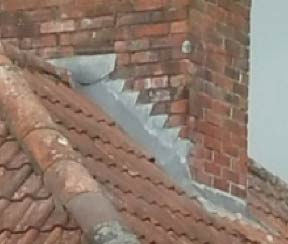
Stepped flashing to the side of a chimney stack
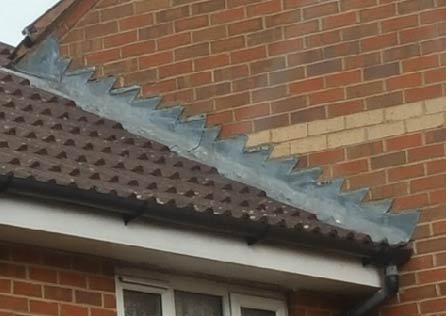
Semi detached houses often have stepped flashings at abutments
What is a Hip Flashing?
Lead flashings are used on hips when getting a hip or ridge tile to remain waterproof would be impossible or would look really untidy.
This might be because a traditional roof has been built with a very high hip board which prohibits a ridge tile sitting squarely over the joint between the two sides of the roof.
Hip flashings are not used widely today as the range of tiles and their associated special tiles, such as hip and valley tiles, is much greater.
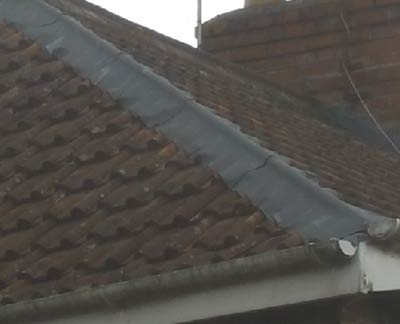
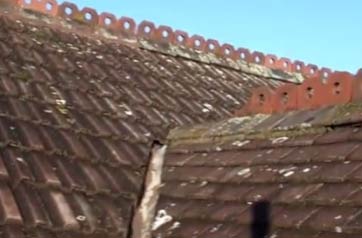
Roof hips are sometimes covered with lead flashing
Metric Measurements, Weights and Codes for Lead Flashing Rolls
The table below shows only the three most commonly used Lead codes and those you are most likely to use at home. Lead comes in 3m and 6 m rolls. For the weight of a 6m roll, please double the weight of the 3m roll shown here.
| Code 3 Lead | Code 4 Lead | Code 5 Lead | ||
| Weight per Sq m | 15kg | 20.41kg | 25.4kg | |
| Thickness of lead | 1.32mm | 1.8mm | 2.24mm | |
| Width in mm | Closest Imperial | Kg Weight per 3m roll | Kg Weight per 3m roll | Kg Weight per 3m roll |
| 150 | 6 inches | 7 | 9 | 11 |
| 180 | 7 inches | 8 | 11 | 14 |
| 210 | 8 inches | 9 | 13 | 16 |
| 240 | 9 inches | 11 | 15 | 18 |
| 300 | 12 inches | 13 | 18 | 23 |
| 360 | 14 inches | 16 | 22 | 27 |
| 390 | 15 inches | 18 | 24 | 30 |
| 420 | 16 inches | 19 | 26 | 32 |
| 450 | 18 inches | 20 | 28 | 34 |
| 510 | 20 inches | 23 | 31 | 39 |
| 600 | 24 inches | 27 | 37 | 46 |
Fitting Lead Flashing
Fitting lead flashing takes a little practice to get it right and we do recommend that you go somewhere to practice or get a professional in to do this job for you.
If lead flashing is not fitted properly it can leak and believe me, if it does, it is a horrendous job to put right. Flashings are one thing that really has to be done 100% right first time.
Cutting the Chase for Lead Flashing
The chases for lead flashing are almost always done with a disc cutter. Please be very careful when using one of these machines, especially on a roof.
A flashing needs to overlap the joint with another surface by a minimum of 150mm where the abutting roof is sloping with 50% of the overlap distance going up the wall vertically. At least 30mm needs to be tucked into the chase.
For flat roofs, the lead which pays on the flat roof should be at least 200mm.
Lead flashing needs to be a minimum of 75mm up the wall
For a standard 30 degree lean-to roof, against a brick wall, the lead on the roof should be minimum 150mm. The vertical lead should be minimum 75mm (incidentally this is the height of a brick) and the lead tucked into the chase should be a minimum of 30mm. This gives an overal minimum width to the lead of 255mm.
A professional, who can dress the lead very close to the roof surface, giving maximum protection, might well use a 240mm lead roll in this situation but as a home improver we strongly suggest you go up a width to 300mm rather than take chances. You can make the chase 100mm up the wall instead of 75mm and have a little more overlap to the roof.
Lead can be chased into stonework
The next step is to cut the chase. Make sure you have a stone cutting disc on your disc cutter and you are wearing the best personal protection equipment you can get, The dust created cutting chases is crazy so do not cut more than you can see.
The chase should be cut as straight as possible to make putting the lead in a little easier and it should be cut in about 30 – 40mm deep. Be careful of telephone wires and electric cables coming down the wall as, when the air is full of dust they are very easy to miss.
Cutting and Folding the Lead Flashing
On the ground, roll out your lead and, using a batten or other straight edge, fold the lip of the lead which will be going into the chase. If you do not have a lead dresser, use another piece of batten to make sure your lip fold is sharp.
Trying to feed the edge of a full width of lead rool into the chase will get you into all sorts of trouble so fold the lip on the ground, slide the lead up the roof, and feed the folded lip into the chase.
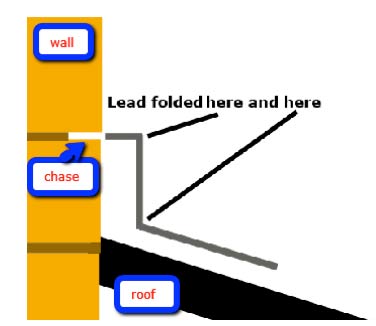
Folding lead flashing to fit into chase
Regardless of the length of the roof you need to protect, you should not attempt to work with a lead section any longer than 1.5m.
You can overlap the sections in the chase so make sure your chase is 10 – 12 mm wide when you cut it.
It is better to have a slightly wider chase than you need in order to be able to lap the lead and to ensure you can get some mortar or sealant in there afterwards rather than the chase be too tight to work in.
Remember, if the water gets into this chase and behind the lead, it is the devils own job to fix this leak.
Fixing the Lead into the Chase
Traditionally this has been done with what we call lead wedges. A strip of lead about 25mm wide is cut from roll, about 150mm long.
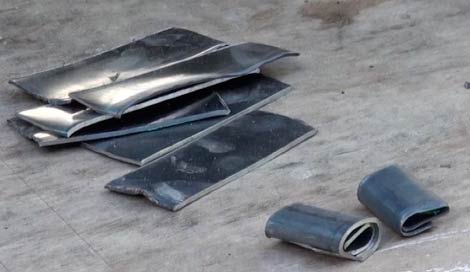
This strip is folded over on itself then bashed flat with a hammer. This lead wedge is then about 8mm thick.
It is pushed into the wall chase, over the top of the lead lip you have pushed in, and then it is bashed in hard with a timber chase wedge to trap the lead flashing lip in the chase.

Lead wedges can be used to hold flashing in place
Inside the chase the lead is gripped fast by the wedge shape as it is bashed in by the chase wedge bolster.
Using a chase wedge will secure lead wedges
Cutting the Lead
The easiest way to cut lead for flashing is to use a sheet lead knife with a hooked blade. You can of course use a normal hobby knife but you will have to keep changing the blade.
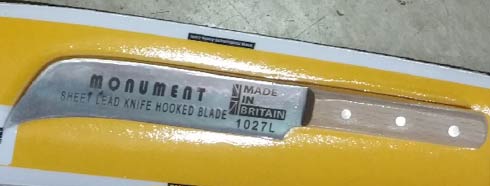
Use a sheet lead knife for best results cutting flashing
Using Flashing Fixing Clips
Moving out of the more traditional ways of fixing lead flashing into chases, you can now buy Lead Flashing Fixing clips which do exactly the same job as lead wedges, but in all honesty, probably do it a lot better.
The flashing clips are sprung loaded so as you push them into the chase, on top of the lead, the top and bottom of the clip grip hard. It then takes an enormous amount of expansion and contraction to shake these clips loose whereas wedges can become loose after a few years.
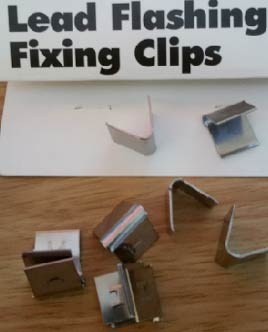
Lead Flashing clips for fixing flashing into chase
Sealing the Flashing into the Chase
When the lead flashing is fixed firmly into the chase, it is time to seal the joint. It is absolutely imperative that this seal is perfect as water can be driven into the chase, get in behind the lead and ruin the work inside.
Cement mortar is not a good thing to use to fill the chase. It is inflexible and cracks easily. Also it does not bond well to the lead. If you wish to use mortar to fill the chase, please use a lime mortar which will move with the lead and is far less likely to crack.
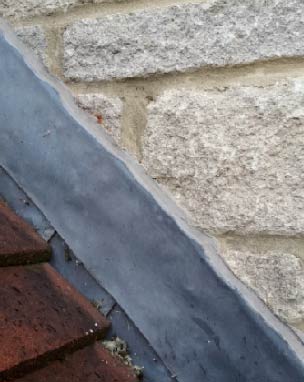
Lead flashing sealed in to chase with lead flashing sealer to prevent water ingress
The best method of sealing this joint is with proprietary lead sealant. This comes in mastic tubes and is easily applied with a sealant gun. The sealant is totally waterproof, guaranteed for 25 years and is a neutral grey colour which should match most masonry joints
Before you apply the sealant, make sure you have brushed all the dust out of the joint
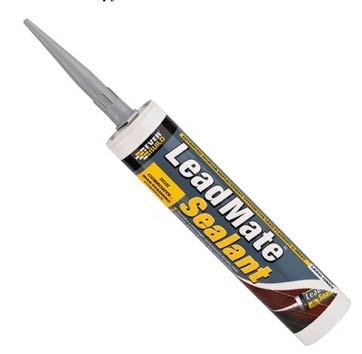
LeadMate sealant for sealing flashing chases
Lead Slates for Chimney Flashing
Another very popular use for lead flashing is the piece of lead used to make the joint waterproof where the soil and vent pipe comes out of the roof. This type of flashing is called a lead slate.
Lead slates are either made completely of lead where the pipe upstand is soldered onto the main slate, or they are what is called quick slate, where a rubber circle is fitted into the centre of the main lead slate and this rubber is cut to allow the soil and vent pipe through.
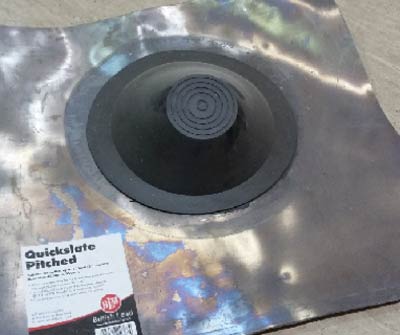
vent pipes can be waterproofed with a lead quickslate
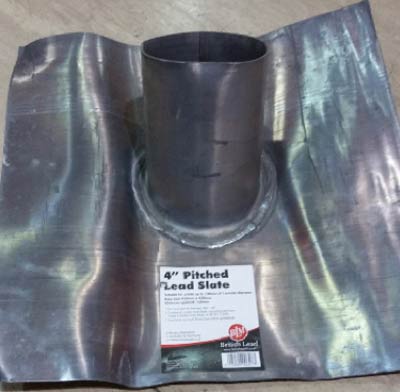
100mm pipes can go through roofs protected by a lead slate
Flashing Tape
There are products available as an excellent cost effective alternative to traditional lead. They are most commonly known by the name Flashing Tap. They are also quite often less expensive than traditional lead but still retain the lead look and finish and they can also be easily used in a DIY situation.
These types of flashing tape can be purchased from most builders merchants and also the majority of the DIY sheds. It is important to read the instructions on your particular type of tape as a primer is often necessary to get the best possible adhesion to some surfaces.
Flashing tape applied to joint
Click here to see how to use flashing tape to repair roofs.
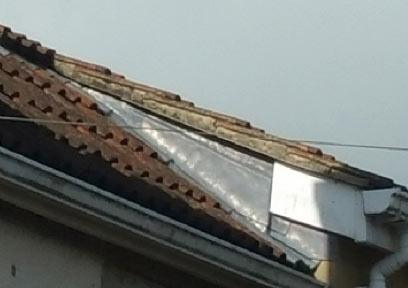
Tape’s are ideal when used in a situation where weight could be an issue, for example, in between a house wall and porch that has a sheet plastic or glass roof.
The tape itself is also very easy to apply as unlike the traditional lead flashing mentioned above they usually feature adhesive on the rear side which forms the watertight bond between the two surfaces.
Generally supplied in sections, the tape is easy to use even on those awkward shapes, as you simply remove the backing tape as you apply, smoothing down with a dry cloth as you go.
Flashband flashing tape
In general, the brand Flashband is one of if not the most commonly used tape of this kind.
Unlike traditional lead flashing, flashing tape can also be used without the need to heat it up which makes it ideal for use in DIY, although if you have to apply in damp or cold conditions, a simple blast from a hairdryer will help aid the adhesion.