A beautifully tiled floor looks amazing and adds a real dimension and talking point to any room, especially an entrance room, however over time tiles can easily work themselves loose which can be a real pain.
In this project we take a look at the reasons why and then how to fix loose floor tiles.
Why do Floor Tiles Come Loose?
There are many reasons why a floor tile can come loose in a floor. The first, and most common reason, is that the floor the tiles have been laid on is unsuitable; especially in bathrooms.
Bathrooms are the most common room for experiencing loose ties because most bathrooms are upstairs which means, in most cases, the floors surface is timber and timber floors move.
They move for two reasons:
Expansion and Contraction
As a room gets warmer, timber floors expand and when they cool down, the timber contracts. When a floor moves like this, any covering that is fixed to it moves too.
The first covering that is on a tiled bathroom floor is the adhesive. As well as expanding and contracting with heating and cooling itself, any hard cementitious covering, such as tile adhesive, will expand and contract at a different rate to that of the timber floor.
This movement between the two materials causes cracks in the least pliable of them, this being the tile adhesive, which then fails.
The heat affecting the bathroom, and most upstairs rooms, comes from downstairs as well as upstairs and due to this any upstairs timber floors move quite a bit in the course of a day.
Bending and Flexing Forces
Timber floors will bend and flex when any force such as walking and body weight is applied to it.
The adhesive under the floor tiles however, unless it is highly flexible, will not bend anywhere near as much as the timber floor and over time will crack and eventually break up.
When the adhesive breaks up, this then obviously leaves the tiles above unconnected and loose.
The Problem With Re-fixing Loose Floor Tiles
For many years, the solution to the problem of loose floor tiles was to strengthen the floor below with plywood or tile backer boards. This was massively inconvenient as well as being hugely expensive.
Not only do you have to replace all of the tiles, adhesive and grout in the room, but you have to spend a huge amount of money on the strengthening of the floor also.
Most methods used to strengthen a timber floor involve raising the actual floor level.
We will run through the different methods that can be used to strengthen a timber floor in order for you to see how costly these can be.
Most of these methods, as well as being expensive, as said, involve raising the level of the floor you are working on. This obviously creates a step between the new floor and the floor next to it (more on this below).
Dealing With the Step Between Two Floor Levels
This is quite easily overcome with purpose made transition strips which can be made out of Aluminium or hardwood.
These are effectively mini ramps, all be it only 15-20mm high, which take you neatly from one level to another.
Most importantly, they stop the entrance to the room being a trip hazard. You can actually buy them on Amazon and normally most high street DIY stores.
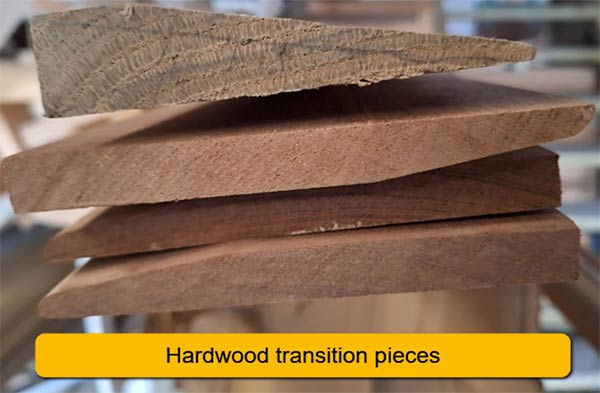
Hardwood transition piece
Tools and Products Needed for Fixing Loose Floor Tiles
In order to successfully fix any loose floor tiles you may have, you will need the following tools and products.
Note: Depending on what method you choose to use on your floor will depend on what you actually need so you may not need everything listed below.
- Tube of Fix a Floor
- Caulk/skeleton gun
- SDS drill/breaker
- Floor scraper
- Dustpan and brush
- Vacuum cleaner
- Enough plywood to cover floor surface
- Transition piece
- Circular saw/handsaw
- Drill/driver
- Box of number 8 x 30mm wood screws
- Selection of SDS masonry bits (4 – 8mm)
- Tape measure
- Jigsaw and blades (for cutting shapes around objects)
- Grout bucket
- Correct colour grout to match existing grout
- Replacement tiles
- Tile adhesive
- Notched tile trowel
- Grout sponge
- Clean water
- Straight edge (spirit level – if raising floor level)
- Clamps (for straight edge – if raising floor level)
How to Fix Loose Floor Tiles
As we have mentioned above, there are several traditional methods of fixing loose tiles in a floor and we will run through what’s involved in each of these below.
This first method has the advantage that it is the easiest and cheapest method of fixing loose tiles that we have come across in 50 years of building.
It does not require the floor to be strengthened and involves using an entirely new product called Fix-a-Floor which is a very strong, easy flowing flexible adhesive which is pumped under the loose floor tiles through holes you can drill in the joints between the tiles.
Method 1 – Using Fix-a-Floor Adhesive to Fix Loose Floor Tiles
To repair a loose floor tile using this innovative and easy to use product, work through the following steps:
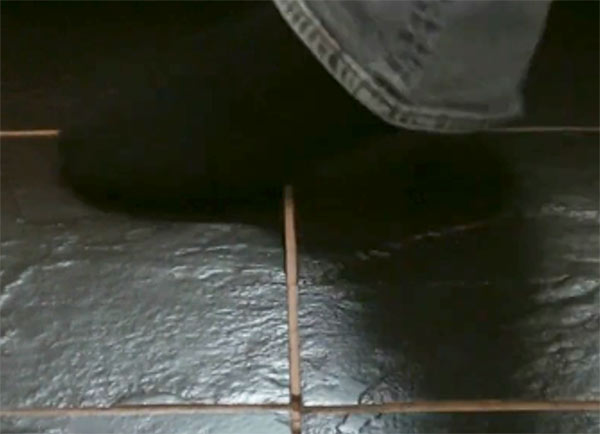
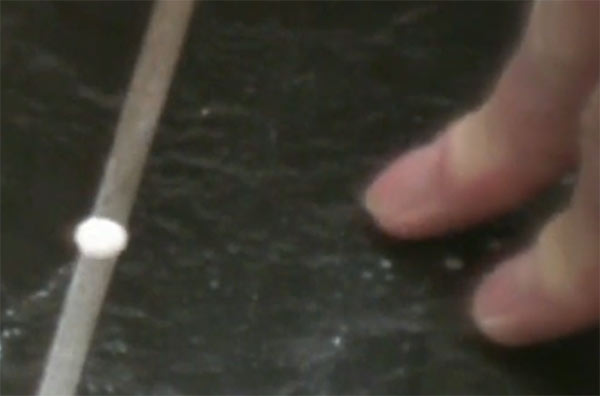
- Identify the loose tile or tiles by pushing lightly with your foot. The image shows two loose tiles adjacent to each other.
- Drill 2 or 3 holes in each grout line surrounding the tile (normally a 5 – 6mm masonry drill bit). The number of holes depends on the size of the tile and we suggest the holes are no more than 75mm apart. Use a vacuum to suck up the dust created by the drilling. Do not drill any further than the depth of the tile!
- Use a Fix-a-Floor sealant gun to pump the adhesive into the holes you have drilled. Squeeze the trigger gently. When the adhesive starts to either come up through an adjacent hole, or puddle round the hole you are working on, it’s time to move to the next hole. Do not worry about adhesive on the tiles, this will clean up. Fill every hole.
- When you have wiped up all of the surplus adhesive, press gently on the tile. You should see the adhesive pushing back up out of the holes. You can then be sure you have injected Fix-a-Floor throughout the underside of the tile.
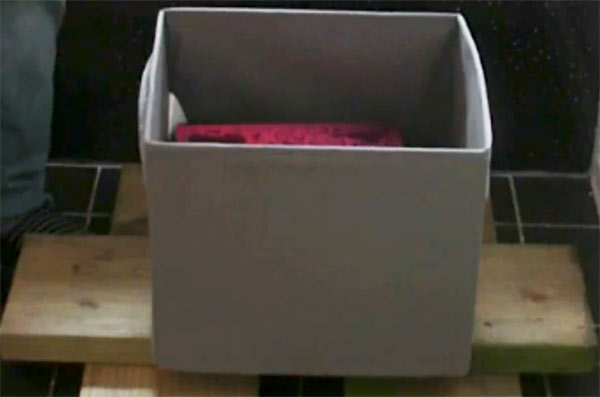
- Place a heavy object on the tile for 24 hours. Do this with all the tiles you have worked on. A bucket of water is fine. If you have done a few tiles in a small area, try and devise a method of weighing them all down at once.
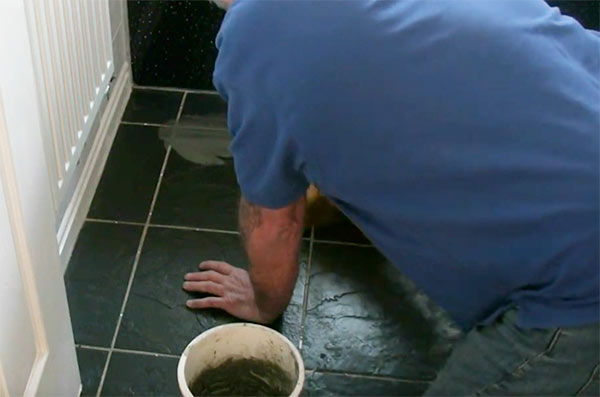
- Once fully dried, mix up a little grout (same as existing) and then use a sponge to push the grout into the joints and cover all the repair areas. Once the grout is dried, clean up and your work is done for a fraction of the price of relaying the floor!
Identifying a loose floor tile
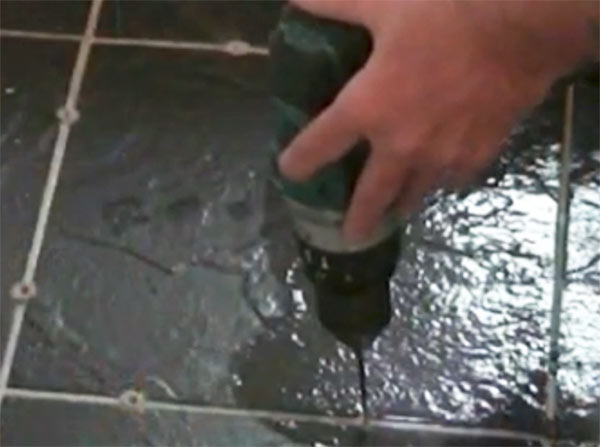
Drill holes in grout lines
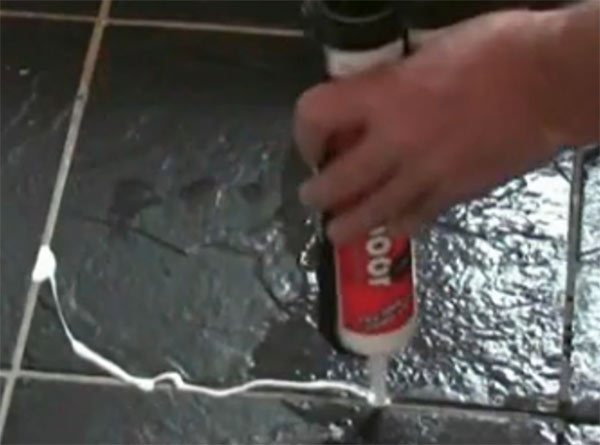
Fill every hole fully with Fix a Floor Adhesive
Gently press down on tile
Apply a heavy weight to any tiles
Re-grout over any repair areas
From the above, you can see just how useful and effective Fix-a-Floor is. The very best thing about it (apart from the ease of use, the portability of the equipment and the outstanding results) is the fact that you can re-use every loose tile you find, providing it’s not broken that is.
You do not have to spend hours chipping up adhesive from the old tiles and existing floor (and breaking tiles when you try and clean them).
You simply open a tube of the Fix-a-Floor adhesive after drilling holes in the grout lines and pump the adhesive under the tiles. Add some weight to the tiles for 24-48 hours and the floor is good to go.
If you would like more information on the process above, check out the YouTube video by Fix a Floor here: https://youtu.be/iHcOi-0Ym58.
Additionally, if you need any further assistance with grouting, see our project on grouting tiles for more help.
Method 2 – Add a Less Flexible Floor Surface (Plywood)
As described above, one of the reasons for tiles becoming loose is because the floor is flexing every time someone walks on it. The best way to stop this is to add a layer on top of the existing floor which is much stronger and less likely to move and flex.
Step 1 – Remove all Tiles
Remove all of the existing floor tiles and the adhesive under them. The timber floor needs to be smooth when you have finished.
This is most easily done with a flat chisel with a SDS fitting which slots into an SDS drill. It can also be done using a bolster chisel and a hammer if you don’t have an SDS drill.
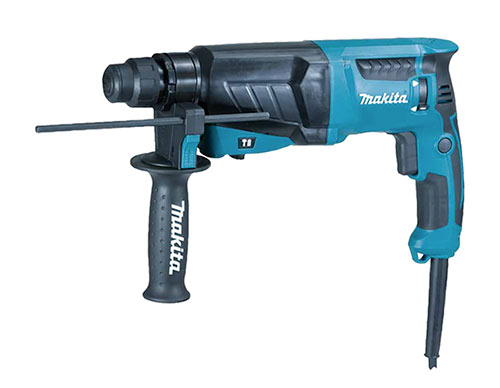
Makita SDS drill
Step 2 – Measuring for New Plywood Floor
Once the adhesive is all chipped up, sweep and vacuum the floor and measure the entire floor area of the room. Use our page on measuring floor areas to help with this.
You will then need to measure the floor area you wish to cover with Plywood comes in sheets which are 2.4m long x 1.2m wide (area of each board is 2.78 square metres).
If, for example the room you are working in is 2.4m x 2.4m it is 5.76 square metres, so you will need enough boards to cover this area.
You will probably not want to tile under the bath but in many cases it is not worth deducting the footprint of the bath from the area because you can only buy Plywood in full sheets and it is always better to have some left over than to have too little.
Step 3 – Lay New Floor
Before you lay the new floor covering, look at the lines of nail or screw heads in the existing floor boards. This will all be in straight lines across the floor because this is where the floor joists run underneath the boards.
It is essential that each board is fixed down to the existing joists. Mark the end of each line on the wall. When the new boards are laid you will know where it is safe to fix the new boards. The fixing should be 200mm apart.
Next, cut 25mm plywood sheets around the loo, pedestal and any other items fixed to the floor.
We then suggest that, as well as the fixings you have used to hold the Ply to the joists, that you make 100% sure your new floor is solid by fixing the ply down to the existing floorboards as well.
Countersink all the screw heads into the top of the Plywood and use 30mm screws to fix down.
There will be at least one hole in the existing floor somewhere (where pipes come through) where you can use your tape to determine the thickness of the floorboards you have.
Your existing boards should be no thinner than 18mm so you can be sure that 30mm screws will not go through both layers and puncture pipes or cables.
Finally, the best Plywood to use is WBP (water & boil proof) as this will be protected from any spillages and the likes. This is especially important when working in a bathroom or kitchen.
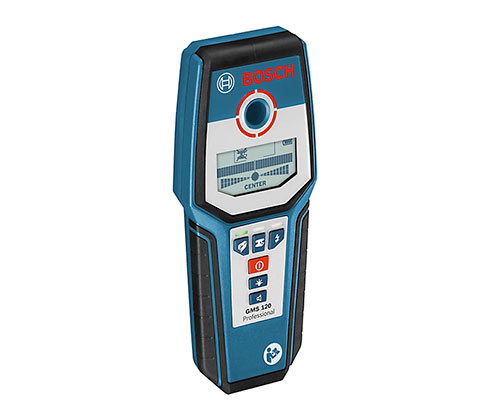
Cable and pipe multi-detector
Step 4 – Paint the Floor
Finally, paint the floor with 4 coats of a solution of water and PVA adhesive mixed at 50/50. Let it dry between coats and when you are finished. This gives a good bond between the wood and the adhesive.
This is the most costly method of ensuring your bathroom tiles will now stay exactly where you put them. If you have never done tiling before take a look here at our Laying Floor Tiles project for help.
Method 3 – Laying Tile Backer Boards
The preparation for fitting tile backer boards is the same as that for fitting Plywood detailed above. The existing adhesive needs to come off and the existing floor needs to be left as smooth and as clear as possible, the floor then needs to be measured and the boards cut and laid to fit.
Tile backer boards are really not designed to strengthen the floor very much and we would be reluctant to use them if there was a lot of flex in the floor. They will however take up a small amount of flex.
Tile backer boards are usually 1200mm x 600mm and can be fixed with screws and washers or stuck to a concrete floor with a flexible tile adhesive.
The major advantage of these boards is that they are only 6mm thick so do not increase the floor height as much as 18 or 25mm plywood. They are also much lighter and easier to cut around pedestals, WC feet, pipes and other similar objects.
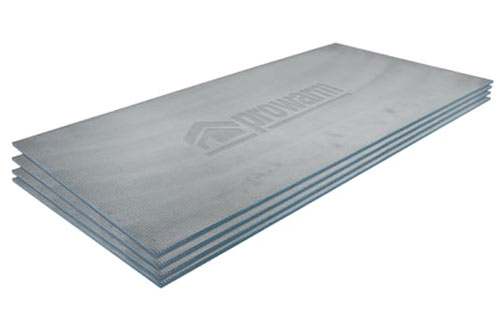
Tile backer boards
Note: If you use either method 2 or 3 above it is likely that you will also have to trim a section off of the base of any doors so that they will open and close correctly as the existing floor level will have been raised.
If you have a tiled floor and one or more of the tiles are loose then it is absolutely essential that you get them repaired to avoid further issues and damage. Now that Fix a Floor have produced a quick and easy solution to achieve there is certainly now no excuse but to get it done!