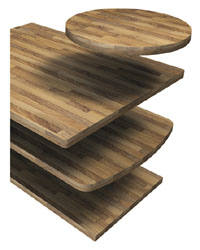
A selection of different shaped hardwood worktops
Joining kitchen worktops, whether laminate or wooden worktops, is called mitering. To provide a neat joint to worktops is the most difficult part of installing a new kitchen. Division strips are available with all worktops, but these can collect the dirt under the rim and have even been known to “trip up” pans etc when sliding them across a surface. A full blown mitre, i.e. 45 degree cut from corner to corner is rarely used as most kitchens, in fact most rooms, are not totally square making a corner to corner mitre virtually impossible to keep neat..
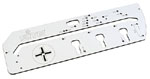
Worktop mitre cutting jig
There are “jigs” available from large diy stores and tool suppliers, which can be clamped onto each half of a worktop and routed cuts made for a precision joint. These are very expensive to buy but available for hire and do take a considerable amount of practice to use.
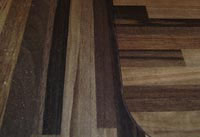
Worktops vary in quality very much from supplier to supplier.
A mitred joint is possible in its simplest form. This is commonly called a Masons Mitre as it originated from a stone masons chisel when looking for a way to avoid wasting large amounts of marble with a mitred joint!
The Masons mitre still requires precision and should not be rushed. Mark both worktops at the very top of the roll and measure your angles as shown below. Do not assume the existing edge of the right hand worktop (as shown below) is square. It will very often be supplied with the laminate finishing a few mm back from the edge. Use a set, or carpenters square to cut this edge first.
Masons mitre
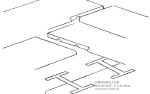
Masons mitre
More often than not you will be supplied with worktops in full lengths unless you have ordered them pre cut. Measure carefully for the amount you will need in your kitchen and cut the surplus off before you start. Make sure the cut is square and use the off cuts to practice this joint on.

Required angles
A fine tooth saw is needed, with between 10 and 12 teeth per inch and best results will be achieved by holding the saw at a shallow angle. Cut away from the roll of the worktop toward the centre and place the saw very carefully for your initial stroke.
We do not advise using a jig saw for this operation. The edge of this joint can be planed with a very sharp plane to remove any little nicks or very fine sandpaper, on a downward stroke only, held against a wooden sanding block
Contact adhesive is not recommended for this joint, pva adhesive will be fine, silicone mastic is preferred, but remember to wipe any surplus off with a damp cloth. The worktops can be fixed together using prefabricated T brackets available from most diy stores and builders merchants.
Fix the top of the T first to the underside of one of the tops then apply the adhesive to the joint and slide the other top into place. Finally secure the “leg” of the T bracket. Pilot holes are recommended for these fixings.
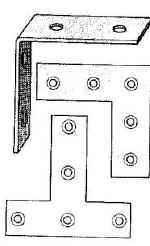
Selection of different types of fixing brackets
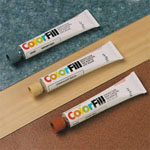
Filling Worktop Joints
If you have not managed to get a perfect joint (and few do…including the pros) worktop coloured filler can be bought. This is simply rubbed into the joint with a finger or small scraper.