In 99% of cases, to be thinking about installing a new fireplace means there has been, or is, an existing fireplace in the property.
In some cases it is simply a matter of taking out the old fireplace and fitting the new but there are some very important points which need to be taken note of.
In this guide, we take a look at how to install a fireplace and everything else you need to know, read on.
What is a Fireplace?
A fireplace is a built-in feature designed to provide warmth and ambiance in a home.
Traditionally, fireplaces burn solid fuels like wood or coal, but modern options include gas, electric, and even bioethanol models.
They can serve as both a practical heating solution and a stylish focal point in any room in pretty much any home.
Fireplaces typically consist of a firebox (where the fire burns), a chimney or flue (to vent smoke and gases), a hearth (a non-combustible base) and also usually a surround (decorative masonry or timber surround).
Designs range from classic open hearths to energy-efficient stoves and contemporary wall-mounted units.
While older homes may have existing fireplaces that can be restored or upgraded, newer properties may require structural modifications to install one.
Whether for heating or aesthetics, choosing the right fireplace depends on fuel type you’re going to be using, efficiency, ventilation requirements, and the style of your home. New contemporary stone fireplace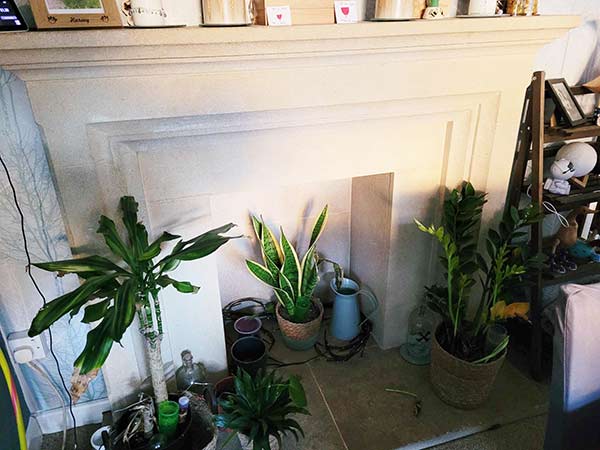
Do you Need Planning Permission for a Fire Place?
In most cases, installing a new fireplace or replacing an existing one in the UK does not require planning permission. However, there are exceptions, especially if your home is a listed building or located in a conservation area.
In such cases, you may need approval from your local planning authority before making any changes.
While planning permission is rarely needed, your fireplace installation must comply with Building Regulations.
These rules ensure the fireplace is safe, properly ventilated, and energy efficient. Key considerations include chimney construction, flue positioning, and minimum distances from combustible materials.
If you plan to install a wood-burning or multi-fuel stove, you may also need to follow Smoke Control Area regulations.
Some areas restrict the types of fuel you can burn, so it’s essential to check local requirements before installation.
For straightforward fireplace replacements, a competent installer registered with a scheme like HETAS can ensure compliance without needing separate approval. However, for significant modifications or new chimney constructions, consulting your local council is always advisable.
What is a Hearth?
A hearth is the non-combustible base beneath a fireplace, designed for safety and covered by UK building regulations. Not all new fireplaces include a hearth, but if required, it must meet specific standards.
Constructional Hearth: This should be made of solid, non-combustible material like concrete or masonry, at least 125mm thick.
If placed over combustible material, there must be a 50mm air gap or a 250mm buffer between the hearth and the material.
Decorative Hearth: The finished surface should be at least 12mm thick, using non-combustible materials such as tiles or fire-resistant board. New traditional fireplace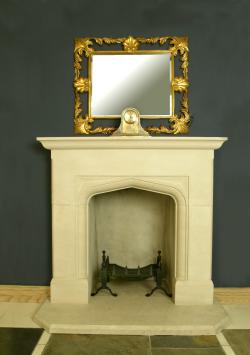
Specifications When Building a Chimney
For proper airflow, chimneys should be at least 4.5m high. Masonry chimneys must be securely tied to or supported by adjacent walls and built using suitable brick, medium-weight blocks, or stone with mortar joints.
Thickness and Clearances: The minimum wall thickness is 100mm, or 200mm if adjoining another dwelling. Combustible materials must be at least 200mm from the inner flue liner or 40mm from the outer chimney face.
Chimneys must be built by a qualified professional following UK building regulations. Detailed guidance is available in Approved Document J 2002 (ADJ). Learn more about building regulations here.
Once the chimney is approved, you can install your chosen fireplace include traditional/woodburner, gas, and modern gel fires.
Fireplace Recess Specifications
A fireplace recess must be made from solid, non-combustible materials. Internal solid walls and jambs should be at least 200mm thick, while cavity walls require 100mm thick leaves and a 50mm cavity filled with non-combustible material.
Recess Size and Flue Requirements: Open fires need a recess at least 350mm deep. For solid fuel fires, the minimum recess should be 500mm by 550mm, with 200mm diameter liners and a flue cross-sectional area of at least 15% of the fireplace opening.
Can you Install a Fireplace Yourself?
Installing a fireplace yourself is possible, but it requires careful planning, the right tools, and a solid understanding of safety regulations and what rules and regulations you need to adhere to.
While a simple decorative fireplace may be a manageable DIY project, fitting a functional wood-burning, gas, or multi-fuel fireplace involves strict Building Regulations that must be followed to ensure safety and efficiency.
If you’re installing a wood-burning or multi-fuel stove, it must be fitted with a suitable flue and proper ventilation.
Chimney construction, clearance distances from combustible materials, and carbon monoxide safety are all critical factors.
To make sure that all aspects comply with UK law, installations should be carried out by a registered professional, such as a HETAS-approved installer, or if doing it yourself, inspected by your local authority’s Building Control team.
Gas fireplaces also require expert handling. In the UK, any gas appliance installation must be carried out by a GasSafe registered engineer.
Attempting a DIY gas fireplace installation is not only dangerous but also illegal without professional certification.
For electric fireplaces, DIY installation is more straightforward, often requiring no more than securing the unit to a wall and plugging it in.
However, if rewiring is needed, it must comply with electrical safety regulations, which require that any electrical work be done by a Part P registered electrician.
Does a Fireplace Need a Chimney or Flue?
Whether a fireplace needs a chimney or flue really depends on the type of fireplace you install.
Traditional wood-burning and multi-fuel fireplaces require a fully functioning chimney with a suitable flue to safely expel smoke and gases. However, modern gas and electric fireplaces offer ventless options, meaning you may not need a chimney at all.
Wood-Burning and Multi-Fuel Fireplaces
A chimney with a correctly lined flue is essential for wood-burning and multi-fuel fireplaces.
The flue channels smoke, carbon monoxide, and other combustion byproducts outside, preventing dangerous build-ups inside your home that are a serious risk to health.
If your property has an old chimney, it may need relining to ensure safe operation and that gases cannot seep back into the building as they rise up the chimney and to also improve efficiency.
Gas Fireplaces
Gas fireplaces come in both vented and vent-free designs. Conventional gas fireplaces require a flue to release potentially harmful fumes outside, often using a Class 1 or Class 2 chimney.
However, modern balanced flue gas fires use a twin-wall pipe that draws in air and expels gases directly through an external wall, making them suitable for homes without a traditional chimney.
Electric Fireplaces
Electric fireplaces are the easiest to install as they produce no actual flames or emissions.
They generate heat using internal heating elements, meaning no flue or chimney is required. Simply plug them into a power source, and they are ready to use.
A good point to note here is that depending on the current they may consume, they may need their own dedicated supply from your consumer unit that will have to be installed by a Part P registered electrician.
The fireplace that suits your home will very much depend on the property type (modern, period etc.), presence of existing chimney/flue, heating and ventilation needs, so to ensure that you get the very best for you and abide by any and all relevant regulations, consult a qualified HETAS installer.
Can you Unblock an Existing Blocked Fireplace?
Yes, you can unblock an old fireplace, unused, but it requires careful assessment and the right approach to ensure safety and compliance with UK building regulations.
Many older homes have fireplaces that were sealed off to improve energy efficiency or because they were no longer in use.
If this is the case for you and you’re looking to open up a previously blocked up fireplace, see our opening and closing a fireplace project) it can usually be reinstated but you will need to get the chimney and flue checked thoroughly first.
A chimney sweep is a good person to call as we would always recommend getting any chimney cleaned first. Sweeps will be able to give you a good idea of whether the condition of your existing chimney is ok or whether or not you may be able to proceed without the expense of installing a flue liner.
A CORGI registered plumber can check the flue for leaks and will run a smoke test to see if the fire will operate as it should.
How to Install a Fireplace
Due to all of the strict rule and regulations that govern the installation of of a fireplace, chimney, flue or any other related objects, we would always highly recommend that a qualified HETAS installer do the work.
In these situations, they will handle any necessary applications and Building Control requirements and then issue you a certificate to confirm all is as it should be at the end.
With this in mind, in this guide we are going to run through all of the steps involved when installing a fireplace. Although each installer will have their own individual methods, the installation should involve the following processes.
Step 1. Choose the Right Fireplace
The first job is to decide on the type of fireplace you want. Depending on teh type of property you have, where you want your fire to go, what existing features you have e.g. existing chimney, flue etc. this may be dictated to you.
In terms of the available options, they include:
- Wood-burning fireplaces – Require a chimney or flue and proper ventilation.
- Gas fireplaces – Need a gas supply and must comply with Gas Safe regulations.
- Electric fireplaces – Simple to install, requiring only a power source. If one isn’t present, this will need to be installed by a Part P registered electrician.
Step 2. Check Building Regulations and Planning Permission
Before any installation work takes place, ensure your new fireplace meets UK building regulations and is suitable for the purposes it’s intended to be used for.
If making structural changes anywhere, such as adding a chimney or flue, you may need planning permission and if not, certainly need to abide by Building Regulations.
Chimneys should only really be constructed by a qualified builder, unless you have the necessary skills and flues should be installed by a registered HETAS engineer to ensure that it meets all required regulations.
Gas and solid fuel fireplaces must comply with Approved Document J of the Building Regulations, so ensure that anything you do is within the specifications of this document.
Step 3. Prepare the Installation Area
If you are installing a brand new fireplace, hearth and surround, then the first task is to clear the area where it will be installed of any and all items.
If you are replacing an old fireplace, remove the existing surround, pull up the existing hearth and remove any further remaining debris so that you have a totally clear area to start with.
If you have an existing chimney/flue, ensure that you get both thoroughly checked over and either the chimney or flue that is present is clear and in good condition. To ensure this you will need to get someone such as a builder or HETAS engineer to full check it over.
As we have mentioned above, if you are having a solid fuel or gas fire installed, both require the means to dispose of combustion fumes and gases and if your home doesn’t have a chimney, you may need to install a twin-wall flue system.
Step 4. Install the Hearth and Surround
The hearth, which protects your floor from heat, must be made from a non-combustible material like stone or concrete. This sits at the base, underneath your fire and protects whatever’s below that from the effects of fire and combustion.
To ensure that it provides adequate protection, it should extend at least 300mm in front of an open fire and 150mm on either side.
Depending on what surfaces surround your proposed fire area and where the fire is being placed, you may also need to install a fire surround that extends behind the fire. This again will be a non-combustible material that surrounds your fire area, covering any combustible materials and preventing them from catching fire.
Where you are installing your fire in an existing opening/recess, you will want to also install a surround. In this case this will go over the face of the recess and extend out either side. Securely fix the fireplace surround, ensuring it aligns properly with the wall and hearth below it.
Step 5. Fit the Fireplace and Flue
If installing a wood-burning or gas fireplace, at this point it is now installed in place.
The appliance is moved into position and is then either connected to the flue or chimney.
When it comes to the flue, it must be noted that it has to be of the correct diameter to ensure proper ventilation and draw. Your installer will know what this should be and the fire manufacturer will also state required diameters etc.
If your existing chimney isn’t quite up to scratch and has the possibility to leak dangerous fumes inside your home, a chimney liner may be required to improve efficiency and safety.
Step 6. Connect Gas or Electric Supply (If Required)
For gas fireplaces, a Gas Safe registered engineer must handle the installation to ensure compliance. This is the law nd cannot be done by anyone else!
Once all installed, they will then issue you with an installation certificate to prove all has been done correctly.
Electric fireplaces simply plug into a standard socket, but ensure the wiring can handle the load.
Some electric fires can draw a lot of current and if the point their connected to isn’t capable of handling this, it can overheat and catch fire!
If this is the case then a dedicated supply will need to be installed at your consumer unit and this can only be done by a Part P registered electrician.
Step 7. Safety Checks and Finishing Touches
Once all completed and any and all installation work has been completed, the fireplace is then fully tested for proper operation.
Wood-burning fires should have a good draw which will allow decent oxygen flow into the fire for combustion and also to suck combustion gases and smoke up the flue.
To test, the fire is lit and if if it gets going quickly and you can see any smoke being sucked up the chimney, all is good.
When it comes to gas fires, these must be checked for leaks! Once an installation has been completed, the installer will then run a series of tests to check this and ensure there are no dangerous carbon monoxide fumes collecting anywhere.
When it comes to an electric fire, these should be tested for function and that they heat up correctly and any electrical supplies do not overheat.
Regardless of what fire you have had installed, you should always install a carbon monoxide detector for additional safety.
With your new fireplace fully installed and tested, you can now enjoy the warmth and ambiance it brings to your home.