Dot and dab is a method of attaching plasterboard to a wall. Instead of building a timber stud frame and fixing the plasterboard to that, it is stuck directly to the wall using dots and dabs of adhesive, hence the name.
In this guide you will find out all you need to know about dot and dab plasterboard and how it’s done, read on to learn more.
What is Dot and Dab Plasterboard?
Dot and dab, otherwise know as direct bond, is a technique that is used to fix plasterboard to a brick or block wall in order to cover it without having to construct expensive timber studwork. It is a popular choice in many UK new build properties.
Plasterboard adhesive is mixed and then applied in “dolops” to the walls surface in set locations and then the plasterboard is position and pushed on to the adhesive holding it on the wall.
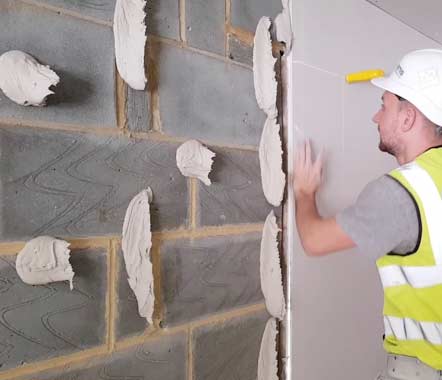
Fixing at Dot and Dab Plasterboard Wall using Direct Bond (Image: Ecomerchant)
Generally dot and dab is used when it’s not possible to construct stud work or there is no stud work to secure the boarding to. It is also much quicker and cheaper to use a direct bond to stick the plasterboard directly to the wall rather than having to build a stud frame first.
The other advantage is that it is a much less skilled job than plastering directly on to the masonry which will save time and money, especially if done yourself.
In terms of summarising the methods for fixing plasterboard to walls, there are essentially three as follows:
- Screwing/nailing to studs or battens fixed to the wall
- Gluing pre insulated
plasterboard (thermal insulation board) to walls - Fixing with plasterboard adhesive, known as Dot and Dab or Direct Bond
Each of these has their merits and will be used in different circumstances when suited.
Tools and Products Needed for Dot and Dab Plastering
To dot and dab plasterboard correctly you will need the following tools and products:
- Enough plasterboard for the job
- Bag(s) of plasterboard adhesive
- Trowel
- Bucket trowel
- Bucket
- Hawk
- 1.2m or longer spirit level
- Tape measure
- Utility knife
- Pen/pencil
- Mixing paddle
- Clean water
- Plasterboard saw
- Plasterboard rasp
- Straight edge/feather edge
How to Dot and Dab Plasterboard and Fix it to a Wall
Fixing dot and dab plasterboard to a solid wall is fairly straightforward. The key to a successful job is ensuring that all boards are flat, level and square with each other.
Step 1 – Prepare the wall
Before applying any adhesive, first prepare the walls surface by brushing it over and removing any dust, debris and loose objects. If there are any features fixed to the wall such as air vents, sockets or switches etc. these will need to be removed.
Note: Before removing any electrical sockets or switches isolate the power to each circuit at your consumer unit or fuse box. Electricity is highly dangerous, never ever be tempted to work on a live circuit!
Before removing any sockets, switches etc. see the below section on how to measure and mark their positions on the plasterboard so they can be cut out ready.
Masonry walls are very porous and will “suck” the moisture out of the adhesive that you use, meaning that it will not cure and create an effective bond.
To stop this happening, after cleaning the walls down, paint on a coat of PVA mixed with water to the manufacturers recommendation, normally around a ratio of 5:1 (5 PVA to 1 water). Many dry liners simply soak the wall with water before dry lining but you must remember they can probably line a wall a lot quicker than you so PVA will give you a little more time. Allow to dry completely for at least 8 hours or so, depending on ambient temperatures.
Step 2 – Cut the Boards
Plasterboard adhesive goes off surprisingly fast, so to make sure that you’re ready and don’t have to spend precious time cutting boards to size when you should be fixing them to the wall you should measure out and cut all your boards beforehand.
In most cases you will be using full size 1.2m x 2.4m plasterboard so any cuts should be fairly minimum, except for end sections and the top of the boards where 2.4m exceeds the height of the room.
Starting from the corner of the room, measure along the wall at the base 1.2m and then make a mark on the wall. Repeat this for all surfaces to be boarded. Where any cuts are needed, measure
from the mark on the wall to the corner and this is the size of cut needed at the end of a run.
For any doors, windows or other items such as electrical sockets and switches, measure from the nearest wall mark to the edge of the object in a few areas up the wall for its total height and then mark this on the plasterboard, using a straight edge to join them together.
Measure the remaining dimensions of the object and mark them on the board and once mapped out, use a utility knife/plasterboard saw to cut the shape out.
Make sure that you measure everything accurately so you get a good and tight fit. You can use a plasterboard rasp for any fine adjustment.
For more help with cutting and preparing plasterboard see our how to cut plasterboard sheets project here.
Step 3 – Mix the Adhesive
The best product to use to dot and dab plasterboard to a wall is plasterboard adhesive as it’s designed specifically for this job. You can also use skim plaster that’s mixed a little thicker as this will do the same job.
Unless you are experienced at using skim plaster we suggest that you stick with plasterboard adhesive as there will be mixing instructions and you will have a little more time before it
sets.
Proprietary dry wall adhesives can be called a range of names, from plasterboard adhesive to bonding compound, but make sure that it is for designed for use with plasterboard.
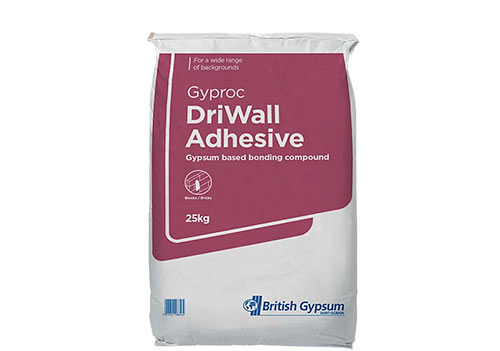
Plasterboard adhesive used for dot and dab plasterboarding
To mix the adhesive up use a clean bucket so as not to contaminate the mix. Follow the instructions on the packet which in most cases will state add clean, fresh water to your bucket and then add the adhesive powder to the water, never the other way around!
In terms of how much to use, it’s very hard to say so it’s best to fill your bucket (assuming a standard 12L builders bucket) around a 1/3 with water and then add 1/4 of the powder and thoroughly mix and then gradually add the power until you get the correct consistency
You are looking for a thick creamy consistency which can stand on the hawk and support itself. If it’s too runny add some more adhesive, too stiff, add a little water.
If this is your first attempt at dot and dab mix and use a little adhesive at a time to prevent any going to waste if it dies out too quickly.
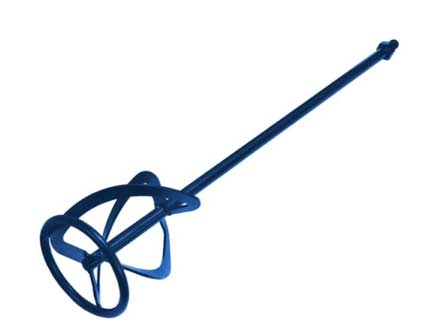
Mixing Paddle for mixing the dot and dab plasterboard adhesive
Step 4 – Applying Dot and Dab Adhesive
This is where you apply the adhesive to the wall, once the PVA has dried. The amount that you use will depend to some extent on the plasterboard that you use; heavier, thicker boards will need more dabs to support the extra weight. If your wall is uneven put more adhesive in the “low” spots and less in the “high” spots so that it will be easier to get the plasterboard level/perpendicular.
Apply the dabs of adhesive every 8 inches (20 cm) to 12 inches (30 cm); be bold and apply a good dollop. Use the board size markings on the wall as a guide to where any corners will fall.
Contrary to popular belief there is no requirement to apply a full line of adhesive around the board to prevent fire spreading through the cavity. The plasterboard itself is rated at 30 minutes fire protection.
It is however recommended to apply continuous adhesive all around each board to stop any insects being able to get in behind and start nesting.
When the boards are pressed down on closely spaced dabs of adhesive they will join to satisfy this requirement, and you don’t want to have too much adhesive to get the boards level.
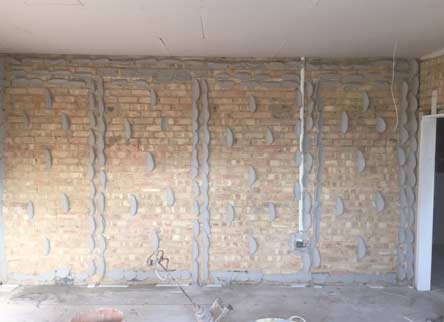
Applying the dot and dab adhesive before fixing the plasterboard (image: Plasterers Tunbridge Wells)
The adhesive will support the edges where they are more likely to get damaged. Take particular care around the bottom of the wall where the skirting boards will be fixed, so that these can be secured easily.
When applying the adhesive it’s best to just concentrate on one board at a time. Covering the entire walls surface as in the image above takes lots of practice, which you probably won’t have at this stage.
Step 5 – Add the Plasterboard
Before fixing anything, take some plasterboard offcuts and cut yourself a selection of small squares and using 2 laid on top of each other, place on the floor against the wall in 2 places.
These will be used to keep the boards off of the floor. Repeat this for any boards to fix in place.
Take your first piece of plasterboard and offer it up to the wall over the adhesive dabs. Angle it in slightly at the base and get it positioned correctly and then push the rest of the board on to the adhesive so it grabs and holds it firmly.
Use the long straight feather edge tool to get the board level, square and perpendicular. Take particular care with the first piece of board as all the others will need to fit flush against this while also being vertically square.
To adjust the board, place the straight edge on its surface and apply a little pressure to push it in. Be very gentle and only do a little at a time, checking the level between each go using the spirit level.
Pulling the board back off the wall to re-level it isn’t easy and you can easily damage it so try not to get yourself in this position.
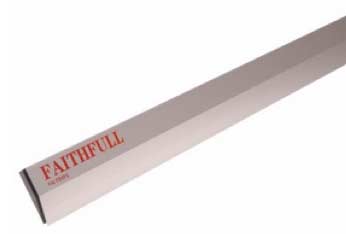
Use a straight edge for getting all dot and dab boards flush
Tap the board into position and then press home firmly so that the adhesive will give a firm fix. Don’t tap with your spirit level as this could damage it.
The gap between the floor and the boards will give you some room for movement. On a ground floor it’s worth making this gap larger, a couple of inches at least, to ensure that damp cannot get from the floor to the boards, which are very hydroscopic and will absorb any moisture around if they can.
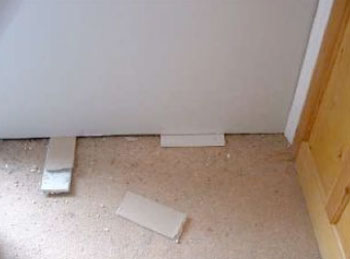
Leave a gap between the floor and your boards when Dot and Dab Drylining (image: Ultimate Handyman)
With subsequent boards you will need to make them flush with those already fixed. Use your feather edge, place it across the face of both boards and ensure that every part is fully in contact with both boards.
If not then you will quickly be able to see what’s out of level.
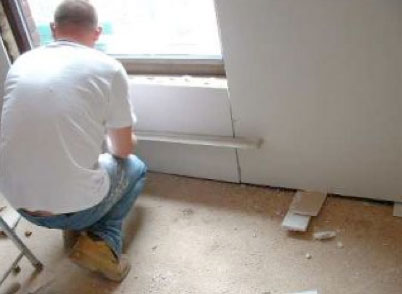
Applying subsequent boards (Image: Ultimate Handyman)
Step 6 – Finishing the Wall
With all the plasterboard now fixed to the wall straight, level and dry, the final job is to finish it and this can be done several ways:
- Plaster: The entire surface is plastered over using standard skim plaster
- Fill Joints and Paint: All joints are filled using filler and the surface is painted
Overall, plastering the surface over generally gives the best finish as the plaster will provide a flat, level and seamless coating that can be painted or wallpapered. However plastering takes a fair bit of practice to master and professional plasterers aren’t cheap so costs are involved.
If you fancy giving plastering a go yourself see our project here on how to skim plaster for more information.
The other option is to simply use a decent filler to fill all the joints between your plasterboard sheets and then paint the surface over. The edges of plasterboard sheets are tapered for this specific purpose.
This method is used a lot in the U.S. and not so much in the UK where plastering is preferred, but it can be done quickly, cheaply and effectively.
The one drawback is that you have to ensure all joints and filled fully and everything is sanded back totally flat as if not, once painted, poorly filled joints stand out a mile off.
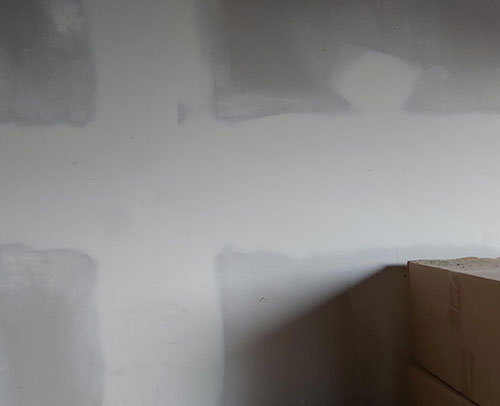
Filled and sanded plasterboard joints
In terms of what to use, one of the best products is by British Gypsum and is called Easi-Fill and is specifically designed for filling plasterboard joints.
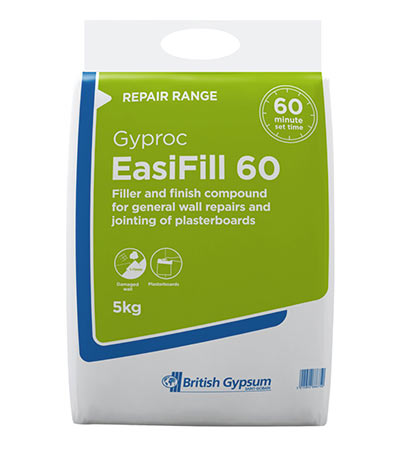
British Gypsum Easi-Fill plasterboard joint filler
It’s simply mixed in a bucket in the same manner as the plasterboard adhesive and then applied over each joint using a trowel in 3 passes, making each pass a little wider each time to feather the edges and create a totally flat finish. Once rubbed down the joint is then pretty much invisible.
As the filler and plasterboard are both extremely porous in much the same way as skim plaster, it first needs a mist coat of paint before any top coats.
Alternatively you can also apply 2 coats of 4:1 mixed PVA and water. This will seal the surface and give a stable base for you to paint on to. This will need to be done, as opposed to the painting if you are planning to wallpaper the wall.
Following the 6 simple steps above will ensure that you can get your plasterboard walls finished using the dot and dab technique very quickly and relatively easily. This is well within the reach of any DIY enthusiast.
Dealing With Sockets and Light Switches
As we have mentioned above, where there are sockets and light switches on the wall, one technique is to measure and mark their position on the wall and then transfer this onto the plasterboard so that you can then cut it out.
Another technique is to leave any socket or switch faceplates fixed to the wall and then position the plasterboard in place over it.
Using a rubber mallet or similar, very gently tap around the face of the plasterboard over the area that it resides behind the board and then remove it. If done correctly this will leave a light imprint on the back of the board in the exact position of the object. You can then cut this out.
One other method is to fix the board in place on the wall and then cut out the hole. This obviously relies on you knowing exactly where the socket or switch is which will again involve you marking it out beforehand.

Socket cut out in plasterboard
Problems and Considerations with Using Dot and Dab Plasterboard
The biggest issues with using dot and dab, or direct bonded plasterboard is that it can be very difficult to fix to. This is the case with plasterboard fixed to studs too, because plasterboard is so soft it cannot support any real weight. For more information on plasterboard fixings and how to fix to plasterboard see our project here.
Plasterboard that has been fixed using dot and dab present a unique problem that standard plasterboard fixings cannot overcome because there is not a sufficient gap between the wall and the back of the plasterboard for the fixing to work.
What happen is that the screw or fixing is unsupported from the wall for a couple of inches, as the plasterboard provides no support. The screw will bend when any load is added to it and rip through the plasterboard.
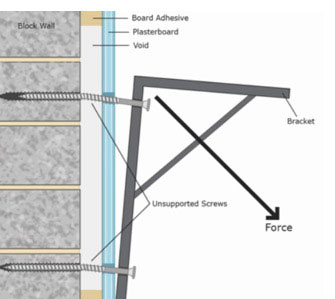
How not to fix to a Dot and Dab Plasterboard wall
The solution is to use a specialist dot and dab plasterboard fixing, such as Corefix. These types of fixings offer support for the screw beyond the wall where it is fixed.

How a specialist Dot and Dab Drywall Fixing works (image: Corefix)
By supporting the screw that will hold the load using a steel core it is possible to fix weighty objects, such as TV brackets and shelves, to a dot and dab wall now.
The alternative is to cut out a section of the plasterboard which will be hidden behind where you are planning to fix the object – TV bracket, shelves, etc. Then you can fix a wooden batten directly to the wall, which will give you a sturdy fixing point for the object you’re fixing.
How to Tell if You Have Dot and Bad Plasterboard
To see if you have dot and dab walls, gently run your hand over the surface of the suspected area, tapping the wall as you go. As you move and tap the surface you should heard a hollow sound, indicating that areas where there is no dot and dab and solid areas where there is.
In the unsupported areas you may also feel the board flex slightly, but don’t press these areas to hard as plasterboard isn’t that strong and you can easily put a hole in it.
Issues With Soundproofing
Many believe that dot and dab helps to improve the soundproofing abilities of a wall but in most cases this is false.
To effectively soundproof an object it’s necessary to separate it from any surrounding structures and essentially create a floating space. Essentially if it’s not connected to any surrounding surfaces then sound cannot travel through.
As we have explained above, dot and dab is the exact opposite of this as it creates a physical connection between the plasterboard and the surface behind and this physical connection allows sound to travel straight through, so this is not the case.
Dot and dab plasterboard has become very popular in recent times as it is a very quick and easy way to finish a wall without needing any specialist trades as it’s something that can be done easily on a DIY basis, however dot and dab surfaces can also be skim plastered at a later date if required.

