After you have treated your damp walls and resolved the reason for them being damp in the first place the next job is to then repair them fully and and then replace any finishing coats such as plaster and then paint or wallpaper.
In this guide you will learn about plastering and repairing walls after damp treatment so that they can be repainted or wallpapered.
Replastering Choices
- Traditional Render – sand and cement to a particular specification
- Advantages: inexpensive
- Disadvantages: slow drying, limited to breathing finishes, cold surface, prone to condensation, slow multi-layer application, not a vapour barrier
- Modern Membranes – dimpled, plastic sheet on a roll, sometimes referred to as plastic lining membrane or air gap membrane
- Advantages: warm surface, no drying time, easy to fix, any finish, vapour barrier
- Disadvantages: slightly more expensive
Unlike normal internal plastering, replastering or external rendering, applying plaster and render to old walls which have been treated for damp requires a different specification and procedure.
Plastering walls after damp treatment needs to follow these specific instructions to work effectively:
Traditional Render
- Hack off all old plaster to at least 450mm clear of all signs of damp or salt and at least 1 metre above ground floor level – use a damp meter to test the walls and remove plaster at least 450mm above the highest level that readings can be obtained. This is to ensure that the residual ‘salts’ do not climb above the new plaster in the future
- Brush the walls to remove all plaster residues, particularly around angle beads. Old plaster will ‘salt’ through your new plaster and will cause damp spots to appear in time
- Repair any holes or poor joints with sand and cement (4:1) using washed, sharp (means slightly gritty) plastering sand (sometimes called screeding or rendering sand. Do not use fine, unwashed sands. Use Renderproof additive (detailed below) in the water. Fine, unwashed sands often contain salt and the fine particles are too numerous to find enough cement particles to bond together tightly – these two problems make for a weak render, prone to the easy passage of ‘salts’
- Special Note – walls made with non-porous stone or brick, like granite or blue brick, will require an adhesive to help stick the render coat to the wall. To help use SBR concentrate. Normal renders and plasters stick to the wall by suction. The walls surfaces need to absorb some water for renders to be able to adhere. Without this suction the render or plaster will not grab the wall and may become loose, cracked and hollow as it dries
- Damp the walls lightly (to reduce ‘suction’, which can cause excessive drying and cracking) and apply a thin coat (maximum 1/2 inch, 12.5mm) of render consisting of 3 parts sand – dry, washed, sharp (means slightly gritty) plastering sand (sometimes called screeding or rendering sand) with 1 part of fresh (free flowing – no lumps) Portland Cement. Thick coats are more likely to slump down the wall during application and crack during drying out
- Scratch the render surface liberally all over with a nail board, trowel, metal float or similar object. Without these scratches the natural drying shrinkage will cause cracking, crazing and hollowness to develop – the next coat will probably pull the first coat off as it dries
- Use only Renderproof waterproofer/plasticiser in the water that the render is mixed with, at the rate of 1 part Renderproof to 40 parts of water. Do not use fine, unwashed or wet sands. Renderproof binds the sand to the cement and prevents liquid water passing through. It also makes the mix stickier (plasticising) which help to hold the render together. Wet sand weighs more than dry, so it will make your mix weak. Fine sands produce a weak, powdery render, which will not resist ‘salts’. Do not allow the plasterer to add plaster (‘finish’ or ‘browning’) or washing up liquid to the mix
- When the render surface is firm enough (but not bone dry, or it will need re-wetting) apply a second coat to exactly the same specification – if further coats will be needed to reach the desired thickness don’t forget to scratch liberally. In hot weather spray the render surface with water to slow the drying process. Excessive drying out increases the suction and can prevent one coat sticking to another. Rapid drying always increases shrinkage, which gives rise to cracking of the render or finish plaster
- Whilst still damp (or re-wet again) apply a skim coat of universal Multi-Finish or Board Finish. Do not polish or add water to the surface. This will produce a shiny, glazed finish which looks good, but is prone to condensation, black mould growth and poor drying
- Delay any decoration for at least one month and then only apply a thin coat of breathable emulsion paint (not a heavy vinyl). Do not repaint for at least three months. Avoid wallpapering at all, if possible. The paint or paper will fall off the wall due to the water vapour that will be trapped underneath in the new render. Wallpaper also absorbs water into its lining and is prone to mould growth
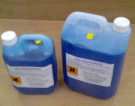
Renderproof – add to sand and cement render as a ‘salts’ barrier
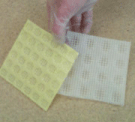
Mesh membrane to cover damp or salty areas, before plastering or plasterboarding

Renderproof waterproof plasticiser for mixing with render
If you would like more help and advice on how to diagnose damp problemsfind out how to diagnose your damp issues using our project here.
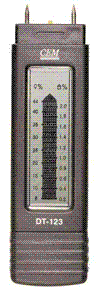
Damp Meter for testing damp levels in materials

Hygrometer for checking humidity levels
Modern Membranes for Damp and Cold Spots on Walls
If you are having issues with damp and cold spots and patches on your walls then you may wish to visit our lining damp walls project.
Here you will be able to find information on how to solve these problems and prevent the appearance of condensation and moulds. They are ideal for lining cold or damp single leaf walls or for solid walls that are inherently cold.
The principle of a plastic lining membrane, damp proof membrane or air gap membrane as they are known is provide an air gap or cavity that keeps damp and cold from a walls surface away from an decorated interior surface.
They feature a dimpled surface that effectively creates and air gap against the lining sheet and the surface behind it.
They can be used in several different ways; they can be fixed directly onto a walls surface and can be battened over or they are also available with a mesh surface that you can then plaster directly over.
Damp plaster is a nightmare problem to have and in most cases for a proper fix involves most of the plaster on the wall having to be removed, but once this is done and the cause of the issue resolved you can be sure of nice dry walls for years to come.