Moss itself is not particularly harmful to people or animals and does not kill grass. However, if grass starts to recede or die, moss can take over those areas.
If you want a “perfect lawn”, moss and similar growths are not ideal. Despite this, many people have begun to appreciate moss, especially during summer, for its aesthetic appeal.
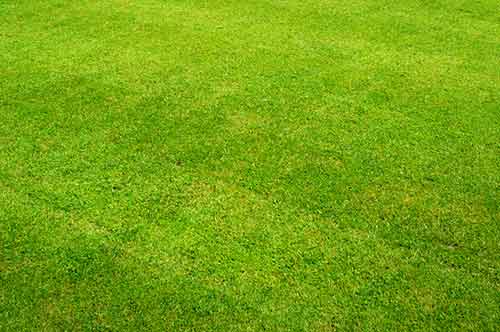
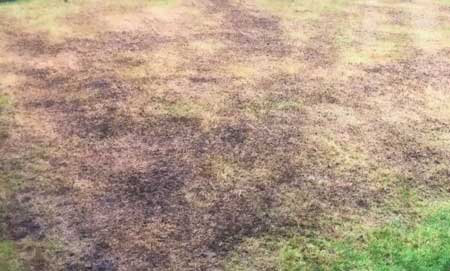
Lawn with moss patches adding aesthetic value
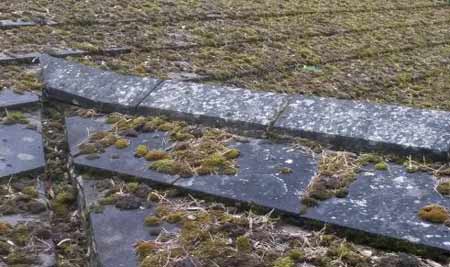
Moss doesn’t just grow on grass. When it pollinates, its spores spread widely, often landing on roofs and other surfaces where it can thrive.
Moss can also benefit your lawn by covering bare patches of soil, preventing erosion and keeping the area intact.
Additionally, moss can indicate soil quality. Moss tends to grow where other plants, such as grass, struggle, suggesting that your soil may be of low quality.
If you prefer to remove moss from your lawn, roof, or other areas, there are several effective methods. Read on to learn more.
What Causes Moss to Grow?
Moss grows in certain locations due to several factors:
- Poor quality soil with low nutrients
- Waterlogged areas due to lack of drainage
- Excessive shade
- Low pH levels, resulting in acidic soil
Poor Quality Soil
Moss doesn’t kill grass but takes over where grass can’t grow. This often indicates poor soil quality lacking essential nutrients for grass growth.
To test your soil, you can either buy a DIY kit or use a professional service. Professional soil testing can be pricey, but it’s thorough. For a list of reputable companies, visit the Soil Association website.
If you prefer a DIY approach, many kits are available. Ensure the kit tests for all major nutrients (N, P, K) and pH levels. Follow the kit instructions to identify any nutrient deficiencies. Once identified, you can choose the right fertiliser or additive to improve your soil.
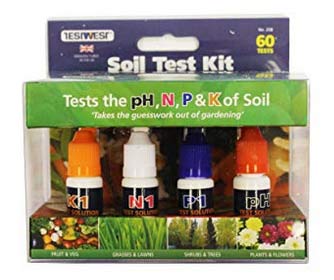
Soil quality testing kit
Poor Drainage
Moss thrives in damp, moist conditions. Poor drainage, often caused by heavy clay soil, creates waterlogged areas ideal for moss growth. Clay soil drains slowly due to its density, allowing water to collect, especially in wet climates like the UK.
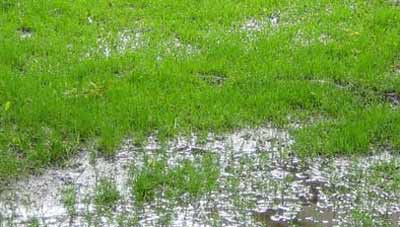
Waterlogged ground caused by heavy clay soil
To check if your soil is clay, roll a small sample into a ball. If it forms a smooth ball that holds its shape, you have clay soil. Sandy soil falls apart, loamy soil crumbles slowly, and peat-based soil won’t hold together.
Improving clay soil requires adding organic matter like compost or well-rotted manure to help break it up. Learn more here.
Compacted soil from heavy foot traffic also prevents proper drainage. Constant walking compresses the soil, making it too dense for water to penetrate.
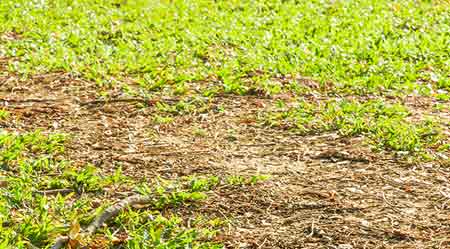
Heavily compacted soil caused by continued footfall
Aeration can solve this issue by creating small holes in the soil to improve airflow and drainage. Use a garden fork or spiked shoes for basic aeration. For severe cases, core aeration removes small soil plugs to enhance drainage and root health.
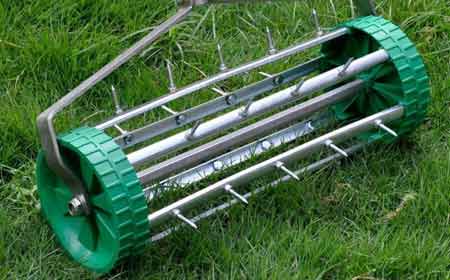
Grass aerator for creating air holes in a lawn
Thatch, a layer of dead grass and leaves, can also hinder drainage. Dethatching, or scarifying, involves raking the lawn to remove this buildup, allowing the grass to breathe and drain properly.
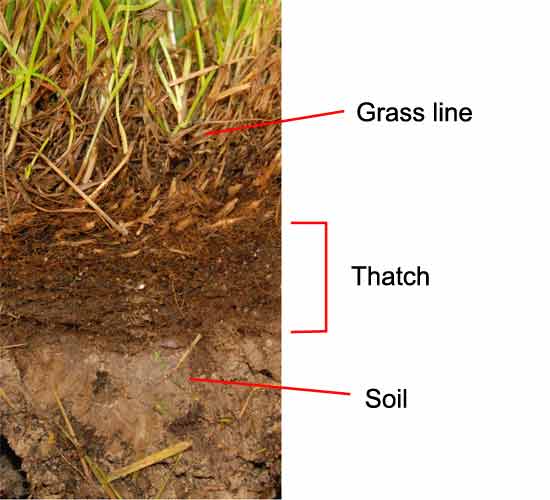
Large amount of thatch present on top of grass
For severe drainage issues, consider installing a French drain or soakaway. Learn more about French drains here.
Too Much Shade and Little Direct Sunlight
Moss thrives in moist, shady areas. To combat moss, ensure your grass gets plenty of sunlight.
Grass struggles to grow in shade. If trees or shrubs block sunlight, the grass becomes weak and moss can take over.
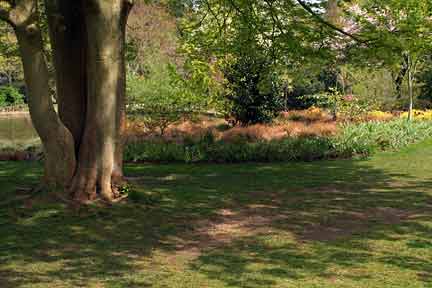
Heavy shade causing grass to struggle to grow – Image courtesy of turfgrowers.co.uk
Trim back trees and shrubs to let more sunlight reach your lawn. Pruning or thinning tree crowns can also help. For overgrown shrubs, a good trim can make a big difference.
If your garden is naturally shaded by tall buildings or located in a deep valley, consider planting shade-tolerant grass. Varieties like tall and hard fescue or ryegrass perform well in low-light conditions.
Look for seed mixes designed for shaded areas at your local garden centre.
Low pH Levels and Acidic Soil
Soil quality greatly impacts plant growth. Grass prefers alkaline soil, while moss thrives in acidic soil.
A neutral pH level of 6.5-7 is ideal for grass. To check your soil’s pH, use a pH testing kit available online or at garden centres.
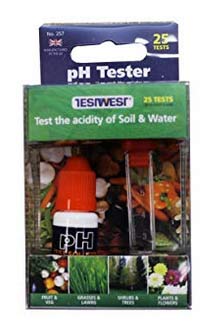
Soil pH testing kit to check soil acid and alkali levels
If your soil is too acidic, raise the pH with calcium-based garden lime. If it’s too alkaline, lower the pH with nitrogen-based fertilisers or soil conditioners. For significant adjustments, use a sulfur-based substance.
Use additives carefully to avoid damaging the soil. Proper pH balance ensures nutrients are available and absorbable by plant roots, promoting healthy growth.
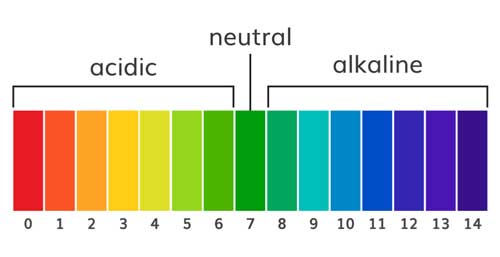
pH scale indicator showing acid to alkali
How to Remove Moss
We’ve covered what causes moss growth and how to improve soil conditions to support healthy grass. But if moss has already taken over, you’ll need to remove it.
Here’s how to tackle moss removal effectively:
Getting Rid of Moss From a Lawn Using Chemicals
To remove moss from your lawn, you have three options: manual removal, using a machine, or using chemicals. Using chemicals is the quickest method but isn’t always the best choice due to potential environmental impact.
While chemical treatments are effective, they introduce substances into your lawn that can affect other plants, pets, and children. We recommend natural methods whenever possible, but sometimes chemicals are necessary.
Glyphosate herbicides are common but harsh. They work by being absorbed into the leaves and traveling down to the roots, killing the plant. Be cautious as they can harm surrounding grass and plants and contaminate the soil.
For safer options, consider sulcate-based herbicides like ferrous sulphate, copper sulphate, or ammonium sulphate. These are effective but less commonly used.
Household bleach can also kill moss but must be diluted with water. Undiluted bleach can damage plants and surfaces. Once applied, the moss will turn white, indicating it’s dead.
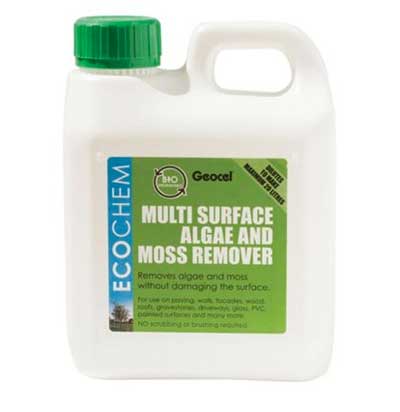
Specialist moss killers are available at garden centres and DIY stores. Look for eco-friendly options that are biodegradable and safe for pets and children. Always follow the manufacturer’s instructions carefully.
Eco-friendly moss killer and remover
An effective and safe solution is cryptocidal soaps, such as dish soap or washing up liquid. These are organic and won’t harm tarmac, patio slabs, metal objects, or grass.
To make a DIY moss-killing solution, mix 20ml of washing up liquid per litre of water. Use a garden sprayer for large areas or a rose sprayer for smaller patches. Spray the solution about an inch from the moss surface for thorough coverage.
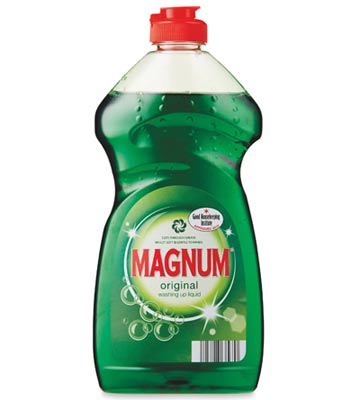
Standard dish soap or washing up liquid
After 24 hours, the moss will turn an orangey-brown colour, indicating it is dying. Once dead, rake it up to remove it completely.
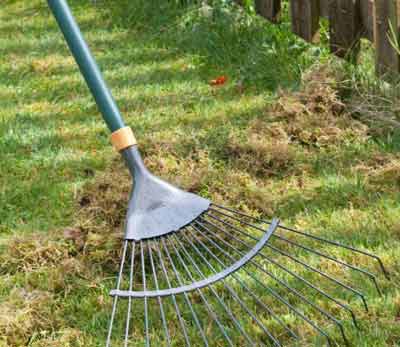
Getting Rid of Moss From a Lawn Manually
Removing moss manually, through raking or scarifying, is hard work but preferred since it avoids using chemicals. The exercise and fresh air are added benefits!
To manually remove moss, you can:
- Use a rake
- Use a scarifier
A rake is the most common tool. Rake over mossy areas, ensuring you reach the soil beneath. Remove all moss and organic matter, leaving a clean patch.
Raking a lawn to remove thatch and moss – Image courtesy of everlush.co.uk
A scarifier, resembling a lawn mower, often includes an aerator. It works like a lawn mower, with a rotating cylinder of thin spikes that rip up moss and thatch.
Scarifiers can be manual or electric. For small areas, a rake suffices. For larger areas, a scarifier is more efficient.
After raking, gather and dispose of the moss. If using a scarifier, most have a collection bag for easy disposal.
How to Treat Bare Patches After Removing Moss
Once the moss is removed, it’s time to repair the bare patches left behind.
If you have removed large areas of moss, your lawn might look thin.
Bare and patchy soil left from removing moss – Image courtesy of lawn-tech.co.uk
To repair this, it’s just a simple job of replanting new grass. Simply scattering seeds won’t be enough; proper preparation is needed to prevent moss from regrowing.
Cover the bald areas with grass seed, then add a 10mm layer of compost to protect the seeds until they germinate and establish.
Keep the area damp but not soaked, as too much water can wash away the seeds and compost. Maintain moisture until the grass starts to grow.
Use grass seed suited for the area’s conditions, such as shade-tolerant varieties for shaded spots.
Applying a nitrogen-rich fertiliser can also help grass grow in challenging conditions.

Bare patch of lawn reseeded with grass seed – Image courtesy of lovethegarden.com
How to Remove Moss from a Roof
Moss doesn’t only affect lawns; it can also grow on roofs. During pollination, moss releases spores that often land on roofs and take root, especially on the north-facing side where it’s damper and shadier.
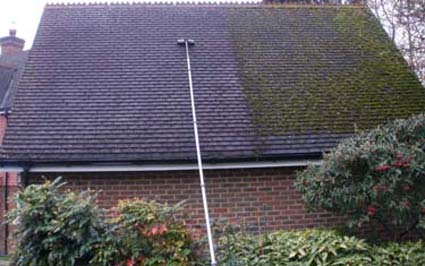
Moss buildup on a pitched roof – Image courtesy of job-prices.co.uk
Wondering if you should remove moss from your roof? Moss itself doesn’t usually harm clay or concrete tile roofs, but it can cause issues over time. It may damage felt-covered roofs (typically flat roofs) and can lead to serious problems like:
- Water soaking into the roof and causing timber rot.
- Freeze-thaw damage from water that freezes in winter.
- Blocked gutters, which can lead to more costly repairs.
Removing moss helps prevent these issues and keeps your roof in good shape. If you have a significant amount of moss, it’s wise to address it.
Here are some effective methods for getting rid of moss on your roof:
- Manual Removal: For small amounts of moss, you can manually remove it using a roof rake or a soft-bristle brush. Be sure to do this carefully to avoid damaging the shingles.
- Chemical Treatments: If you have a lot of moss, chemical treatments might be more effective. Products containing potassium salts of fatty acids or zinc sulphate are commonly used. Follow the instructions carefully and consider the impact on the environment.
- Hiring Professionals: For extensive moss problems, it might be best to hire a roofing professional. They have the tools and expertise to safely and effectively remove moss and prevent future growth.
How to Remove Moss from a Roof Using a Brush
Removing moss from a roof is straightforward if you use the right tools. A stiff brush is ideal for dislodging moss from roof tiles or concrete surfaces.
Here’s a step-by-step guide to brushing moss off your roof:
- Choose the Right Brush: Use a roof brush with an extendable handle, or a stiff-bristle decking brush on a long pole. Avoid metal scrapers to prevent damaging your roof.
- Accessing the Roof Safely: For the safest approach, use a tower scaffold or work platform. If a ladder is your only option, ensure it’s stable and use a ladder standoff to keep it away from the eaves and avoid leaning it on the gutters.
- Brushing Technique: Brush downward to avoid damaging or dislodging tiles. Collect the moss in a bucket or bag and make sure to clear it from the gutters to prevent blockages.
- Alternative Methods: If you prefer not to climb onto the roof, use a long pole and brush from the ground. Specialised roof cleaning tools are available for this purpose.
By following these steps, you can effectively remove moss from your roof while ensuring safety and avoiding damage.
Brushing moss off of a roof using a long handled brush – Image courtesy of hawkroofing.co.uk
How to Remove Moss from a Roof with Bleach or Chemical Moss Removers
Removing moss from your roof using bleach or chemical moss removers can be effective but also risky. This method typically requires access to the roof and specialised equipment.
Here’s what you need to know:
- Specialist Equipment Required: To use bleach or chemicals, you need the right equipment to safely access and work on your roof. Without this, it’s challenging and dangerous.
- Application Method: A moss-killing solution is sprayed over the roof to kill the moss. This process needs careful handling to avoid accidents.
- Safety Concerns: Working at height with chemicals poses risks. Chemicals can drip onto people or objects below, so it’s crucial to take extreme caution.
- Our Advice: If you lack experience or the right tools, avoid using this method. Instead, consider safer, more manageable alternatives for moss removal.
If you do choose to use bleach or chemicals, make sure to follow all safety guidelines and use proper protective gear.
Washing moss off of a roof using moss killing chemicals
Using a Pressure Washer to Remove Roof Moss
A pressure washer or steam cleaner can effectively remove moss from your roof. These tools use high-pressure water to blast away moss quickly.
However, there are several risks associated with this method:
- Safety Concerns: Operating a pressure washer on a roof is risky. Wet and slippery conditions can lead to accidents.
- Potential Damage: Pressurised water can force its way under roof tiles, potentially causing leaks and damage to your loft space.
- Effective Technique: To avoid damage, you must work from the bottom of the roof upwards. However, this technique can still push water under tiles.
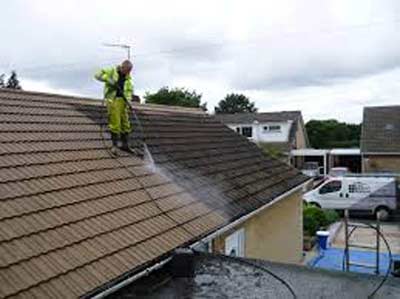
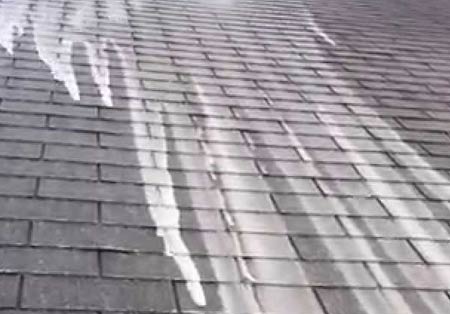
Using a pressure washer to remove moss form a roof – Image courtesy of a1builders.ws
How to Prevent Moss from Re-Growing on Roofs
After removing moss from your roof, it’s important to take steps to keep it from coming back. While it’s hard to prevent moss entirely, you can delay its return with these simple methods.
Like with lawns, the key is to remove or reduce the conditions that moss thrives in:
- Trim Trees and Bushes: Cut back any trees, bushes, or shrubs that shade your roof. Moss loves shade, so reducing it will help prevent re-growth.
- Clean Gutters Regularly: Keep your gutters free from debris. Clogged gutters can hold water, creating a perfect environment for moss.
- Improve Roof Drainage: Ensure your roof has proper drainage. Standing water can encourage moss growth.
While you can’t change the north-facing aspect of your roof, these actions can help you manage moss better.
Removing moss from lawns or roofs can be hard work, but the best approach is to focus on preventing moss from growing in the first place.