There are a number of commonly used textured wallpapers that you are likely to find if you are doing a redecoration or renovation project. By far and away the most common is Woodchip wallpaper, but you will also find Anaglypta Wallpapers too. Let us briefly explain what these are before we explain how you get these and other types of textured wallpapers off your walls.
What is Woodchip Wallpaper?
Woodchip wallpaper is a cheap paper with small chips of wood within it giving the effect of a textured wall finish and was the ideal choice for hiding imperfect or cracked walls. It was really popular in the 1970s so commonly found in renovation projects.
The wallpaper consists of two layers of paper with wood fibre (chips) in between, and different types have different sizes and forms of the chips depending on the preferred effect. Woodchip is a type of “ingrain” wallpaper.

Woodchip wallpaper is a form of ingrain paper
What is Anaglypta Wallpaper?
Anaglypta Wallpapers are textured papers that are designed to be painted. They are made from paper or vinyl and applied to the wall as any other wallpaper. It is still popular in certain circles today and can have a dramatic effect where used.
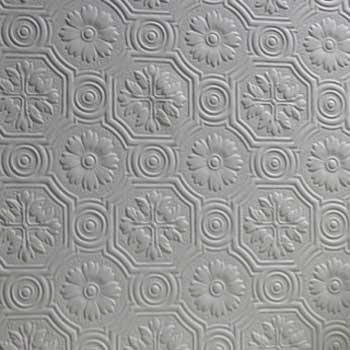
Anaglypta Wallpaper is designed to be painted over
Covering or Removing Textured Wallpapers
As styles and tastes change people need to remove these textured wallpapers; it is possible to paint over them but it is not recommended to skim plaster over them. Plastering over paper is not recommended because the plaster will only be as good as the wallpaper paste holding on the paper.
And often these textured papers have been used to hide crumbly and cracked walls which should be dealt with prior to plastering.
Incidentally, Artrex and other textured coatings can be skimmed over so long as it has not blown. This is typically more economical when you have a large area and there is no asbestos in it, otherwise you should remove it. Find out more about dealing with Artex and textured coatings here.
There are options to cover woodchip and other textured papers which are used, although our preference it to remove them where ever possible.
There are products that are designed to be used over cracked and textured surfaces, such as polycell smoothover. We don’t like this option and they are certainly not a good option for a large area.
The other option is to apply an insulated lining paper and then your finish over this. Again you are relying on the adhesion of the underlying paper and trusting the wall is sound, so we would recommend removing the underlying paper whenever possible.
There are a number of products that can be used, and you can find out more on our insulating walls project.
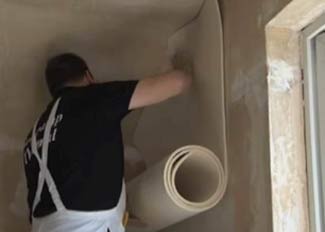
Hanging Sempatap insulation on to a wall
How to Remove Woodchip Wallpaper
One of the biggest issues about these textured wallpapers is that they have either been designed to be painted over, or as they have been in place for so long they have at least one coat of paint over them. This makes removing them more problematic, which typically means harder work!
There are a number of techniques that you can employ to remove these wall papers, but essentially they are all aimed at achieving the same thing; moistening and loosening the paste holding the paper on to the wall so that it will come away cleanly.
Advocates of the various techniques for removing woodchip wallpaper swear by their various methods. Here are the most common:
- Wallpaper Steamer
- Wallpaper Remover and/or warm (soapy) water
- Wallpaper removal gel or pastes
Our preferred option is to use a gel or paste, but each method has its pros and cons and there are tricks that can be used to make them more effective.
Before you start, which ever method you use, it is important that the room is prepared and ready. This will be a messy business so you will need to protect floors and carpets. Use carpet protector and dust sheets, and it is also a good idea to put newspaper at the base of the wall to collect all the bits and this can be picked up and all disposed of in one go.
Using A Wallpaper Steamer to Remove Woodchip Paper
When steaming wallpaper, and particularly woodchip wallpaper, it is important to scour the surface with a tool to perforate the surface so that the steam can get under the paper and work on the glue. These tools seem to be called after all manner of animals from hedgehogs to tigers!
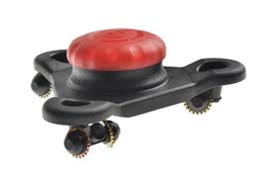
A Wallpaper Tiger to perforate the surface of the wallpaper
Having perforated the paper it is worth sponging down the surface of the wall so that some water starts to soak into paper.
You can add some wallpaper remover or soap to the water which help loosen the glue even more. Start the steamer before you do this as they take quarter of an hour or so to warm up, which is about how long it will take to sponge down.
Once the paper is been perforated and soaked then you can start steaming it off.
Removing woodchip wallpaper using a steamer
Hold the steamer pad to the wall for about 10 seconds with one hand and then lift it so you can scrape off the paper with the other. Be careful as this will be hot. Move the scraper under the woodchip lifting it as you go. Keep going until you have removed all the woodchip or textured paper.
This is a quick but messy and labour intensive way to strip woodchip wallpaper; if you are not applying the steam then the paper will not be coming off. You have to purchase or hire a steamer for the job – it is worth getting a good one as the cheaper versions tend to break quickly.
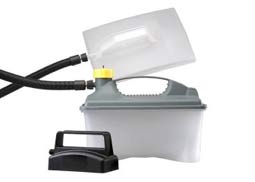
Use a good quality Steam Stripper
Woodchip Paper Removal with Wallpaper Remover
This is the same process as describe above but without the steamer. Immediately after applying the wallpaper remover solution to the wall you should start to remove the paper with a stripping knife of scraper.
In our experience this is not easy stripping woodchip this way as it is thicker than normal paper and the remover will not penetrate so easily. Expect to make two passes as you are very likely to have to apply a second sponging of paper remover solution to get the remnants of the wallpaper off the wall.
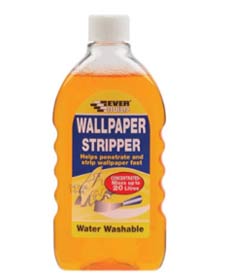
Wallpaper stripper available from our online store here
While this is a cheap and simple way to remove textured paper it is much harder work and is likely to take a little longer.
Using Wallpaper Removal Gel or Pastes to Strip Woodchip
This is a variation on using traditional wallpaper removers, but rather than applying a liquid which runs off the wall, you apply a gel to the wall which sticks to it allowing the moisture and active ingredients to penetrate the wall.
Scour the surface as in the other methods, then apply the gel or paste with a brush or a roller. Then you can wait for the product to work through the paper and start to work on the glue.
This might take up to an hour to work especially if there have been a number coats of paint over the paper.
Apply generously as the more you apply the better it will work which means the less effort that you have to put in scraping!
Once you are ready and the stripping gel has started to work you can start to scrape off the paper. Again you’ll probably need to take two passes, especially if the woodchip has been painted over a few times.
Our preferred product for stripping woodchip and other textured wallpapers is X-Tex

X-Tex artex and textured wallpaper stripper is both effective and eco friendly
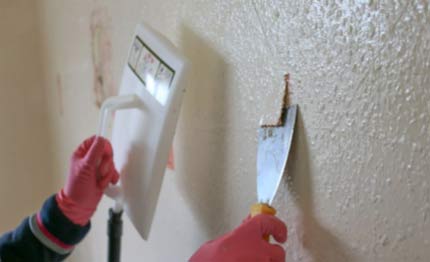
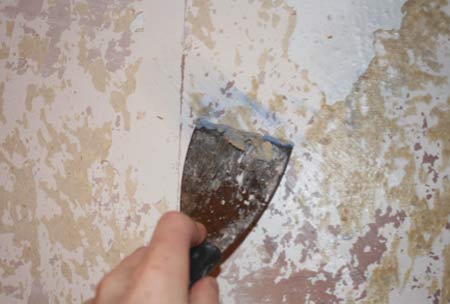
In some circumstances, it can be easier to scrape the top layer of paper off dry and then use the remover paste to remove the under layer.
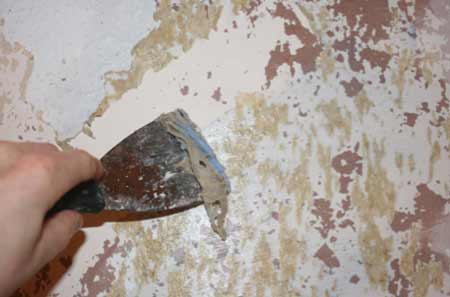
Scraping off underlay and paste after applying X-Tex
The benefit of this method is it is probably the easiest as you don’t need to hold a steamer pad to the wall all day and the gel stick to the wall making it penetrate to the glue much more effectively.
It is possibly a little more time consuming than steaming, but quicker and easier than using traditional wallpaper remover. For these reasons this is usually the approach we take even is these pastes are more expensive than liquid wallpaper removers.
Preparing the Wall after Removing Woodchip or Textured Wallpaper
Once you have got the paper off, which ever method you have used you will need to wash the walls down to get rid of any residual glue. We would suggest that you use a sugar soap solution to do this.
It is likely that you will have gouged the wall in the odd place while scraping off the woodchip paper, so you will need to fill this and another cracks or chips.
Once the wall as been stripped then the preparation is the same as you would for any other wall. See more details about preparing walls for painting here.
Removing woodchip and textured wall papers like Anaglypta is not easy, simply as it takes time and it physically demanding, however there is no reason why any DIY enthusiast could not do it with any of the methods we describe. Every wall will be different and different techniques will work better or worse so you will have to experiment a little to see what works for you.