Render is a sand and cement mix that is applied to the surface of an exterior wall. As a form of cladding, render provides an attractive yet water and moisture resistant finish to many homes in the UK and indeed throughout the world. It is relatively cheap and comes in a range of colours and finishes that can cater for pretty much any taste.
Over time render can become damaged and if this is the case, water and moisture can penetrate down loosening it and causing it to detach from the surface below.
If this is the case then the old render will need hacking off and replacing with new. Find out how to repair and patch damaged render in our DIY guide below.
How to Repair and Patch Rendered Walls
Rendering is very similar to plastering in that render is mixed to a certain consistancy and then it is applied to a walls surface in 2 coats, but unlike plastering the thin render coat is applied first and then the thicker finishing coat is applied after.
As we have mentioned, there are many different render finishes that are all finished slightly differently but in the case of our example here we are going to finish with a “Tyrolean” finish, the popular traditional rough finish that you may think of when someone mentions render.
Rought traditional Tyrolean render finish
Remove old Damaged Render and Objects
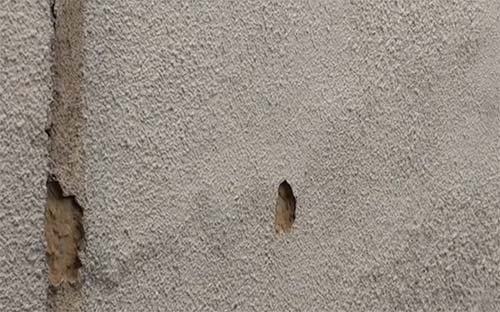
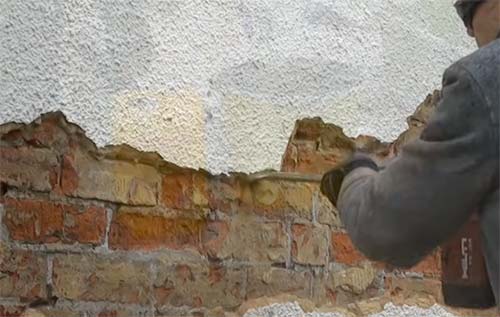
Before any new render can be applied the first job is to remove all of the old and damaged render back down to the walls surface beneath it. As you can see form the image below, the render has chunks missing and it has “blown” or separated away from the walls surface below.
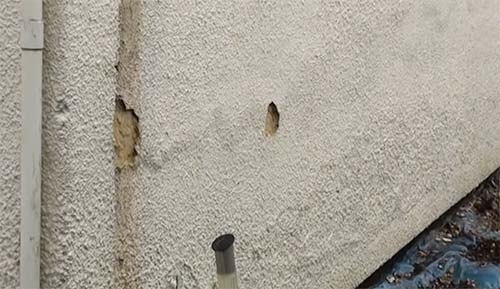
Damaged and blown render on house
In this case, the damaged render is a previously repaired patch. The contractors or individual that originally repaired the damage didn’t use any cement in the mix, or certainly not enough if they did hence the reason it looks just like sand.
Starting at the point of the damage, use a claw hammer to start chipping the old render off all the way back down to the brick or block wall below.
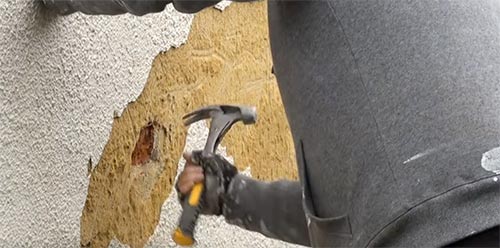
Removing old and damaged render with claw hammer
As you chip away, work outwards from any obvious damaged areas until you find the edges of any solid and sound render. Any damaged or blown render will sound hollow when tapped so tapping with your hammer can help identify these damaged areas quickly and easily. Keep working until all of the damaged and unsound render has been chipped off the wall.
Removing render using a claw hammer over a large area is tough work so to save time and energy the best tool to use is a small breaker with a cranked (slightly angled) chisel. The cracked angle of the chisel makes it easy to pry the render from the wall but also run along the walls surface without digging into it.
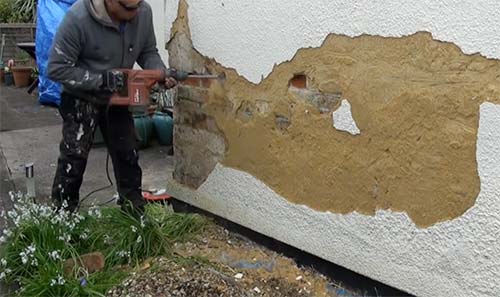
Removing old render using a breaker and cranked chisel
Once all of the old and damaged render has been removed from the wall, run along all of the edges of the render with your breaker and chisel and remove them just to be 100% there are no damaged sections left.
Run along edges to check for remaining damaged render
Brush Wall and Remove Dust and Debris
Once all of the old and damaged render has been removed from the wall the next job is to give it a good clean up. Starting and the top and working down, use a hand brush or an old masonry brush, and brush the entire exposed walls surface over fully removing any dust or debris from the surface and also any cracks or holes that exist.
Also, give the now exposed edge of the render a good brushing to remove and dust or loose material. It is hugely important that the area is cleaned properly as any remaining dust or debris can affect how your new render bonds to the existing surface in that it can cause it to fail leading to the exact same issue we are currently repairing.
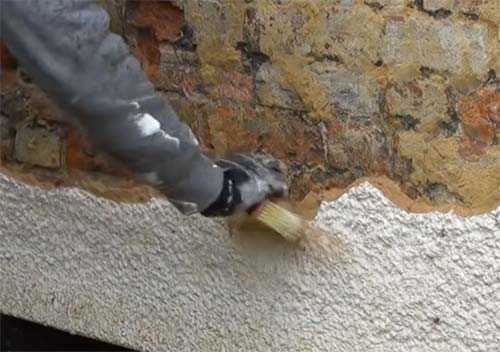
Brush away all dust and debris from walls surface
Mix and Apply SBR
Once the walls surface has been fully cleaned the next jb is to mix and apply an SBR base to the wall. This will help the first coat of render bond to the walls surface and also prevent the dry wall from sucking all the moisture out of the render before it has cured.
Using an old bucket, pour a few inches of SBR in the bottom and then an equal amount of water to create a 50/50 mix. Mix both in well using a mixing stick or similar.
Once mixed, use an old masonry brush to brush a coating over the entire area that we removed the render from. Ensure that you also fully coat the bare edges of the existing render.
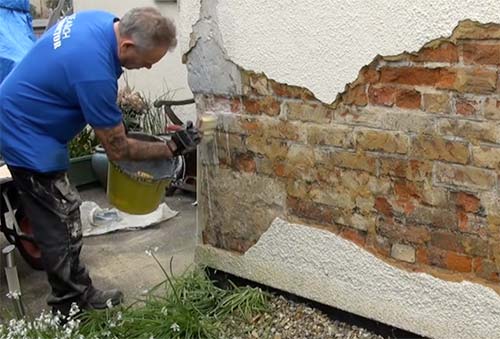
Painting SBR onto bare wall surface
Fill Holes and Depressions
Once the wall has been fully coated with SBR and it has cured the next task is to fill any holes or deep depressions. When our first coat of render is applied to the wall we want it to go on as flat a surface as possible so that we get a nice even 5 – 6mm on the wall. If it’s a uniform thickness it will cure at the same rate across its entire surface.
Mix up a 50/50 sand mix, 50% sharp sand and 50% soft sand at a 4:1 mix e.g. 4 sand 1 cement (for help on mixing comcrete/cement see our project here) and then apply it to any holes.
Push the mix fully into each hole and smooth it off to create as smooth and even a surface as you can.
Fill any holes and deep depressions to create a smooth surface
Mix First Render Coat
Now that the bare wall has been correctly prepared we can finally start to get some render on the wall. The first render coat or scratch coat as it’s known is applied to the wall as a fairly thin coat, only around 5 – 6mm. As we have said it’s important to get a nice even and uniform coat across the entire area.
In terms of mixing up the first coat of render, it’s mixed at 5:1 mix (3 sharp gritty sand, 2 very soft sand, 1 cement and water). In our example here, as we need a fair amount of render we used a cement mixer to mix up a large batch and it was then poured into a barrow ready for applying.
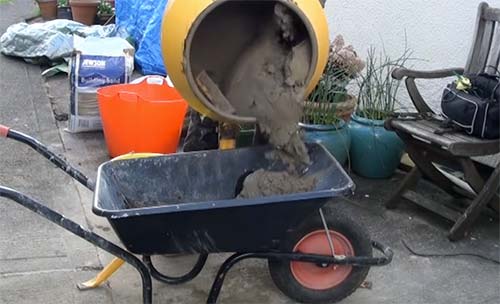
First render coat mixed in cement mixer
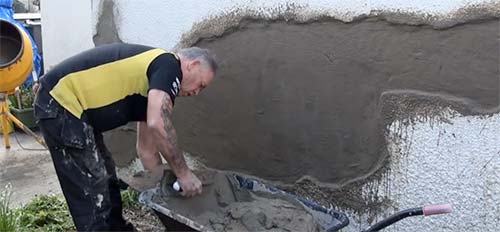
The render mix is then applied to the walls surface using a plasterers trowel and a hawk in much the same was as plaster is applied. The hawk is loaded and then the trowel is loaded from the hawk.
As you apply the render mix to the wall, push it into the wall so it bonds and then spread to a uniform thickness of between 5 and 6mm. Also be sure that you force the render mix into the edges of the existing render, again, to ensure a good bond. Work your way along the wall until it’s fully covered.
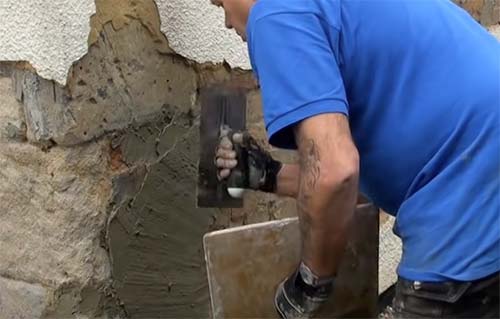
Applying first render coat to walls surface
As you apply the render, don’t be too concerned with the fact it’s not totally flat and level. The odd slight trowel ridge or rough patch isn’t a huge deal at present.

First render coat applied to walls surface
Once the first coat is all on the wall, next, use a scratch comb or polyurethane float with 5 or 6 screws inserted in one end to form a scratch coat.
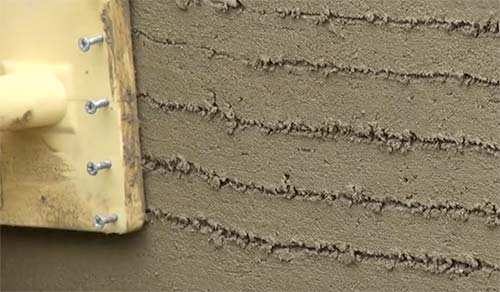
Forming a scratch coat in a render coat
The scratch coat is essential as it creates a fantastic bond for the final top coat and without it the top coat won’t bond correctly.
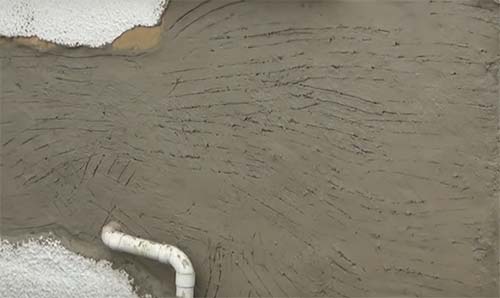
First render coat fully scratched and ready for second coat
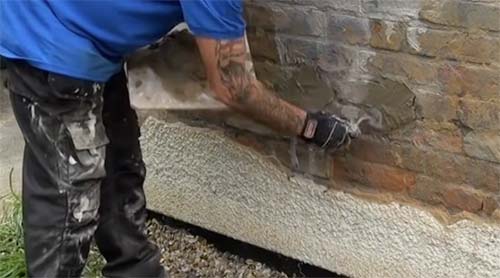
Free-Hand Rendering Corners
Applying render in a straight run over a wall is a little tricky if it’s your first try but certainly nothing that cannot be achieved with a little time and practice, however as we have in our example here, we also have a 90° corner to deal with.
If you’ve never tried before, corners can be a bit tricky, especially when trying to do them freehand without a hard edge to follow.
The secret to getting a corner right is to take your time and build it up slowly. Putting it on too deep cause it to just fall off the wall. Once on, use your trowel to start forming the corner.
Once it’s shaped as much as possible you can then use a polyurethane float and sponge to smooth it over (see below for more information).
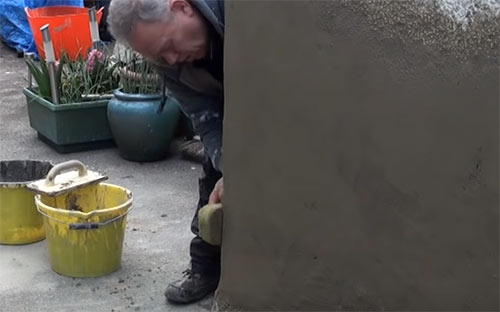
Sponge finishing rendered corner
Mix and Apply Second Coat
Once the first coat is on the wall the second coat can then be applied, however there are a few point to be aware of before you do. Unlike plastering where the thick coat goes on first and the thinner top coat after, as we have said, the thin coat is applied first and the thick coat after.
With this in mind you should leave the fist 5 – 6mm coat for a few hours before applying the top coat as the top coat is thick and heavy (around 10mm), the thinner first coat needs to have bonded enough to take the weight as if it’s not the heavy top coat will simply drag it off the wall!
However, you don’t want the first coat to dry to the point that it’s fully dried as when you apply the top coat it will simply suck all the moisture out before it cures correctly, so letting it dry too much isn’t a great idea.
In the event that it does dry too much, before applying your top coat you should soak the wall and by this we mean give it a real thorough dousing in water so that it is dripping wet.
The second coat, like the first coat is a 5:1 mix but this time the mix is 3 soft, 2 sharp sand and 1 cement. This ensures that this final coat can be “closed up” e.g. smoothed flat for not only a great finish but to ensure no water and moisture can penetrate it.
In terms of applying the top coat, get it on the wall in the same way as the first coat by using a plasterers trowel and hawk. The second coat needs to be applied to around 10mm thick to give a total thickness of around 15 – 16mm over the 2 coats.
When applying, push the render mix into the wall to create a decent bond and also work it into the edges of the existing plaster
Applying second coat of render
Drag Excess Render off and Smooth Over
Once the second coat is in place on the wall we next need to start to level it off slightly. Using a piece of timber, a spirit level or plasterers darby and lay it across the render so that either end is resting on the existing plaster.
Run your straight edge over the surface of the entire rendered area and take off any high spots. Your top coat should be just below the existing render level as once the top coat has cured a Tyrolean top coat will need to be applied.
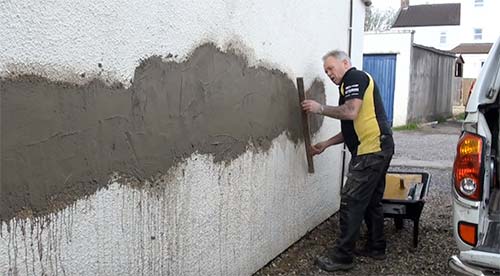
Levelling off top coat with straight edge
Once all high spots have been taken off use a flat polyurethane trowel to rub over the surface to both smooth and compact the surface and ensure it is just below the existing render surface. When rubbing, rub in a circular motion to ensure the entire surface is covered.
Rubbing render surface using polyurethane float
Sponge Second Coat Over and Fill Holes
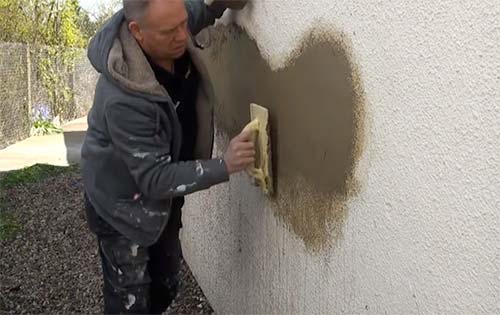
Once the top coat render has been trowelled over the next task is to get the sponge out and sponge the entire area over.
When using a sponge ensure it’s slightly damp as this will prevent the render from sticking to teh sponge as you brush it over teh surface. Wet teh sponge and then wring it out so it’s not dripping and then it’s ready to go.
The act of sponging has 2 effects, it firstly helps to close the surface over and prevent any water or moisture penetration and secondly it helps to smooth over any rough areas.
At this stage it’s also a good time to fill any small holes or depressions that may still existing. Simply scoop some render on to your sponge, rub it into the area and then smooth it off.
Also pay close attention to the edges of the existing render and give these a good rubbing over to seal the new render to the existing.

Sponging over top coat render
Once the entire area has been smoothed and sponged you’re pretty much done and dusted in terms of repairing render. As we have commented, there are quite a few different render types and if you are going for a smooth finish then you can simply allow it to fully cure and then paint it.
However, as in our example here, further finishes can be applied on top of this finished coat and in this case to match the existing rendered finish we need to apply a Tyrolean coat.
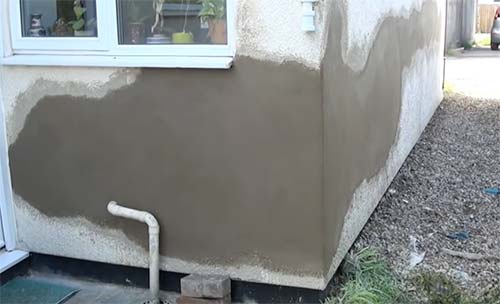
Smoothed render finish ready for Tyrolean coating