Render is a mixture of sand, cement and sometimes lime that is applied to the external walls of a house to weatherproof them, cover the existing materials or change their appearance.
Rendering is very similar to plastering and is a job that requires some skill and plenty of practice. Despite this it’s certainly something that you can learn to do. Read on to find out how to render walls and everything else you’ll need to know.
A Note on Mixing Render
The correct ratio of mix to use for render is a 5:2:1 mix for both coats however they differ slightly over the 2 coats in that for the top coat you would use more soft sand than sharp sand so that you can get a smoother finish. The ratios for both coats are as follows:
- Scratch coat/first coat = 5:2:1 mix of 3 sharp sand, 2 soft sand, 1 cement plus water
- Top coat = 5:2:1 mix of 3 soft sand, 2 sharp sand, 1 cement plus water
For more detailed information on how to correctly mix mortar and render see our project on Mortar Mixes here.
The aim of applying render is to form a solid, strong, waterproof surface to cover the layer below, whether its brick, block, stone or even old render. As such the mix needs to be strong and wherever possible, this strength is increased by adding the sharp sand (or grit) to the mix.
The sharp or coarse sand is a lot grittier than soft sand or builders sand. Soft sand contains more clay than sharp sand and is a lot more flexible. The sharp sand is added to reduce the flexibility of the render and to give it greater strength against both cracking, shrinkage and erosion.
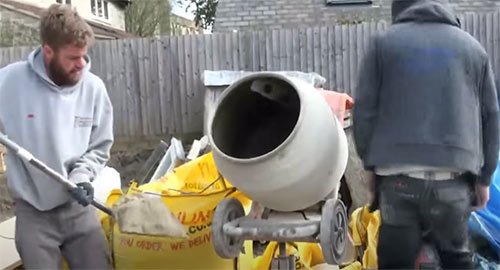
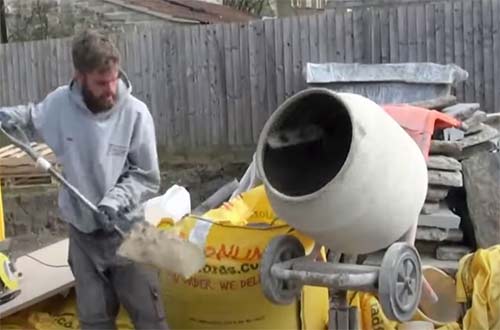
The best way to mix the render is in a cement mixer as this ensures that the mix is even and that the correct amount of water is added. Mixing in a wheelbarrow is fine but almost always there is a little unmixed sand and cement at the bottom which does not become apparent until emptying out the barrow.
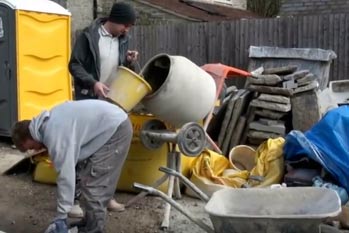
A mixer is the best way to mix sand and cement render as it’s more thorough
When mixing render, your equipment, including mixer, water, soft sand, sharp sand and cement should be as close to the work area as possible to save on time running backwards and forwards. Also remember to clean your tools thoroughly after and between usage
If it is likely to be very cold in the evening with even a hint of frost or ice, then the work must be covered (preferably by hessian sacking or even a old blanket) to stop the water in the render freezing.
If it is allowed to freeze it will expand and on thawing it will leave a void which will again fill with water when it rains. This will also freeze and so the process goes on. See our project on Freeze-Thaw action for more information.
Note: If rendering a chimney stack the mix should be a little stronger as the weather erosion is greater at this height so follow the mix guidelines on the link above to our mortar mixes project.
Types of Render Finish
There are 7 different types of render finish and depending on the type of surface or structure you’re working on will depend on what type is used. The types of render finish are cement render (most common), lime render, acrylic render, polymer render, clay, pebble dash and single coat render.
- Cement Render: The most common type of render used on most buildings in the UK. Made using sand and cement it’s cheap to produce and easy to apply to most surfaces. Can be left as is or can be painted using a decent quality exterior paint
- Lime Render: Used mostly on older, period properties, the lime allows it to breath very well and stay flexible, helping to prevent damp, especially in properties that have solid walls and no cavities
- Acrylic Render: A newer, man-made type of render, it features acrylic resin which helps to make it flexible and waterproof which helps to stop cracking. As it’s waterproof it is also much less breathable which can cause damp issues over time
- Silicone Render: This is basically a sand and cement or lime render with silicone added into the mix. Like the acrylic render it has increased water resistance and flexibility but unlike acrylic it stays breathable
- Clay Render: One of the most traditional types of render and as it uses clay, it is very environmentally friendly and easy to produce. As it can be activated using water it is easy to rework and repair but on the flip side to this it’s no good when in direct contact with heavy rain as it erodes away, so not great for use in the UK unless it is protected
- Pebble Dash: A familiar sight on many UK homes, pebble dash render is made using a standard cement or lime render mix but it then either has pebbles, gravel or the similar added in with the mix or the standard cement/lime mix is coated on the wall and the pebbles, gravel etc. are then applied to the mix. It produces a rough, textured finish that’s generally a bit of a “desired taste”
- Single Coat Render (Monocouche): As you may guess from the name, this is a render that’s applied in a single coat and can be trowelled or sprayed on to the wall. In most cases they are based on a standard cement render and come pre-mixed so all you do is add water. They are very low maintenance so generally don’t need repair and can also come coloured so no need for painting
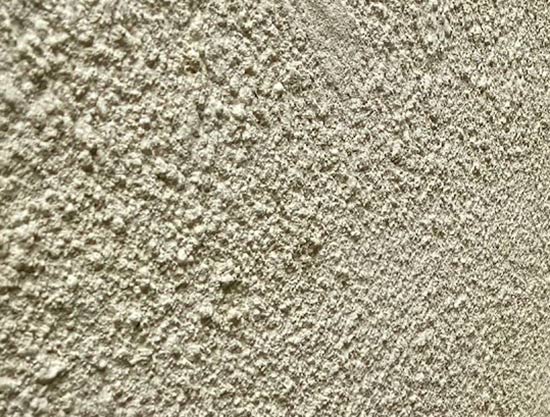
Textured render created using small pieces of gravel
On the whole most renders, despite any clay-based renders are rather damaging to the environment, especially the plastic-based offerings. With today’s focus on looking after the environment there are other options available such as cork-based render and others so it’s well worth exploring these options also.
However the one downside is that as they are so specialist they need a specially trained team to apply them which can be very expensive.
How Thick Should Render be on an External Wall?
Although rendering is pretty much the same as plastering, render is applied much thicker with a total depth of 15mm or so over two coats as opposed to 5mm with plastering.
Again unlike plastering the first coat is the thin coat when rendering and is applied to the wall as a 5 – 6mm layer. The second thicker coat is then applied at a depth of around 10mm to give you around a 15mm total depth.
Tools and Materials for Rendering a Wall
To ensure your rendering goes as smoothly as possible and you stand the best chance of getting a great finish you will need the following tools and materials:
- Hammer
- Chisel/bolster
- Stiff brush
- Plastering/rendering trowels
- Polyurethane float
- Plasterers hawk
- Plasterers darby or straight edge
- Scratch comb
- Bucket
- Small paint brush
- Sponge
- Sharp sand (enough for area to be rendered)
- Soft sand (enough for area to be rendered)
- Cement (enough for area to be rendered)
- Clean water
- Cement mixer or wheel barrow (depending on how much render you’re mixing)
- Rendering stop beads, angle beads (if needed)
Plasterers darby used for leveling plaster and render
How to Render a Wall
As we have mentioned, rendering is very much the same as plastering and due to this requires practice beforehand to get the hang of it so take the time to practice using a piece of platerboard fixed to a garage or shed wall first.
Try to make sure you have a couple of fine days to do the job in – if it rains too soon after you apply the render, it will be washed off the wall. A little forethought here could be handy so think about fixing a tarpaulin or strong polythene sheeting to the top of the wall you are working on so if it does rain you can simply drop the sheet to keep it dry.
Step 1 – Prepare Wall for Rendering
The first step before adding any render to any surfaces is to prepare the surface to be rendered correctly.
Unless the wall has been recently built, you will need to clean it well by removing any loose paint, dust or loose debris, plants growing and anything similar. Use a long handled stiff broom and stiff hand brush to brush the entire surface over, removing as much loose material as possible.
Scrub off any mould with a bleach, or fungicide solution and finally hose down the wall to remove any dust and dirt that could stop the render from adhering.
If you are rendering over any existing render or a surface that’s a bit loose ensure that you remove any and all loose objects from the surface using a hammer and chisel.
After washing down it will be fine to render the wall if it is still damp, in fact it needs to be damp so the porous surface doesn’t suck all of the moisture our of the render before it’s cured, but do not try and render while it is still running with water as it wont stick.
If there are any objects such as drainage downpipes, soil pipes, alarm boxes, security lights etc. these will all need to be removed to give you as flat and clear a surface as possible.
Clear external wall prepared and ready for rendering
Step 2 – Alter any Existing Features
Once the wall is correctly cleaned down you will need to remove any air vents and extend them out and also any window sills if they are particularly shallow e.g. bring them out to the new surface level of the finished wall.
How this is done will depend on how much each needs to be extended by. It may be the case you can purchase an adaptor of some kind but in some cases it may be easier to remove the item entirely and replace with new.
If you are rendering around any corners or up to any doorways or windows then you will need to fix some angle beads in place as these will give you a nice, sharp, crisp corner to render up to. These are effectively the same as angle and stop beads used in plastering.
Some professional plasterers/renderers may choose not to use these as they can achieve a sharp corner without them.
Additionally if you have to render a particularly large area then using some stop beads to divide it up is a great idea so that you don’t have to try and render the entire surface in one go.
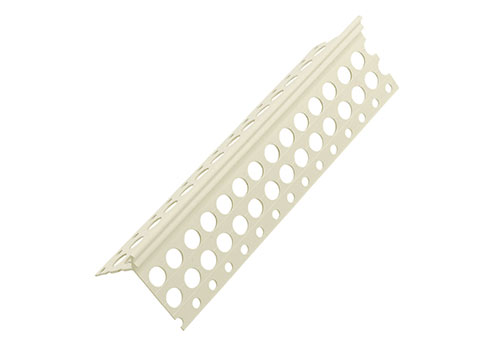
External rendering angle bead
Step 3 – Lay out Dust Sheets
Rendering can be a messy job and although it’s outside you may still have objects and surfaces that are delicate and need protecting such as Indian Sandstone paving slabs or the similar.
To protect these surfaces lay out dust sheets or better still a tarpaulin under and around any walls or surfaces that are to be rendered.
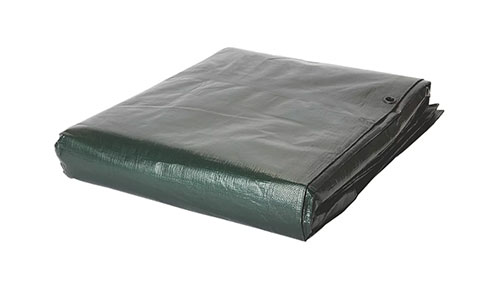
Tarpaulin to lay out over surfaces to protect from rendering
Step 4 – Fix Battens in Place (if Required)
If you are new to rendering then judging how thick 15mm is can be very tricky. Similarly, if you have a very wide wall to render then keeping a uniform thickness over the entire expanse is also very challenging.
A handy trick to resolve this is to setup screed battens. These are 15mm thick wooden battens, which you fix to the wall. See our project on fixing to masonry to accomplish this.
Screed battens fixed to wall to help level render
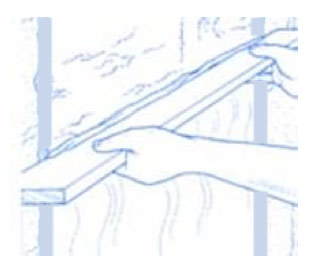
Place battens about 900mm apart and make sure the screws are flush with the face of the timber because you will be using these battens to help you level the render by sliding a straight edge or plasterers darby over them. This will then take off any render above that level ensuring nothing goes above the 15mm total depth. This is demonstrated in the image above. This will also help to divide the wall up in to more manageable chunks.
The battens fixed to the wall will make your first couple of attempts a lot easier as the wall (providing it was fairly flat in the first place) should be flat. If you try to apply the render free-hand and you do not have the experience of getting a uniform thickness on the wall, then the difference in thickness will not only lead to a difference in surface level (leaving it almost impossible to trowel smooth) but could leave it prone to cracking where thick render meets render of a different depth.
Use a straight edge to level up render
Step 5 – Mix up First Render Mix
As in this example, the wall needing to be rendered is fairly large so the render is mixed using a cement mixer. As stated the ratio to use for your first mix is 5:2:1 – 3 sharp sand, 2 soft sand and 1 cement.
Add the sand to the mixer in the correct proportions, making sure you measure them accurately and turn the mixer on. Mix the two sands for a few minutes and then add the cement, again using the correct proportion.
Slowly add water until you get the correct consistency, self supporting and not too wet.
Mixing first render mix using a cement mixer
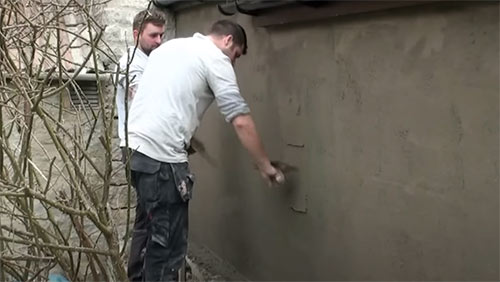
Step 6 – Apply First Coat of Render to Wall
Before adding any render, ensure the wall is damp to the touch, but not running with water.
Apply the render with a steel plastering trowel and scooping it from a plasterers hawk. Use a firm hand to press and ensure it sticks to the damp wall. As stated, the first coat of render should be a thin coat of about 5mm thick. This coat is pushed well into the wall.
The thickness is important because we are asking the wall to start “sucking” the render in for it to adhere properly to the wall. It can only do this effectively if there is little weight being applied as, if we try and get too much on the wall in one go, gravity will start to pull it off.
5mm of render is about the thickness that the wall can start to absorb and which will “stick” almost immediately. Once the 5mm is on all over the wall, it then needs to be left to dry before “scratching” the first coat.
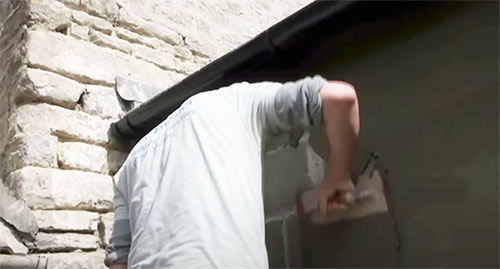
Applying first coat of render to the wall using a steel plasterers float
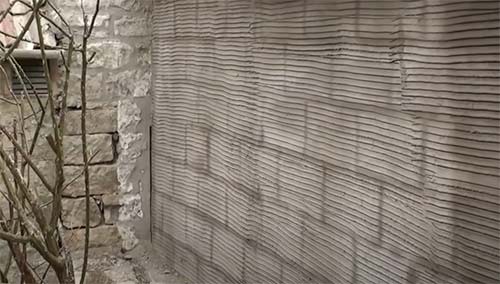
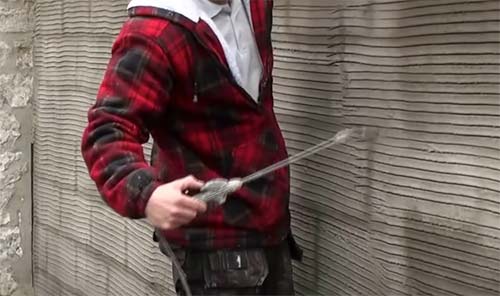
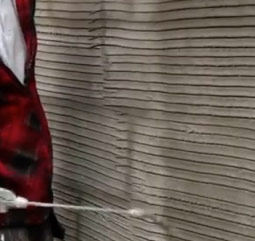
Step 7 – Scratch With Scratching Comb
Once the surface of the first coat is fairly solid but not dry, use a scratching comb to scratch the entire surface over. This is done to provide a “key” for the second coat so that it will fully stick to the first.
Professional plasterers use an over-sized comb type tool for this (seen in the image above). You could make your own by hammering four or five nails into a piece of wood or simply running over the surface with a screwdriver.
There is no need to scratch right down to the original wall surface, just a few millimeters deep enough to provide a key for the second coat.
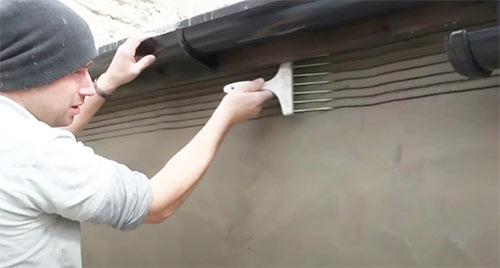
Scratching comb used for keying first coat for better bond to second coat
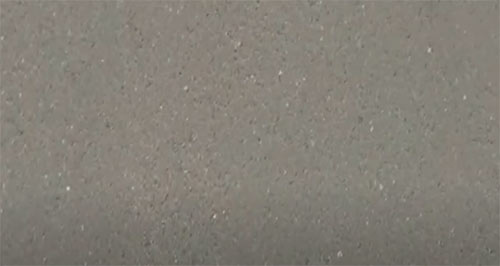
Step 8 – Test Dryness of First Coat
Ideally before applying the second finishing coat, the first coat needs to be fully stuck to the wall so that it provides a stable and solid base for the top coat.
To ensure this, leave the first coat for around 24 hours to dry out. Once dry, it should turn a light grey colour and look similar to the image below.
Despite the above, some professional plasterers will start applying their second coat after only an hour or so. Depending on the drying conditions and after years of experience they will know when it’s safe to do so. We suggest leaving it for 24 hours as you wont have the same levels of experience at this stage.
First render coat dried out and light grey in colour
Step 9 – Apply Second Render Coat
For the second render mix this again will be a 5:2:1 mix but this time you’ll need to use more soft sand than sharp sand so the mix will be 3 soft sand, 2 sharp sand and cement.
As above, add sand to the mixer, mix for a few minutes then add cement, mix for a few minutes and then start adding water slowly until you get to the correct consistency of self supporting and not too wet.
Mixing up second render mix
Before applying the second coat to the wall, wet the entire surface down using a garden sprayer or bucket and paint brush. This wil prevent the dry surface sucking all the moisture from the render mix before it cures correctly.
Dampen down first coat before applying second render coat
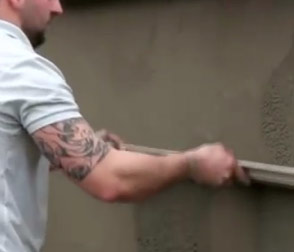
Start applying the second coat using your plasterers steel float. Mound the mix on to a hawk to make it easier to transport and apply.
To get to the desired 10mm thickness for your second coat, start building it up in layers. If you have used battens then build past them a little as it can then be levelled using a straight-edge.
Work in smaller sections of the wall. Once you’ve built up to 10mm in thickness, run over the surface using the straight edge, moving it from side to side as you move upwards. Once done, move on to the next section of wall applying the render then levelling it until you have covered the entire wall.
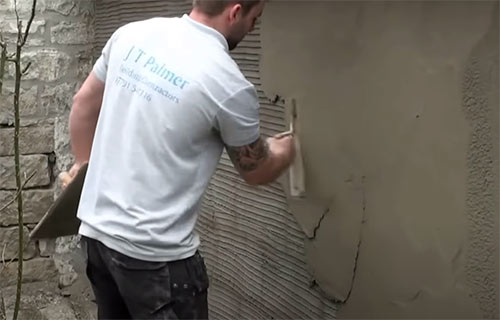
Applying second coat of render
As you drag the straight edge up the wall and pull off any high spots it is inevitable that you will leave some holes as the render clings together and some is pulled off by the straight edge.
Small holes and imperfections in surface caused by levelling
Fill in any holes using some more render applied using the trowel and repeat the straight edge levelling process using the battens as guides, if there are any. If not use the straight edge itself and ensure render is touching all the way across its length.
Fill any holes and imperfections using more render
If you have used battens, when the render has been on the wall for an hour or so, remove them carefully and fill in the holes left by them. This is best done by using a pointing or a gauging trowel. Scrape the surplus render from the straight edge back onto your spot-board.
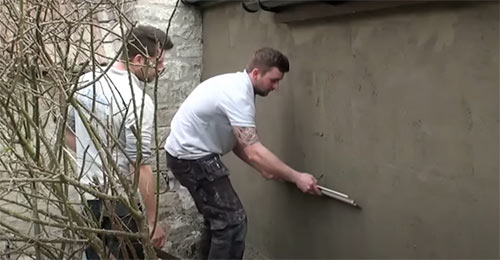
Step 10 – Floating up Render
Once the battens have been removed and any other voids or imperfections are filled to be level with the rest of the wall, the wall should be left for another hour or so to start the drying out process.
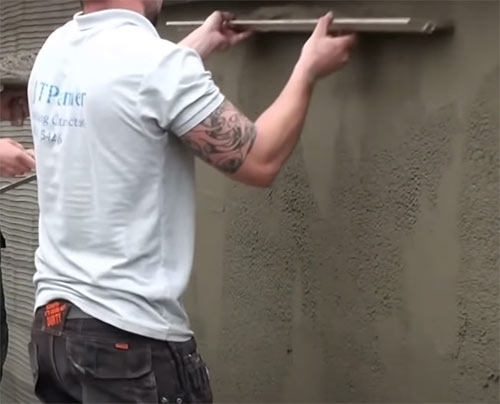
Once it is hard enough to push a rendering float onto the surface without render bulging out around the float, you can begin to float the surface up.
Floating has the effect of closing up the render. All the little air holes are filled and the render becomes smoother and more waterproof.
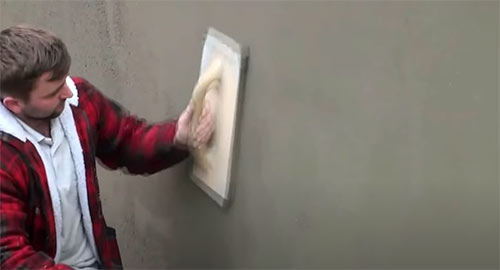
Use a wooden or polyurethane float to get a good render finish
The float should be pushed fairly firmly (only practice will show you the pressure required) onto the surface then moved in a circular motion as you can see in the below video. Cover the whole wall and then go back and start again. You will end up with a lovely smooth, closed surface.
It sounds simple but you’ll find that the technique takes a bit of practice to get used to it and it may take you a while before you can manage a nice smooth finish.
Floated render surface that’s nice and smooth
Step 11 – Sponge Down Render
The final stage in the rendering process is sponge the surface over. Many renderers will use an ordinary large car sponge which is very slightly damp, to give a final pass to the wall.
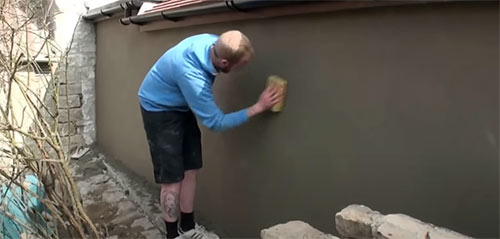
A sponge finish on render makes it really smooth and waterproof
By rubbing very gently, as you can see from the video below, the wall surface becomes completely closed, with no holes making it very smooth, very waterproof and easy to paint.
After sponging over has been completed it should then be left for at least 24 hours or so to fully dry out.

Sponged over render that’s smooth and all holes closed up
Step 12 – Painting and Final Finishes
Although correctly applied render is fairly waterproof in its own right, it can be a little dull to look at so many choose to increase the visual appeal of render plus make it more water resistant by painting it.
If it’s nice and smooth then this is easy and in most cases the paint can be rollered on, however if the finish is rough such as a pebble dash finish then this is much more difficult and in most cases will need to be rollered on using a thick piled roller sleeve and then brushed over using a masonry brush.
In terms of what paint to use, don’t skimp on quality here, go for the best paint you can afford. It will not only go on easier it wil last much longer also. One of the very best to go for is Sandtex or Dulux Weathershield.
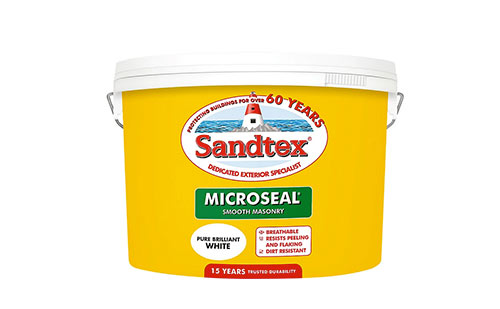
Sandtex masonry paint ideal for painting render
Time Between Render Coats
The guidelines given in this render tutorial are exactly that – guidelines! It does not matter if you leave the wall a week or even a month, between cleaning it down and rendering it. Just make sure that the wall is slightly damp when you start and that you have brushed it over to remove any new dust that may have accumulated.
Similarly, it does not matter if there is a week or two between the first coat and the second coat as long as the same dampness is applied to the wall before the second coat is applied.
Damping the render down gives better adhesion
The reason for the surfaces needing to be damp before applying any render is so the wall does not suck out the moisture from the render mix too quickly. If this happens, the wall simply absorbs the water from the render leaving effectively a dry mix on the surface which will soon crumble and fall off.
If the render is allowed to dry out slowly (achieved by a slightly damp wall underneath) the render dries while soaking slowly into the wall forming a much stronger layer which is firmly fixed to the wall.
Using Lime Mortar for Rendering
If you live in a listed building or your walls were originally built in lime mortar, you will be expected to complete any rendering in lime.
Lime does the same job as cement in that it holds the particles of sand together while setting (albeit much more slowly) but its real value is that it allows any moisture trapped in the surface of the building to evaporate out.
This evaporation is called “breathing” so when you hear the phrase “The walls must be allowed to breathe” this is what it means.
Lime mortar is also much more flexible than cement mortar and given that older walls move more than their newer counterparts, the lime allows the walls to move more without any cracking.
Lime is normally mixed with the sand at a 3 to 1 ratio e.g. 3 sand to 1 lime. Some builders merchants sell bags of lime which are especially designed to work with cement so a mix could be used which incorporates both. This gives some breathability while setting harder more quickly but advice should be sought when considering using lime mixes of any kind at home.
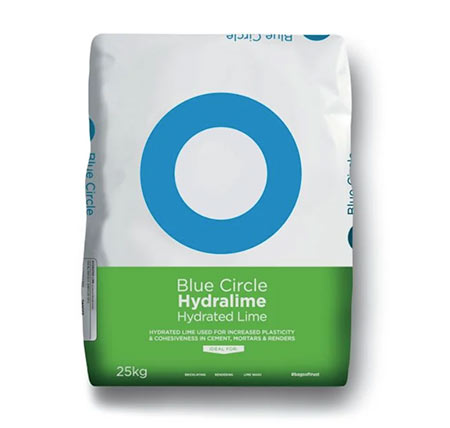
Lime used to make lime render
Rendering and the Building Regulations
If you do plan to render a house wall you should be aware that any changes to the exterior require you to check with your local Building Control Department of your council as to whether your changes (i.e. the render) will mean that your wall must be upgraded to comply with the current “Thermal Element” regulations.
A Thermal Element is a wall, roof or floor which separates any heated part of a building from any space which is unheated, e.g. outside.
If your proposed rendering will cover more than 25% of the wall you may have to upgrade the wall to comply with current insulation requirements if this is possible. In a cavity wall for example, this may mean you need to insert cavity insulation.
More information can be found in Part L1B (Appendix A) of the Building Regulations Document on The Conservation of Heat and Power in Existing Dwellings. For more information see our project on Building Regulations Approved Document L.
Adding Insulation When Rendering
If insulating the interior of a wall or within the cavity is not possible then in the case of the above it may be necessary to insulate the exterior surface of a wall or walls.
This is effectively done by either mechanically fixing (screws, bolts etc.) or gluing solid insulation sheets or in some cases building a timber battening frame to contain the insulation sheets over the exterior wall and then it is then covered using a mesh fixed in place and rendered over or the mesh is fixed over the insulation and rendered straight on top of that.
The mesh can either be fabric or metal-based and provides a key and a rigid base for the render to both stick to and help to prevent cracking.
Out of the options available this is normally the last option to consider as it doesn’t give a great finish and doesn’t always provide the levels of insulation the other 2 options achieve.

Expended metal lathe sheets used to create key for render
Rendering a wall, like plastering, is fairly tricky to do and certainly requires practice to achieve a good finish but despite this as long as you put the time in, it’s nothing that cannot be mastered and soon you’ll be rendering like the pros!