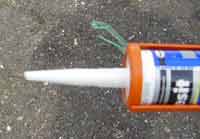
Using silicone sealants, or mastic as it is commonly called, together with decorators caulk, are very common jobs and should be very easy. We believe they are made more difficult by the self applicator tubes which operate like a syringe and, again this is only our opinion, make it almost impossible to maintain a neat joint.
The best, easiest and least expensive way to apply mastic, sealant or decorators caulk is by sing a sealant gun or applicator gun (sometimes also known as a skeleton gun). You can maintain absolute control and get a neat and tidy job.
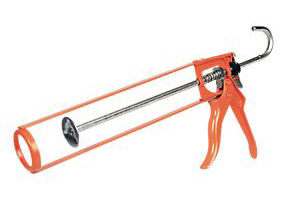
Sealant gun, applicator gun or skeleton gun
As professional tradesmen we advise that you buy an extra tube of the sealant you need to apply and have a practice with it. Sealants mastics and caulk are not that easy to remove when wet and can be very messy so practice makes perfect and you may find that an extra few bob is well worth the trouble.
Firstly you need to work out which sealant you need from the many hundreds you are faced with on the DIY Store shelves. You can choose from this lot which is an overview of the types available. Applying mastic and decorators caulk instructions are below.
Different Types of Sealant, Mastic and Caulk
Below you will find a run down of the basic types of sealants available on the market and what they do. You may also have heard tradesmen and some DIY’ers use the term "mastic" when refering to sealants. The name mastic is a bit of an umbrella term for all types of sealants and really stems from years ago when there were only a few types of sealant (or mastic). As technology helped to develop the range of sealants we have today the term "mastic" was replaced with sealant instead.
Silicone Sealants (General purpose)
Silicone sealants are not water based so they do not need to dry to go hard, they go hard through a chemical process occurring as a reaction with air. This process is called curing. Silicone sealants are waterproof, can be used outdoors for a variety of waterproofing jobs and come in many colours including clear.
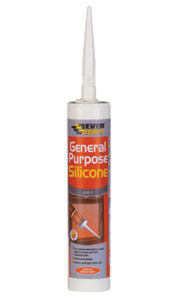
General Purpose Silicone Sealant
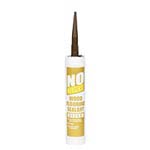
Water Based General Purpose Sealants and Decorators Caulk
These sealants and fillers are water based and usually used for gap filling down the sides of architraves or in the top of skirting boards. Again they are supplied in many colours and can be over-printed, some can be sanded and the white ones can sometimes be stained but check on the tube if this is the case.
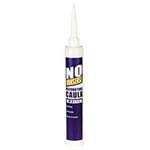
Water based Sealants
Roofing and Gutter Sealants
Roofing and gutter sealants are highly flexible, completely waterproof and can be used, as the name suggests, for sealing leaks in gutters and flat roofs. The surface must be absolutely free from dust to get the best possible seal.
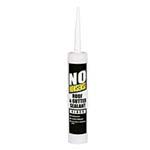
Gutter and roof sealant
Frame Sealants
These sealants are designed to seal between window and door frames and the surface they are fixed to. They usually have greater (up to 30%) flexibility than normal sealants and are UV fade resistant. A dust free surface is a necessity here as absolute adhesion must be obtained between frame and wall for a watertight joint.
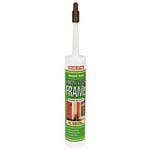
Frame Sealants
Glazing Sealants
Cures gently and with great flexibility to allow for expansion and contraction between glass and frame these sealants usually contain fungicide and are suitable for sealing glass to PVCu, wood, aluminium and polycarbonate frames.
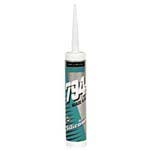
Glazing Sealant
Intumescent Sealants
Intumescent or fire stop sealants are for maintaining the integrity of a wall or partition in the event of a fire. Ideally used to seal attic walls between semi detached or terraced houses and to seal frames in fire risk areas.
Intumescent fire sealant
Flooring Sealants
Flooring sealants are designed with great flexibility in many colours to fill expansion joints in, especially, laminate floors. Especially important here to practice before using as a messy joint on the floor stands out like a sore thumb.
Flooring Sealant
Sanitary Sealants
Sanitary sealants are suitable for kitchen and bathroom use, have great flexibility and provide a flexible waterproof seal.
Sanitary Sealants
Using a Sealant Gun for Sealing With Silicone, Mastic and Caulk
Using a sealant gun (this obviously includes mastic and decorators caulk, not just sealant) takes practice to get it right and even the basics like trimming the nozzle are important. Firstly, using a sharp hobby knife, place the nozzle on a flat surface which will not be damaged if you cut into it. Then cut the nozzle at an angle of about 45 degrees.
The higher up the nozzle the smaller the aperture you will leave so start small and widen, by cutting further down, if required. By cutting small, a very thin, neat line of mastic can be applied. Wider strips are much harder to get neat.
Cut nozzle to suit job in hand
Screw the nozzle onto the end of the tube and insert into gun. Squeeze the trigger gently until you can see the mastic appearing in the nozzle. Always have a piece of rag with you.
Place the nozzle onto the job at the same angle as the nozzle cut then lift the handle end slightly to allow the mastic to be squeezed out. Move the gun at the same time as pulling the trigger (this is where a little practice is invaluable) keeping the bead of mastic uniform in thickness. Do not move too quickly or you will "stretch" the bead, too slowly and it will distort.
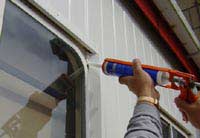
Hold at angle and squeeze trigger
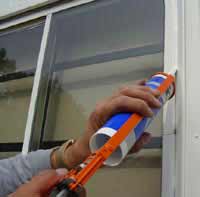
Pull gun down slowly to get an even bead
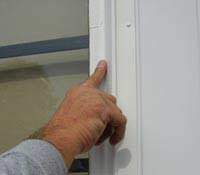
Use sealant tool or your finger to get a perfect finish
Even the pros very rarely get the finished bead of mastic perfect with the gun so some "touching up" is usually required! We use a finger, dipped in water which we then run gently, but firmly, over the bead to shape it into the joint. This is not recommended practice however and a special tool is available for this job. Don’t forget that practice makes perfect!