A leaking bath or shower tray can be a nightmare. Even a very small, slight one can cause a huge amount of damage over time, especially if it goes unnoticed.
In this guide we explore the reasons why shower trays and baths can leak and how you can identify the problem areas and get them fixed.
How do You Know if a Bath ot Shower is Leaking?
There are a few telltale signs that your bath or shower tray may have a leak somewhere, here follows a selection of the most common:
Stains and Water Marks
One of the first signs of a hidden leak is damp or water stains on the ceiling below your bathroom or shower.
If you notice peeling paint, sagging plaster, or unexplained, brownish watermarks, your bath or shower tray could be leaking.
In severe cases, water may even drip through the ceiling.
Water Pooling Around the Bath or Shower
If you see puddles forming around the base of your bath or shower, this could mean the sealant has failed or water is escaping from an unseen gap, split or crack somewhere.
Run water and check if it collects in a specific area and by doing so, this can help pinpoint where the leak is coming from.
Loose or Mouldy Sealant
Worn-out or mouldy sealant around the bath or shower tray is a common cause of leaks.
If you notice cracks, gaps, or black mould forming along the edges, water may be seeping through and damaging the surrounding walls or flooring.
Musty Smells or Mould Growth
Persistent damp or musty smells in your bathroom can indicate trapped moisture from a slow leak.
Check for mould or mildew around the skirting boards, wall corners, or underneath the bath panel, as these are signs of excess moisture building up.
Spongy or Warped Flooring
Bathroom flooring that feels soft, bouncy, or warped could be a sign of water damage from a long-term leak.
Wooden floors may swell, while vinyl or tiles can lift or become discoloured if water is seeping underneath.
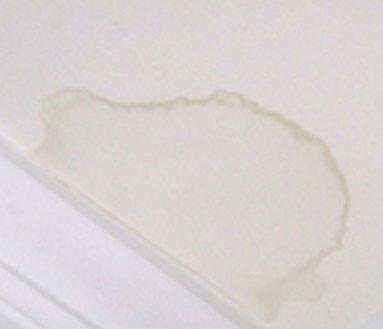
Brown stain on bathroom ceiling indicating leak
Common Reasons for Bath and Shower Tray Leaks?
Once you have identified that your bath or shower tray is leaking, the next point to cover is exactly why it is leaking and what has caused this headache. In respect to this, here are some of the most common reasons:
Worn or Damaged Sealant
Over time, the silicone sealant around your bath or shower tray that prevents water trickling down behind or under it can deteriorate, crack, or peel away from the surface it’s seeing against.
As commented, this allows water to seep through gaps, leading to damp walls and floors. If you notice loose or mouldy sealant, it’s time to remove and replace it with a fresh waterproof silicone seal.
For help with this, see our removing and replacing silicone sealant project for more tips.
Poor Installation
If a bath or shower tray is not installed correctly, so that it does not suffer from any movement whatsoever, it may shift or move slightly when in use, and over time this will cause gaps to form between the tray and surrounding walls and then inevitably leaks!
Ensuring your bath or shower tray is securely fixed in place, either stuck or fixed to the floor or fixed to surrounding surfaces will prevent any movement and thus any leaks.
Cracks in the Bath or Shower Tray
Small cracks in a shower tray or bath can allow water to leak through, even if they’re not immediately visible.
Hairline fractures often develop due to general wear and tear, heavy impacts, poor-quality materials or the fact that it’s not supported correctly at the base.
Minor cracks can sometimes be repaired with a specialist sealant or glue, however this is very often only a temporary measure and will likely fail in time also.
As you may imagine, larger, more significant damage will mean a replacement.
Loose or Leaking Waste Pipes
A very common cause of leaks can also come from underneath the bath or shower tray due to loose or faulty waste pipe connections and waste outlets e.g. the plug.
If water is dripping below your bathroom or pooling around the base, check the waste trap and pipe joints for any signs of leaks.
If you find any, often tightening or replacing worn washers, seals or sealant can often solve this problem.
Blocked or Overflowing Drains
A partially blocked drain can cause water to back up and overflow around the edges of the bath or shower tray.
Hair, soap scum, and debris can build up in pipes and drainage outlets over time, restricting water flow.
To combat this, regularly cleaning the drain, plug outlet and using a drain un-blocker can prevent this issue and should always be carried out as part of routine maintenance.
Movement in the Flooring or Walls
If there is even the slightest amount of movement in your bathroom floor or walls due to settling or simply just poor construction, this can pull the bath or shower tray away from the wall, breaking any sealant or seals that are in place.
This is more common in older homes or properties with wooden subfloors and even in some poorer quality new builds.
The only real cure in these situations is to reinforce the floor or wall and then reseal any gaps to stop any leakage.
How to Fix a Leaking Bath or Shower Tray
Once you have identified the fact that you have a leak and then the likely area in which it is leaking from, it’s then time to actually get on with the task of fixing it.
This should be done sooner rather than later in all cases, as the longer it is allowed to persist for, the more damage and costs it will create!
Step 1. Identify the Source of the Leak
As we have mentioned, but will reiterate for completeness, before attempting a repair, find out exactly where the water is escaping.
Firstly, dry the area thoroughly, especially any areas of collecting or pooling water and then run the bath or shower, checking for drips under the tray, around the waste pipe, or along the edges where the bath meets the wall and anywhere else you can identified for potential leaks.
Look for damp patches, dripping/running water, mould growth or peeling paint, as these can indicate a hidden leak and help identify the exact source of your leaking issues.
Once you have identified the source of the leaking issues you can then progress on to the stage of fixing it.
Step 2. Replace Worn or Damaged Sealant
Firstly, we will deal with the most common cause of leaks: faulty sealant. To fix this:
- Use a sharp knife/utility knife or sealant remover tool to strip away the old silicone. Ensure that you remove every trace of it, no matter how small.
- Clean the area thoroughly with warm soapy water and let it dry completely and then use either a specialist silicone sealant remover or white spirit to clean the area over, removing any slight traces of silicone film.
- Apply a high-quality waterproof silicone sealant around the bath or shower tray using a sealant gun. See our applying silicone sealant project for help.
- Once applied, use a sealant tool or wet finger to smooth the bead for a clean finish.
- Leave it to cure for at least 24 hours before using the bath or shower.
Step 3. Check and Tighten Pipe Connections
Once you have checked and replaced any faulty or damaged sealant, the next task is to check any pipework and waste outlets.
If the leak is coming from underneath, inspect both the waste trap and pipe connections. Loose fittings and seals can easily cause water to leak and drip onto floors and ceilings.
To resolve such issues, depending on what waste fittings are featured (normally 40mm PVC compression fittings), tighten the connections by hand or with a wrench if needed, but avoid over-tightening, as this can easily damage the washers and seals.
If a washer looks worn or cracked, replace it to create a better seal. Likewise if it’s loose then water being water, will easily leak!
Step 4. Movement in Bath or Shower Tray
A loose bathtub or shower tray can cause leaks and huge long-term damage if not properly secured. If your bath is moving, follow these steps to fix it firmly in place.
- 1. Prepare Timber Supports: For plastic baths, use 2-inch x 1-inch treated timber to create sturdy supports (known as bearers). Cut two pieces to approximately 400mm in length.
- 2. Fix the Supports in Place: Position the timber bearers under the bath’s edges, between the main body and the end walls. Secure them using wall plugs and screws for a firm hold. If space is tight, it may require some effort to fit them properly.
- 3. Reinforce with Adhesive: Apply a strong construction adhesive to the back of each bearer before fixing them in place. This provides additional support and prevents future movement.
- 4. Secure the Bath Ends: To stabilise the bath further, place additional bearers under the edges at both ends. As space may not allow for screws, use adhesive and wedge the supports in place until fully set.
With some cheaper plastic baths and shower trays, they can be very weak and if not supported correctly in the base and if too much weight is applied they can easily split. If this is the case for you then you can run some 3 or preferably 4 x 2 inch timber under the base, supporting them with chocks every 8 inches or so off of the floor to provide additional adequate support.
Quite often if your bath or tray has split due to this issue, the damage will be too great to rectify and it will replacing, however if you spot this issue before damage occurs it may save you a fair amount of hassle and expense.
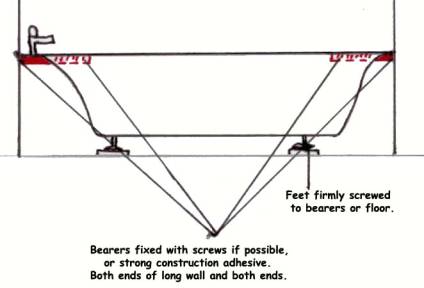
Bath support cross section
Step 5. Repair Small Cracks in the Shower Tray
If, unlike the above you have no major damage and you find only hairline cracks in the shower tray, use a specialist acrylic or epoxy repair kit to seal them.
Firstly, pop to your local DIY store and purchase a suitable repair kit. Once you have done so, fully read the manufacturers instructions and follow each step to the letter.
Normally this will involve firstly cleaning the area around the damage correctly and then mixing and applying the filler to the split or crack.
Once it has fully cured and dried (normally around 24 hours or so), smooth it off by using the appropriate tool provided.
Once again, ensure you allow it to dry completely before using the bath or shower.
Just to reiterate again, if the crack is large or continues to grow, you may need to replace the bath or shower!
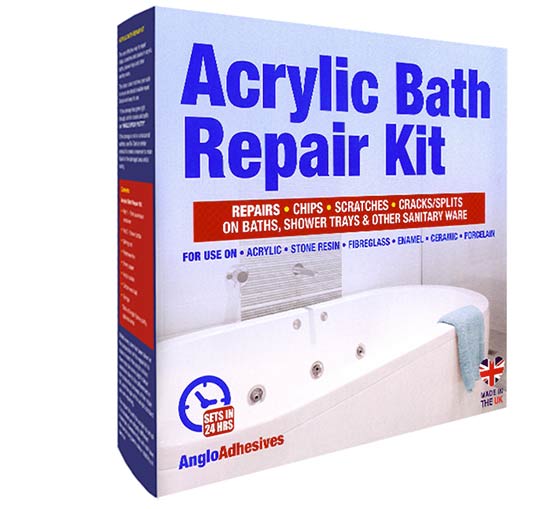
Epoxy bath and shower repair kit
Step 6: Inspect Tiles and Grout
One final tip is to also check the grout between your tiles, as even a tiny pinhole can allow water to seep behind, leading to hidden leaks and serious damage over time.
If you spot any cracks or weak areas, use a grout rake to remove it and also an inch or so either side.
Once gone, mix up a fresh batch of grout and refill the joints to ensure a watertight seal. Again, allow it to fully cure before use, usually 24 hours or so.
For a full guide, visit our grouting tutorial.

Grout rake with serrated edge
Once of the best ways to avoid the hassle and expense of having to fix or replace a leaking bath or shower tray is to prevent the damage occurring in the first place, so make sure that you regularly inspect the condition of sealant, the shower or bath itself and also any pipework and wastes!