If you have a standard bath in your bathroom then the chances are that the open side or sides have been covered in using a bath panel.
Fitting a bath panel is a pretty straight forward job, but if you have never done it before there are some points to you need to be aware of.
What are Bath Panels?
The main job of a bath panel is to cover in the open underside of a non-free standing bath and hide away all of the unsightly plumbing and pipework that reside there.
They also protect the floor area under the bath from splashing and potential water ingress that could get into and under floor boards and floor coverings and cause untold damage to joists, ceilings and other items.
Due to the huge number of different styles, shapes, sizes of bath tub there are an equally large number of different types of bath panel to accommodate the different types of baths.
In terms of how they are constructed, 3 main materials are used; acrylic, wood or MDF. The majority of panels seen in homes are constructed from acrylic plastic and again there are a huge range of different types and styles, one of the big differences being quality, some are much sturdier than others.
Acrylic bath panels are generally constructed using a fibre glass core that is then coated with plastic to form the smooth finished face. Depending on the thickness of the fibre glass will depend on how sturdy the panel is.
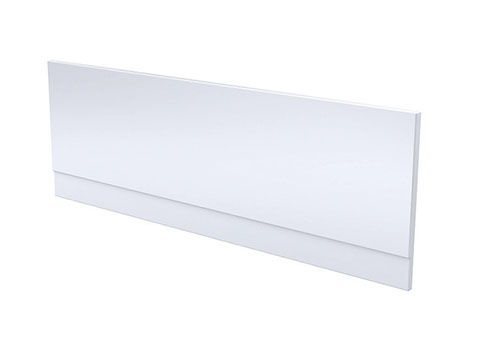
Basic acrylic bath panel
When it comes to wood and MDF bath panels, again there is a huge range of types, styles and levels of quality, but the one downside that wood and MDF has compared to acrylic is the fact that it is susceptible to water and moisture damage and will most cases likely degrade and rot in time, where as acrylic will not.
However, if any timber or MDF is fully painted and maintained and any edges sealed to prevent water or moisture from getting in, then there is no reason why they won’t go on for many years.
As the space underneath a bath is fairly large and once its covered over is then effectively dead space, today some manufacturers have also integrated storage into their bath panels to make use of this space.
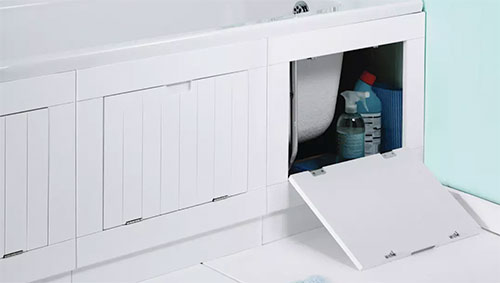
Bath panel with storage
Shower baths (bottom below) and freestanding or traditional Victorian baths (below) present different difficulties with regard to fitting bath panels due to there shape.
Traditional bath
Shower bath
The Victorian, many with clawed feet, are usually left open but baths with rounded sections or profiles can cause problems when it comes to bath panel fitting. A good way round this problem is to make up a simple frame between the bath and the floor and fit PVCu cladding to it.
Cut the cladding to length and fit together as you push it under the overhanging lip of the bath. The joint between floor and cladding can be covered by one of the many PVCu moldings available. They are all very pliable.
How do You Cut Bath Panels to Fit?
To fit an acrylic bath panel you will often need to cut it to the correct size so that it fits neatly in the space and the best tool to use to do this is a standard hacksaw. Once cut you will then have to sand the cut edges using a fine grit sand paper to remove any burrs.
However, if you are fitting a wooden or MDF bath panel and it needs cutting to size, the best tool to use would be a circular saw or a jig saw, however it is essential that you ensure that your cuts are totally straight.
When cutting a bath panel of any type you should ensure that it’s placed on a solid, flat and level work surface, with the edge to be cut over hanging slightly. If you can clamp it while cutting, all the better.
Due to the number of different types, sizes and styles of bath it would be almost impossible to have a panel that fits every one so a few standard sizes are made so that they can be cut to size as required. With some more expensive baths they may come with their own bath panel cut to the correct size.
What Sizes do Bath Panels Come in?
Bath panels come in 2 different types, front panels to fit the long sides of a bath and also end or side panels to fit the shorter side sections and each of these also comes in a range of sizes so they can be cut to fit pretty much all types and sizes of bath.
The most common sizes of front panels are:
- 1800mm
- 1700mm
- 1600mm
- 1500mm
The most common sizes of side panels are:
- 800mm
- 750mm
- 700mm
It is also possible to get 2-piece bath panels. These generally work by having a large top panel section and a smaller plinth section at the base. The large panel is generally fixed in place and the smaller plinth panel fixed to the base of it. If any height adjustment is needed, it is generally the top edge of the plinth that is cut to fit as the cut edge is then hidden behind the top panel.
Tools and Products Needed for Fitting a Bath Panel
In order to successfully fit a bath panel you will need the following tools and products:
- Chosen bath panel
- Sturdy solid work surface
- Hacksaw
- Tape measure
- Spirit level
- Drill/driver
- Pen or pencil
- Wall plugs
- 8 x 50mm screws
- Sealant
- Sealant gun
- 3 x 2 inch timber for batten(s) recessed if possible, if not include 12 x 50mm door stop timber also to fix to base to create recessed timber
- Adhesive or screws and PVC screw caps
- Selection of HSS drill bits
- 6mm masonry drill bit
- Hammer
- 12 x 32mm door stop (if you need to make a rebate and haven’t got a router)
8 x 25mm screws (if screwing panel in place)
How to Fit an Acrylic Bath Panel
In the majority of cases a bath panel will need to be cut to fit correctly so this is what we have based this example on.
When purchasing a bath panel for you home, try and get one that fits the dimensions as closely as possible, preferably with one edge that fits exactly and the other that needs to be trimmed to fit as this will reduce any cutting and work needed.
Step 1 – Check Bath Panel Over
The very first job to do once you have got your bath panel home or it’s been delivered is to thoroughly inspect it for any damage. Check both sides of the panel for scratches, scrapes or splits and also check all corners for any damage.
Due to their size and relatively flimsy nature they do get easily damaged, especially in the back of couriers vans so before you stash it and go to fit it just to realise the corners been broken off, check first.
Step 2 – Test Fit Bath Panel
The next job is to test fit the panel so that you know where it needs to be cut.
Place the panel next to the gap that it is going to fill and then use a spirit level to ensure that it is perfectly upright.
Using the spirit level again, level it against the edge of the bath and floor so that it’s perfectly upright and then use the tape measure to measure from the underside of the lip of the bath to the floor.
The difference between this and the height of the panel is what will need to be removed.
Finally measure the width of the bath by measuring from one end of the lip to the other. If there is a difference between this and the length of the panel this is what will need to be cut off.
Step 3 – Measure and Cut to Size (if needed)
The next stage is to cut the panel to size and then shape it to fit around any obstructions. When cutting the panel, always mark and cut the base and also which ever end will butt up to a wall, this way when sealed in any cut edges should be invisible.
Also the lip at the top of the panel will be needed to hold the panel in place under the lip of the bath. If it’s cut away it will loose a lot of its rigidity and you will then need to construct a full frame to fix it to, to reinforce it.
Lay the panel down on a flat surface and then measure and mark 2 points across the dimension that needs to be cut and joint the 2 points so you have a line to follow.
Using a hacksaw, very steadily cut along each line and then once cut, gently sand over using a 240 grit or higher piece of sand paper.
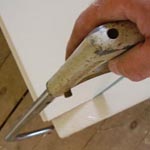
Fig 1 – Cutting down the bath panel to size
Tip: If you have to remove a lip from your panel, purchase some double glazing trim bead (roughly £5 for 2.5m) and then glue this in place along the inside of the cut edge using construction adhesive. This will give it some strength back again.
Where the handle of the hack saw restricts the cut you can simply use the blade on its own but make sure you use gloves when you do this (Fig 2).
The easiest method is to use the mini hacksaw. Remember to let the saw do the work and push and pull gently and slowly to avoid splitting the plastic.
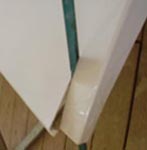
Fig 2 – Using just a hacksaw blade to cut a bath panel when the handle eventually gets in the way
Once cut, place the panel back in place and level it vertically using the spirit level and note if there are any objects in the way such as pipes, skirting etc. Using a suitable pen, mark the top and bottom of the obstruction and also the depth.
With any obstructions marked, use the hacksaw and also a suitable sized hole saw (for any circular objects such as pipes) and cut out each obstruction and then smooth off cut edges using some 240 grit sandpaper. Once done, test fit to make sure everything is correct.
Step 4 – Cut Rebate in Timber Batten
You will only need to complete this step if you are fitting a bath panel that’s made to measure as due to the fact you won’t be cutting it, it will still retain the reinforcing lip all the way around and when butting it up to the batten fixed to the floor, the lip will need a recess to tuck under so that the front of the panel touches the batten so it can be glued or screwed correctly.
The rebate can be created in two ways: Either use a router to cut a rebate in a piece of timber or take a standard piece of 3 x 2 timber and fix a 12mm piece of door stop to it to create a rebate.
Measure the length of your panel from inside one lip to the other and cut a piece of 3 x 2 inch timber to length Using a 10mm straight cut router bit. Cut a rebate along the 3 inch face to a depth of 25mm.
If you haven’t got a router, cut a piece of 3 x 2 inch timber and 12 x 32mm door stop to the correct length and then nail the door stop timber to the 3 inch face so that the faces of one edge are flush, leaving you with a rebate.
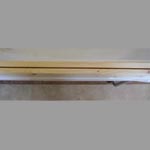
Fig 3 – Slotted piece of batten for bath panel
Step 5 – Mark Batten(s) Position and Fix
Position the bath panel in place under the bath and the use a spirit level to level it so it’s totally upright. Check at either end and along the length of the panel if it is flat.
Slide the timber with the rebate in behind the panel and very gently push it up so the back of the rebate touches the lip of the panel. Be careful not to move the panel as this will knock it off square.
Hold the timber firmly and use a decent pen of pencil to draw a line on the floor along its back edge so you know exactly where it should go if it gets moved.
Next, remove the bath panel and timber and drill 4 or 5 holes along the length using a 6mm HSS bit. Position the timber back in place under the bath, ensuring it lines up with the floor mark and then use a drill/driver and 6mm masonry bit to mark through each hole.
Remove the timber and drill out each hole, sweep or vacuum up and dust and then push a red wallplug into each hole.
Pop the timber back in place and then use an 8 x 50mm screw through each hole to secure the batten firmly to the floor.

Fig 4 – Checking bath panel is straight
Step 6 – Fit Bath Panel
With the batten in place, the final job is to fit the panel. It can either be stuck using a decent construction adhesive or screwed and then screw caps added to each screw to hide it.
To screw it, pop it back in place under the bath and then measure up around 30mm (to clear the rebate if there is one) and then mark 5 – 6 evenly spaced locations along the edge that you are fixing.
Use a 3mm HSS drill bit to drill out each hole, add a bead of silicone to the top lip of the panel and then push it in place.
Pop a screw cap on each screw, screw through each hole and then close the cap and wipe away any excess silicone.
If you’re using adhesive or silicone, apply a thin bead to the top lip, flip the panel around and then add another bead along the base, roughly 30mm up. Finally pop the panel in place, ensuring you push the base into the timber and then wipe off any excess.
In both cases, leave the panel for a good 8 hours or so for the silicone to cure.
Because we intend to tile the floor in this picture later in the year, our bath panel sits a good 15mm off the floor, as can be seen in Fig 5.
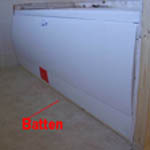
Fig 5 – Bath panel fitted to bath
There are a great number of different ways to fit a bath panel to a bath, some state that you should build a full timber frame, others assume that you have one made to measure. Our guide above offers you the most simple and straight forward method of fitting a bath panel that should suit any situation.

