Shower Panels or Tiles?
Of course this is a personal choice and there is no doubt that tiles have had, and always will have the larger part of the DIY market when it comes to waterproofing shower rooms and bathrooms. This is because the perception is that tiling a bathroom is a lot cheaper than fitting shower panels, which, considering DIY Labour is completely free, they may well be.
There are many types of shower panel on the market. Aquabord, Mermaid, Aquapanel, Wetwall, Minerelle, Aquamura, and so on. These are all Trade names for waterproof panels made specifically for use in the bathroom.
For the purposes of this project we have chosen to work with Aquabord. Aquabord is a PVC panel system with tongue and groove joints which need no trim in between boards and, when fitted correctly, give virtually invisible joints.
One downside to these boards, as with every shower panel, is that they scratch quite easily so please do handle them with care.
There are many shower panel suppliers in the market place but our preferred supplier for shower panels and associated fittings, is a company called Interior Panel Systems Ltd or IPSL.
There are two types of Aquabord panel – the hollow core range at 1m wide and the Styrofoam filled laminate range at 1.2m wide. Both types of board are 2.4m high.
The Styrofoam offers greater insulation (warmth and sound) and greater strength within each board but is obviously heavier than the hollow core.
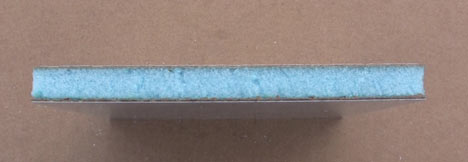
Solid and insulated Aquabord shower panel
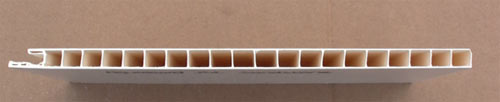
Light and flexible Aquabord tongue and groove panel
Shower panels can be fitted round baths, showers, toilets and hand basins
Cost of Fitting Shower Panels to a Bathroom
Lets look at other areas of cost. Most people tile or clad their bathroom on two or three walls. The long side of the bath and the tap-end, where the shower usually fits, so lets work with three walls to clad the bath, shower and toilet plus hand basin.
Cost of Shower Panels, Adhesive, Trims and Sealant
An Aquabord PVC tongue and grooved shower panel, measuring 2.4m high by 1m wide costs about £80 in August 2017. You will need 2 tube of adhesive to fix this to the wall which cost £8.00 each.
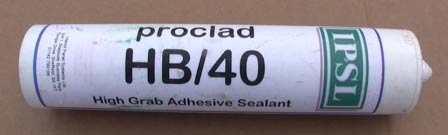
Use high grab, waterproof adhesive for shower panels
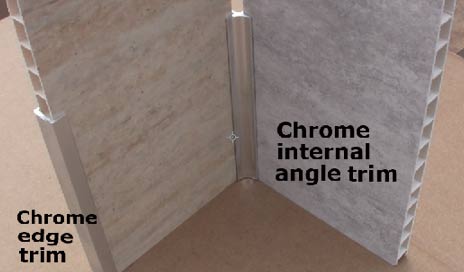
In an average bathroom measuring say 3m long and 2m wide, you will also need (for 3 walls) two internal angle joining trims at £23 each and two edge trims to finish off the edges of the shower panels at £20 each. You will also need a tube of sanitary silicone sealant at £7.00 each.
There is also the option of using a specially designed trim for the edge of your bath or shower where it meets the bottom of the boards. This is a very sensible and totally waterproof option for DIYers and we suggest it is used.
The pros rely on their skills with a silicone gun to provide the waterproof joint but at about £10 for a Cladseal, is it really worth a first-timer taking the chance?
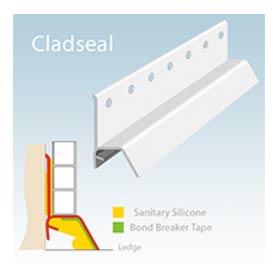
Cladseal shower and bath waterproof trim
The prices used here are for the most expensive (chrome) trims and absolutely top quality adhesive and sealant. We would not recommend cutting any corners when it comes to buying materials to keep a bathroom waterproof!
For this project, we used only the top quality trims and seals
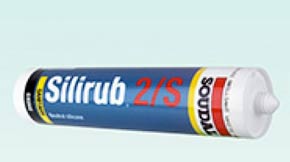
Use only the best sanitary silicone for shower panels
Delivery on all of the above, with most companies (after spending £100 or more) is free so nothing has been included for this.
Total Cost of Fitting a Bathroom With Shower Panels
So, for our complete bathroom refit we have:
| Materials | Cost |
| 7 panels @ £80 each | £560 |
| 14 tubes of adhesive @ £8.00 each | £112 |
| 2 internal trims @ £23 each | £46 |
| 2 Edge trims @ £20 each | £40 |
| 1 tube sealant @ £7.00 | £7 |
| 1 Cladseal bath edge @ £10 | £10 |
| Total | £775 |
Total material cost for 3 walls of a 3m x 2m bathroom is £775.00 (including VAT)
You will need a fine toothed saw, a hack saw for the trims and a sealant gun. We would suggest that most avid DIYers will have these things already but for the sake of argument lets say you have to go and buy a new fine toothed saw at £10.
Total cost of materials and equipment for installing shower panels to three rooms of your bathroom, is now £785
Time it Takes to Fit Shower Panels to a Bathroom
Using the DIY Doctor website for guidance it should take a DIYer a day to strip out the WC and hand basin. During this time they will also be able to de-grease the walls with a rag dipped in white spirit and be fully ready for fitting shower panels the next day.
The shower panels can be cut and fitted easily in a day but to be realistic we have also added another half a day for clearing up and sealing everything with silicone.
You can get all the help you need on the installation of the shower panels by watching and reading the additional installation guide and video found on the IPSL website.
With all of the above in mind, the total time to panel out a bathroom is two and a half days.
Use only the best sanitary silicone for shower panels
The Real Cost of Ceramic Tiling a Bathroom
For the same sized bathroom (16.8 sq m) the tiles will vary hugely depending on individual choice. The trend these days however, is the larger travertine type tile but conservatively we can say that, with reasonable quality tiles, the cost will be about £14.00 per sq m.
Rarely do people tile a bathroom without some sort of pattern or border so we can realistically say the tiles will come to £16.00 per sq m. We need to add 10% to our area for waste, sometimes even more for bigger tiles.
Add to that the cost of the adhesive and grout at another £2.00 per sq m
Add 3 trims needed for edges (as with shower panels) at £15 each
If you are removing the old tiles you will need to add £85.00 for plasterboard, plaster etc where holes need to be repaired.
Using the size of your own bathroom as a guide and also teh information above, work out the cost for both ceramic tiles and shower panels. You may be surprised at how close in total cost they are!
Tools Needed for Tiling a Bathroom
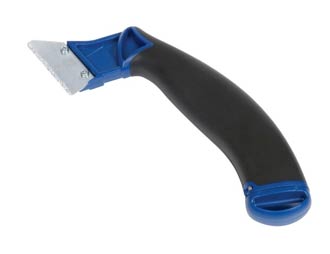
Very few DIYers carry the range of tools required to fit a bathroom properly. There are cutters, tile nips, tile saws, floats, grout floats, levels etc and it is a pretty fair bet to say you will need to go out and buy at least some of these.
It is also fair to say that unless you spend £30 on an electric tile cutting machine, this job is really going to be hard work!
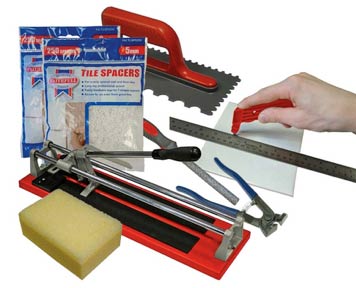
The DIY Doctor tilers starter tool kit
Whereas cutting a hole in a shower panel for pipes is easy, especially through hollow core where you can even use a hobby knife; cutting or drilling a hole for pipes in a ceramic or porcelain tile is not so easy.
To do any job properly, you need the right tools and tiling is no exception. We sell a starter tiling tool kit in our store and we suggest, if you are going to do this job right, you will be spending in the region of £90 on tools.
The financial cost then of tiling a bathroom is then:
| Materials/Tools | Cost |
| Tiles, spacers, adhesive and grout (16.8sq m plus 10% waste) @ £18 | £332.64 |
| Trims | £45 |
| Making good existing walls | £85 |
| Tools | £90 |
| Total | £552.64 |
Total Financial Cost of Ceramic Tiling a Bathroom
Total cost of materials and equipment for installing ceramic tiles to three rooms of your bathroom, is now £552.64
Time Taken to Tile a Bathroom
Now here’s the thing! Even a pro would struggle to fully complete a bathroom tiling job in 2 days and the average price for a tiler is about £30 per square m. They would reckon on maybe 2 – 2.5 days for 17 sq m in a cramped bathroom.
You however, are going to take 5 days. There is no doubt about it. 5 days is no big deal you say, but when you have removed the toilet and the basin, it is!
It’s inconvenient, it’s messy, it’s frustrating and it’s very hard work with the number of cuts one has to make in a bathroom.
You can visit our page on how to lay ceramic tiles in bathrooms and kitchens for some help, but it will still be hard work. Believe us, when you have disrupted the bathroom, you have disrupted the entire house and everyone in it! Is it really worth it for £200 ?
How DIY Tiling can Cost a Fortune
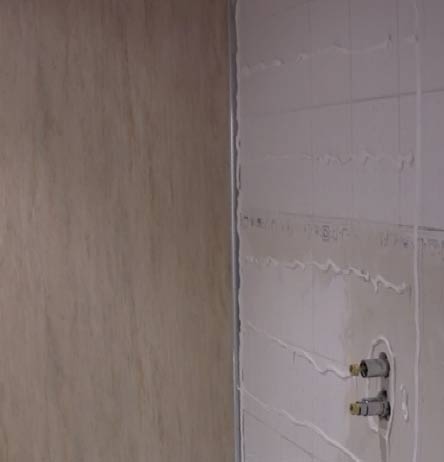
We made a point of calling the previous paragraph, the financial costs, because some of the other costs are not so obvious. For example over 85% of bathrooms that are tiled, leak. Just take a look on Google if you do not believe us.
Tiling is not usually the problem, it’s the grouting that causes the problems. Most DIYers are in such a hurry to finish the job they slap the grout into the joints (which they have rarely left wide enough) without checking that every singe joint is absolutely packed with grout.
If the joint is not full it will leak and leaking joints cost an arm and leg in terms of the potential affects of the leak. The image below says everything and this was the result of some hurried tiling.
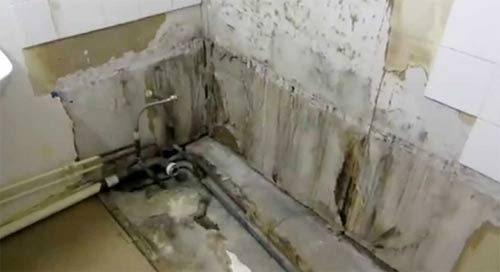
Bad tiling can cost a lot of money
Main Advantage of Shower Panels Over Tiles
We think the image below says everything! There has never been a tiled bathroom where the grouted joints stay clean for very long.
Maintenance of these joints is a pain and sales of grout rakes from our shop shows just how many people have to rake out the old grout in their tiles to put in new grout. Of all the jobs in the world, raking out tile grout has to be the worst!
With shower panels all you need do is wipe over with a cloth!
Use a grout rake to re-joint your ceramic tiles
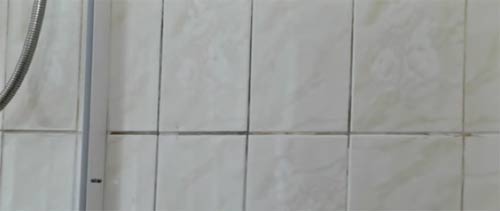
Bathroom wall tile joints get dirty and can go mouldy
Choosing Your Shower Panels
The range of shower panels is huge. You can request a brochure from IPSL by clicking on the banner below and you will see that you can have everything from sparkly night-club walls to a lovely plain gloss white.
Request a shower panels brochure from IPSL

Shower panels come in all designs and colours
Plain shower panels are more traditional
Benefits of Decorative Shower Panels
For just fitting a shower tray, the Aquabord sizes usually enable the shower area to be clad in just two panels, at right angles to each other and joined by one jointing bead. The edges of each board are covered with an edge trim or external corner and matching skirting boards are available for decoration on otherwise plain walls.
Bathroom and shower panels can be installed over existing tiles in bathrooms and come in either plain, or in a huge variety of patterns. They are warm to the touch and can be wiped clean and because of their inherent warmth will reduce condensation problems in the bathroom.
The panels can be simply stuck to existing walls and most manufacturers will actually sell shower kits. These kits, based on the experience of thousands of showers, are for two or three wall showers and include everything required to finish the job.
Good suppliers will offer full installation instructions and most have these in downloadable format from their websites.
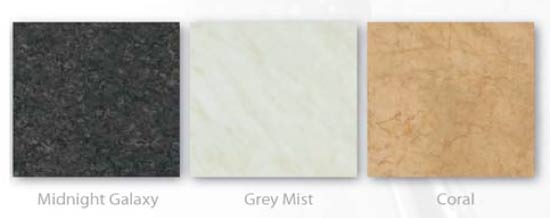
Aquabord design examples including Midnight Galaxy, Grey Mist and Coral
How to Fit Shower Panels
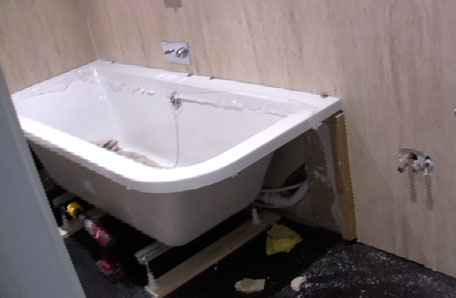
When fitting out an existing bathroom with shower panels we suggest removing the WC and the hand basin.
The shower panels can go right down to the floor behind both of these items of bathroom furniture and they can be re-fitted onto the panels.
This gives one, uninterrupted surface which can be kept clean really easily and removing a basin and toilet is not a problem.
For help with this please visit our many pages on fitting bathrooms and other bathroom related projects.
Toilet and basin removed ready for shower panel installation
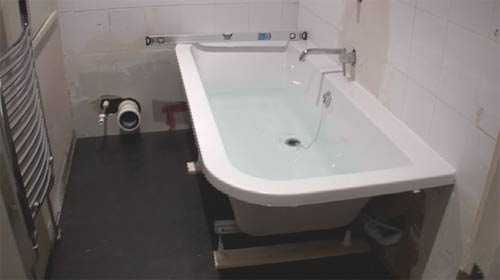
The bath should remain in position, or, if you are replacing the bath, then it should be fitted before the panels are put on the walls.
This ensures that the panels are fitted over the lip of the bath which, in turn, makes absolutely sure that the water can run down the shower panels and into the bath rather than onto the floor.
The panels can be bought in kits so the thinking is done for you. You can even take a look at the IPSL 3D room visualisation software and try your ideas out.
Buy a shower room kit which includes adhesive and trims
Prepare Bathroom Walls Ready for Installation
As a general rule it is advisable to leave shower panels in the bathroom for half an hour or so before installation begins.
Bathrooms are hot and humid places and any material needs to adjust to the area it is to be installed in to minimise movement after installation.
Make sure all surfaces are clean and any painted surfaces must be sanded to give the adhesive a good key.
Always seal newly plastered walls and see our Painting New Plaster project in our projects area for how to do this.
Fitting a Shower Panel Corner Bead
If you are fitting to an existing bath, line the bath with some hard surface covering such as Roll and Stroll. When you have lined the bath, it is as well to lay a dust sheet in the bottom as well.
If you are fitting a new bath it will come already wrapped with a protection film. Do not forget to remove this film before you start any sealant work.
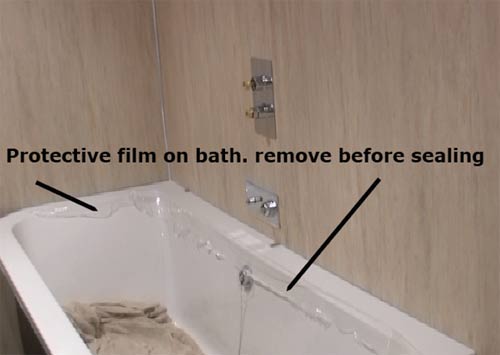
Remove baths protective film before sealing bath to wall
Measuring up to Fit Your Shower Panels
Make sure the walls are vertical. If they are not you will need to cut the edge of the shower panel (that fits into the corner) at an angle to ensure that the other edge is vertical.
Shower panels must be fitted fully upright as, of course, should tiles. If you are not sure how to fit to a wonky corner, take a look at our project on scribing timber.
Prepare an area for cutting shower panels. These panels are large so give yourself plenty of room.
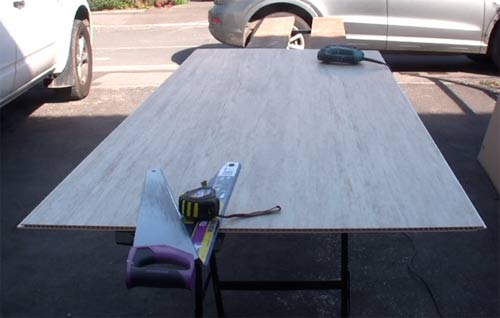
Plenty of room is required for cutting shower panels
Cut all beads with a hacksaw after measuring carefully for the correct length
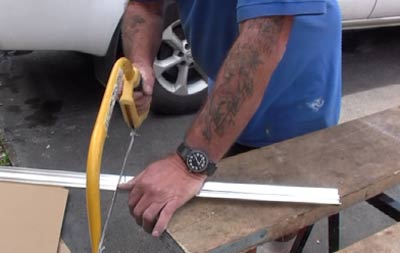
Measure carefully before cutting shower panel beads
Fit bead into corner of wall, pressing in well.

Shower panels must be fitted fully upright
Fit the first panel into the slot in the corner bead after you have applied the adhesive to the wall.
Measure for your panels and cut with the face side up. Always double (or even treble) check your measurements before you cut anything. Panel adhesive is applied to the walls just as you would when tiling. Use the sealant gun and apply the adhesive as shown in the installation instructions.
Push panel hard into bead and cut subsequent panels to same wall.

First shower panel pushed into corner bead
The panel should not be taken right down to the shower tray or bath edge as some movement must be expected. Leave the panels a couple of mm short and fill the gap with a recommended sanitary sealant. This applies at ceiling level also.
Most manufacturers, and definitely those dealing with PVC, uPVC or plastic panels will not allow the use of Solvent adhesives and sealants. This is because the solvent melts the PVC. Always use the adhesive supplied with your panels.
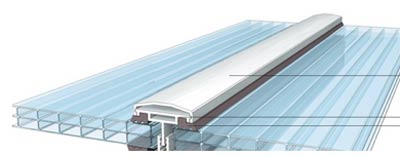
With some types of corner bead, a finishing cap is pushed into two lugs after sealant is applied to the gap. This principle is used as glazing bars on double glazed roofing sheets also. This gives a completely water-tight seal and even if a drop of water gets behind the finishing bead it cannot do any damage as the corner bead itself is stuck to both of the shower panel board sides. Ingenious solutions for a great DIY product.
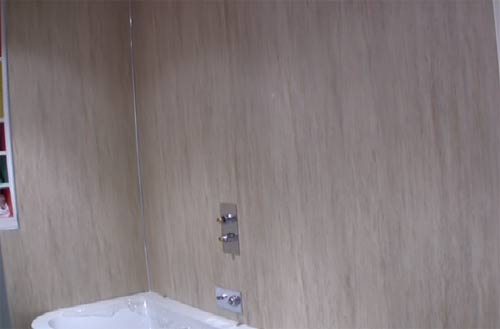
Waterproof joints are important on shower panels
Many Aquabord trims have a push in slot which, when sealed with adhesive or sealant, is every bit as waterproof.
Measure for your next board and apply adhesive to the wall as before.
Use plenty of adhesive to fit shower panels
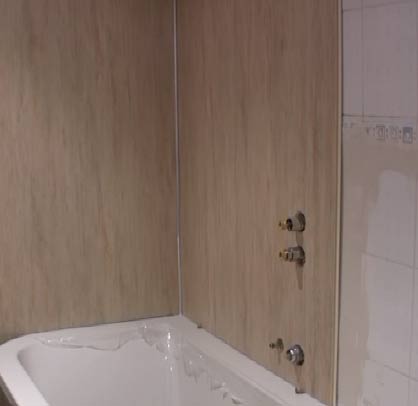
Measure very very carefully and drill out holes for shower units and taps.
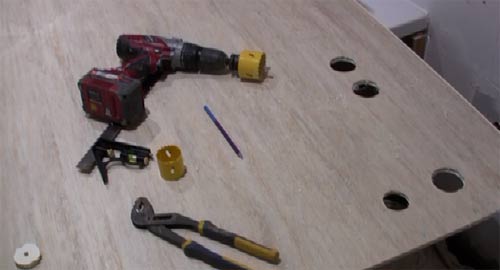
Holes drilled in shower panel for concealed shower unit
Put a couple of 2mm spacers on bath edge to stand next board on and leave gap between bottom of board and bath. Push board firmly to wall.
Make all holes and cuts neat to shower panels
Continue laying boards until you reach the next corner or edge.
Fit panels right up to corner of room
When you get to your last cut into a corner of the room you will need to place and glue the edge of the board into the corner bead first. Then the adhesive is put on the wall and the last cut, together with the corner bead, is pushed back to the wall. It is impossible to fit the corner bead and then try to join the tongue and grooved edge to the last board while, at the same time pushing the cut edge into the corner bead.
When you have finished you should end up with a room like this
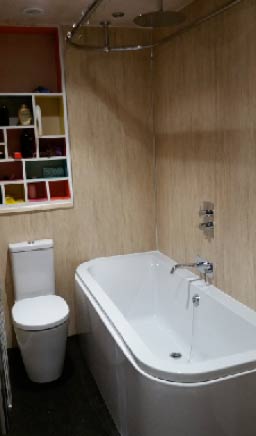
Aquabord shower panels make a great bathroom
We hope you have enjoyed this project and learned a bit about fitting shower panels and their advantages over tiles. For the record, our preferred suppliers also do a great range of bathroom floor coverings.
Bathrooms are generally so small that once you have made the decision to go through the discomfort of not having a proper bathroom for a few days, it really is worth the extra time getting everything done at once. A new floor does not take long to lay and it is so worth it to have the whole room looking just how you want it.
Good luck with your own project.