Creating a tyre swing is a fun and easy way to keep kids entertained outdoors during the summer. You can hang the swing from a sturdy tree or build a custom frame if needed.
Making a tyre swing is simple and inexpensive, requiring just a few basic tools, some chain, hooks, eyebolts, and an old tyre.
For step-by-step instructions on how to build a tyre swing, keep reading below.
Types of Tyre Swings
There are several types of tyre swings, each suited to different mounting objects and uses. The two main designs are:
- Vertical Tyre Swing: This is the easiest to set up. The tyre is hung from its top using a single fixing, and users can stand on or sit in the centre hole.
- Horizontal Tyre Swing: This design is slightly more complex. The tyre is mounted in 3 or 4 points around the sidewall to keep it level, allowing users to sit in the rim hole.

Choose the type based on the users. For older kids and adults who enjoy 360° swinging, a vertical tyre swing is ideal. For younger children, a horizontal swing with controlled movement might be better.
Horizontally hung tyre swing fixed in in two places
Choosing the Right Tyre for Your Tyre Swing
The choice of tyre for your swing depends on the users and whether the swing will be hung horizontally or vertically.
For a horizontal swing used by older kids and adults, opt for a larger tyre with a bigger centre hole, such as a 16-inch tyre. This ensures safety as the user won’t fall through.
For younger children, choose a smaller tyre with a smaller hole, like a 13 or 14-inch tyre, to provide better control and safety.
For a vertical swing, a larger tyre with a bigger centre hole, such as a 17-inch tyre, is recommended for easier access and use.
To find a suitable tyre, consider checking scrap yards, tyre centres, or local mechanic workshops, where you might get one for free. Be cautious with large tyres, as they are heavy; ensure the mounting structure can support the weight.
Also, if you encounter discarded tyres, consider repurposing them rather than letting them go to waste.
Where to Hang a tyre Swing and How Much Space You Need
When installing a tyre swing, ensure the mounting structure can support both the weight of the tyre and the users. Kids often test limits, so the mount needs to be robust.
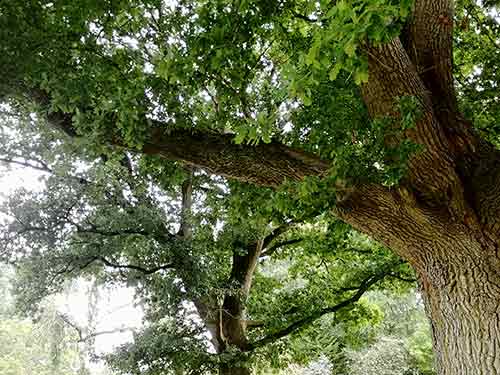
The ideal spot is a strong, healthy tree. Choose a hardwood tree, like oak or beech, with a branch at least 8 inches in diameter. Inspect the branch for rot, cracks, or weak spots.
If a suitable tree isn’t available, consider building a dedicated swing frame or a play fort, like our kids’ playhouse project.
Ensure the mounting structure can support at least 80 kg.
For space requirements, if you have a large garden, a single mounting point allows for full 360° swings. Ensure ample clearance around the swing.
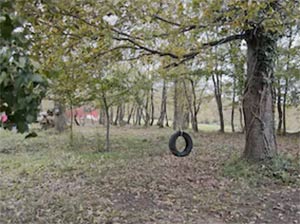
If space is limited, use two mountings to restrict swinging to back-and-forth motion.
Keep the swing at least 1.5 times the length of the rope or chain away from obstacles. The bottom of the tyre should be 18 to 24 inches off the ground.
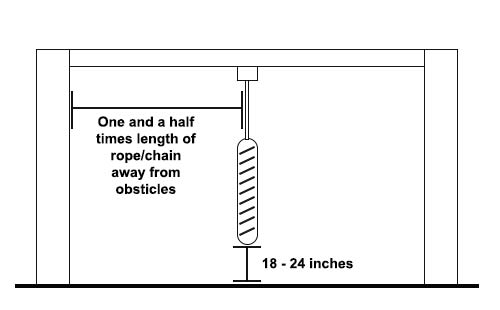
How far away a tyre swing should be placed from surrounding objects
Additional Safety Tips for Tyre Swings
For safety, ensure the area around the tyre swing is clear of obstacles. Kids often jump or fall off, so the ground below should be soft to cushion any falls.
Use a lawn or cover the area with several inches of play-safe garden bark. Extend this surface beyond the swing’s range to account for potential falls or jumps.
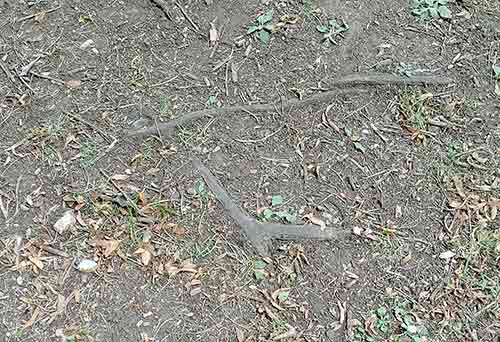
Inspect the area for stones, rocks, or exposed tree roots. Remove any hazards or consider relocating the swing to avoid them.
If you’re hanging the swing from a tree, you’ll need to use a ladder. Make sure the ladder is stable and secure. Check our ladder safety guide for tips on safe ladder use.
How to Make a Vertical Tyre Swing
A vertical tyre swing is one of the simplest to create. It only needs a single mounting point on the tyre and one attachment point from the support object.
For this guide, we used a lifting strap around an RSJ in our yard instead of a tree. However, the assembly process is exactly the same whether you use a tree or a beam.
Follow these steps to make your own vertical tyre swing:
Step 1 – Clean the Tyre Thoroughly
Start by cleaning the tyre to ensure it’s safe for use. A dirty tyre can damage clothes and affect performance.
Scrub the tyre with a brush and warm soapy water, focusing on the treads to remove all dirt and grime. Clean both the outside and the inside, as the interior can be particularly grimy and odorous.
After scrubbing, rinse the tyre with clean water and let it dry completely before use.

Thoroughly clean the tyre inside and out
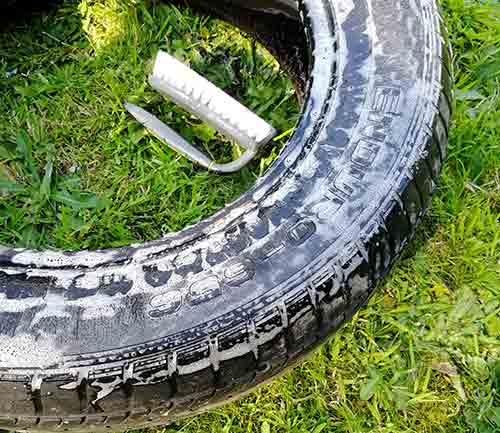
Step 2 – Drill Drain Holes in the Base
To prevent water from pooling in your tyre swing, drill drain holes in the base. This is crucial, especially in the UK where rain is frequent.
Position the tyre vertically with the top section facing down. Using a 13mm flat drill bit, drill several evenly spaced holes around a quarter of the bottom edge to allow water to escape.
Note: Clean the drain holes regularly to remove any leaves or debris that might block them.
Drain holes drilled in bottom of tyre swing tyre
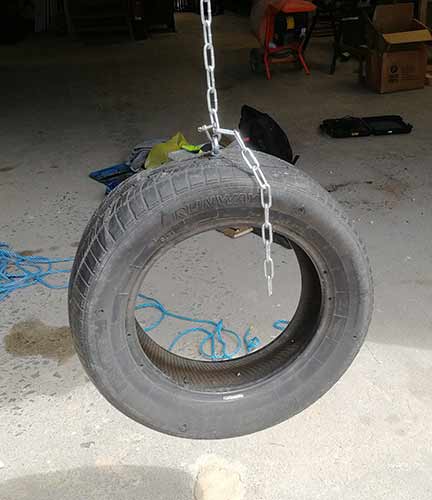
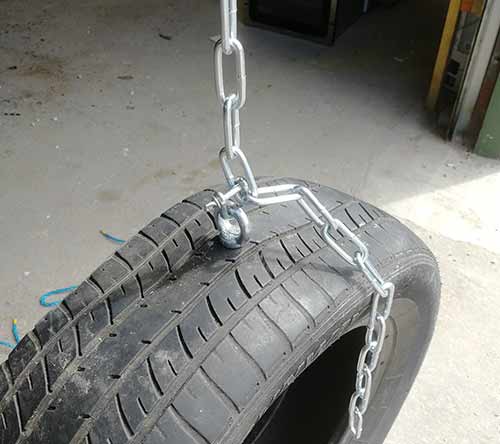
Step 3 – Install the Hanging Eye Bolt
After drilling the drain holes, turn the tyre 180° and mark the centre of the top tread. Drill a 10mm hole at this mark using a 10mm drill bit.

Drill a hole in the top centre of the tyre tread
Insert a 20mm M8 galvanised lifting eye bolt into the hole. Add a 30mm washer to distribute the weight and prevent the nut from tearing through the tyre. Secure with the nut, tightening it fully.
Lifting eye bolt inserted, washer added and nut tightened up
Step 4 – Attach Swing Hanger and Add Chain/Rope
With the eye bolt installed on the tyre, focus on the mounting object, such as a sturdy tree branch or, as in our case, an RSJ and lifting strap.
You can use either chain or rope for hanging. We’re using an 8mm chain, but 20mm braided polyester rope is also strong, durable, and weather-resistant.
To protect the tree branch from damage, use a lifting strap or sleeve the rope/chain with a piece of hose. This prevents wear on the branch and allows it to stay healthy.
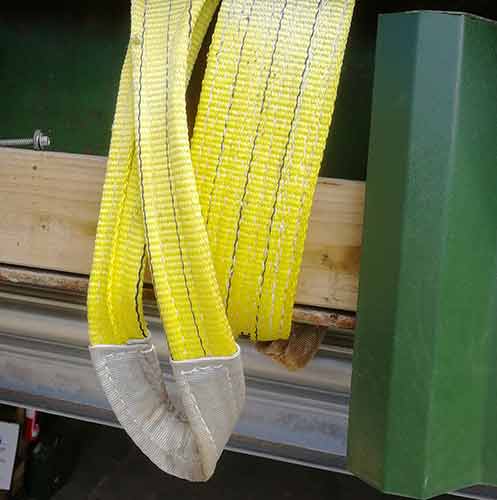
Lifting strap used for hanging the tyre swing
Ensure the rope or chain is not too tight to avoid restricting branch growth. Use a sliding choker knot for the rope or chain to allow the branch to grow freely.
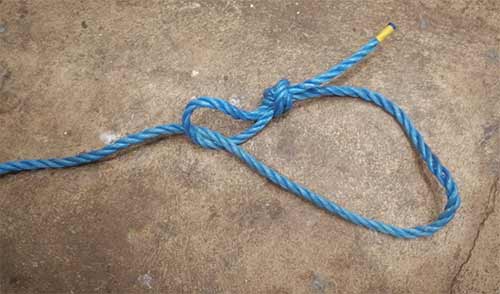
Sliding choker knot for securing the swing
Lifting straps often come with loops at both ends, which can be used to create a sliding choker knot.
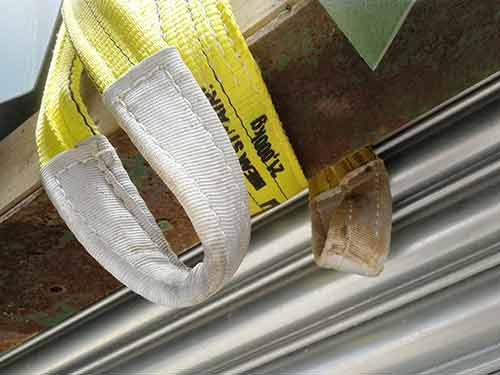
Loops on a lifting strap for easy attachment
Once the strap or rope is secured around the branch, attach your chain or rope to it. Ensure it’s strong and secure. For rope, add a rope eye to prevent wear, or use a choker knot.
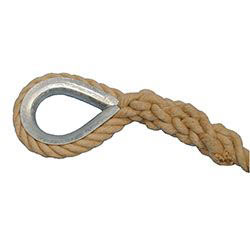
Eye loop and rope eye to prevent rope wear – Image courtesy of ropesdirect.co.uk
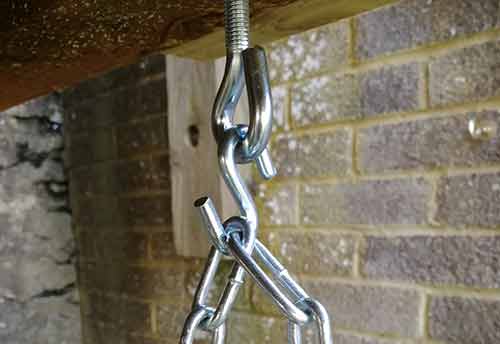
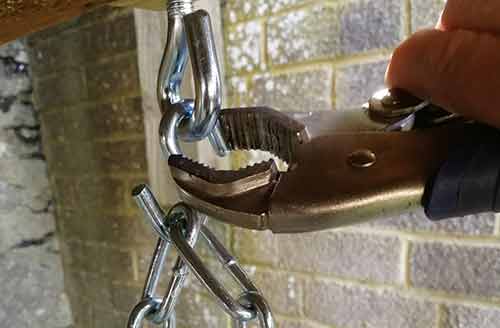
For chain, use a locking carabiner, quick link, or d-shackle to attach it securely.
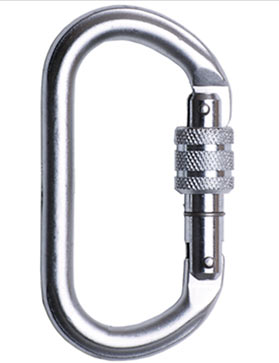
Locking carabiner for securing chain
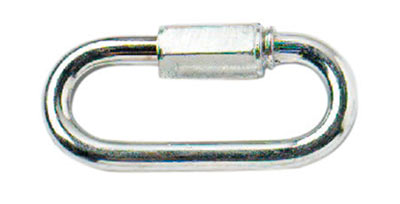
8mm stainless steel Quick Link
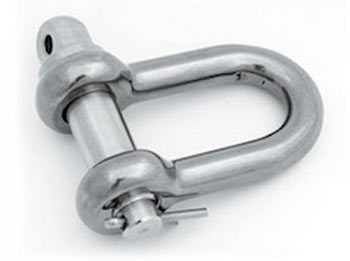
D-shackle with captive locking pin
After attaching the rope or chain to the branch, measure and cut it to the desired length, leaving enough for a secure attachment to the tyre.
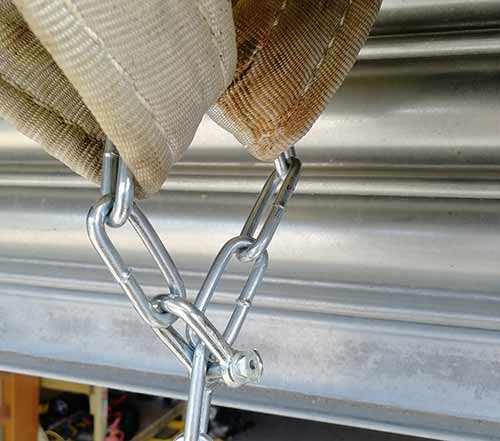
Tyre swing chain looped through lifting straps and down to tyre
Step 5 – Attach the Tyre to the Chain
With the chain or rope securely fastened to the tree branch or mounting object, it’s time to attach the tyre.
If you’re using rope, create a strong loop by splicing an eye and adding a rope eye, or simply use a secure knot. Ensure the knot or loop is robust enough to support the tyre and its users. For guidance on tying strong loops, check out this guide on end loops in rope.
Connect the loop to the tyre using a strong carabiner, Quick Link, or d-shackle with a locking pin.
If you’re using a chain, the chain link serves as your loop. Attach the tyre to the chain with a carabiner, Quick Link, or d-shackle.
Tyre swing attached to swing chain using a d-shackle
How to Make a Horizontal Tyre Swing
A vertical tyre swing is fun for kids and adults, but it may not be ideal for younger children who need more support. A horizontal tyre swing offers a safer and more comfortable option, allowing kids to sit and hold on easily, similar to a traditional swing.
In this guide, we use 6mm chain, but you can also use 20mm braided polyester rope, which is strong and durable.
Follow the steps below to build your horizontal tyre swing.
Step 1 – Clean Your Tyre
Start by thoroughly cleaning your old tyre. Use a stiff brush and warm, soapy water to scrub away all dirt and debris. Pay special attention to the treads.
After scrubbing, rinse the tyre with clean water to remove any soap residue. Let it drain and dry completely before using it.
Scrubbing old tyre for tyre swing
Step 2 – Drill Drainage Holes
After cleaning the tyre, it’s time to drill drainage holes. Rain can quickly fill the tyre with water, so proper drainage is essential.
Place the tyre flat on the ground with the side that will be the base facing up. Use a 13mm drill bit to create drainage holes around the middle of the tyre’s sidewall, spaced about 4 inches apart.
These holes will help water drain out. Check periodically for leaves or debris that might block the holes and clean them if necessary.
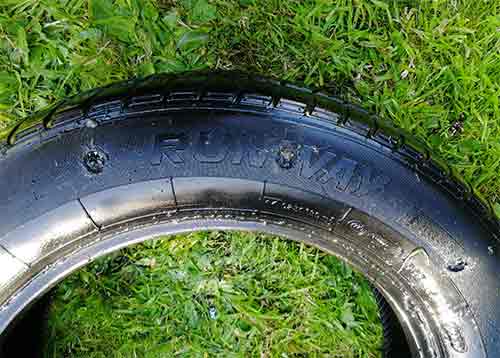
Drain holes in underside of tyre swing tyre
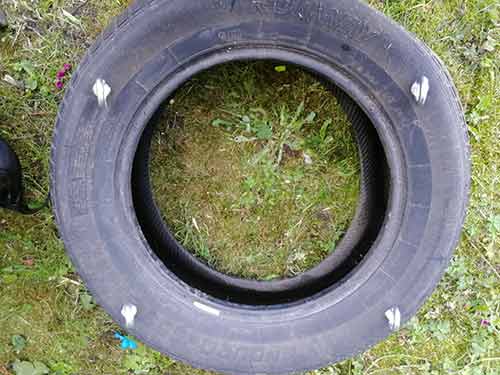
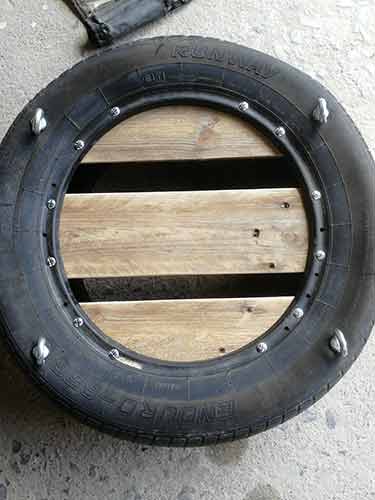
Step 3 – Mark and Drill Eyebolt Holes in the Tyre
Flip the tyre so the top side is up. We need to mark four fixing points for stability.
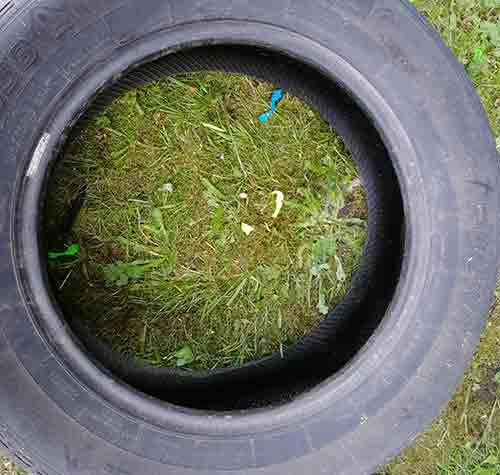
Tyre flipped over, showing the top side
For a stable, back-and-forth swinging motion, attach the tyre at two points on each side. This keeps the swing level and secure.
Space the attachments evenly and as close to the edge as possible, without weakening the tyre. For a 15-inch tyre, use a cardboard template to mark holes: 400mm apart on the front and rear, and 320mm on the sides.
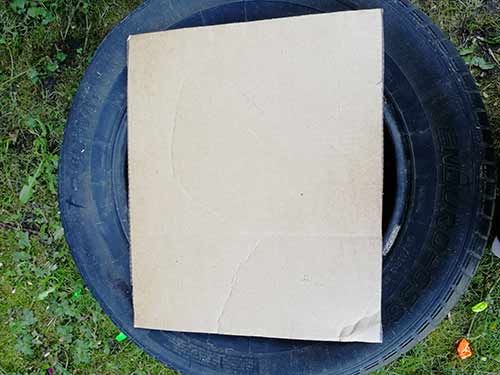
Cardboard template for marking eye holes
Position the template on the tyre, mark the drilling points, and drill with a 13mm bit. Insert a hanging eye bolt into each hole, add a 40mm M8 washer to distribute weight, and tighten the nut. Ensure all eyebolts face the same direction before fully tightening.
Hanging eyes fixed in place on wall of tyre and turned so they are all facing the same direction
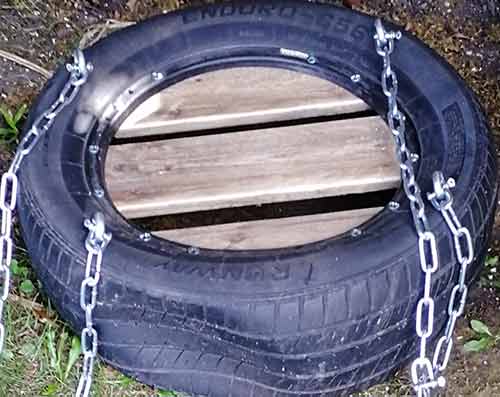
Step 4 – Install the Seat and Secure It
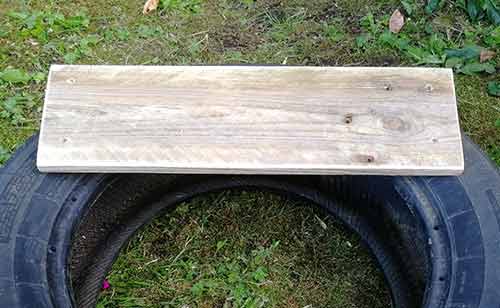
To prevent smaller children from falling through the centre of the tyre, add a seat. You can use various materials, such as a rubber mat or cut-out tread, but we used old pallet slats for ours.
Rope seat example – Image courtesy of morningchores.com
Cut one pallet slat to 18 inches (457mm) for the middle, and two more to 16 inches (406mm) for the sides. Sand them smooth to avoid splinters.
Sanded pallet slat
Place the longest slat through the centre of the tyre and support it with timber blocks. Drill through the tyre wall and slat with an 8mm bit, then secure with an M8 bolt, nut, and a 40mm M8 washer.

Fixed pallet slat
Attach the two shorter slats on either side of the centre slat, spacing them about 1.5 inches (37mm) apart.
Pallet slats fixed to tyre swing to create seat
Step 5 – Attach Chains to the Sides
Now, attach chains to the sides of the tyre to connect it to the swing. Cut two sections of chain, each 1000mm long. A hacksaw can cut through chain, but using an angle grinder is faster and easier.
Mark the cutting points on the chain with a felt-tip pen.
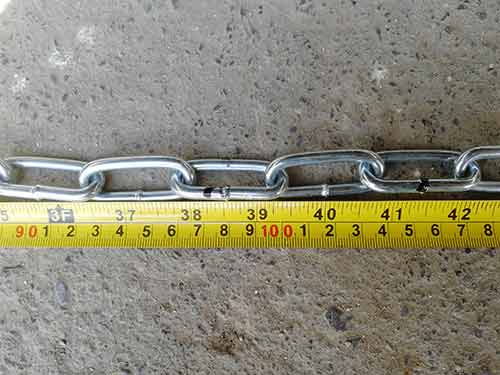
Marked cutting points on the chain
Attach each chain section to the hanging eyes on the tyre using heavy-duty D-shackles rated for 80kg.
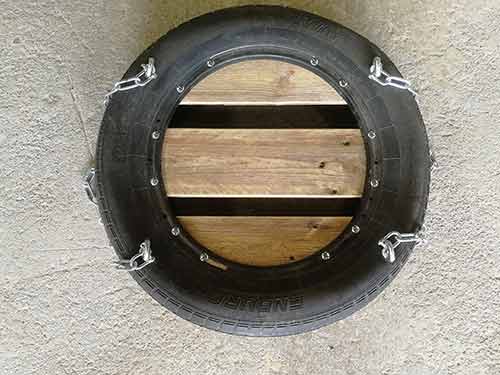
Chains attached with heavy-duty D-shackles
Alternatively, you can use heavy-duty S-hooks, locking carabiners, or Quick Links. Ensure all connections are secure for safety.
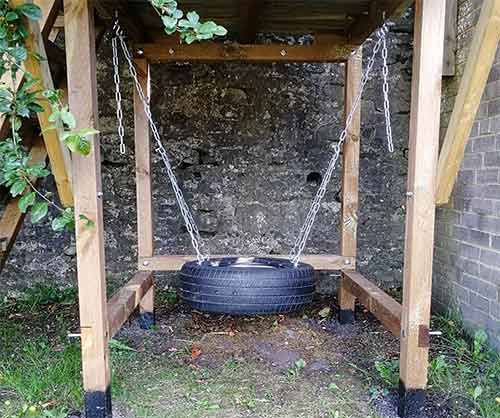
Step 6 – Install Swing Mountings
With the tyre swing assembled, the next step is to secure the mounting points for the swing. The method will depend on what you’re hanging the swing from. If it’s a tree branch, refer to the section above titled “What can you hang a tyre swing from?” for advice on selecting a suitable branch. For detailed instructions on fixing mountings, see “Step 4” in the vertical tyre swing guide.
Unlike a vertical tyre swing that hangs from one point, this swing requires two mounting points, spaced apart to match the distance between the hanging eyes on either side of the tyre.
In this example, we mounted the tyre swing beneath a raised playhouse. We started by fixing eye bolts to the playhouse’s support beams.
To ensure the swing hangs centred, measure and mark the midpoint of each side support beam. Drill a 13mm hole using a flat wood drill bit, then insert an M8 eye bolt. Add a 30mm washer before tightening the nut to prevent it from pulling through the beam.
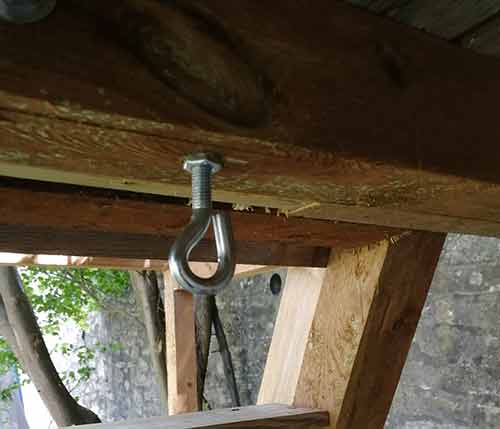
Eye bolt secured to the underside of the playhouse
Finally, attach chains to each eye bolt using heavy-duty S-hooks, Quick Links, D-shackles, or carabiners, ensuring all connections are secure.
Swinging chains fixed to eye bolts using s-hooks beneath raised playhouse structure
Step 7 – Attach the Tyre Swing to the Mountings
With the swing chains securely attached to the eye bolts, the final step is to connect the tyre to the swing chains.
We used heavy-duty D-shackles for this task.
To ensure the tyre hangs evenly, each swing chain should be attached at the exact midpoint between the hanging eyes on each side of the tyre. To find this point, lift the chain on one side, then adjust your hand to the centre between the hanging eyes. Mark this spot with a pen.
Attach a D-shackle to the marked chain link, then connect it to the last link in the swing chain. Secure the D-shackle tightly.
Repeat the process on the other side to complete the installation.
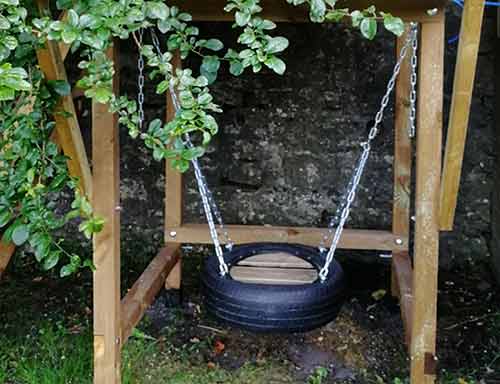
Tyre swing hanging between two chains under a playhouse
Use a spirit level to double-check that the tyre is hanging evenly. Once everything is level, close the S-hooks used for hanging, and trim any excess chain with an angle grinder.
Squeezing closed s-hooks to secure tyre swing in place
Building a tyre swing is simple and fun. With a strong mounting point and enough room for it to move, it will provide hours of entertainment for the kids!